Polka Dot Nail Art is SO Back Smaller, Cuter and Everywhere You Scroll

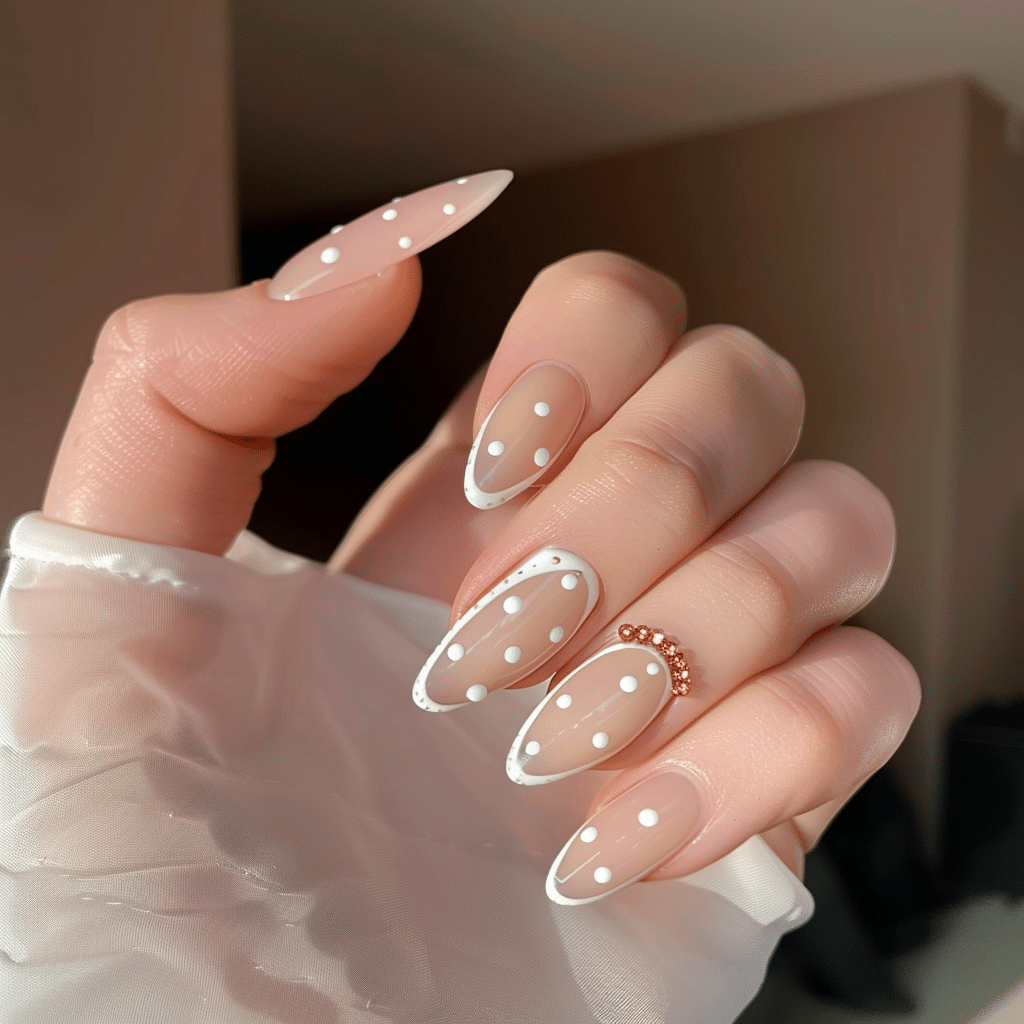
Polka dot nail art is experiencing a stunning renaissance in the beauty world, with delicate micro-dots replacing the bold patterns of the past.
This refreshed take on a classic design features smaller, more sophisticated spots that create an elegant, modern aesthetic perfect for any occasion. The trend has taken social media by storm, with nail artists and enthusiasts showcasing countless variations that prove this playful pattern has grown up.
| Topic | Details |
| Category | Nail Art |
| Skill Level | Beginner |
| Time Needed | 45-60 minutes |
| Tools Needed | Dotting tool, gel polish, UV/LED lamp, base and top coat |
| Best For | Anyone wanting a versatile, playful yet sophisticated nail design |
Table of Contents
Why This Nail Technique Works
Polka dot nail art has resurged because it strikes the perfect balance between fun and sophistication that modern beauty enthusiasts crave. The smaller dot sizes create a refined look that works equally well in professional settings and social gatherings. Unlike intricate nail art that requires steady hands and advanced skills, polka dots are achievable for beginners while still allowing experienced nail artists to showcase their creativity.
The versatility of this technique makes it a favorite among nail technicians and at-home enthusiasts alike. You can customize polka dots to match any aesthetic, from minimalist monochrome designs to colorful playful patterns. The dots add visual interest without overwhelming the nail, creating a balanced composition that complements various nail shapes and lengths. When executed with gel polish, the design maintains its crisp appearance for weeks without chipping or fading.
From a technical perspective, polka dots work because they require minimal tools and straightforward application methods. The design translates beautifully across different base colors and finishes, allowing for endless experimentation. The current trend toward micro-dots creates a sophisticated texture that catches light beautifully, adding dimension to the nails without excessive embellishment.
Tools and Products Needed for Polka Dot Nail Art
| Product | Purpose | Alternatives |
| UV/LED Lamp | Cures gel polish between layers | 48-watt lamp or higher for faster curing |
| Gel Base Coat | Protects natural nail and ensures adhesion | Rubber base for extra strength |
| Gel Polish Colors | Base color and dot color | Any contrasting gel polish shades |
| Dotting Tool Set | Creates perfectly round dots in various sizes | Bobby pin, toothpick, or ballpoint pen |
| Gel Top Coat | Seals design and adds shine | Matte top coat for different finish |
| Nail File | Shapes nails and removes length | 180-grit file for natural nails |
| Nail Buffer | Smooths nail surface for better adhesion | 240-grit buffer block |
| Cuticle Oil | Hydrates cuticles and surrounding skin | Jojoba or vitamin E oil |
| Nail Dehydrator | Removes moisture and oils from nail plate | Rubbing alcohol as temporary solution |
| Gel Cleanser | Removes sticky layer after curing | Isopropyl alcohol at 90% concentration |
Quality tools make a significant difference in achieving professional results with polka dot nail art. Investing in a proper dotting tool set gives you multiple size options for creating varied patterns. For those looking to expand their gel nail collection, visit Gel Nails by Lina for expert recommendations and tutorials on perfecting your technique.
Step-by-Step Application Guide for Polka Dot Nail Art
Nail Preparation
- Remove any existing nail polish using acetone and cotton pads thoroughly.
- Wash hands with soap and water to eliminate oils and debris.
- Push back cuticles gently using a cuticle pusher or orange wood stick.
- File nails to your desired shape and length using smooth strokes.
- Buff the nail surface lightly to create slight texture for better adhesion.
- Apply nail dehydrator to remove moisture and prepare the nail plate.
- Wipe nails with alcohol to ensure a completely clean surface.
Base Coat Application
- Apply a thin layer of gel base coat to each nail carefully.
- Cap the free edge by running the brush along the nail tip.
- Cure under UV/LED lamp according to manufacturer instructions, typically 30-60 seconds.
- Check that base coat is completely hardened before proceeding to color.
Gel Polish Layers
- Apply your chosen base color in a thin, even layer across the nail.
- Cap the free edge to prevent premature chipping and lifting.
- Cure the first color coat under the lamp for recommended time.
- Apply a second thin coat of base color for opacity and depth.
- Cure the second coat completely before adding polka dot designs.
- Cleanse the tacky layer with gel cleanser if your polish requires it.
Creating the Polka Dot Design
- Select your dotting tool size based on desired dot diameter.
- Dip the tool into your contrasting gel polish color generously.
- Touch the tool perpendicularly to the nail surface to create round dots.
- Space dots evenly or create random patterns based on your design preference.
- Work quickly as gel polish may thicken on the tool between applications.
- Clean the dotting tool between colors using gel cleanser or alcohol.
- Create variation by using multiple dot sizes throughout the design.
- Cure the dotted layer under the lamp for full recommended time.
Curing Process
- Ensure each nail receives adequate exposure to the UV/LED light source.
- Position hands flat in the lamp with nails facing the bulbs directly.
- Cure for the full recommended time without removing hands early.
- Check that dots are completely hardened before touching or adding layers.
Finishing and Top Coat
- Apply a thin layer of gel top coat over the entire design.
- Cap the free edge thoroughly to seal the polish layers together.
- Avoid flooding cuticles or sidewalls with excess top coat product.
- Cure the top coat for the full recommended time for maximum durability.
- Cleanse any remaining tacky layer using gel cleanser and lint-free wipes.
- Apply cuticle oil around nails and massage into surrounding skin gently.
Pro Nail Technician Tips for Polka Dot Nail Art
- Use a light touch when creating dots to prevent gel polish from spreading beyond the intended size. Pressing too hard creates irregular shapes instead of perfect circles.
- Work with fully opaque gel polishes for dots to ensure they show up vibrantly against the base color in just one layer without requiring multiple applications.
- Clean your dotting tool frequently between applications to maintain consistent dot sizes and prevent color contamination that muddles your design aesthetic.
- Apply thin layers of base color before adding dots to prevent excessive thickness that can lead to peeling and premature lifting around the cuticle area.
- Plan your dot placement before starting by visualizing or lightly marking positions to create balanced, aesthetically pleasing patterns that look intentional rather than random.
- Allow base color to cure completely and cool before adding dots to prevent colors from bleeding together and creating blurred edges that look unprofessional.
Professional nail artists at Gel Nails by Lina recommend practicing dot placement on paper or practice wheels before working on actual nails to develop muscle memory and confidence.
Common Gel Nail Mistakes with Polka Dot Nail Art
| Mistake | Why it Happens | How to Fix |
| Dots spreading into blobs | Too much polish on dotting tool or wet base coat | Wipe excess polish from tool and ensure base is fully cured |
| Uneven dot sizes | Inconsistent pressure or polish amount on tool | Reload tool with same amount for each dot and use perpendicular touch |
| Dots peeling off | Skipping top coat over dots or insufficient curing | Always seal dots with gel top coat and cure fully |
| Color bleeding together | Applying dots on uncured or tacky base layer | Cleanse tacky layer before adding dots or ensure complete curing |
| Dots looking flat | Over-smoothing with thick top coat application | Apply thin top coat layer to maintain dimensional appearance |
Nail Design Variations for Polka Dot Nail Art
| Style | Description | Best Occasion |
| Minimalist Micro-Dots | Tiny scattered dots in neutral tones on nude base | Professional settings, everyday wear, subtle elegance |
| Ombre Dot Pattern | Gradient of dot sizes from large to small | Creative events, artistic expression, fashion-forward looks |
| Negative Space Polka | Dots on bare nail with colored tips or accents | Modern minimalist occasions, summer events, casual chic |
| French Tip with Dots | Classic french manicure with dots along smile line | Weddings, formal events, elegant celebrations |
| Rainbow Polka Dots | Multi-colored dots on white or pastel base | Parties, festivals, playful casual outings |
| Monochrome Sophistication | Black dots on white or white dots on black | Business meetings, sophisticated dinners, timeless style |
| Metallic Accent Dots | Gold, silver, or chrome dots on colored base | Holiday parties, evening events, glamorous occasions |
The beauty of polka dot nail art lies in its adaptability to any personal style or event. Experimenting with different color combinations and dot placements allows you to create unique designs that reflect your personality while staying on trend.
Nail Care and Maintenance for Long-Lasting Polka Dots
Maintaining your polka dot nail art requires consistent care to preserve both the design and nail health underneath. Apply cuticle oil daily to keep the surrounding skin hydrated and prevent the polish from lifting at the edges. Moisturized cuticles create a better seal around the nail, extending the life of your gel manicure significantly. Focus on massaging oil into the cuticle area and underneath the free edge where dryness commonly occurs.
Protect your polka dot nail art from excessive water exposure and harsh chemicals that can weaken the gel bond. Wear gloves when washing dishes, cleaning with strong products, or engaging in activities that involve prolonged water contact. While gel polish is durable, constant exposure to moisture and chemicals can cause premature lifting and dullness. Taking preventive measures ensures your design stays vibrant and intact for the full wear period.
Avoid using your nails as tools to prevent chipping and damage to both the design and natural nail. Opening cans, peeling stickers, or scraping surfaces puts unnecessary stress on the gel layers and can cause cracks or breaks. If you notice any lifting around the edges, resist the urge to peel or pick at the polish, as this removes layers of your natural nail and causes weakness.
Regular maintenance appointments every two to three weeks help address growth and prevent damage from occurring. As your nails grow, the gap between the cuticle and polish becomes more noticeable and creates opportunities for lifting. Professional fills or complete removal and reapplication keep your nails looking fresh while allowing nail technicians to assess nail health.
How to Remove Gel Nails Safely
Safe gel nail removal preserves your natural nail health and prevents damage that can take months to repair. Begin by gently filing the shiny top coat layer with a medium-grit file to break the seal and allow acetone to penetrate more effectively. This step significantly reduces soaking time and makes removal easier without excessive force or scraping that damages the nail plate.
- File the top coat surface gently to remove the shine completely.
- Soak cotton pads in pure acetone until thoroughly saturated with solution.
- Place soaked cotton directly onto each nail, covering the entire surface.
- Wrap each finger with aluminum foil to secure cotton and prevent evaporation.
- Wait ten to fifteen minutes for acetone to dissolve the gel layers.
- Remove foil and cotton from one nail to check if gel has softened.
- Gently push softened gel off using an orange wood stick or cuticle pusher.
- Avoid scraping or forcing gel that has not fully dissolved yet.
- Re-soak any nails where gel remains firmly attached to the nail plate.
- Buff nails gently after complete removal to smooth the surface lightly.
- Wash hands thoroughly and apply nourishing cuticle oil and hand cream.
Give your nails a break between gel applications to allow them to recover and maintain their natural strength. Even a few days without polish allows nails to breathe and prevents the yellowing or brittleness that sometimes develops with continuous gel wear.
Nail Health and Safety with Polka Dot Nail Art
Maintaining nail health while enjoying polka dot nail art requires attention to proper application techniques and product quality. Always ensure adequate nail preparation without excessive filing that thins the nail plate and causes weakness over time. The goal is to create slight texture for adhesion, not to remove significant layers of the natural nail that protect the sensitive nail bed underneath.
Watch for signs of nail damage such as discoloration, brittleness, or separation of the nail from the bed, which indicate the need for a break from gel applications. Persistent moisture trapped under gel polish can create an environment for fungal or bacterial infections that require medical treatment. If you notice green discoloration, persistent pain, or swelling around the nail, consult a dermatologist promptly for proper evaluation and treatment.
Use only high-quality gel products from reputable manufacturers that have been properly tested for safety and performance. Cheap or counterfeit products may contain harmful ingredients that cause allergic reactions, skin sensitivity, or long-term nail damage. Investing in quality products protects both your nail health and the longevity of your polka dot designs.
Frequently Asked Questions About Polka Dot Nail Art
How long do gel nails with polka dots last?
Gel nails with polka dot designs typically last two to three weeks with proper application and care. The longevity depends on factors like nail growth rate, daily activities, and how well you maintain the manicure with cuticle oil and protection from harsh chemicals. Proper nail preparation and thin gel layers contribute significantly to extended wear time. Some people experience up to four weeks of wear, while others need touch-ups sooner based on their individual nail characteristics and lifestyle.
How do I remove gel nails safely without damaging my natural nails?
Safe gel nail removal involves soaking nails in pure acetone for ten to fifteen minutes until the gel softens enough to push off gently. Never peel or force gel polish off, as this removes layers of your natural nail and causes significant damage. Wrap acetone-soaked cotton pads in foil around each nail to maximize penetration and minimize evaporation. After removal, always apply cuticle oil and moisturizer to replenish hydration and nourish the nail plate back to health.
What is the difference between gel nails and acrylic nails for polka dot designs?
Gel nails cure under UV/LED light and offer a more natural, flexible finish that works beautifully for polka dot nail art. Acrylic nails use a liquid monomer and powder polymer system that air-dries to create a harder, more durable enhancement suitable for length extensions. Gel polish is thinner and easier to work with for detailed designs like polka dots, while acrylic requires more skill to create smooth, thin applications. Most people find gel more comfortable and natural-feeling for nail art applications on natural nails.
Why do my gel nails with polka dots peel after a few days?
Gel nails peel prematurely due to inadequate nail preparation, moisture on the nail plate, or skipping important steps like dehydrator and base coat. Oil, lotion, or water on nails before application prevents proper adhesion and causes lifting around the cuticle area. Applying gel layers too thickly or not capping the free edge also contributes to peeling and chipping. Ensure thorough cleansing, proper product application, and complete curing between each layer to prevent this common issue.
How can I make my polka dot gel nails last longer?
Making gel nails last longer requires diligent cuticle oil application, wearing gloves during wet work, and avoiding using nails as tools for prying or scraping. Apply thin, even layers of gel polish and ensure complete curing of each layer to create a durable finish. Keep hands and nails moisturized but avoid getting oil or lotion on the nail plate before your next manicure. Proper nail preparation with dehydrator and gentle buffing creates the ideal surface for long-lasting adhesion and extended wear time.
Conclusion
Polka dot nail art has evolved into a sophisticated, versatile design that suits any style or occasion with its modern micro-dot aesthetic. This accessible technique allows both beginners and experienced nail enthusiasts to create stunning manicures that stay on trend while expressing personal creativity. By following proper application techniques, using quality gel products, and maintaining regular nail care, you can achieve salon-quality polka dot designs that last for weeks. The endless variation possibilities make this classic pattern feel fresh and exciting every time you try a new color combination or dot placement pattern. Embrace this charming trend and discover how polka dot nail art can elevate your everyday style with minimal effort and maximum impact.