15 Classy Nails Designs for Every Occasion

Classy nails designs elevate your appearance for weddings, business meetings, casual outings, and special celebrations.
These 15 timeless nail art styles combine sophistication with versatility, ensuring your manicure complements any event. Whether you prefer understated elegance or bold statements, mastering these techniques transforms your nail game completely.
| Topic | Details |
|---|---|
| Category | Nail Art / Gel Nails |
| Skill Level | Beginner to Advanced |
| Time Needed | 45-90 minutes per design |
| Tools Needed | UV/LED lamp, gel polish, nail file, dotting tools, brushes |
| Best For | Anyone seeking elegant, occasion-appropriate nail designs |
Table of Contents
Why These Classy Nail Designs Work
Classy nail designs maintain their appeal because they balance artistic expression with professional presentation. These styles utilize neutral color palettes, geometric precision, and strategic embellishments that enhance rather than overwhelm. The longevity of gel-based classy designs ensures your manicure remains flawless throughout multi-day events, making them ideal for weddings, business conferences, and extended celebrations.
The psychological impact of well-groomed nails influences personal confidence and professional perception. Studies in fashion psychology demonstrate that polished nail presentations correlate with increased self-assurance and positive social impressions. Classy designs achieve this effect by combining timeless aesthetic principles with modern nail technology, creating manicures that photograph beautifully and withstand daily activities.
Professional nail artists favor these 15 designs because they accommodate various nail shapes, lengths, and skin tones. The adaptability of these techniques allows customization without compromising sophistication. From short natural nails to long almond shapes, each design translates seamlessly across different nail characteristics while maintaining its elegant essence.
Tools and Products Needed for Classy Nail Designs
| Product | Purpose | Alternatives |
|---|---|---|
| UV/LED Lamp | Cures gel polish layers | Dual-wavelength lamp for faster curing |
| Base Coat | Protects natural nail and improves adhesion | Rubber base for added strength |
| Gel Polish Collection | Provides color options for designs | Regular polish with gel top coat |
| Nail File (180 grit) | Shapes and smooths nail edges | Glass file for gentler filing |
| Nail Buffer | Creates smooth surface for polish application | 3-way buffer block |
| Cuticle Oil | Maintains nail health and flexibility | Vitamin E oil or jojoba oil |
| Gel Top Coat | Seals design and adds shine | Matte top coat for different finish |
| Nail Art Brushes | Creates precise lines and details | Toothpick for simple designs |
| Dotting Tools | Makes perfect circles and patterns | Bobby pin as makeshift tool |
| Nail Cleanser | Removes sticky layer and preps nails | Isopropyl alcohol 99% |
For premium gel polish collections and professional nail tools, visit Gel Nails by Lina for curated product recommendations that ensure salon-quality results at home.
15 Step-by-Step Classy Nail Designs
Design 1: Classic French Manicure
- Prepare nails by filing into desired shape and pushing back cuticles gently.
- Apply thin base coat layer and cure under UV/LED lamp for 30 seconds.
- Paint entire nail with sheer pink or nude gel polish in two thin coats.
- Cure each color coat for 60 seconds under the lamp.
- Use striping brush to create precise white tip along free edge.
- Cure white tip for 60 seconds, then apply gel top coat.
- Cure final layer for 60 seconds and wipe with nail cleanser.
Design 2: Minimalist Negative Space
- Prep nails with base coat and cure completely.
- Apply nude gel polish to three-quarters of nail, leaving cuticle area bare.
- Create geometric lines using striping tape or thin brush.
- Fill selected sections with contrasting color, maintaining clean edges.
- Remove tape carefully before curing if using tape method.
- Cure design for 60 seconds, then seal with top coat.
Design 3: Elegant Chrome Accent
- Apply base coat and cure, then apply two coats of gel color.
- Cure color coats thoroughly before applying no-wipe top coat.
- Cure top coat for full 60 seconds until completely hardened.
- Rub chrome powder onto one or two accent nails using silicone tool.
- Buff powder until mirror-like finish appears evenly.
- Seal chrome with gel top coat designed for chrome finishes.
- Cure final layer and avoid wiping to preserve chrome effect.
Design 4: Subtle Ombre Gradient
- Apply base coat and white or light gel base color.
- Cure base completely, then place small amounts of two colors on palette.
- Use makeup sponge to dab colors onto nail in overlapping pattern.
- Blend colors by gently patting sponge in rolling motion.
- Cure ombre layer for 60 seconds, repeat for deeper saturation.
- Apply gel top coat to smooth texture and add shine.
Design 5: Delicate Gold Foil
- Apply base coat and two coats of neutral gel color.
- Apply thin layer of no-wipe top coat to tacky surface.
- Cure for only 15-20 seconds to maintain slight tackiness.
- Press small pieces of gold foil onto designated areas.
- Seal foil immediately with regular gel top coat.
- Cure completely for 60 seconds to secure foil placement.
Design 6: Classic Red Almond Nails
- File nails into elegant almond shape with tapered sides.
- Apply base coat and cure thoroughly.
- Apply rich red gel polish in two thin, even coats.
- Cure each coat for 60 seconds under lamp.
- Apply gel top coat for high-gloss finish.
- Cure final layer and cleanse sticky residue completely.
Design 7: Nude and White Marble
- Apply base coat and nude gel base color, cure completely.
- Drop small amounts of white and gray gel on palette.
- Use thin brush to swirl colors on nail in marble pattern.
- Avoid over-mixing to maintain distinct veining effect.
- Cure marble design for 60 seconds.
- Apply gel top coat and cure for glossy finish.
Design 8: Thin Line Art
- Apply base coat and chosen base color in two coats.
- Cure base color completely before adding details.
- Use extra-thin striping brush to create delicate lines.
- Draw geometric patterns, curved lines, or abstract designs.
- Cure line art for 60 seconds to set design.
- Seal with gel top coat and cure completely.
Design 9: Pearl Embellishment Accent
- Complete base and color application on all nails.
- Apply top coat to all nails except accent nail, cure those.
- Place small dot of uncured gel on accent nail where pearl desired.
- Use tweezers to position pearl or caviar bead precisely.
- Cure with embellishment in place for 60 seconds.
- Carefully apply top coat around pearl without covering completely.
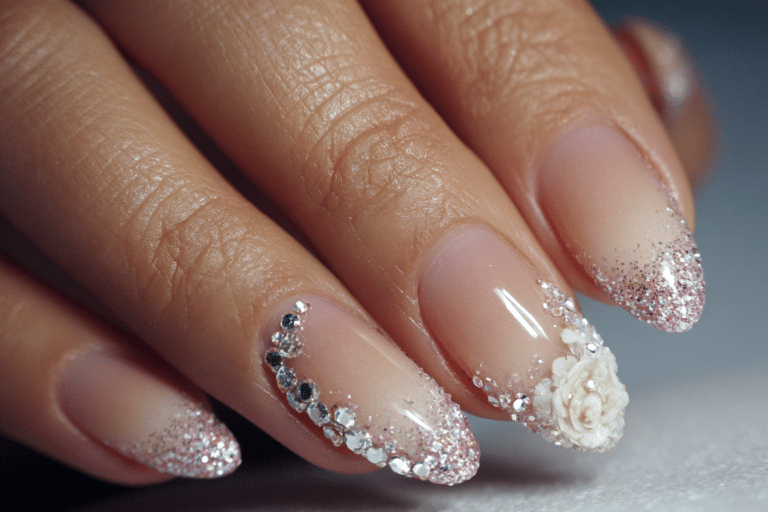
Design 10: Soft Pink Glitter Gradient
- Apply base coat and soft pink gel base, cure fully.
- Apply glitter gel polish to tips only using light patting motion.
- Build glitter density gradually toward free edge.
- Cure glitter layer for 60 seconds.
- Apply second glitter layer if more intensity desired.
- Seal with gel top coat, cure, and cleanse.
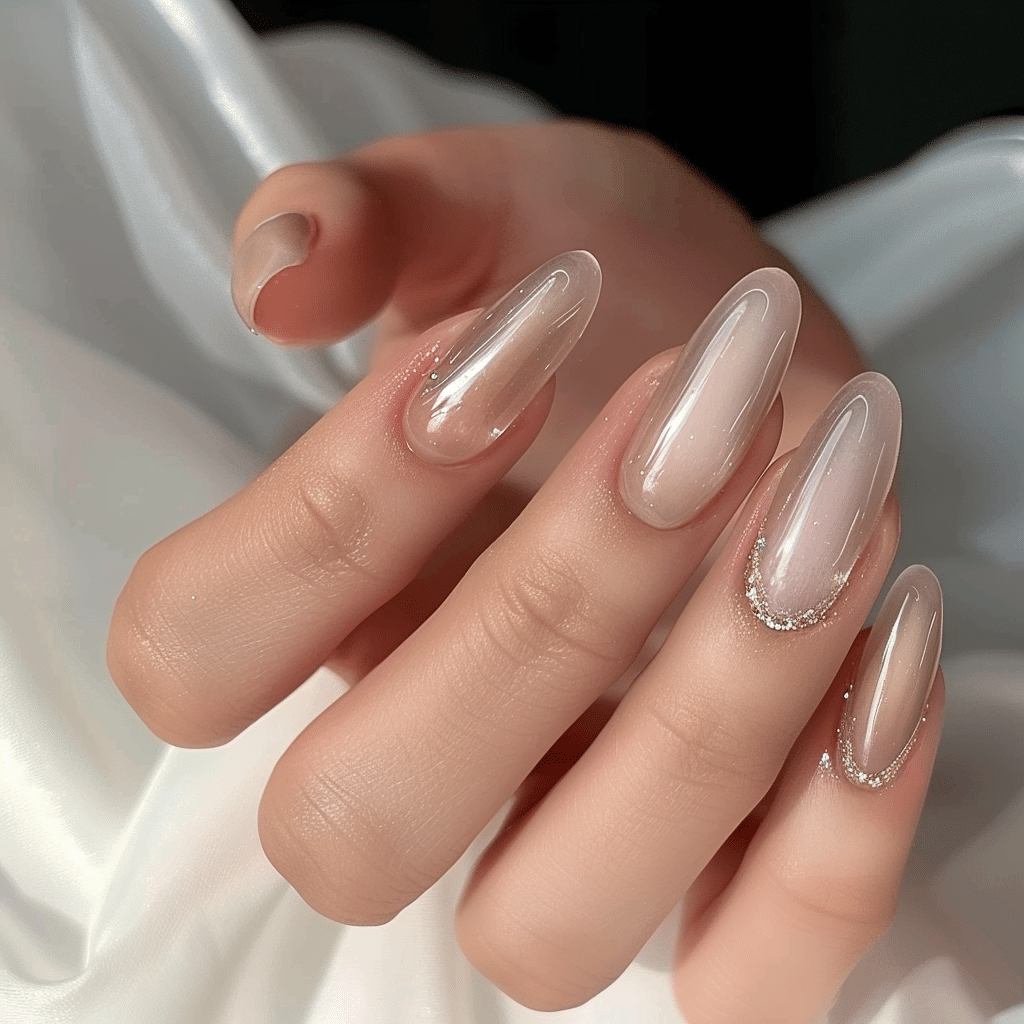
Design 11: Timeless Nude Manicure
- Prepare nails with proper filing and cuticle care.
- Apply base coat and cure for 30 seconds.
- Select nude shade matching your skin undertone perfectly.
- Apply two thin coats, curing 60 seconds between each.
- Finish with high-gloss gel top coat.
- Cure final layer and remove sticky residue completely.
Design 12: Elegant V-French Tips
- Apply base coat and sheer pink base color, cure both.
- Use striping brush to paint white V-shape at tip.
- Create chevron pointing toward cuticle instead of straight line.
- Cure V-tip for 60 seconds until hardened.
- Clean up edges with small brush dipped in cleanser.
- Apply gel top coat and cure for final finish.
Design 13: Monochrome Geometric Design
- Apply base coat and black or white base color.
- Cure base completely before adding geometric elements.
- Use striping tape to section nail into geometric shapes.
- Fill alternating sections with contrasting gel color.
- Remove tape before curing, then cure for 60 seconds.
- Seal design with gel top coat and cure thoroughly.
Design 14: Champagne Shimmer
- Apply base coat and cure under lamp.
- Apply two coats of champagne or rose gold shimmer gel.
- Cure each coat for 60 seconds to build opacity.
- Ensure even coverage without streaking or bald spots.
- Apply gel top coat for enhanced shine and protection.
- Cure final layer and wipe away sticky layer.
Design 15: Baby Boomer Ombre
- Apply base coat and cure completely.
- Apply white gel to tips, pink gel to base.
- Use makeup sponge to blend colors in center seamlessly.
- Pat and roll sponge gently to create soft gradient.
- Cure blended design for 60 seconds.
- Apply gel top coat to smooth surface, cure, and cleanse.
For additional design inspiration and technique tutorials, explore the comprehensive guides available at Gel Nails by Lina.
Pro Nail Technician Tips for Classy Designs
- Apply gel polish in thin layers rather than thick coats to prevent wrinkling, bubbling, and improper curing that compromises design longevity.
- Cap the free edge by running brush along nail tip with each coat to seal edges and prevent premature chipping or lifting.
- Dehydrate nails properly before base coat application using nail prep solutions or alcohol wipes to remove natural oils completely.
- Allow each layer to cure for the full recommended time based on your specific lamp wattage to ensure complete polymerization.
- Keep gel polish away from cuticles by maintaining 1-2mm gap to prevent lifting, infection risk, and unprofessional appearance.
- Store gel polishes away from direct sunlight and heat sources to maintain consistency and prevent premature thickening or separation.
Common Gel Nail Mistakes with Classy Designs
| Mistake | Why it Happens | How to Fix |
|---|---|---|
| Thick gel layers | Trying to achieve opacity in one coat or rushing application process | Apply 2-3 thin coats instead, allowing proper curing between each layer |
| Improper curing | Using low-wattage lamp or removing nails too soon from light | Invest in quality 48W+ lamp and cure full recommended time |
| Skipping nail prep | Rushing through initial steps or not understanding their importance | Always cleanse, file, buff, and dehydrate nails before base coat |
| Flooding the cuticle | Applying polish too close to cuticle area or using too much product | Maintain small gap and use clean brush to remove excess immediately |
| Not capping free edge | Forgetting final step or not understanding its purpose for longevity | Run brush along tip edge with every coat including base and top |
Nail Design Variations for Different Occasions
| Style | Description | Best Occasion |
|---|---|---|
| French Gel Nails | Classic white tips with nude or pink base for timeless elegance | Weddings, job interviews, formal events |
| Chrome Nails | Mirror-finish metallic effect using special powder technique | Evening parties, celebrations, fashion events |
| Ombre Nails | Gradient color transition from light to dark or between two shades | Summer events, casual outings, creative workplaces |
| Minimalist Nail Art | Simple lines, dots, or negative space designs with neutral colors | Business meetings, daily wear, professional settings |
| Seasonal Nail Designs | Designs incorporating seasonal colors and thematic elements | Holiday parties, seasonal celebrations, themed events |
| Pearl Embellished | Delicate pearl or crystal accents on neutral base colors | Bridal events, anniversaries, upscale dinners |
| Classic Red Manicure | Bold red gel polish in glossy or matte finish | Date nights, holiday parties, confidence boost |
| Nude Nails | Natural-looking shades matching skin tone for subtle elegance | Any occasion, professional environments, everyday wear |
Nail Care and Maintenance Between Appointments
Maintaining classy gel nail designs requires consistent care to preserve appearance and protect natural nail health. Apply cuticle oil twice daily, focusing on the cuticle area and surrounding skin to prevent dryness, cracking, and premature lifting. Hydrated cuticles create a barrier against bacteria while maintaining the polished appearance of your manicure throughout its two to three week lifespan.
Wear protective gloves when performing household tasks involving water, cleaning chemicals, or mechanical work. Extended water exposure softens the nail plate and weakens gel adhesion, while harsh chemicals can dull the shine and cause discoloration. This simple protective measure extends your manicure’s lifespan significantly and prevents unnecessary damage to both gel and natural nails.
Avoid using your nails as tools to open packages, scratch surfaces, or pry objects. This habit causes stress fractures in the gel layer, leads to chipping, and can damage the natural nail underneath. Instead, use appropriate tools for tasks and treat your manicure as the investment it represents.
Schedule regular maintenance appointments every 2-3 weeks to address growth, prevent excessive lifting, and maintain nail health. Professional nail technicians at facilities like Gel Nails by Lina can assess nail condition, perform proper removal, and apply fresh designs safely.
How to Remove Gel Nails Safely
- File the shiny top coat layer gently using 180-grit file to break seal without filing natural nail.
- Soak cotton pads in pure acetone and place directly on each nail surface.
- Wrap each finger in aluminum foil squares to hold cotton in place and trap heat.
- Wait 10-15 minutes allowing acetone to dissolve gel polish completely.
- Remove foil and cotton, then gently push softened gel off using wooden cuticle stick.
- Avoid forcing gel off if resistance felt; rewrap and soak additional 5 minutes instead.
- Buff nails gently with fine buffer to smooth any remaining residue.
- Wash hands thoroughly with soap to remove all acetone traces.
- Apply cuticle oil generously and moisturize hands completely.
- Allow nails to rest for 24-48 hours before applying new gel manicure.
Nail Health and Safety Considerations
Protecting natural nail health while enjoying classy gel designs requires understanding potential risks and implementing preventive measures. Over-filing the nail plate during preparation removes too many protective layers, causing weakness, sensitivity, and increased susceptibility to infections. Professional nail technicians should only lightly buff the surface to remove shine, never file aggressively into the nail bed.
Allow nails to breathe between gel applications by scheduling breaks every 8-12 weeks. During this rest period, focus on intensive nail care using strengthening treatments, cuticle oils, and hydrating serums. This practice prevents cumulative damage, allows assessment of natural nail condition, and gives the nail plate time to regenerate fully.
Watch for signs of nail infections including redness, swelling, pain, green discoloration, or unusual odor around nail beds. These symptoms require immediate attention from healthcare professionals rather than continued manicure applications. According to dermatological research, improper nail care practices contribute significantly to fungal and bacterial infections that require medical treatment.
Choose reputable nail salons that follow strict sanitation protocols, use properly maintained equipment, and employ licensed nail technicians. Verify that tools undergo proper sterilization between clients, disposable files are discarded after single use, and workstations maintain cleanliness standards that protect client health.
Frequently Asked Questions
How long do gel nails last with classy designs?
Properly applied gel nail designs typically last 2-3 weeks without chipping or significant wear. The longevity depends on nail preparation quality, application technique, daily activities, and maintenance practices. Classy designs using neutral colors and simple embellishments often show less visible growth line than bold colors, extending the perceived freshness of your manicure.
How to remove gel nails safely at home?
Safe gel removal requires soaking nails in pure acetone for 10-15 minutes after filing off the top coat layer. Wrap each nail in acetone-soaked cotton secured with aluminum foil, then gently push softened gel off with a wooden stick without forcing. Never peel or pick gel polish off as this removes layers of natural nail, causing damage that takes months to repair fully.
Are gel nails better than acrylic nails for classy designs?
Gel nails offer more natural appearance, flexibility, and easier application for classy designs compared to acrylic nails. Gel polish provides glossy finish without buffing, cures quickly under UV/LED light, and feels lighter on nails. Acrylic nails offer superior strength for extremely long extensions but appear thicker and require more maintenance for elegant, understated looks.
Why do my gel nails peel after a few days?
Gel nails peel prematurely due to improper nail preparation, insufficient dehydration, gel application too close to cuticles, or inadequate curing time. Oil, moisture, or debris on the nail surface prevents proper adhesion, while thick gel layers don’t cure completely through all levels. Ensure thorough cleansing, proper base coat application, thin layers, and full curing time to prevent peeling issues.
How can I make my gel nails last longer?
Extend gel nail longevity by applying cuticle oil daily, wearing gloves during household tasks, avoiding excessive water exposure, and not using nails as tools. Proper application technique including nail dehydration, thin gel layers, edge capping, and complete curing creates stronger foundation. Schedule fills before significant growth appears to prevent lifting and maintain professional appearance throughout wear time.
Conclusion
These 15 classy nails designs offer sophisticated options for every occasion, from professional settings to elegant celebrations. Mastering these timeless techniques using proper tools, quality gel products, and professional methods ensures stunning manicures that enhance your personal style. Whether you prefer minimalist elegance or subtle embellishments, these designs provide versatile foundations for expressing your unique aesthetic while maintaining polish and refinement in any situation.