Bahamas Themed Nails: Your Complete Guide to Tropical Nail Art

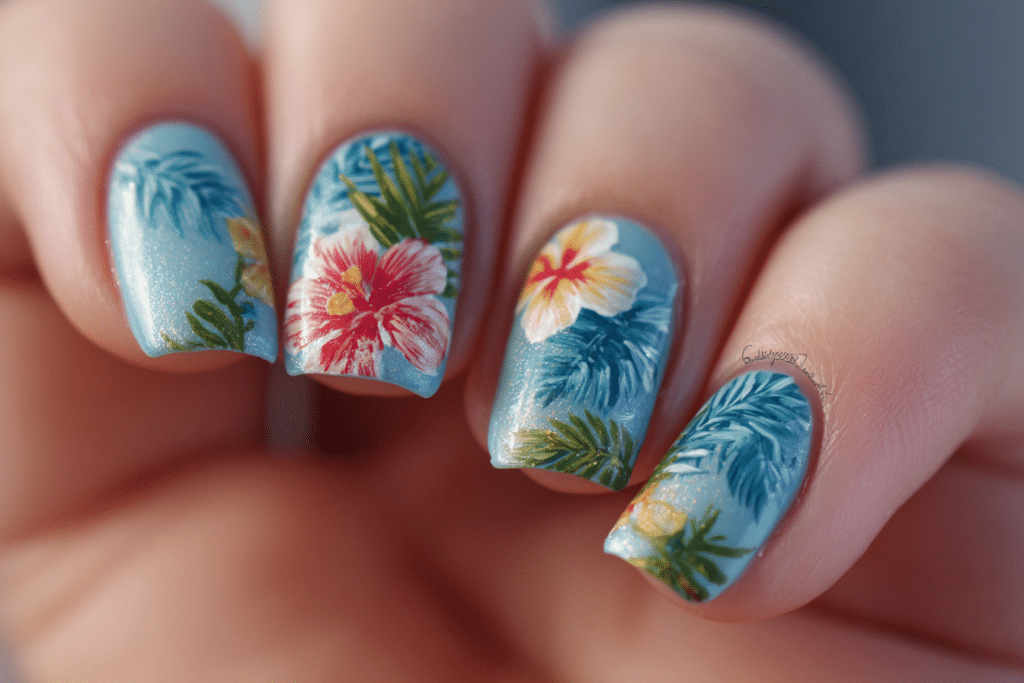
Bahamas themed nails capture the vibrant essence of tropical paradise through stunning color combinations and beach-inspired designs.
This nail art style combines turquoise blues, sandy neutrals, coral pinks, and tropical elements to create vacation-ready manicures. The technique works beautifully with gel polish, offering lasting wear perfect for summer events and island getaways.
| Topic | Details |
|---|---|
| Category | Nail Art |
| Skill Level | Intermediate |
| Time Needed | 90-120 minutes |
| Tools Needed | UV/LED lamp, gel polish, nail art brushes, dotting tools |
| Best For | Summer events, beach vacations, tropical enthusiasts |
Table of Contents
Why This Nail Technique Works
Bahamas themed nails work exceptionally well because they combine color psychology with artistic expression. The turquoise and aqua shades evoke feelings of relaxation and tranquility, mirroring the clear Caribbean waters. These colors naturally complement most skin tones, making the design universally flattering and appealing to diverse clientele.
The gel polish medium provides the perfect canvas for tropical designs because it offers superior color saturation and glossy finish. Unlike traditional nail polish, gel formulas maintain their vibrant appearance throughout extended wear periods. The layering capabilities of gel polish allow nail technicians to build depth and dimension, creating realistic ocean effects and gradient skies that capture the Bahamas aesthetic.
Professional nail artists appreciate this style because it allows creative freedom while following structured design principles. The tropical theme provides clear direction for color selection and motif choices, yet offers endless variations. From minimalist ocean waves to elaborate palm tree scenes, the Bahamas inspiration adapts to various skill levels and client preferences.
Tools and Products Needed
| Product | Purpose | Alternatives |
|---|---|---|
| UV/LED Lamp | Curing gel polish layers | 48W or higher LED lamp |
| Base Coat | Protecting natural nails and adhesion | Ridge-filling base coat |
| Turquoise Gel Polish | Main ocean color | Aqua or teal shades |
| White Gel Polish | Wave details and highlights | Opaque white paint gel |
| Coral/Peach Gel Polish | Sunset accents | Pink or orange shades |
| Nail Art Brushes | Detail work and designs | Fine liner brushes |
| Dotting Tools | Creating bubbles and textures | Toothpicks or bobby pins |
| Nail File (180 grit) | Shaping natural nails | Glass nail file |
| Nail Buffer | Smoothing nail surface | 4-way buffer block |
| Cuticle Oil | Hydrating nail beds | Jojoba or vitamin E oil |
| Top Coat | Sealing design and shine | No-wipe glossy top coat |
| Nail Cleanser | Removing tacky layer | Isopropyl alcohol 70% |
For the best results with your Bahamas themed nails, visit Gel Nails by Lina for professional application and quality gel products that ensure long-lasting tropical designs.
Step-by-Step Application Guide
Nail Preparation
- Remove any existing nail polish using acetone and lint-free wipes to ensure a clean surface.
- Trim nails to desired length using professional nail clippers, cutting straight across to prevent splitting.
- File nails into your preferred shape, moving in one direction to avoid weakening the nail structure.
- Push back cuticles gently using a wooden or rubber cuticle pusher, avoiding aggressive techniques that cause damage.
- Buff the nail surface lightly with a fine buffer to remove shine and create texture for adhesion.
- Cleanse nails thoroughly with nail cleanser or isopropyl alcohol to remove oils and debris.
Base Coat Application
- Apply a thin layer of gel base coat, starting from the cuticle and sweeping toward the free edge.
- Cap the free edge by running the brush along the nail tip to prevent premature lifting.
- Cure the base coat under UV/LED lamp according to manufacturer instructions, typically 30-60 seconds.
- Check for complete coverage, ensuring no bare spots remain on the nail surface.
Gel Polish Layers
- Choose your primary Bahamas color scheme, typically starting with a turquoise or aqua base shade.
- Apply the first thin layer of colored gel polish, maintaining even coverage across the entire nail.
- Cure the first color layer completely before proceeding to the second coat.
- Apply a second thin coat of the same color for opacity and vibrant color payoff.
- Cure the second layer, ensuring complete polymerization for durability and longevity.
- Create gradient effects by applying lighter blue or white polish to the tips using a sponge technique.
- Blend colors while still wet, then cure to set the ombre ocean effect.
Design Details and Art
- Use a fine nail art brush to paint white wave details along the cuticle or tips.
- Create foam effects by dotting white polish in irregular patterns where waves meet sand colors.
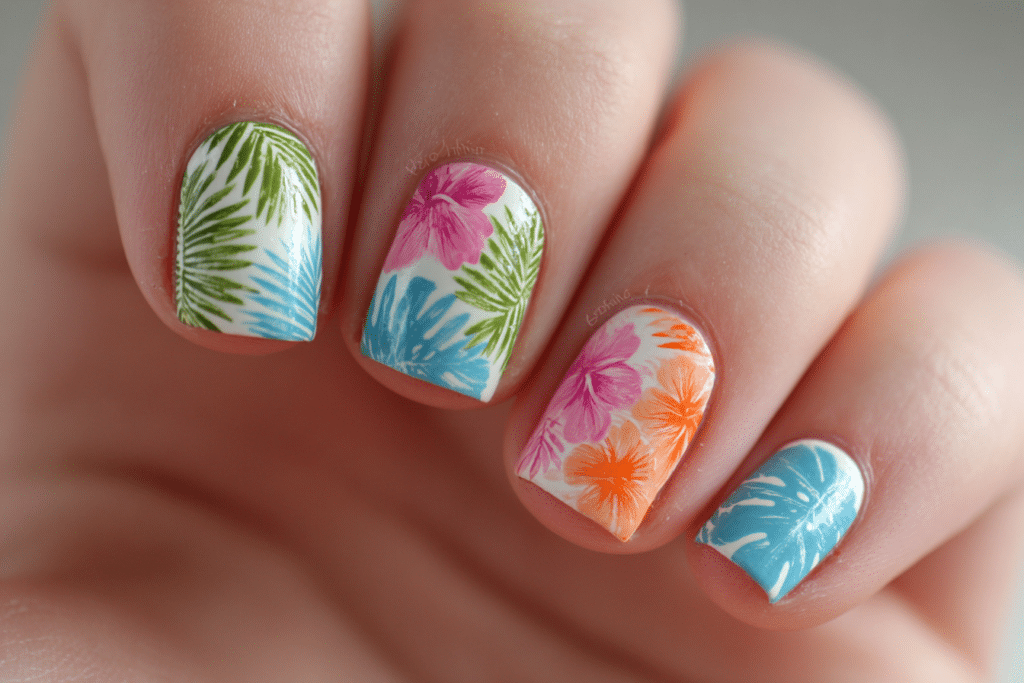
- Add palm tree silhouettes using black or brown gel polish with a liner brush for tropical accents.
- Paint small starfish or shell details using coral, peach, or gold gel polish for dimensional interest.
- Allow each design element to cure before adding overlapping details to prevent smudging.
- Build depth by layering translucent colors over base designs for realistic water effects.
Curing Process
- Ensure each gel layer receives adequate curing time based on your specific lamp wattage.
- Position hands correctly in the lamp so all nails receive equal UV/LED exposure.
- Cure design elements individually if working with multiple detailed components on one nail.
- Avoid under-curing, which leads to peeling and premature wear of your Bahamas themed nails.
Finishing and Top Coat
- Apply a generous layer of gel top coat over the entire design, sealing all art elements.
- Cap the free edge thoroughly with top coat to lock in color and prevent chipping.
- Cure the top coat for the full recommended time, typically 60 seconds for optimal hardness.
- Cleanse nails with alcohol or nail cleanser to remove the tacky inhibition layer if using a traditional gel top coat.
- Apply cuticle oil around the nail beds and massage gently to hydrate and nourish the skin.
- Buff any minor imperfections gently if needed, then reapply a thin top coat layer and cure again.
Pro Nail Technician Tips
- Use thin gel polish layers rather than thick applications to prevent wrinkling, bubbling, and incomplete curing that compromises the manicure.
- Create realistic ocean depth by layering translucent turquoise over white, then adding darker blue gradients toward the cuticle area.
- Seal all design edges with top coat, extending slightly beyond nail art elements to prevent premature lifting and peeling.
- Work with one hand completely before starting the other to maintain consistent workflow and prevent accidental smudging of wet gel.
- Store gel polishes away from direct sunlight and temperature fluctuations to maintain optimal consistency and prevent premature curing in bottles.
- Invest in quality gel brushes specifically designed for nail art, as they provide better control and precision for tropical details.
For professional techniques and flawless Bahamas themed nails, explore expert services at Gel Nails by Lina where experienced technicians specialize in tropical nail artistry.
Common Gel Nail Mistakes
| Mistake | Why it Happens | How to Fix |
|---|---|---|
| Thick gel layers | Applying too much product at once to save time | Use multiple thin coats instead, curing between each layer |
| Improper curing | Insufficient lamp wattage or incorrect hand placement | Upgrade to 48W LED lamp and ensure full nail exposure |
| Skipping nail prep | Rushing through preparation steps to speed up process | Always buff, cleanse, and dehydrate nails before base coat |
| Flooding the cuticle | Applying polish too close to cuticle line | Leave 1mm gap from cuticle and use cleanup brush |
| Mixing gel brands | Using incompatible products from different manufacturers | Stick to one gel system or test compatibility first |
Bahamas Themed Nail Design Variations
| Style | Description | Best Occasion |
|---|---|---|
| Classic Ocean Gradient | Turquoise to white ombre mimicking crystal clear waters | Beach vacations, summer parties |
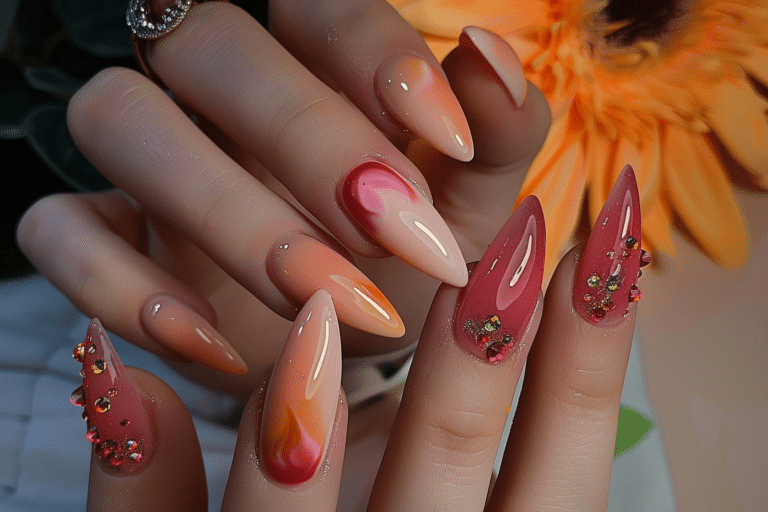
| Sunset Paradise | Coral, peach, and gold gradient with palm tree silhouettes | Evening events, destination weddings |
| Minimalist Beach | Nude base with single accent nail featuring tropical scene | Professional settings, everyday wear |
| Starfish and Shells | Sandy neutral tones with 3D shell embellishments | Resort wear, tropical celebrations |
| Tropical Chrome | Aqua chrome finish with minimal white wave details | Special occasions, luxury events |
| Palm Tree French | French tips with palm tree and beach scene on tips | Versatile for multiple occasions |
Nail Care and Maintenance
Maintaining your Bahamas themed nails requires consistent hydration and protective habits. Apply cuticle oil at least twice daily, focusing on the nail beds and surrounding skin to prevent dryness and cracking. This practice keeps the natural nail flexible and reduces the risk of gel polish lifting at the edges.
Protect your tropical manicure by wearing gloves during household chores, cleaning tasks, and gardening activities. Exposure to harsh chemicals and excessive water weakens the bond between gel polish and natural nails. Avoid using your nails as tools to open cans or scrape surfaces, as this creates stress points that lead to cracking and peeling.
Schedule regular maintenance appointments every two to three weeks to address regrowth and maintain the pristine appearance of your design. Professional fills and touch-ups preserve the integrity of your Bahamas themed nails while allowing nail technicians to check for any underlying nail health issues. Between appointments, monitor your nails for signs of lifting or damage that require immediate attention.
How to Remove Gel Nails Safely
- File the shiny top coat layer gently using a coarse nail file to break the seal and allow acetone penetration.
- Soak cotton balls or pads in pure acetone, ensuring they are saturated but not dripping excessively.
- Place the acetone-soaked cotton directly onto each nail, covering the entire gel polish surface completely.
- Wrap each finger tightly with aluminum foil, securing the cotton in place and preventing evaporation during soaking.
- Allow nails to soak for 15-20 minutes, checking periodically to see if gel has softened sufficiently.
- Remove foil wraps one finger at a time and gently push off softened gel using a wooden cuticle pusher.
- Avoid forcing or scraping gel polish, as this damages the natural nail plate and causes thinning.
- Buff nails gently to remove any remaining residue, then wash hands thoroughly with soap and water.
- Apply nourishing cuticle oil and hand cream immediately after removal to restore moisture and prevent brittleness.
- Allow nails to rest for at least 24 hours before applying a new gel manicure for optimal nail health.
For safe removal of your Bahamas themed nails without damaging your natural nails, consider professional removal services at Gel Nails by Lina where technicians use gentle techniques and nourishing treatments.
Nail Health and Safety
Protecting natural nail health while enjoying Bahamas themed nails requires understanding proper application and removal techniques. Over-filing the nail plate during preparation removes too much of the protective keratin layer, leading to weakness and sensitivity. Professional nail technicians recommend light buffing only to remove shine, not to thin the nail substantially.
Maintain proper sanitation practices by ensuring all tools are properly sterilized before use and never sharing nail implements. Bacteria and fungi thrive in moist environments, making proper tool hygiene critical for preventing infections. Allow nails periodic breaks between gel applications, typically one week every three months, to assess natural nail condition and provide recovery time.
Frequently Asked Questions
How long do gel nails last?
Gel nails typically last two to three weeks with proper application and care. Bahamas themed nails maintain their vibrant appearance throughout this period due to gel polish superior color retention. Factors affecting longevity include nail preparation quality, daily activities, and adherence to maintenance routines like regular cuticle oil application.
How to remove gel nails safely at home?
Safe gel nail removal requires soaking nails in pure acetone for 15-20 minutes after filing the top coat. Wrap each nail in acetone-soaked cotton and aluminum foil to maximize product penetration. Never peel or force gel polish off, as this removes layers of the natural nail and causes significant damage requiring weeks to repair.
What is the difference between gel nails and acrylic nails?
Gel nails cure under UV or LED light and offer a more flexible, natural feel compared to acrylic nails. Acrylics harden through chemical reaction and provide greater strength for extreme length. Gel polish works better for Bahamas themed nails because it delivers superior shine and color vibrancy perfect for tropical designs.
Why do my gel nails peel after a few days?
Gel nails peel prematurely due to inadequate nail preparation, oil residue on the nail plate, or skipping important steps. Moisture trapped under gel polish causes lifting, as does applying layers too thickly. Ensure thorough cleansing before application, proper curing time, and avoiding water exposure for two hours after your manicure to prevent early peeling.
How can I make my gel nails last longer?
Extend gel nail wear by applying cuticle oil daily, wearing gloves during wet work, and avoiding harsh chemicals. Cap the free edge with each gel layer during application to seal the tip completely. Schedule regular maintenance appointments and address any lifting immediately to prevent water infiltration that accelerates breakdown of the gel bond.
Conclusion
Bahamas themed nails offer a stunning way to bring tropical paradise to your everyday style through vibrant colors and creative designs. This comprehensive guide provides all the techniques, tools, and expert knowledge needed to achieve professional results. Whether you choose classic ocean gradients or elaborate sunset scenes, proper application and maintenance ensure your tropical manicure remains beautiful throughout its wear period. Visit Gel Nails by Lina for expert application and discover how Bahamas themed nails can transform your nail art experience with island-inspired beauty.