Summer Beach Nail Design Ideas and Application Guide

Summer beach nail design captures the essence of coastal beauty through vibrant gel colors, ocean-inspired patterns, and tropical themes perfect for warm weather.
These designs combine professional gel polish techniques with creative artistry to deliver vacation-ready manicures that withstand sun, sand, and water. Professional nail technicians favor beach-themed designs during summer months because they offer endless creative possibilities while maintaining the durability clients need for active beach lifestyles.
| Topic | Details |
|---|---|
| Category | Nail Art / Gel Nails |
| Skill Level | Beginner to Intermediate |
| Time Needed | 60-90 minutes |
| Tools Needed | UV/LED lamp, gel polish, nail art brushes, dotting tools |
| Best For | Summer vacations, beach lovers, tropical events |
Table of Contents
Why This Nail Technique Works
Summer beach nail design works exceptionally well because gel polish formulations provide superior adhesion and flexibility that withstands exposure to saltwater, chlorine, and intense sunlight. The cured gel creates a protective barrier over natural nails while delivering vibrant color saturation that remains chip-free throughout extended vacation periods. Unlike traditional nail polish, gel formulas cure under UV or LED light to form a hardened coating that resists the wear and tear of beach activities.
The chemical composition of quality gel polish includes photoinitiators that react with UV light to create strong polymer chains, resulting in a manicure that maintains its glossy finish for two to three weeks. Beach-themed designs particularly benefit from gel application because the layering technique allows nail artists to build dimensional effects like waves, sand textures, and gradient sunsets without compromising structural integrity. This durability makes summer beach nail design the preferred choice for clients planning tropical getaways or extended outdoor activities.
Professional nail technicians recommend beach designs because they accommodate both bold and subtle aesthetics while providing the longevity active clients require. The versatility of gel polish enables intricate detailing with fine brushes while maintaining the strength needed to protect natural nails from environmental stressors common during summer months.
Tools and Products Needed
| Product | Purpose | Alternatives |
|---|---|---|
| UV/LED Lamp | Cures gel polish layers | Dual-purpose lamp with adjustable timer |
| Base Coat | Protects natural nail and improves adhesion | Strengthening base coat for thin nails |
| Gel Polish Colors | Provides vibrant summer shades | Gel paint for detailed art |
| Nail File (180 grit) | Shapes nail edges | Glass file for gentle shaping |
| Nail Buffer | Smooths nail surface | 4-way buffer block |
| Cuticle Oil | Hydrates cuticles and surrounding skin | Vitamin E oil or jojoba oil |
| Top Coat | Seals design and adds glossy finish | Matte top coat for varied texture |
| Nail Art Brushes | Creates detailed beach designs | Striping brush and detail brush set |
| Dotting Tools | Makes dots, bubbles, and small details | Bobby pins or toothpicks |
| Nail Cleanser | Removes tacky layer after curing | Isopropyl alcohol (90% or higher) |
For premium gel nail supplies and professional-grade products, visit Gel Nails by Lina to explore curated collections designed for long-lasting beach manicures.
Step-by-Step Application Guide for Summer Beach Nail Design
Nail Preparation
- Remove any existing nail polish using acetone-soaked cotton pads and allow nails to dry completely for five minutes.
- Push back cuticles gently using a cuticle pusher or wooden stick to expose the entire nail surface without causing damage.
- Shape nails to your desired length and form using a 180-grit nail file with smooth, unidirectional strokes from edge to center.
- Buff the nail surface lightly using a fine-grit buffer to remove shine and create texture for optimal gel adhesion.
- Cleanse nails thoroughly with nail cleanser or alcohol to remove oils, dust, and debris that could prevent proper bonding.
Base Coat Application
- Apply a thin layer of base coat to each nail, starting from the cuticle area and extending to the free edge with smooth strokes.
- Cap the free edge by brushing the base coat across the nail tip to seal and prevent lifting at stress points.
- Cure nails under UV lamp for 60 seconds or LED lamp for 30 seconds according to manufacturer specifications for your base coat.
- Check that base coat has cured completely with no tacky spots before proceeding to color application.
Gel Polish Layers and Beach Design
- Select your primary beach color such as ocean blue, sandy beige, coral pink, or turquoise and apply the first thin coat.
- Cure the first color layer for the recommended time, typically 60 seconds under UV or 30 seconds under LED light.
- Apply a second thin coat of the same color to achieve full opacity and vibrant color saturation without thick application.
- Cure the second layer completely before beginning any detailed nail art or accent designs on selected nails.
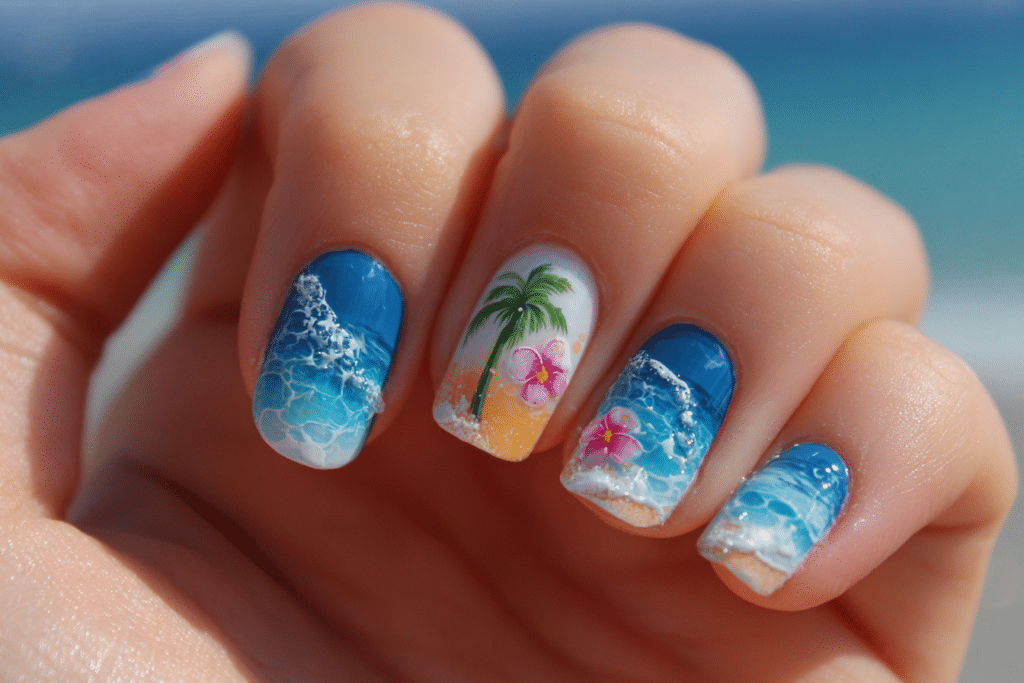
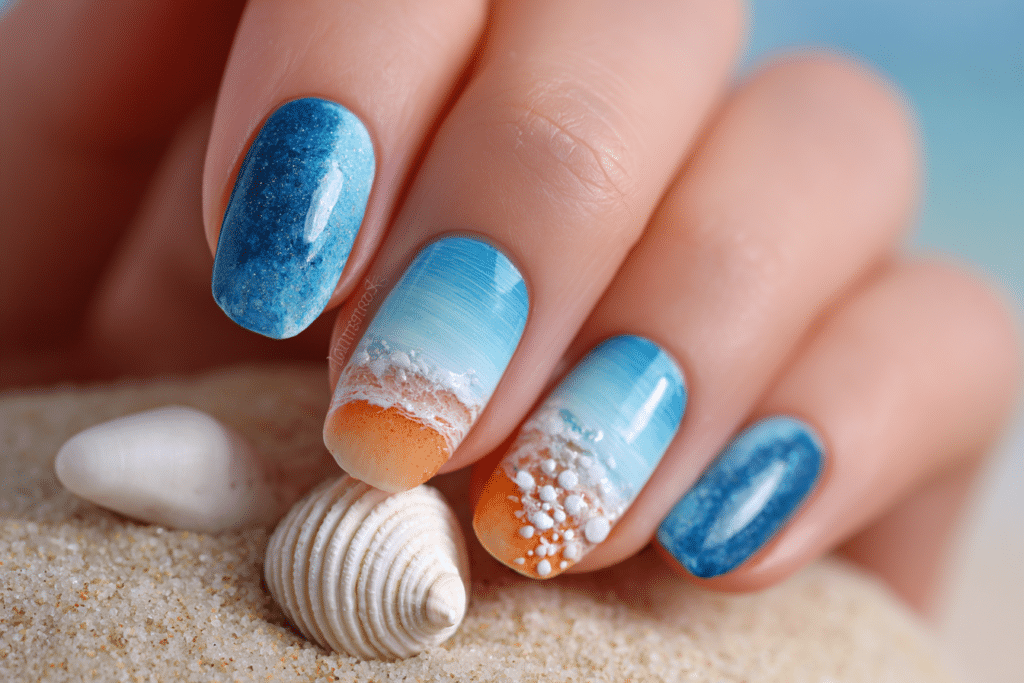
- Create beach designs using a detail brush with white gel for wave tips, gold for sand accents, or multiple colors for sunset gradients.
- Add dimensional elements like tiny dots for bubbles, thin lines for palm trees, or gradient blending for tropical sunsets.
- Cure each design element after application to prevent smudging and maintain crisp lines throughout the artistic process.
Curing Process
- Ensure each gel layer receives adequate curing time by positioning hands correctly in the lamp with nails flat and exposed to light.
- Monitor curing times carefully as under-curing leads to peeling while over-curing can cause brittleness in the gel coating.
- Allow gel polish to cool for 10 seconds after removing from lamp before touching or applying additional layers.
Finishing and Top Coat
- Apply a thin layer of top coat over the entire nail design, ensuring complete coverage from cuticle to free edge.
- Cap the free edge again with top coat to seal the entire manicure and maximize chip resistance during beach activities.
- Cure the top coat layer for the full recommended time, usually 60-90 seconds under UV or 30-60 seconds under LED.
- Wipe away the sticky inhibition layer using a lint-free wipe saturated with nail cleanser for a glossy, smooth finish.
- Apply cuticle oil generously to all fingers, massaging into cuticles and surrounding skin to restore moisture after gel application.
Discover more professional gel nail techniques at Gel Nails by Lina
Pro Nail Technician Tips
- Apply gel polish in thin layers rather than thick coats to prevent wrinkling, peeling, and incomplete curing that compromises manicure longevity.
- Avoid flooding the cuticle area by maintaining a small margin between gel polish and skin to prevent lifting and allow natural nail growth.
- Extend curing time by 10-15 seconds when working with dark or heavily pigmented colors that require more UV exposure for complete polymerization.
- Prep nails thoroughly by ensuring they are completely dry and oil-free before base coat application for maximum adhesion strength.
- Store gel polish bottles away from direct sunlight in a cool, dark location to preserve color vibrancy and formula consistency.
- Create beach designs on accent nails while keeping other nails simple to balance visual interest without overwhelming the overall aesthetic.
- Use a thin brush dipped in cleanser to correct mistakes immediately before curing rather than attempting to remove cured gel polish.
Common Gel Nail Mistakes
| Mistake | Why it Happens | How to Fix |
|---|---|---|
| Thick Gel Layers | Applying too much product at once to save time | Apply multiple thin coats instead, curing between each layer |
| Improper Curing | Insufficient lamp wattage or expired bulbs | Replace UV bulbs every 6 months and verify LED lamp output |
| Skipping Nail Prep | Rushing through cleaning and buffing steps | Always cleanse, buff, and dehydrate nails before base coat |
| Flooding the Cuticle | Applying gel too close to skin without proper margins | Leave a small gap at cuticle line and clean excess before curing |
| No Edge Sealing | Forgetting to cap the free edge with each layer | Brush base coat, color, and top coat across nail tips |
Nail Design Variations for Summer Beach Nails
| Style | Description | Best Occasion |
|---|---|---|
| Ocean Wave French Tips | White tips with blue wave details and foam accents | Beach weddings and coastal vacations |
| Tropical Sunset Ombre | Gradient blend of pink, orange, and yellow hues | Summer parties and tropical destinations |
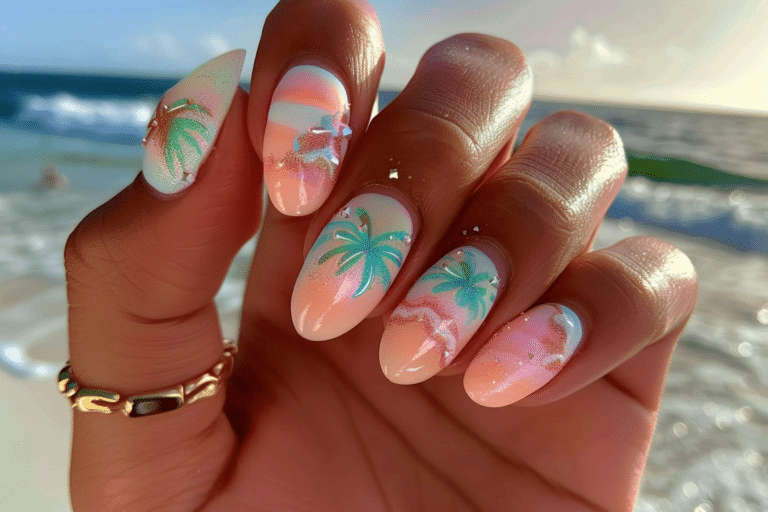
| Palm Tree Accent Nails | Silhouette designs with palm trees against sunset backgrounds | Resort vacations and island getaways |
| Seashell and Starfish Art | Detailed shells with pearl accents and glitter sand | Beach events and nautical themes |
| Coral Reef Minimalist | Simple coral color with one accent nail featuring reef details | Everyday summer wear and casual outings |
| Turquoise Chrome Nails | Metallic ocean blue with reflective chrome powder finish | Evening events and upscale beach venues |
| Watercolor Beach Scene | Soft blended colors creating abstract ocean landscapes | Artistic expression and creative showcases |
Nail Care and Maintenance
Maintaining summer beach nail design requires consistent hydration and protective habits to preserve both the gel manicure and underlying nail health. Apply cuticle oil at least twice daily, focusing on the cuticle area and skin surrounding each nail to prevent dryness and cracking caused by sun exposure and saltwater. This regular moisture application keeps the skin supple and prevents the gel edges from lifting due to dehydration.
Protect your manicure during beach activities by applying sunscreen to hands before sun exposure and rinsing nails with fresh water after swimming in chlorinated pools or ocean water. Wear protective gloves when applying sunscreen, handling rough surfaces, or engaging in activities that could stress the gel coating. Avoid using nails as tools to open cans, peel labels, or perform tasks that create pressure points where gel lifting commonly begins.
Schedule gel nail maintenance every two to three weeks to address natural nail growth and prevent excessive stress on the gel-to-nail bond. Between salon visits, monitor nails for signs of lifting at edges or cuticle areas and avoid peeling or picking at loose sections. Instead, file down any lifted edges gently and apply a thin layer of top coat to temporarily seal compromised areas until professional repair is possible.
For comprehensive nail care resources and maintenance products, explore the collection at Gel Nails by Lina designed specifically for extending gel manicure longevity.
How to Remove Gel Nails Safely
Safe gel nail removal prevents damage to natural nails and maintains nail bed health for future manicures. Begin by filing the shiny top coat layer with a coarse nail file to break the seal and allow acetone penetration into the gel layers. Soak cotton pads in pure acetone and place one pad over each nail, ensuring complete coverage of the gel polish surface area.
Wrap each finger tightly with aluminum foil strips to secure the acetone-soaked pads and create a sealed environment that accelerates gel breakdown. Allow nails to soak for 10 to 15 minutes, checking progress by gently pressing on the foil to feel if gel has softened sufficiently for removal. After soaking, remove foil wraps and use a wooden cuticle stick to gently push off softened gel, working from cuticle to tip.
Avoid forcing or scraping gel polish aggressively as this removes layers of natural nail and causes weakness and damage. If gel remains adhered after initial soaking, re-wrap nails with fresh acetone pads for an additional five minutes rather than applying excessive pressure. Once all gel is removed, wash hands thoroughly with soap and water, then apply cuticle oil and hand cream to restore moisture
Nail Health and Safety
Protecting nail health during gel manicure application and wear requires attention to proper technique and recognition of potential complications. Over-filing the nail surface removes protective layers and weakens the nail plate, making it susceptible to breakage and infection. Professional nail technicians recommend light buffing only to remove surface shine without aggressive filing that thins the natural nail structure.
Monitor nails regularly for signs of fungal infection, including discoloration, thickening, or separation of the nail from the nail bed, especially in the warm, moist environment common during summer months. If you notice persistent pain, swelling, or signs of infection around the nail area, remove gel polish immediately and consult a dermatologist. Maintain proper hygiene by ensuring all nail tools are sanitized before use and avoid sharing implements that could transfer bacteria or fungi.
Avoid excessive UV exposure by applying broad-spectrum sunscreen to hands before curing gel polish or wearing fingerless UV-protective gloves during the curing process. This precaution reduces cumulative UV damage to skin while still allowing effective gel polymerization under lamp exposure.
Frequently Asked Questions
How long do gel nails last?
Gel nails typically last two to three weeks with proper application and care before requiring maintenance or removal. The longevity depends on factors including nail growth rate, daily activities, and adherence to proper preparation techniques during initial application. Summer beach conditions may slightly reduce wear time due to increased exposure to water, sun, and physical activities that stress the gel coating.
How to remove gel nails safely at home?
Remove gel nails safely by filing the top coat, soaking nails in acetone-saturated cotton pads wrapped with foil for 10 to 15 minutes, then gently pushing off softened gel with a wooden stick. Never peel or force gel polish off as this removes layers of natural nail and causes significant damage. Always moisturize thoroughly after removal with cuticle oil and hand cream to restore hydration and protect nail health.
What is the difference between gel nails and acrylic nails?
Gel nails use a gel polish formula cured under UV or LED light to create a flexible, glossy finish, while acrylic nails use a liquid monomer and powder polymer combination that air-dries to form a hard coating. Gel manicures appear more natural and flexible, making them ideal for summer beach nail design with their glossy finish and easier removal process. Acrylics provide more strength and length extension but require more aggressive filing during removal and feel less natural than gel applications.
Why do my gel nails peel after a few days?
Gel nails peel prematurely due to inadequate nail preparation, oil or moisture on the nail surface before application, or insufficient curing time under the lamp. Other common causes include applying gel layers too thickly, flooding the cuticle area, or failing to cap the free edge with each coat. Ensure thorough cleansing, proper buffing, and complete dehydration of nails before base coat application to prevent early lifting and peeling.
Conclusion
Summer beach nail design offers endless creative possibilities for vacation-ready manicures that combine artistic expression with the durability required for active beach lifestyles. By following professional application techniques, using quality gel products, and maintaining proper nail care practices, you can achieve stunning beach-inspired nails that last throughout your summer adventures. Whether you prefer bold tropical designs or subtle ocean hues, mastering these gel techniques ensures your summer beach nail design remains flawless from the first day of vacation to the last sunset.