2025’s Most Stunning Blue Nail Designs Unveiled

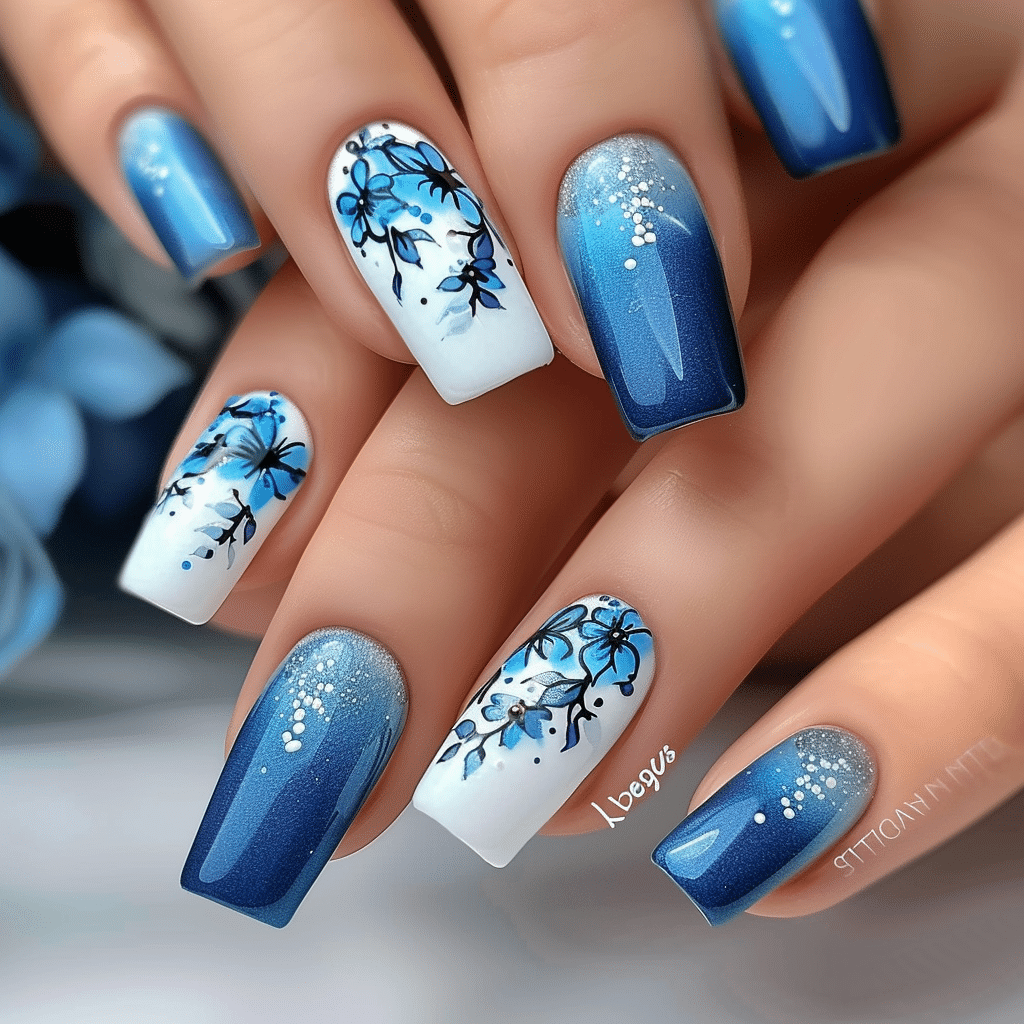
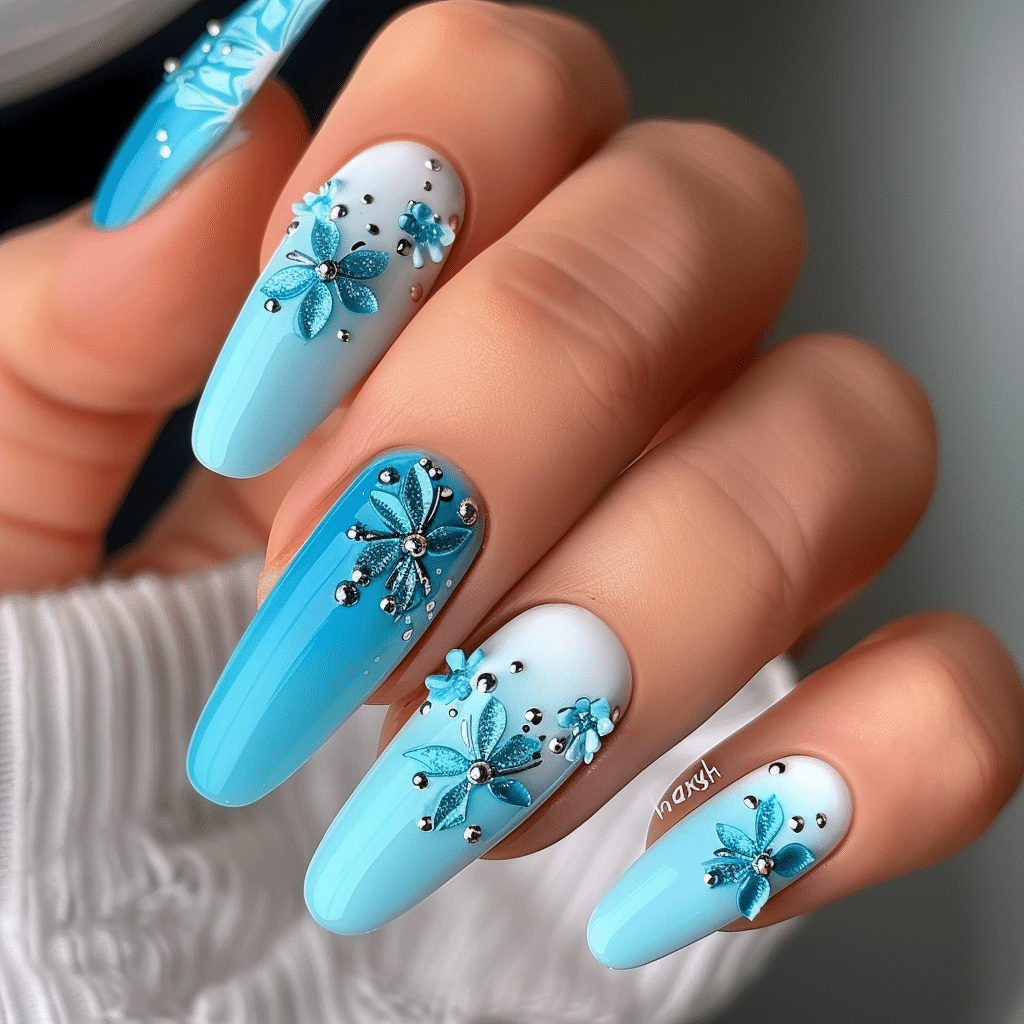
Blue nail designs dominate 2025 as the most versatile and sought-after color trend in gel manicures.
From electric cobalt to soft powder blue, these designs offer endless possibilities for nail enthusiasts. This comprehensive guide explores techniques, tools, and professional methods to achieve salon-quality blue nail art at home.
| Topic | Details |
|---|---|
| Category | Nail Art / Gel Nails |
| Skill Level | Beginner to Advanced |
| Time Needed | 45-90 minutes |
| Tools Needed | UV/LED lamp, gel polish, nail art brushes, base coat, top coat |
| Best For | Anyone seeking trendy, long-lasting nail designs with professional finish |
Table of Contents
Why Blue Nail Designs Work
Blue nail designs have emerged as the premier choice for 2025 because of their universal appeal and psychological impact. The color blue evokes feelings of calm, confidence, and creativity, making it perfect for both professional and casual settings. Unlike traditional reds or pinks, blue shades complement every skin tone and offer remarkable versatility in finish options from matte to glossy chrome.
The technical advantages of blue gel polish formulations have improved significantly this year. Modern blue pigments cure evenly under LED lamps without color shifting or fading. The wide spectrum of blue tones available allows nail technicians to create dimension through layering techniques. Darker blues like navy provide excellent opacity in two coats, while lighter blues create beautiful translucent effects for watercolor designs.
Blue gel polishes also demonstrate superior wear characteristics compared to other fashion colors. The molecular structure of blue pigments resists UV degradation better than warmer tones, maintaining vibrancy for three to four weeks. This longevity combined with stunning visual appeal explains why blue nail designs continue trending throughout 2025.
Tools and Products Needed
| Product | Purpose | Alternatives |
|---|---|---|
| UV/LED Lamp | Cures gel polish layers properly | 48W or 80W professional lamp |
| Gel Base Coat | Protects natural nail and improves adhesion | Peel-off base for temporary wear |
| Blue Gel Polish | Creates main color design | Multiple blue shades for variation |
| Nail File (180 grit) | Shapes natural nail edges | Glass file for gentle filing |
| Nail Buffer | Smooths nail surface for even application | 240 grit buffer block |
| Cuticle Oil | Hydrates and maintains nail health | Jojoba or vitamin E oil |
| Gel Top Coat | Seals design and adds shine | Matte or no-wipe top coat |
| Nail Art Brushes | Creates detailed designs and patterns | Dotting tools for simple designs |
| Alcohol Wipes | Cleanses nail surface and removes tacky layer | Lint-free wipes with isopropyl alcohol |
For premium blue gel polish collections and professional nail tools, visit Gel Nails by Lina for expert-curated products that deliver salon-quality results.
Step-by-Step Application Guide for Blue Nail Designs
Nail Preparation
- Remove any existing nail polish using acetone-soaked cotton pads and gentle pressure to avoid damaging the nail plate.
- Trim nails to your desired length using professional nail clippers with sharp, clean blades.
- File nails into your preferred shape using a 180-grit file in one direction to prevent splitting.
- Push back cuticles gently using a wooden or rubber cuticle pusher after softening with warm water.
- Buff the nail surface lightly with a 240-grit buffer to remove shine and create texture for better adhesion.
- Clean nails thoroughly with an alcohol wipe to remove oils, dust, and debris from the surface.
- Wash hands with soap and dry completely before beginning gel application to ensure maximum adhesion.
Base Coat Application
- Apply a thin layer of gel base coat starting from the center of the nail near the cuticle.
- Brush outward toward the free edge using smooth, even strokes without touching the skin.
- Cap the free edge by swiping the brush horizontally across the tip to seal the nail.
- Cure the base coat under your UV/LED lamp for the manufacturer’s recommended time, typically 30 to 60 seconds.
- Check that the base coat has cured completely with no tacky spots before proceeding to color application.
Gel Polish Layers
- Apply the first thin layer of blue gel polish using the same technique as the base coat.
- Start with minimal product on the brush to prevent flooding the cuticles or sidewalls.
- Cure the first color layer for 60 seconds under the LED lamp for complete polymerization.
- Apply a second thin layer of blue gel polish to achieve full opacity and rich color saturation.
- Cure the second layer for 60 seconds, ensuring the lamp bulbs cover all nails evenly.
- Add nail art designs such as swirls, ombre effects, or chrome accents if desired before sealing.
- Cure any additional decorative elements according to the specific product instructions provided by manufacturers.
Curing Process
- Position your hand completely inside the UV/LED lamp with all fingertips centered under the light source.
- Set the timer according to your gel polish brand recommendations, typically ranging from 30 to 90 seconds.
- Avoid moving your hand during the curing cycle to prevent smudging or uneven polymerization.
- Check that each layer has hardened completely by gently touching the surface with a clean tool.
- Re-cure any layers that feel soft or tacky for an additional 30 seconds to ensure proper hardening.
Finishing and Top Coat
- Apply a thin layer of gel top coat over the entire nail surface, including the design elements.
- Cap the free edge again with the top coat to lock in color and prevent chipping.
- Cure the top coat for 60 to 90 seconds depending on the formula thickness and lamp wattage.
- Remove the tacky residue layer using an alcohol wipe or lint-free pad with cleanser solution.
- Apply cuticle oil around the nail edges and massage gently to hydrate the skin and enhance shine.
- Allow nails to cool for two minutes before exposing them to water or applying pressure to surfaces.
For detailed video tutorials on advanced blue nail design techniques, explore the comprehensive guides at Gel Nails by Lina featuring professional nail artist demonstrations.
Pro Nail Technician Tips
- Always use thin gel polish layers instead of thick applications to prevent wrinkling, bubbling, or incomplete curing that leads to peeling.
- Avoid touching the cuticle area by leaving a millimeter gap around the edges to prevent lifting from natural oils and moisture.
- Cure each layer for the full recommended time even if the surface feels dry to ensure complete polymerization through all layers.
- Clean your brush regularly between coats using alcohol wipes to prevent color contamination and ensure smooth application without streaking.
- Store blue gel polish bottles upside down for 24 hours before use to remix settled pigments and achieve consistent color intensity.
- Use a dehydrator or pH balancing primer before base coat application on naturally oily nails to maximize adhesion and longevity.
Common Gel Nail Mistakes
| Mistake | Why it Happens | How to Fix |
|---|---|---|
| Thick Gel Layers | Rushing application or using too much product on the brush | Apply multiple thin coats instead of one thick layer, wiping excess polish from brush before application |
| Improper Curing | Weak lamp bulbs, insufficient cure time, or hand positioning outside light range | Replace LED bulbs every six months and cure each layer for full recommended duration |
| Skipping Nail Prep | Time pressure or underestimating importance of surface preparation | Always buff nails lightly and cleanse with alcohol before base coat to remove oils |
| Flooding the Cuticle | Overloaded brush or starting polish application too close to the cuticle line | Leave small gap near cuticles and use cleanup brush dipped in acetone to remove excess |
| Skipping Edge Sealing | Not capping the free edge with base coat and top coat layers | Swipe brush horizontally across nail tip with each coat to prevent chipping and peeling |
Blue Nail Design Variations
| Style | Description | Best Occasion |
|---|---|---|
| French Blue Tips | Classic French manicure with blue tips instead of traditional white for modern twist | Professional settings, everyday wear, office environments |
| Ocean Chrome Blue | Metallic chrome powder over blue base creates iridescent, mirror-like finish | Evening events, parties, special celebrations |
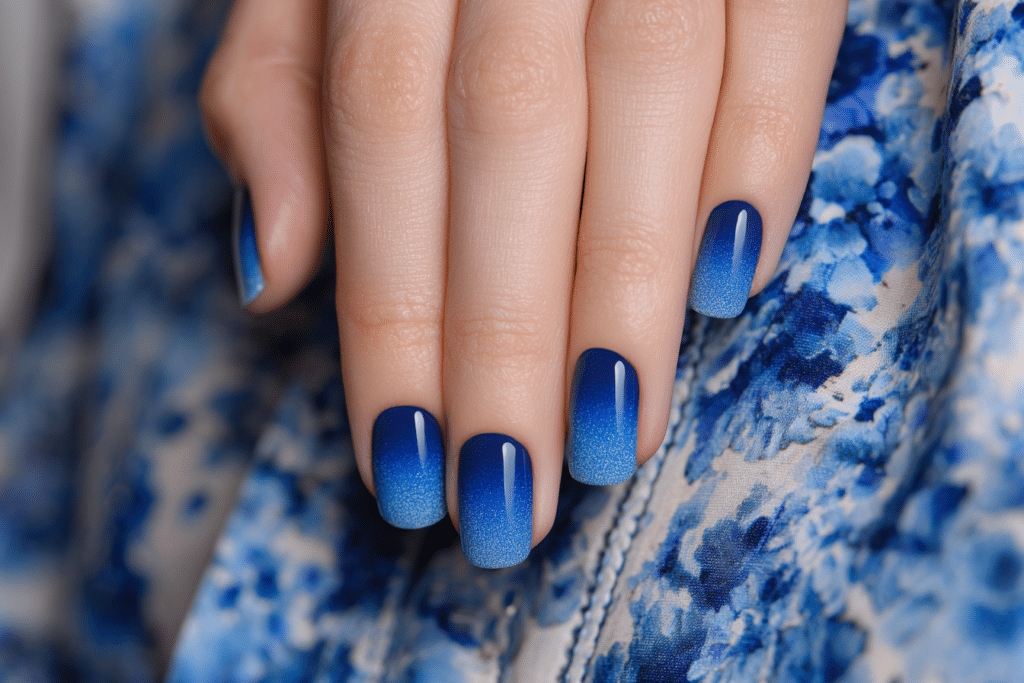
| Blue Ombre Fade | Gradient transition from dark navy at cuticle to light sky blue at tips | Summer vacations, beach outings, casual weekend wear |
| Minimalist Blue Accent | Neutral base with single blue accent nail featuring geometric patterns or crystals | Professional meetings, interviews, conservative workplaces |
| Cobalt Marble Swirl | White and blue marbled effect creates elegant stone-like texture and depth | Weddings, formal dinners, elegant gatherings |
| Electric Blue Glitter | Vibrant blue base covered with fine or chunky holographic glitter particles | Holiday parties, concerts, festival events |
| Matte Powder Blue | Soft blue shade sealed with matte top coat for sophisticated, velvety appearance | Autumn fashion, professional photoshoots, artistic events |
Nail Care and Maintenance
Maintaining healthy nails while wearing blue gel designs requires consistent daily care and proper hydration techniques. Apply cuticle oil at least twice daily, especially before bedtime, to prevent dryness and maintain flexibility around the nail bed. The oil creates a protective barrier that prevents moisture loss and keeps the gel manicure looking fresh longer. Massage the oil into cuticles and underneath free edges to nourish the natural nail plate beneath the gel layers.
Protect your blue gel manicure from harsh chemicals by wearing gloves during household cleaning, dishwashing, or gardening activities. Prolonged exposure to cleaning products, chlorine, or saltwater can dull the blue pigments and weaken the gel bond. Reapply top coat every five to seven days to refresh shine and extend wear time. This maintenance layer prevents micro-scratches and protects the design from environmental damage.
Monitor your nails for signs of lifting, particularly around the cuticle area and sidewalls where natural oils accumulate. Address small lifted areas immediately by gently filing the lifted edge and applying a thin layer of gel top coat to reseal. Never pick or peel lifted gel polish, as this removes layers of your natural nail and causes long-term damage. Schedule proper removal and reapplication every three to four weeks to maintain nail health and prevent over-wearing gel products.
Keep natural nails strong between gel applications by taking occasional breaks every three to four months. During break periods, apply strengthening treatments and nourishing oils to restore moisture balance. Discover professional nail care products and maintenance guides at Gel Nails by Lina designed specifically for gel manicure longevity.
How to Remove Gel Nails Safely
Safe gel nail removal prevents damage to the natural nail plate and maintains nail health for future manicures. Begin by filing the shiny top coat layer with a 180-grit nail file to break the seal and allow acetone penetration. This step significantly reduces soaking time and makes removal more efficient without excessive nail exposure to acetone.
Soak cotton pads in pure acetone and place them directly on each nail, ensuring complete coverage of the gel surface. Wrap each finger tightly with aluminum foil to create heat and prevent acetone evaporation. The wrapped method accelerates gel breakdown and typically requires only 10 to 15 minutes of soaking time compared to 20 to 30 minutes with open soaking methods.
After soaking, gently push softened gel polish off the nail using a wooden cuticle pusher or orange stick with minimal pressure. Never force or scrape gel that has not fully dissolved, as this tears away layers of the natural nail. Re-soak stubborn areas for an additional five minutes rather than applying excessive force that causes nail thinning and weakness.
Nail Health and Safety
Maintaining nail health while enjoying blue gel designs requires awareness of potential risks and preventive measures. Over-filing the nail surface during preparation removes protective keratin layers and leads to thin, weak nails prone to breakage. Always use light pressure when buffing and limit surface preparation to gentle texture creation rather than aggressive smoothing. Professional nail technicians recommend filing only until the natural shine disappears without creating heat or discomfort.
Allergic reactions to gel polish ingredients can develop over time, even if you have used products successfully before. Symptoms include itching, redness, swelling of fingers, or skin peeling around the nails. If you experience these reactions, discontinue gel polish use immediately and switch to traditional nail polish alternatives. Test new gel polish brands on one nail first before applying to all fingers to identify potential sensitivities.
Protect your skin during UV/LED lamp curing by applying broad-spectrum sunscreen to hands 20 minutes before your manicure appointment. While LED lamps emit minimal UV radiation compared to sunlight, consistent exposure during frequent manicures accumulates over time. Fingerless gloves offer additional protection while allowing nails to cure properly under the light source.
Frequently Asked Questions
How long do gel nails last?
Gel nails typically last two to three weeks with proper application and care techniques. The longevity depends on several factors including nail preparation quality, lifestyle activities, and natural nail growth rate. Individuals with faster nail growth or physically demanding jobs may experience lifting sooner than those with slower growth rates. Applying cuticle oil daily and avoiding harsh chemicals significantly extends wear time beyond the three-week average.
How to remove gel nails safely at home?
Safe home removal requires soaking nails in pure acetone for 10 to 15 minutes after filing off the top coat layer. Wrap each finger with acetone-soaked cotton and aluminum foil to accelerate the softening process and prevent evaporation. Gently push softened gel off with a wooden tool without forcing or scraping the nail surface. Always moisturize thoroughly after removal and avoid picking or peeling gel polish to prevent nail damage.
What is the difference between gel nails and acrylic nails?
Gel nails are cured under UV or LED light and offer a more flexible, natural appearance compared to acrylic nails. Acrylics are created by mixing liquid monomer and powder polymer that air-dry into a hard layer without requiring lamp curing. Gel nails generally cause less damage during application and removal, while acrylics provide greater strength for extremely long nail extensions. Gel polish is easier to remove with acetone soaking, whereas acrylics often require filing down before soaking.
Why do my gel nails peel after a few days?
Gel nails peel prematurely due to inadequate nail preparation, natural oils on the nail surface, or moisture trapped under the gel. Skipping the buffing step or failing to cleanse nails with alcohol before application prevents proper adhesion of the base coat. Applying gel polish too close to cuticles or skin allows moisture to seep underneath and break the bond. Ensure thorough preparation, use thin polish layers, and cap the free edge with each coat to prevent early peeling
How can I make my gel nails last longer?
Make gel nails last longer by applying cuticle oil twice daily, wearing gloves during cleaning tasks, and avoiding prolonged water exposure. Proper nail preparation including light buffing and alcohol cleansing creates the foundation for extended wear. Apply thin gel layers and cure each coat for the full recommended time to ensure complete polymerization. Reapply top coat weekly to refresh shine and seal the edges, preventing chips and lifting from daily activities.
Conclusion
The stunning blue nail designs of 2025 offer endless creative possibilities for both beginners and experienced nail artists. From classic French tips to dramatic chrome finishes, these versatile designs suit every occasion and personal style. By following proper application techniques, using quality products, and maintaining consistent nail care, you can achieve salon-quality blue gel manicures that last weeks. Embrace the blue nail trend and transform your manicure with these expert techniques and professional tips that deliver beautiful, long-lasting results.