Trendy Leopard Nail Ideas That Exude ‘That Girl’ Energy

I still remember the moment I first attempted leopard nails at home. It was a Sunday evening, and I was scrolling through TikTok you know, the usual rabbit hole when I stumbled upon this absolutely *stunning* leopard nail design. The colors were chic, the spots were perfectly placed, and the whole aesthetic just screamed confidence and sophistication. I thought to myself, “I can do this.”
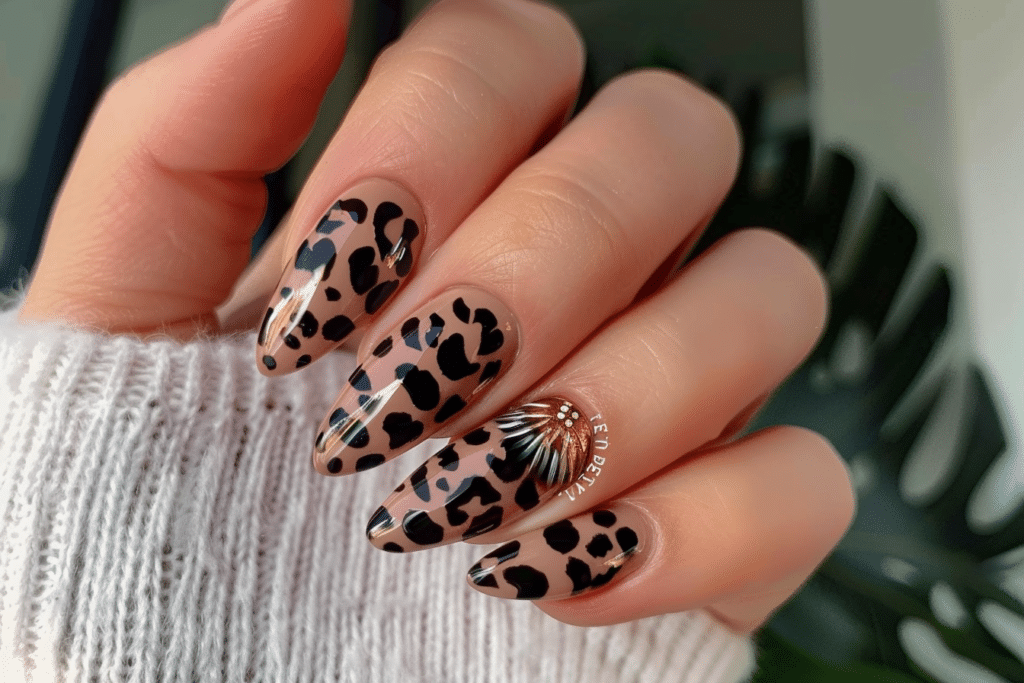
Spoiler alert: my first attempt was… let’s call it a learning experience. My spots looked more like a Dalmatian had walked across my hands, the lines were uneven, and I somehow got gel polish in places I didn’t even know existed. But here’s the thing I didn’t give up. After watching a few tutorials and investing in better tools, I created a leopard nail design that I was genuinely proud of. That’s when I realized that mastering trendy leopard nail ideas that exude ‘That Girl’ energy isn’t just about having steady hands; it’s about understanding the technique, having the right products, and believing you can create salon-quality nails at home.
If you’re ready to elevate your nail game and capture that effortless, confident “That Girl” aesthetic, you’re in the right place. Let’s dive into everything you need to know about creating gorgeous leopard nails with gel polish.
Table of Contents
What Does ‘That Girl’ Energy Mean in Nail Fashion?
“That Girl” energy has become a cultural phenomenon, especially among Gen Z and millennial women. It represents a polished, intentional aesthetic someone who looks put-together, confident, and effortlessly chic. When it comes to nails, “That Girl” energy means:
- Elevated yet approachable designs
- Neutral and earthy color palettes mixed with bold accents
- Attention to detail and precision
- Quality that looks professional without appearing overdone
- A sense of sophistication and self-assurance
Leopard nails fit perfectly into this aesthetic because they’re bold enough to make a statement but refined enough to work in any setting whether you’re heading to brunch, the office, or a night out with friends.
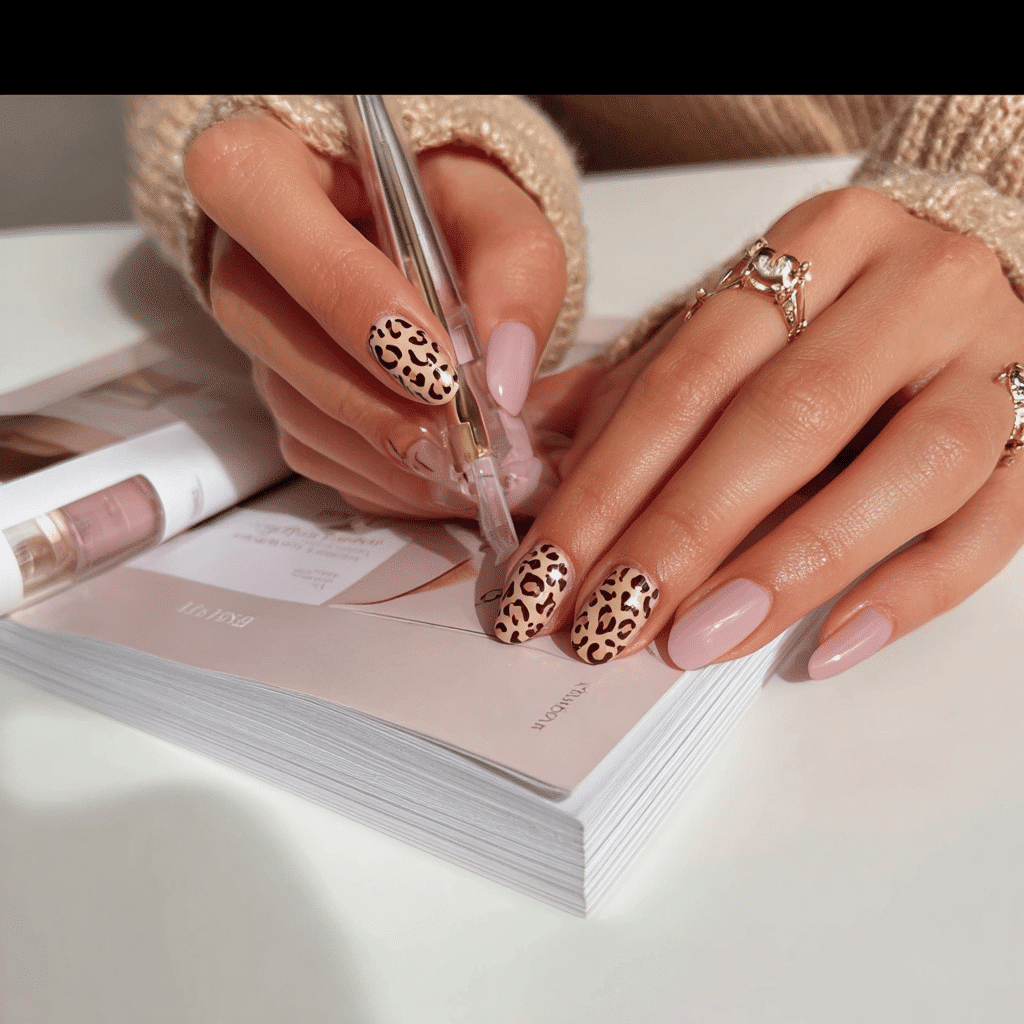
Why Trendy Leopard Nail Ideas Are the Ultimate “That Girl” Statement
Leopard print has made a major comeback in fashion, and nails are the perfect canvas to express this trend. Unlike full leopard-print outfits (which can feel overwhelming), leopard nails are just the right amount of daring. They’re versatile, timeless, and incredibly flattering on every skin tone.
The beauty of leopard nail designs is their adaptability. You can go minimal and sophisticated with a few well-placed spots, or you can go bold with a full, coverage-style pattern. The choice is yours, and that’s what makes them so perfect for expressing your individual style.
Essential Tools and Products You’ll Need
Before we get into the design process, let’s talk about what you’ll need to create professional-looking leopard gel nails at home. Having quality tools makes all the difference in the final result.
Gel Polish and Base Coat
- Base coat: A gel base coat that bonds well with your natural nail
- Main color: Nude, beige, or cream gel polish (your leopard “canvas”)
- Detail colors: Black, dark brown, burnt orange, or navy gel polish for the spots
- Accent colors: Gold, rose gold, or metallic gel polish for added dimension
- Top coat: A quality gel top coat for shine and protection
Application Tools
- Fine-tipped dotting tools (various sizes)
- Thin liner brushes for detail work
- Gel nail brush for base coat application
- Nail files (180-grit for shaping)
- Cuticle pusher
- Alcohol or gel cleanser for wiping sticky residue
- UV or LED lamp for curing
Prep Materials
- Nail dehydrator or rubbing alcohol
- Gel primer
- Nail file (220-grit for buffing)
- Nail polish remover for mistakes
Step-by-Step Guide: Creating Your Trendy Leopard Nail Ideas
Step 1: Prepare Your Nails
Start with clean, dry nails. Push back your cuticles gently and file your nails into your desired shape. I recommend a square or rounded square shape for leopard designs they provide plenty of canvas for your pattern.
Buff the surface of your nails lightly to remove shine and help the gel adhere better. Wipe away all dust with a lint-free wipe, then apply a thin coat of gel primer.
Step 2: Apply Base Coat
Apply a thin layer of gel base coat to each nail. Cure in your UV or LED lamp according to the manufacturer’s instructions (typically 30-60 seconds). This creates a sticky layer that the polish will bond to.
Step 3: Apply Your Base Color
Now comes the fun part! Apply 1-2 thin coats of your base color. I love using a soft nude or cream shade because it creates the perfect “canvas” for the leopard spots. Cure after each coat.
Pro tip: If you want a more dimensional look, apply a slightly darker shade to half the nail and blend it with your main color before it fully cures.
Step 4: Create the Leopard Pattern
This is where precision matters. Using your fine-tipped dotting tool or thin liner brush, start creating your leopard spots. Here’s my recommended approach:
- Dip your tool into black gel polish
- Create crescent or oval shapes scattered across the nail
- Don’t aim for perfect symmetry leopard patterns are naturally irregular
- Leave space between spots so the base color shows through
- Cure this layer for 30-60 seconds
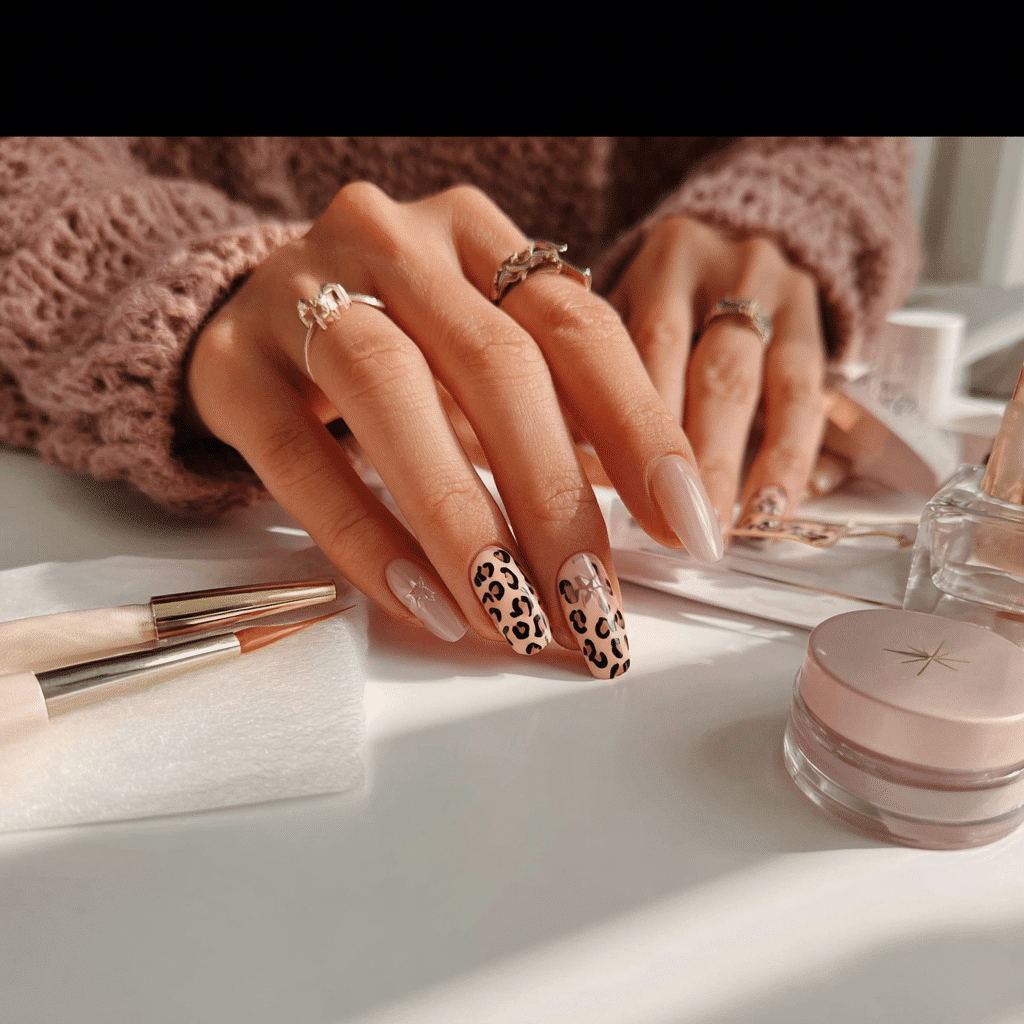
Step 5: Add Detail and Dimension
Here’s the secret to making your leopard nails look professional: add dimension. Using a slightly lighter shade (like dark brown or taupe) or a metallic shade, create small lines or dots inside some of the black spots. This mimics the natural variation in leopard print and elevates the entire design.
You can also add tiny gold or rose-gold flecks around the edges of spots for extra glamour.
Step 6: Apply Top Coat
Once you’re happy with your pattern, apply a generous layer of gel top coat. This seals everything in and gives you that glossy, professional finish. Cure for the full recommended time, then wipe away the sticky residue.
5 Stunning Trendy Leopard Nail Ideas Variations
1. The Classic Leopard
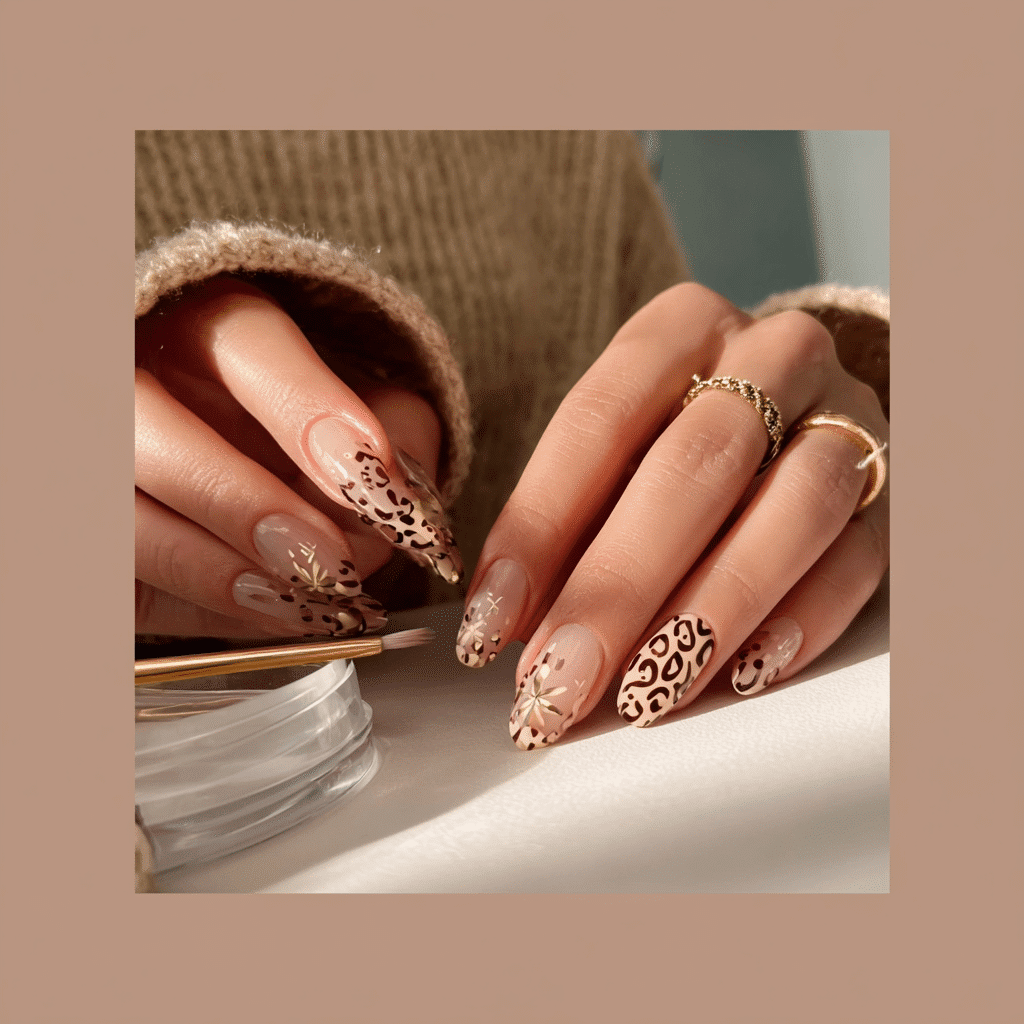
The timeless black-and-tan leopard print is always elegant. Use black spots on a warm beige or cream base for a look that’s sophisticated and professional.
2. Ombré Leopard
Blend two complementary colors (like peachy nude and warm pink) and layer your leopard spots over the gradient. This creates depth and visual interest.
3. Metallic Leopard
Swap out one of your colors for metallic polish. A gold base with black leopard spots, or a nude base with rose gold spots, feels incredibly luxe and modern.
4. Half-and-Half Leopard
Paint leopard spots on only half of each nail, leaving the other half solid. This minimalist approach is perfect if you want the “That Girl” vibe without going full animal print.
5. French Tip Leopard
Combine a French tip with leopard spots on the nude base. Extend the black tips and add leopard spots to the tips for a modern twist on a classic.
Common Mistakes to Avoid
Learning from my own mishaps (and years of practice), here are the most common mistakes I see when creating leopard nails at home:
Mistake #1: Spots That Are Too Uniform
Real leopard print isn’t perfectly symmetrical. If your spots look too organized, they’ll appear artificial. Embrace the irregularity!
Mistake #2: Not Enough Space Between Spots
Overcrowding your design makes it look messy. Leave plenty of your base color showing through for a polished, intentional look.
Mistake #3: Using Too Much Polish on Your Brush
When applying detail work, less is more. A tiny amount of gel on your dotting tool gives you more control and precision than a glob of polish.
Mistake #4: Skipping the Prep Work
I cannot stress this enough: proper nail preparation is crucial. If you skip buffing or primer, your gel won’t adhere properly and may chip within days.
Mistake #5: Not Letting Each Layer Fully Cure
Rushing the curing process is one of the fastest ways to ruin your design. Make sure each layer is completely cured before moving to the next step.
Pro Tips for Salon-Quality Results
- Invest in quality tools: Cheap dotting tools don’t hold polish well. Splurge on good ones—your nails will thank you.
- Practice on a nail wheel first: Before applying to your actual nails, practice your design on a practice nail wheel. This builds muscle memory and confidence.
- Use a steady hand technique: Rest your hand on a solid surface and move your entire hand, not just your fingers, for better control.
- Keep a gel cleanser nearby: If you make a mistake, wipe it away immediately with a gel cleanser before it cures.
- Create a reference image: Have your design inspiration pulled up on your phone so you can reference it while working.
- Don’t skip the top coat: A quality top coat makes the difference between amateur and professional-looking nails.
- Experiment with color combinations: Leopard print isn’t just black and tan. Try navy with rose gold, or chocolate brown with cream.
Nail Shape and Trendy Leopard Nail Ideas Compatibility
Not all nail shapes work equally well with leopard designs. Here’s what I recommend:
| Nail Shape | Best For Leopard Design | Why |
|---|---|---|
| Square | ⭐⭐⭐⭐⭐ | Maximum canvas space for intricate designs |
| Rounded Square | ⭐⭐⭐⭐⭐ | Perfect balance of space and elegance |
| Round | ⭐⭐⭐⭐ | Works well but offers less design space |
| Oval | ⭐⭐⭐⭐ | Flattering and works with most designs |
| Almond | ⭐⭐⭐ | Beautiful but more limited space |
| Coffin/Ballerina | ⭐⭐⭐ | Trendy but the tapered edges limit design space |
How Long Will Your Trendy Leopard Nail Ideas Last?
With proper application and maintenance, gel leopard nails typically last 2-3 weeks before you notice significant growth at the base. The gel polish itself is incredibly durable and won’t chip under normal use. However, remember that your natural nails grow constantly, so you’ll need a fill-in appointment or a full removal and reapplication after about 3 weeks.
Removal and Aftercare
When it’s time to remove your leopard nails, please be gentle. Use a proper gel removal process with an acetone soak or gel remover never peel or pick at the polish. After removal, pamper your nails with cuticle oil and a nourishing hand cream. Your nails need a break between gel applications to stay healthy and strong.
Frequently Asked Questions About Trendy Leopard Nail Ideas
Can I Create Leopard Nails Without a UV or LED Lamp?
Unfortunately, no. Gel polish requires UV or LED light to cure properly. An LED lamp is more affordable and faster than UV, so I’d recommend investing in one if you’re serious about gel nails at home.
What’s the Difference Between Gel Polish and Regular Polish for Leopard Designs?
Gel polish is superior for leopard designs because it doesn’t smudge, allows for precise detail work, lasts much longer, and the colors are more vibrant. Regular polish would chip within days, especially with the thin lines required for leopard spots.
How Do I Fix Mistakes While Creating My Leopard Design?
If you make a mistake before curing, use a gel cleanser or rubbing alcohol on a thin brush to carefully remove the error. If the layer is already cured, you can carefully file away the mistake or layer more gel over it.
What If I Don’t Have a Dotting Tool?
While a proper dotting tool is ideal, you can improvise with a toothpick, bobby pin, or even a thin paintbrush. Just be aware that the results won’t be quite as professional. I’d definitely recommend investing in at least one or two dotting tools they’re affordable and make a huge difference.
Can I Wear Leopard Nails to Work or Formal Events?
Absolutely! Leopard nails exude sophistication and confidence exactly the qualities employers and event hosts appreciate. Keep the design refined (not overly chaotic), stick to professional color combinations (black and tan, navy and cream), and you’ll look polished and put-together.
Conclusion: Own Your ‘That Girl’ Energy
Creating trendy leopard nail ideas that exude ‘That Girl’ energy isn’t just about nails it’s about expressing confidence, creativity, and intentionality. It’s about taking time for yourself and producing something beautiful with your own hands.
Yes, my first attempt was messy. Yes, I made countless mistakes along the way. But each mistake taught me something, and now I create leopard nails that rival salon quality. The best part? That sense of accomplishment and pride every single time I look at my hands.
You have everything you need to master this skill. You have the knowledge, the step-by-step guide, and the pro tips from someone who’s been in the trenches. Now it’s your turn to step into your “That Girl” energy and create nails that make you feel unstoppable.
Your leopard nails are waiting. Go create something beautiful. 💅 Don’t forget to join our Pinterest for more inspiring nail art tips