Cute Heart Press On Nails – Easy Nails for Valentine’s Day

When I was 22, I tried giving myself at-home nails for my first real Valentine’s date. I followed a YouTube tutorial, painted on glitter, and tried to use regular nail polish for a heart design. By the second day, half of the glitter fell off, the heart was smudged, and I was mortified literally. That’s when I discovered press-on nails, and it changed everything.

Fast forward 10 years, and I run a small nail boutique, Gel Nails By Lina, where I teach women how to create salon-quality looks in their own homes. Press-on nails, especially heart-shaped designs for Valentine’s, are my favorite “DIY hacks.” They’ve saved me from salon appointments, chipped polish, and the agony of DIY flops. This guide will show you how to make your Valentine’s Day nails stunning, stress-free, and perfect for every occasion.
Table of Contents
What Are Press-On Nails and Why Hearts Rule for Valentine’s
Press-on nails are pre-designed, ready-to-apply nail enhancements that stick using either 3D printed adhesive, dotting gel, or UV gel. They’re different from nail stickers or nail stamping because they’re thicker, longer-lasting, and provide a dimensional effect.
Heart press-ons are a Valentine’s Day staple for good reason. Whether you love minimalist pink hearts or over-the-top glitter and 3D rhinestone designs, these nails radiate affection, love, and personal style. Best of all, they don’t require a nail drill, UV light (usually), or advanced artistic skills.
Here’s why they’re perfect:
- Easy to apply in 5-10 minutes
- Available in 30+ Valentine’s Day themes
- No damage to natural nails when removed correctly
- Can be reused up to 50+ times with proper care
Step-by-Step Guide to Applying Cute Heart Press On Nails
- Prep your nails: Clip and file to your preferred shape. Buff lightly to remove oils (never over-buff natural nails). Wipe with a nail cleanser like our DIY Nail Prep Kit.
- Choose your press-ons: For Valentine’s, opt for rose gold hearts, red & white combos, or minimalist designs like single hearts with French tips.
- Trim to fit:
- Use snippers to cut press-ons just past fingertip
- Round sharp edges for comfort
- Apply adhesive: Dot 1-2 spots of gel or UV adhesive (like our Valentine’s Press-On Gel) onto the sticker backing. Let it sit for 10 seconds before pressing.
- Attach and press: Apply even pressure across the entire nail surface for 10+ seconds
- Cure if needed: Some adhesives require 60 seconds under a UV light. Always check instructions
- Finish with topcoat: Add a high-gloss nail topcoat to protect designs and increase shine
3 Common Mistakes to Avoid
Over the years, I’ve seen clients repeat these mistakes here’s how to fix them:
- Mistake #1: Using too much adhesive
- Solution: Less is more! Too much gel makes press-ons pop off faster
- Mistake #2: Rushing the pressing step
- Solution: Take 10+ seconds to press firmly. This creates suction that lasts
- Mistake #3: Skipping nail prep
- Solution: Always wipe nails with alcohol-free cleansers and buff if needed
Pro Tips for Long-Lasting Valentine’s Nails
- Double-check size: Bring your cut finger next to the press-on to match width before cutting or attaching
- Hybrid approach: Combine press-ons with regular gel polish for more personalization
- Beaded hearts: Add tiny glass beads for texture it’s a 1-minute way to elevate basic designs
- Mix metals: Balance rose gold hearts with some silver for contrast
- Store properly: Keep unused press-ons in sealed containers to avoid oxidation
Essential Tools for Cute Heart Press On Nails
- 3D printed press-on nails (search “Valentine’s Heart Shape 3D Press-Ons”)
- Quick-dry adhesive (non-alcoholic)
- Snippers (don’t use clippers meant for toe nails)
- Buffing block
- Jewel tweezers for rhinestones, beads, or tiny embellishments
Pro tip: Invest in a UV Gel Press-On Adhesive it lasts up to 2 weeks vs. regular gel’s 3-5 days.
Comparison Table: Press-On vs. Traditional DIY Nails
| Feature | Heart Press-On Nails | Classic DIY Nails |
|---|---|---|
| Time to apply | 5-10 minutes | 30+ minutes |
| Tools Needed | 1 brush + 1 bottle of gel | 10+ tools including UV light |
| Design Control | Pre-made artistic designs | Requires steady hand/art skills |
| Cost per use | $50 set = $1 per use | 30+ minutes and $20+ in products |
Valentine’s Press-On Inspirations
Here are three trending heart designs for 2024:
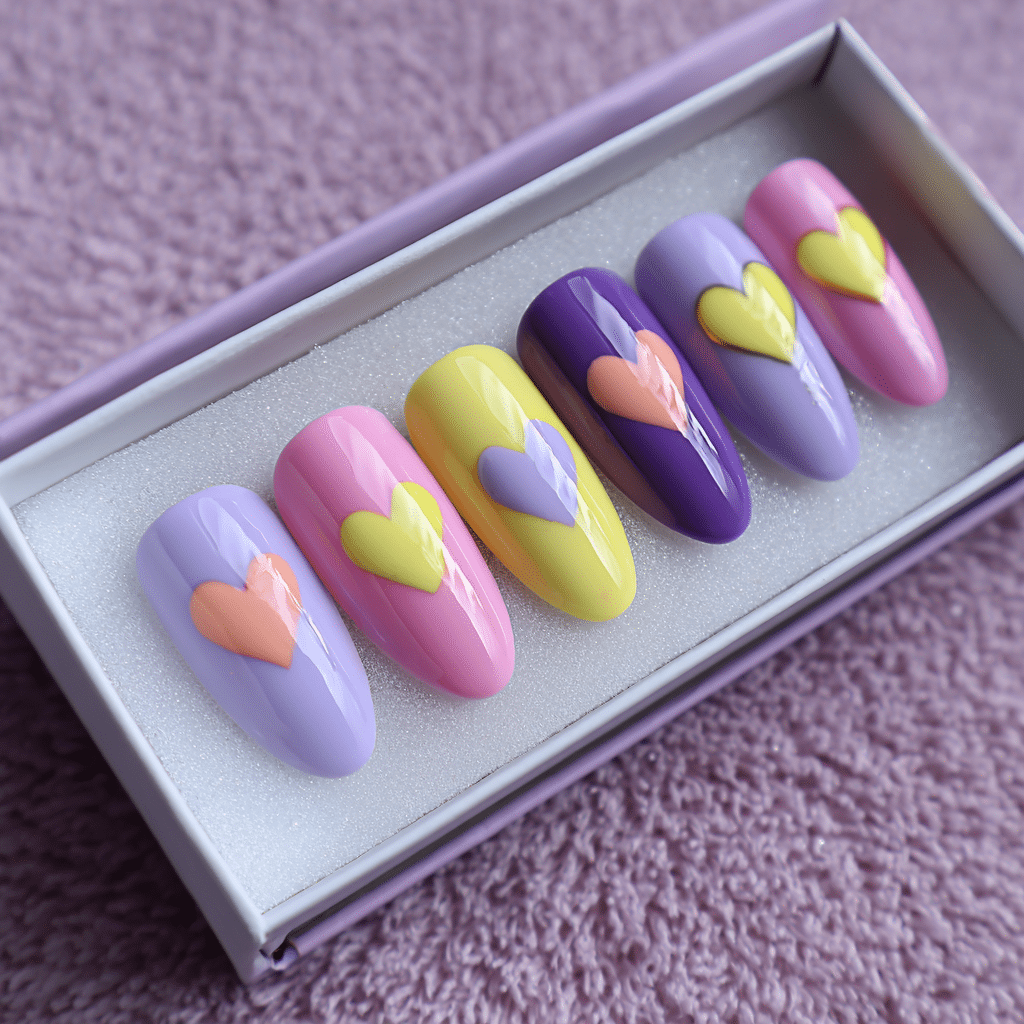
- 3D Stacked Hearts:
- Lay a basic heart first
- Glue smaller hearts on top for dimension
- Finish with a nail resin coat for durability
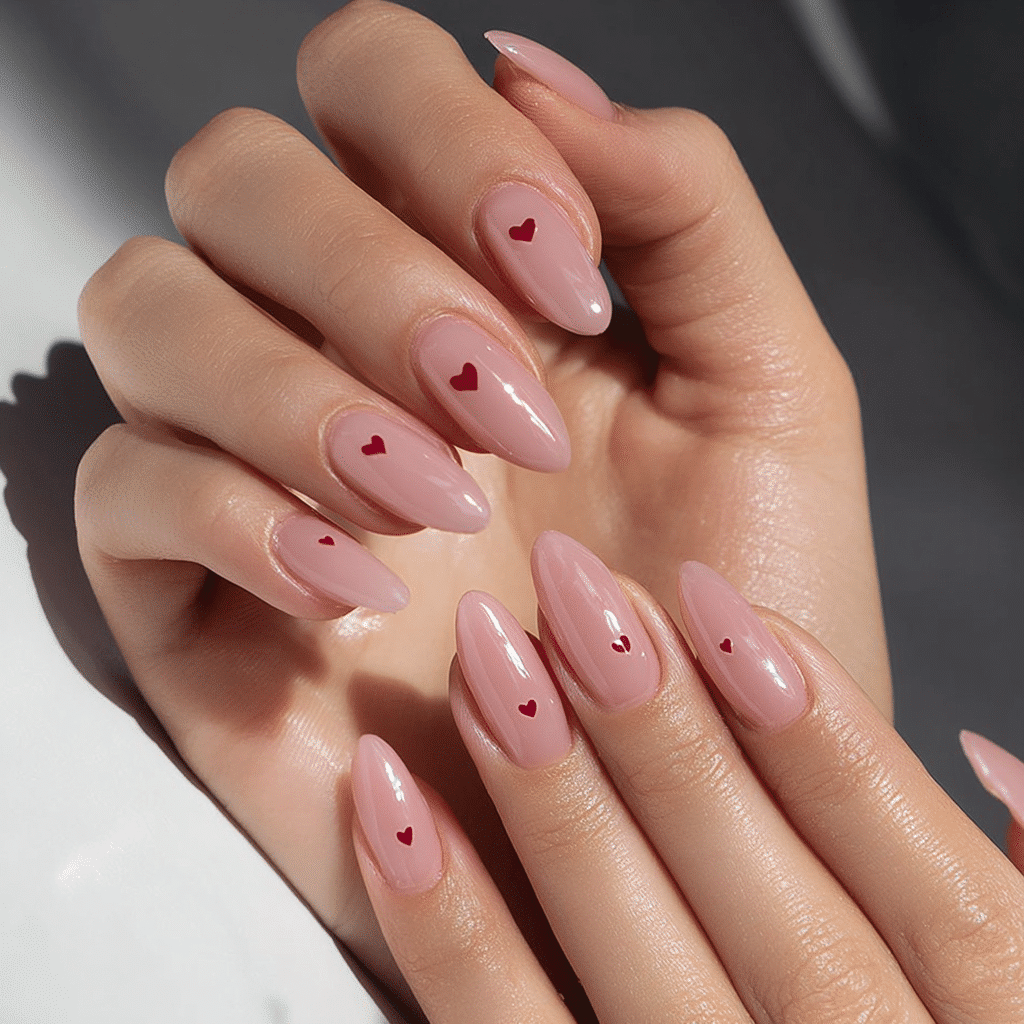
- Skin-Color Hearts with Rhinestones:
- Pair pink/rose gold accents
- Add a tiny red heart in the center
- Top with UV resin drops for a realistic 3D look
- Gel Polish Hearts:
- Paint solid color base
- Draw half-heart on edge with gel polish pen
- Seal with topcoat and let cure
5 Ways to Customize Cute Heart Press On Nails
- Add edible glitter for a sparkly touch
- Paint tiny hearts inside press-on shapes using a fine brush
- Overlay with gel top coat mixed with rose gold shimmer polish
- Use nail markers to add names or dates inside heart frames
- Paint natural nail tips with complementary French manicure gel
Frequently Asked Questions About Cute Heart Press On Nails
How long will my heart press-on nails last?
With UV gel adhesive, 7-10 days of normal wear. Regular gel lasts 3-5 days. Avoid excessive water exposure or harsh chemicals.
Can I take them off easily?
Yes! For non-UV adhesive: gently lift edges with an orangewood stick and remove. For UV gel: use gentle nail polish remover (acetone-free). Never peel off suddenly it damages your natural nails.
Do they work for short nails?
Definitely! Choose mini heart press-ons or start with a longer basic nail and build the heart on top. Don’t forget to use a base coat for better grip.
Can I wear them during a Valentine’s party?
Absolutely! Opt for designs like:
– Matte rose gold hearts
– Glittery red/white hearts
– 3D press-ons with rhinestone accents
Mix with nail glue containing no alcohol for secure hold and no chipping.
What if I don’t like them after Valentine’s?
Store the leftover press-ons in a cool, dry place. They’ll keep for up to 2 years and make great gifts (like for Mother’s Day hearts or anniversary press-ons later!).
How to Store and Reuse Your Press-On Nails
Proper storage preserves adhesion power and design clarity:
Use silica-based desiccant packets to absorb moisture
Keep in airtight tins or jewelry boxes
Never store in bathroom vanity humidity kills adhesion
Valentine’s Press-On DIY Kit Ideas
| Kit Type | Price Range | Adhesive Included? | Design Options |
|---|---|---|---|
| Beginner Set | $30-$50 | ✓ | Simple heart shapes, basic glitter options |
| Mid-Level Set | $50-$80 | ✓ | Mix-and-match hearts, 3D rhinestone press-ons |
| Complete Set | $80+ | ✓ | Custom sizes, UV light, 30+ design options |
My favorite tip: Buy a complete set with 16mm heart press-ons perfect for thumb-sized nails and easy layering over other shapes.
Heart Designs That Never Go Out of Style
- Classic Red: A red heart on white base timeless and romantic
- French Hearts: Add hearts to French manicure tips
- Watercolor Hearts: Gradient ombre styles are soft and romantic
- Gel-Filled Hearts: Paint the heart shape with regular gel for 3D effect
- Mini Heart Accents: Use 2-4mm size for subtle sparkle perfect for daytime dates
My Top 3 Valentine’s Press-On Designs
- Gel-Infused Hearts:
- Fill heart shape with soft neon gel
- Mist with nail adhesive and apply a regular heart press-on
- Finished look: glowing 3D heart with edge definition
- Rose Gold with Silver Detail:
- Use rose gold for base and glue silver beads along the heart edges
- Finish with a nail resin pen for dimension
- Result: sophisticated yet feminine design
- Minimalist White Hearts:
- Paint natural nails with white gel
- Apply heart press-on shapes this works even with natural nails
- Best for casual Valentine’s Day outfits
Why Press-On Nails Are Your Valentine’s Secret Weapon
Heart press-ons let you:
- Showcase your style without risking salon mistakes
- Save $30-$80+ on a Valentine’s Day manicure/pedi
- Experiment with bold colors like red and magenta
- Keep your natural nails healthy and unchipped
The Easiest Valentine’s Look Yet
- Paint natural nails with nude gel polish
- Glue larger heart shapes on thumb, pointer, and pinky
- Leave other fingers as simple French manicure
- Add clear rhinestones to plain press-ons for DIY sparkle
This creates a balanced look that’s elegant enough for date nights but easy for last-minute applications.
How to Spot Quality Press-On Nails
Look for these features when shopping:
- Thin 3D backing for natural feel
- Gel adhesive-friendly material (usually acrylic or resin)
- Smooth edges without burring
- Colorfast finishes that won’t bleed or fade quickly
- Reusability up to 30+ times
5 Quick Tips to Make Your Valentine’s Nails Pop
- Use a crayon-like gel pen to sketch heart outlines before attaching press-ons
- Add a tiny red heart to the base for contrast
- Paint the natural nail with a matching color before attaching (enhances dimensional effect)
- Try heart-shaped nail wraps in floral designs
- Use a gel topcoat with holo shimmer for a futuristic Valentine’s twist
Final Valentine’s Press-On Checklist
Before starting your DIY:
- Washed hands and clean natural nails
- Pressed-ons matching your nail color/length
- Quick-drying adhesive (avoid alcohol-based products)
- Gel topcoat ready (optional but recommended)
- UV light if needed (some adhesives require 60 seconds light exposure)
My All-Time Favorite Tools for Heart Press-Ons
- Gel Adhesive Pens for precision
- Rose Gold Press-On Sets from local salons
- Edible glitter bottles (halal-friendly alternatives available)
- Mini rhinestone drills for adding sparkle
- Soft LED light for curing adhesive without heat or fumes
Final Thoughts on Valentine’s Press-On Nails
I still laugh about that glitter fiasco a decade ago, but now I love sharing this easy way to create Valentine’s Day magic at home. Whether you’re making breakfast for two or heading to a formal ball, press-on hearts let you shine. Browse my curated collection on Pinterest.