Almond Press On Nails: Your Complete Guide to Elegant At-Home Manicures

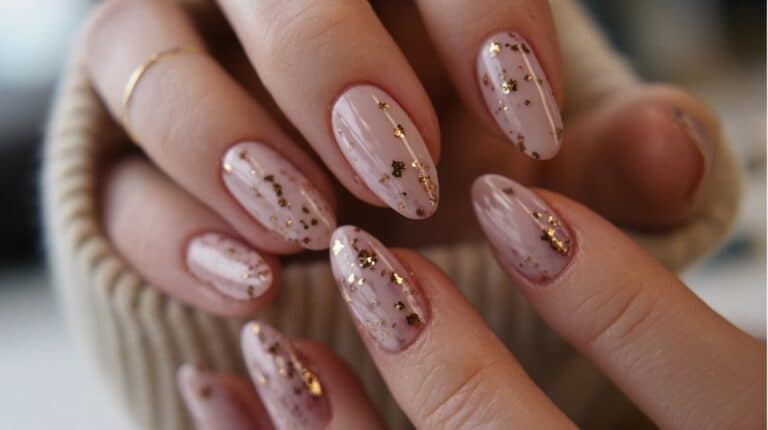
Almond press on nails combine the sophisticated elegance of almond-shaped tips with the convenience of instant application.
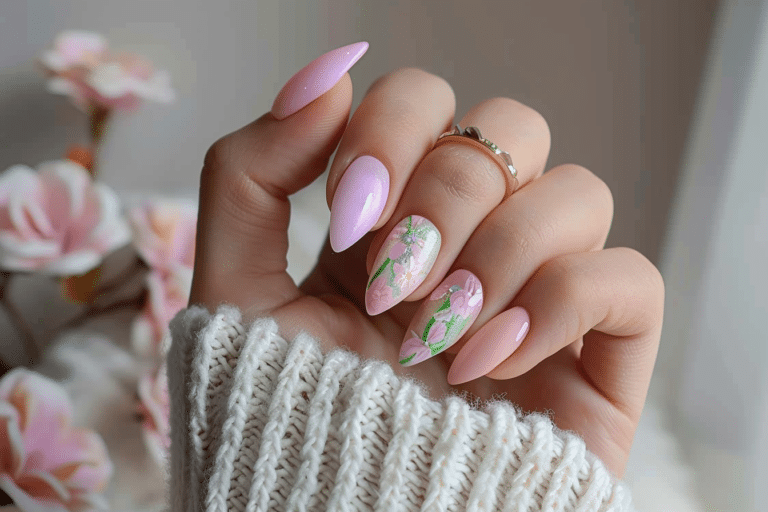
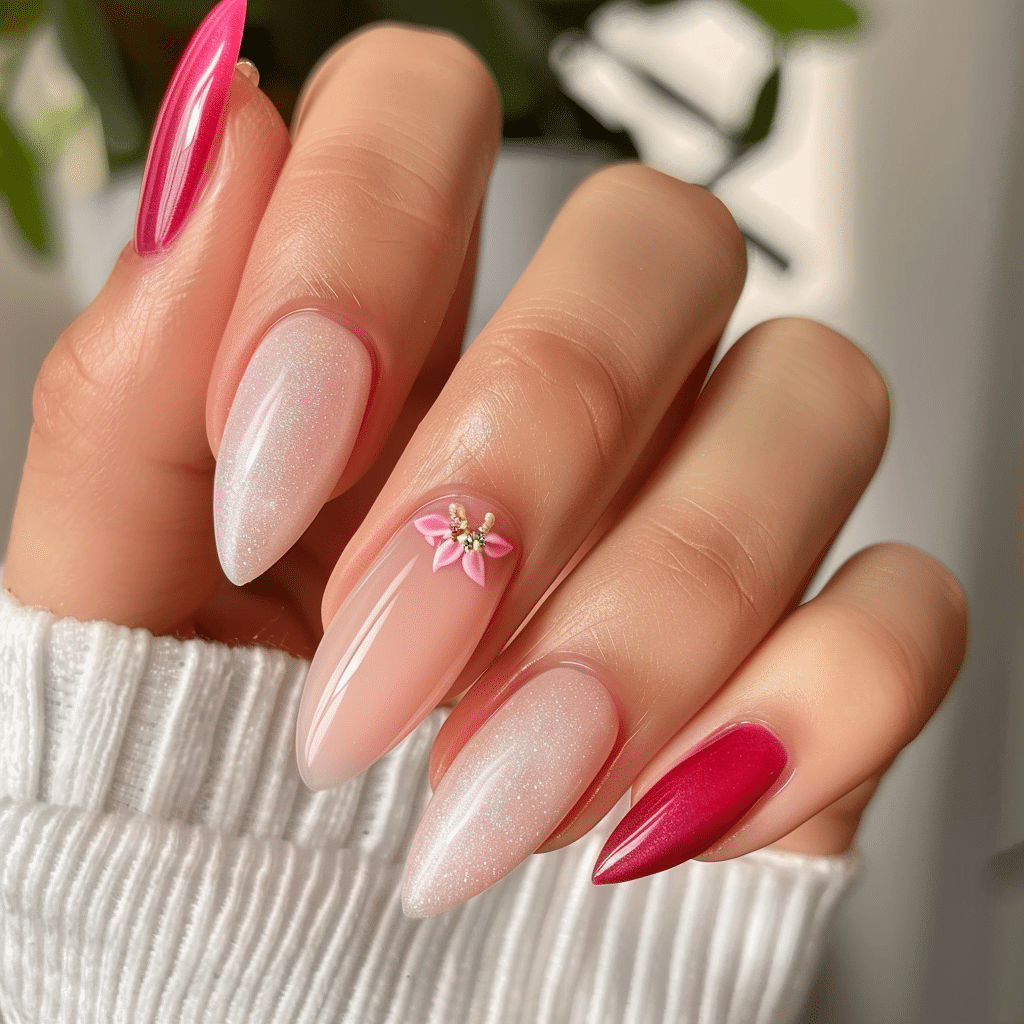
These pre-shaped artificial nails feature a tapered design that elongates fingers while providing a practical length. The almond shape remains one of the most flattering nail styles for all hand types and occasions.
| Topic | Details |
|---|---|
| Category | Nail Art / Nail Care |
| Skill Level | Beginner |
| Time Needed | 15-20 minutes |
| Tools Needed | Nail file, buffer, alcohol wipes, adhesive tabs or glue |
| Best For | Anyone wanting salon-quality nails at home without the commitment |
Table of Contents
Why Almond Press On Nails Work
The almond nail shape creates a natural extension of the fingertip with its gently tapered sides and rounded point. This design mimics the organic shape of the nail bed, making it universally flattering across different finger widths and lengths. The balanced proportions prevent the extreme pointiness of stiletto nails while offering more sophistication than basic round or square shapes.
Press on technology has evolved dramatically with improved adhesives and flexible materials that conform to natural nail curves. Modern almond press on nails use quality ABS plastic or gel-like materials that bend slightly with natural nail movement. The pre-shaped design eliminates filing errors and ensures consistent symmetry across all ten fingers, something even experienced nail technicians appreciate for its time-saving benefits.
The combination of almond shaping with press on convenience addresses common manicure challenges. The shape naturally draws the eye lengthwise rather than widthwise, creating an elongating optical effect. The moderate point remains practical for daily tasks while maintaining elegance, and the removable nature allows for style changes without damaging natural nails underneath.
Tools and Products Needed for Almond Press On Nails
| Product | Purpose | Alternatives |
|---|---|---|
| Almond press on nail set | Main artificial nails in almond shape | Custom almond tips with gel polish |
| Nail file (180 grit) | Shape natural nails and refine press on edges | Glass nail file, emery board |
| Nail buffer | Smooth natural nail surface for better adhesion | Fine grit file block |
| Alcohol wipes | Cleanse oils from natural nails | Rubbing alcohol with cotton pads |
| Cuticle pusher | Push back cuticles for clean application | Wooden orange stick |
| Adhesive tabs or nail glue | Secure press on nails to natural nails | Dual-sided nail tape |
| Cuticle oil | Hydrate nail beds after application | Vitamin E oil, jojoba oil |
For comprehensive guidance on nail preparation techniques, visit Gel Nails by Lina for professional tips and product recommendations.
Step-by-Step Application Guide
Nail Preparation
- Wash your hands thoroughly with soap and warm water to remove dirt and oils.
- Push back cuticles gently using a cuticle pusher at a 45-degree angle.
- Trim natural nails short using nail clippers to create a flat base.
- File natural nail edges smooth in one direction to prevent splitting.
- Buff the nail surface lightly to remove shine and create texture for adhesion.
- Wipe each nail with an alcohol pad to remove all oils and dust particles.
Sizing and Selection
- Lay out all almond press on nails and organize them by size.
- Match each press on nail to your natural nail width without forcing.
- Select sizes that cover the entire natural nail without touching skin.
- Arrange selected nails in order from thumb to pinky for efficient application.
- Test fit each nail without adhesive to confirm proper sizing beforehand.
Adhesive Application
- Choose between adhesive tabs for temporary wear or nail glue for extended durability.
- Apply a thin layer of nail glue to the natural nail or peel adhesive tab backing.
- Press the adhesive tab firmly onto the natural nail, smoothing out air bubbles.
- Work quickly with glue as it sets within 10 to 15 seconds.
- Apply adhesive to one nail at a time to maintain control and precision.
Press On Nail Application
- Align the press on nail cuticle edge slightly above your natural cuticle line.
- Place the nail at a 45-degree angle and press down toward the free edge.
- Press firmly for 30 seconds, applying even pressure across the entire surface.
- Focus pressure on the center first, then sides to eliminate air pockets.
- Repeat the process for all ten fingers, starting with your dominant hand.
Finishing and Refinement
- File the free edge of each almond press on nail to your desired length.
- Shape the point to match your preferred almond taper using smooth strokes.
- Check for any lifted edges and apply additional pressure if needed.
- Apply cuticle oil around the base of each nail to moisturize the area.
- Avoid water contact for at least one hour to allow adhesive to fully cure.
Pro Nail Technician Tips for Almond Press On Nails
- Size down rather than up when between sizes to prevent lifting at the sidewalls and ensure secure adhesion across the entire nail surface.
- Warm press on nails briefly with a hairdryer on low heat to make them more pliable and easier to conform to natural nail curves.
- Apply nail glue in a thin zigzag pattern rather than flooding the surface to avoid excess seepage and messy application.
- Cap the free edge by running a small amount of glue along the tip underside to seal and prevent premature lifting during daily activities.
- Store unused almond press on nails in their original packaging away from heat to maintain shape integrity and prevent warping over time.
- Apply a thin layer of clear top coat over press on nails after two days to add extra shine and extend wear duration.
Common Press On Nail Mistakes
| Mistake | Why it Happens | How to Fix |
|---|---|---|
| Choosing wrong nail size | Rushing selection process or not measuring natural nail width properly | Hold each size against natural nail and ensure complete coverage without overhang |
| Skipping nail preparation | Wanting to speed up application time or underestimating importance of clean surface | Always buff, cleanse, and dehydrate natural nails for maximum adhesive bond strength |
| Using too much glue | Fear of nails popping off leads to over-application of adhesive | Apply thin even layer only on natural nail and press firmly to spread |
| Applying on wet nails | Not waiting long enough after washing hands or using hand lotion beforehand | Wait 10 minutes after washing and ensure nails are completely dry before application |
| Not pressing long enough | Impatience during application process or multitasking during the crucial bonding phase | Hold steady firm pressure for full 30 seconds per nail without releasing |
Nail Design Variations for Almond Press On Nails
| Style | Description | Best Occasion |
|---|---|---|
| Classic French almond | White tips with nude or pink base in elegant almond shape | Professional settings, weddings, everyday elegance |
| Ombre almond nails | Gradual color transition from base to tip with smooth blending | Date nights, parties, fashion events |
| Chrome almond press ons | Metallic mirror finish in silver, gold, or rose gold shades | Evening events, holidays, special celebrations |
| Minimalist almond art | Simple line work, dots, or single accent nail with clean design | Daily wear, office appropriate, understated style |
| Seasonal almond designs | Holiday themes, florals, or seasonal colors matching current trends | Festive gatherings, seasonal celebrations, themed parties |
| Matte almond finish | Non-glossy textured surface in bold or neutral tones | Modern casual looks, artistic expression, trendy aesthetics |
Explore more design inspiration and techniques at Gel Nails by Lina where professional nail artists share their creative approaches.
Nail Care and Maintenance
Maintaining almond press on nails requires gentle handling and consistent hydration practices. Apply cuticle oil twice daily around the base of each press on nail to prevent the natural nail underneath from becoming brittle. The oil creates a moisture barrier that keeps both natural and artificial nails flexible, reducing the risk of cracking or peeling at the edges.
Wear protective gloves when performing household chores, especially those involving water, harsh chemicals, or prolonged submersion. Water exposure weakens adhesive bonds and causes press on nails to lift prematurely. The almond shape with its tapered point can catch on fabrics and surfaces, so approach tasks mindfully to prevent accidental snagging or breakage.
Avoid using your almond press on nails as tools for opening cans, scratching, or prying objects. The pointed shape concentrates force at the tip, making it more vulnerable to cracking than blunt shapes. Instead, use appropriate tools for these tasks to preserve your manicure. Check daily for any lifting at the edges and apply a small amount of nail glue to reattach if needed.
Keep natural nails healthy underneath by limiting continuous press on wear to three weeks maximum. Allow natural nails to breathe for at least three to five days between applications while moisturizing with strengthening treatments. This cycle prevents natural nail thinning and maintains the healthy foundation needed for future press on applications.
How to Remove Almond Press On Nails Safely
- Soak a cotton ball in pure acetone and place it directly on the press on nail surface.
- Wrap each fingertip tightly with aluminum foil to hold the cotton in place and trap heat.
- Wait 10 to 15 minutes to allow the acetone to penetrate and dissolve the adhesive bond.
- Remove foil and cotton, then gently wiggle the press on nail from side to side.
- Apply light pressure at the cuticle edge to lift the press on nail without forcing.
- Use a wooden cuticle stick to gently push under any remaining adhered sections.
- Never pull or rip press on nails off as this damages the natural nail surface layers.
- File away any remaining adhesive residue gently after all press ons are removed.
- Wash hands thoroughly and apply cuticle oil generously to rehydrate natural nails.
- Buff natural nails lightly to smooth the surface and restore natural shine.
Nail Health and Safety
Protecting natural nail health while enjoying almond press on nails requires awareness of potential damage signs. Over-buffing the natural nail surface removes essential keratin layers that provide strength and protection. Limit buffing to light surface smoothing rather than aggressive thinning, and never buff the same area repeatedly during a single preparation session.
Monitor for signs of nail infections including redness, swelling, pain, or discoloration around the nail bed. Moisture trapped between the press on nail and natural nail creates an environment where bacteria and fungi thrive. If you notice any infection symptoms, remove press on nails immediately and consult a dermatologist for appropriate treatment before reapplying.
Allergic reactions to nail glue or press on materials can manifest as itching, burning, or contact dermatitis. Test new products on one nail first and wait 24 hours to check for adverse reactions. Choose hypoallergenic adhesives and high-quality press on nails made from medical-grade materials when you have sensitive skin or known allergies.
Frequently Asked Questions
How long do almond press on nails last?
Almond press on nails typically last between 7 to 14 days when applied with nail glue and proper preparation techniques. Adhesive tab application provides shorter wear time of 3 to 7 days but allows for easier removal and reusability. Longevity depends on factors including nail preparation quality, daily activities, water exposure, and whether you followed proper application steps.
How do you remove press on nails safely without damage?
Safe press on nail removal requires soaking each nail in acetone for 10 to 15 minutes using the cotton and foil wrap method. This dissolves the adhesive bond without requiring force that damages natural nails. Never peel or pull press on nails off directly, as this strips away layers of the natural nail plate and causes thinning, weakness, and potential pain.
Are press on nails better than acrylic or gel nails?
Press on nails offer convenience, affordability, and no UV exposure compared to gel nails, while being less damaging than acrylics that require filing and harsh chemicals. They provide temporary wear without commitment and can be changed frequently to match different styles. However, professional gel and acrylic applications typically last longer and withstand more intensive daily wear, making each option suitable for different lifestyle needs.
Why do press on nails peel or pop off early?
Press on nails peel prematurely due to inadequate nail preparation, oil residue on natural nails, wrong size selection, or exposure to water too soon after application. Skipping the buffing step prevents proper adhesive bonding to the smooth natural nail surface. Using press on nails that are too large creates gaps at the sidewalls where lifting begins, while water contact within the first hour weakens the adhesive before it fully cures.
How can you make almond press on nails last longer?
Making almond press on nails last longer requires thorough nail preparation including buffing, cleansing with alcohol, and ensuring complete dryness before application. Use nail glue instead of adhesive tabs for extended wear, apply thin even layers, and cap the free edge with extra adhesive. Wear gloves during wet tasks, apply cuticle oil daily to prevent lifting, and reglue any edges that begin to separate immediately rather than waiting.
Conclusion
Almond press on nails deliver salon-worthy elegance with beginner-friendly application that takes just minutes to complete. This flattering nail shape elongates fingers naturally while the convenient press on format eliminates the time and expense of professional manicures. With proper preparation, quality products, and careful maintenance, you can achieve stunning results that last up to two weeks. Whether you prefer classic French tips or bold artistic designs, almond press on nails offer endless style possibilities for every occasion. Visit Gel Nails by Lina for more expert nail care guidance and inspiration to perfect your at-home manicure techniques.