Girly Acrylic Cruise Nails: Cute Summer 3D Flower Nail Ideas

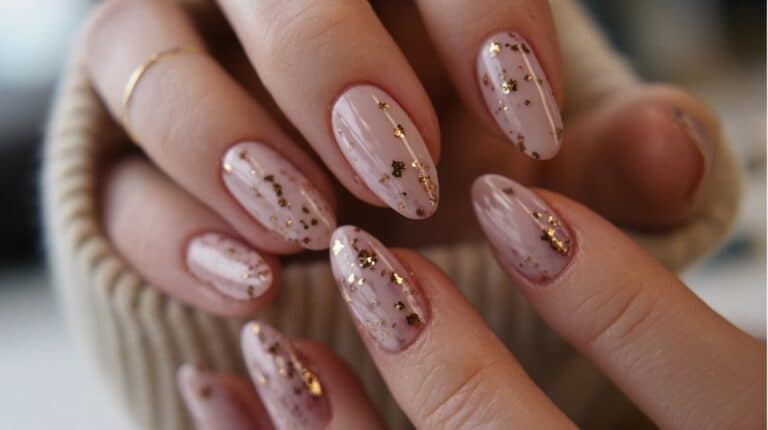
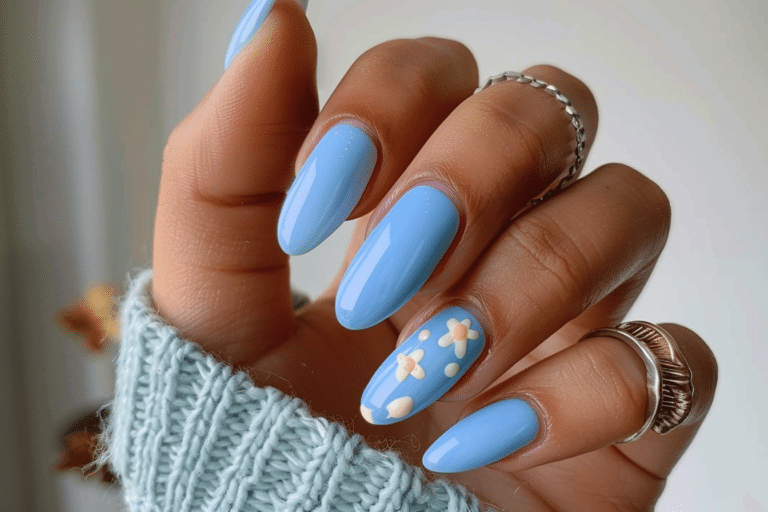
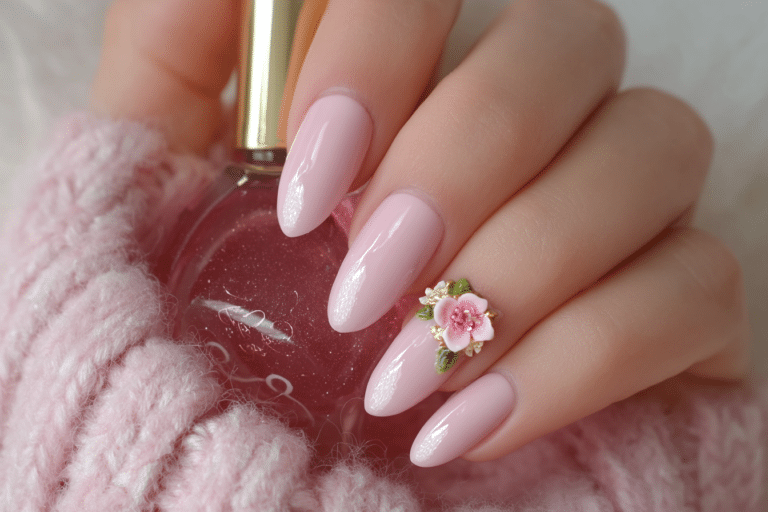
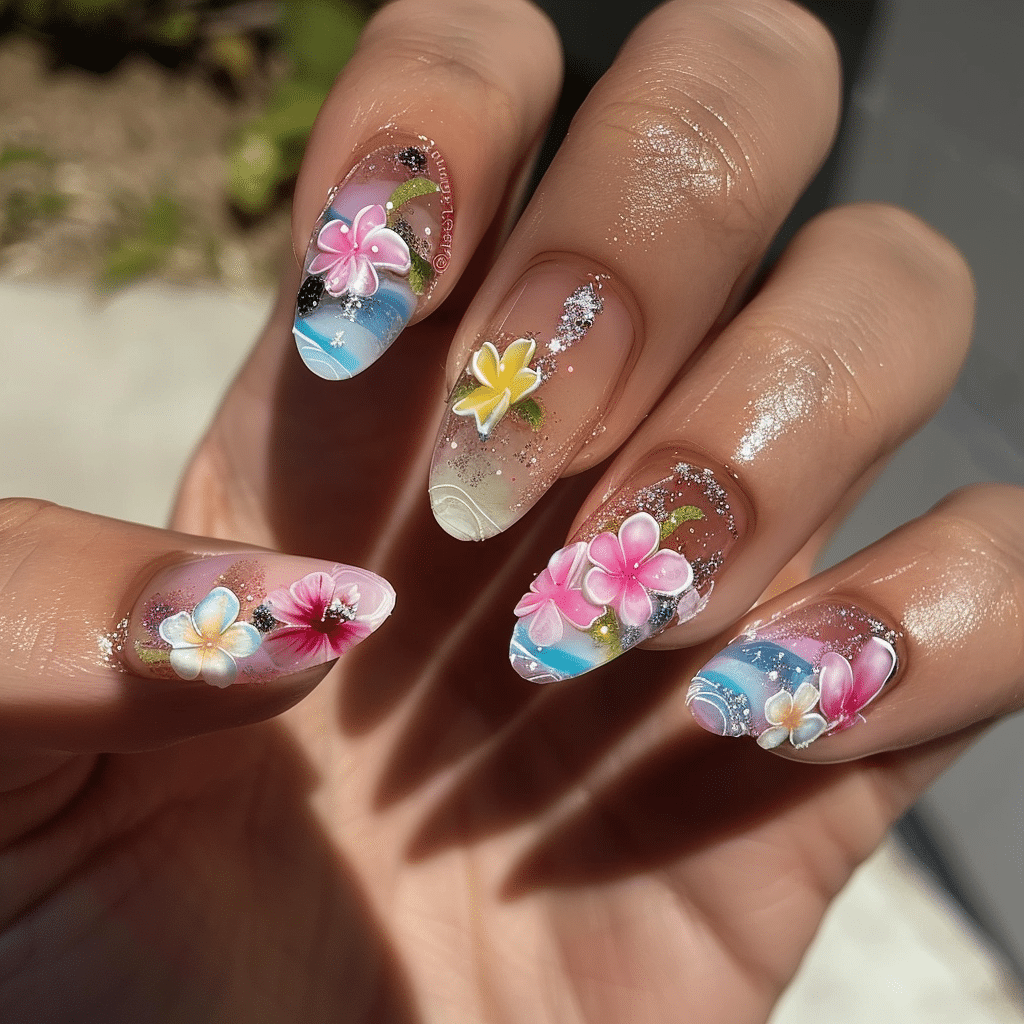
Girly acrylic cruise nails featuring 3D flower designs are the ultimate summer manicure statement for vacation-bound travelers. These pretty nails combine dimensional floral art with vibrant summer colors and elegant oval shapes.
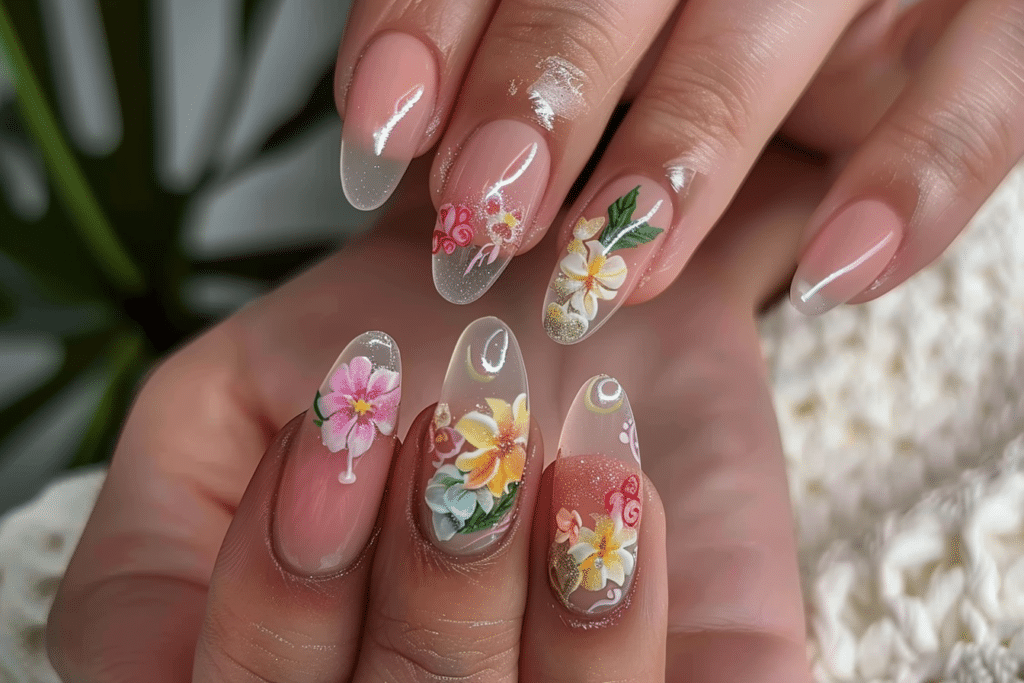
Perfect for beachy destinations, holiday escapes, and spring break adventures, this nail style captures the essence of feminine sophistication with playful vacation vibes.
| Topic | Details |
|---|---|
| Category | Nail Art / Acrylic Nails |
| Skill Level | Intermediate to Advanced |
| Time Needed | 90-120 minutes |
| Tools Needed | Acrylic system, nail forms, 3D flower accessories, nail glue |
| Best For | Vacationers, cruise travelers, summer celebrations, beach weddings |
Table of Contents
Why This Nail Technique Works
Girly acrylic cruise nails with 3D flower embellishments work exceptionally well because acrylic provides the strength and durability needed for vacation activities. Unlike regular polish that chips easily with water exposure and beach activities, acrylic creates a protective layer that withstands swimming pools, ocean waves, and constant sun exposure. The medium allows nail technicians to extend natural nails into flattering oval shapes that elongate fingers while providing a canvas for intricate design work.
The 3D flower elements add texture and dimension that photographs beautifully against tropical backdrops and vacation scenery. These raised floral designs catch light differently than flat nail art, creating visual interest from every angle. Acrylic adhesion ensures that these delicate embellishments stay secured throughout your entire cruise or beach holiday. The clean girl aesthetic combined with pretty floral touches appeals to those seeking feminine elegance without overwhelming boldness.
Summer nail designs featuring dimensional flowers provide versatility for both daytime beach activities and elegant evening dinners. The technique allows customization of flower sizes, placements, and color combinations to match personal style preferences and vacation wardrobes. Professional nail technicians can create cohesive looks by coordinating flower colors with swimwear palettes or resort fashion choices for Instagram-worthy nail inspiration.
Tools and Products Needed
| Product | Purpose | Alternatives |
|---|---|---|
| Acrylic liquid monomer | Creates acrylic mixture for nail extensions | Polygel system with slip solution |
| Acrylic powder in multiple colors | Forms nail structure and base colors | Dip powder system |
| Nail forms or tips | Extends nail length and shapes | Full cover nail tips |
| Acrylic brush | Applies and sculpts acrylic product | Size 8-12 kolinsky brush |
| 3D flower nail charms | Creates dimensional floral designs | Hand-sculpted acrylic flowers |
| Nail glue or resin | Secures 3D embellishments | Clear acrylic overlay |
| Nail file 180 grit | Shapes and refines acrylic nails | Electric nail file with safety bit |
| Nail buffer | Smooths nail surface before polish | Fine grit sanding band |
| Cuticle pusher | Prepares nail bed area | Metal or wooden cuticle tool |
| Nail dehydrator | Removes oils for better adhesion | Rubbing alcohol or acetone |
| Gel top coat | Seals design with glossy finish | No-wipe gel top coat |
| UV/LED lamp | Cures gel top coat layers | 48-watt LED lamp minimum |
| Cuticle oil | Hydrates nails and surrounding skin | Jojoba or vitamin E oil |
For premium acrylic systems and professional nail supplies, visit Gel Nails by Lina for curated product recommendations and tutorial resources.
Step-by-Step Application Guide for Girly Acrylic Cruise Nails
Nail Preparation
- Sanitize hands thoroughly with antibacterial wash and allow them to dry completely before beginning the application process.
- Push back cuticles gently using a cuticle pusher, removing any dead skin from the nail plate surface.
- File natural nails to your desired starting length, creating a smooth free edge that will blend with extensions.
- Buff the natural nail surface lightly to remove shine and create texture for optimal acrylic adhesion.
- Apply nail dehydrator to all ten nails, allowing the product to air dry for 30 seconds between applications.
- Select appropriate nail forms or tips based on desired extension length and nail bed width measurements.
Acrylic Extension Application
- Apply nail forms securely under the free edge, ensuring the form creates the perfect oval shape template.
- Pour acrylic liquid monomer into a dappen dish, preparing your workspace with polymer powder in multiple colors.
- Dip your acrylic brush into monomer, then pick up a small bead of clear or pink acrylic powder.
- Place the bead at the apex of the nail, pressing and smoothing it toward the cuticle and sidewalls.
- Create the nail extension by applying acrylic beads onto the form, building the structure in thin layers.
- Shape each nail into an elegant oval form while the acrylic remains workable and slightly damp.
- Allow the acrylic to cure completely for three to five minutes before removing forms or continuing.
- File nails into perfect oval shapes using 180-grit files, refining length and smoothing all surfaces evenly.
- Buff the entire nail surface until smooth and free of ridges or uneven texture spots.
Summer Color Base Application
- Remove all dust particles from buffing using a clean nail brush and alcohol-based cleanser spray.
- Apply a thin coat of gel base coat to protect the acrylic and prepare for color application.
- Cure the base coat layer under your UV/LED lamp according to manufacturer specifications for proper adhesion.
- Paint nails with your chosen summer shade, such as soft pink, peach, lavender, or clean white tones.
- Apply gel polish in thin, even layers to prevent bubbling and ensure smooth color coverage throughout.
- Cure each color layer for the recommended time, typically 60 seconds under LED or 120 under UV.
- Add a second coat of color if needed for opacity, curing thoroughly between each application.
3D Flower Design Placement
- Plan your flower placement design by laying out charms on a clean surface before application begins.
- Apply a small amount of nail glue or clear resin to the back of each 3D flower charm.
- Place flowers strategically on accent nails, typically on ring fingers or creating patterns across multiple nails.
- Press each flower firmly for ten seconds to ensure complete adhesion to the nail surface base.
- Add smaller floral elements, pearls, or rhinestones around main flowers to create cohesive summer designs.
- Build dimension by layering different sized flowers and creating depth with varied placement heights.
Finishing and Top Coat Sealing
- Apply gel top coat carefully around 3D elements, sealing the base of each flower without flattening texture.
- Use a thin brush to apply top coat in hard-to-reach areas between flower petals and embellishments.
- Cure the top coat layer for the full recommended time to ensure maximum durability and shine.
- Cleanse nails with alcohol or gel cleanser to remove any sticky residue from the top coat.
- Apply cuticle oil generously around all nails, massaging it into the skin and underneath free edges.
- Inspect each nail under good lighting to ensure all elements are secure and the finish looks flawless.
For more detailed tutorials on acrylic nail techniques, explore the comprehensive guides at Gel Nails by Lina for professional tips and video demonstrations.
Pro Nail Technician Tips for Perfect Cruise Nails
- Work in thin acrylic layers to prevent heat spikes during curing, which can cause discomfort and lifting at the cuticle area.
- Keep acrylic beads at a medium consistency for optimal control, avoiding mixtures that are too wet or excessively dry.
- Cap the free edge with top coat on every layer to seal the nail tip and prevent water penetration during swimming.
- Apply 3D flowers slightly away from cuticles to avoid snagging on clothing or getting caught during daily activities.
- Use a no-wipe top coat for the final layer to eliminate tacky residue that attracts dust on vacation.
- Test flower adhesion by gently pressing each element after 24 hours to ensure they remain secure before travel.
- Create color coordination by selecting flower shades that complement your cruise wardrobe and swimwear color palette.
- Seal smaller embellishments completely under gel top coat while leaving larger 3D flowers dimensional for visual impact.
Common Acrylic Nail Mistakes to Avoid
| Mistake | Why it Happens | How to Fix |
|---|---|---|
| Thick acrylic layers | Using too much product or insufficient filing creates bulky, unnatural appearance | Apply thin layers and file thoroughly between steps for natural contour |
| Lifting at cuticles | Inadequate nail prep or product touching skin causes separation from nail bed | Dehydrate properly and maintain tiny gap between acrylic and cuticle |
| Flowers falling off | Insufficient adhesive or failure to seal bases allows embellishments to detach | Use quality nail glue and encapsulate flower bases with clear acrylic |
| Air bubbles in acrylic | Incorrect liquid-to-powder ratio or tapping brush creates trapped air pockets | Use proper bead consistency and press product smoothly without patting |
| Uneven nail shapes | Rushing the filing process or working without proper lighting causes asymmetry | File each nail systematically under bright light, checking from multiple angles |
| Color bleeding under flowers | Applying 3D elements before gel polish fully cures causes color transfer issues | Ensure complete curing of all color layers before adding any embellishments |
Nail Design Variations for Summer Vacations
| Style | Description | Best Occasion |
|---|---|---|
| Tropical floral explosion | Multiple 3D flowers in bright coral, yellow, and fuchsia covering most nails | Caribbean cruises, beach resorts, tropical destination weddings |
| Minimalist single bloom | One delicate white or pastel flower on each ring finger with nude base | Clean girl aesthetic, yacht parties, elegant beach ceremonies |
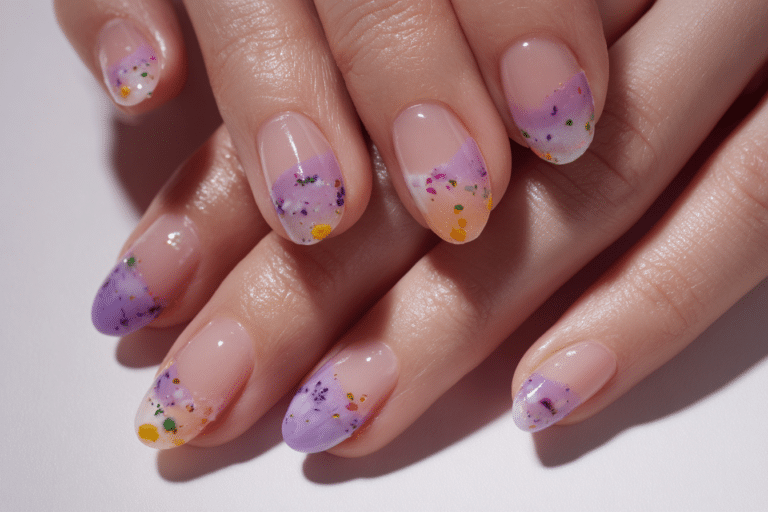
| Ombre flower garden | Gradient base colors transitioning from pink to white with scattered small flowers | Spring break trips, sunset cruises, romantic getaways |
| French tip with floral accent | Classic white French tips featuring tiny 3D flowers at the smile line | Formal cruise dinners, destination events, sophisticated travel |
| Pearl and flower combination | Delicate flowers surrounded by pearl embellishments on pastel backgrounds | Bridal cruises, anniversary celebrations, luxury vacations |
| Beachy chrome florals | Chrome powder base with holographic finish topped with iridescent flowers | Festival cruises, party boats, trendy beach clubs |
| Pressed flower art | Real dried flowers encapsulated in clear acrylic for authentic botanical look | Eco-conscious travel, garden-themed events, nature-inspired vacations |
Nail Care and Maintenance During Your Cruise
Maintaining girly acrylic cruise nails throughout your vacation requires daily attention to hydration and protection from harsh elements. Apply cuticle oil at least twice daily, especially after swimming in chlorinated pools or saltwater, which can dehydrate both natural nails and surrounding skin. The oil creates a protective barrier that prevents brittleness and keeps the acrylic-skin junction flexible and healthy throughout your trip.
Wear waterproof sunscreen on your hands to prevent UV damage to both skin and nail products during extended sun exposure. Avoid using nails as tools to open cans, peel fruit, or scrape surfaces, which can cause lifting or breakage of both acrylic and 3D embellishments. Rinse hands with fresh water after ocean or pool swimming to remove salt and chemicals that may compromise nail integrity over time.
Check 3D flower elements daily for any signs of loosening, applying a tiny drop of nail glue immediately if needed. Pack a small nail care kit containing cuticle oil, a mini file, nail glue, and clear top coat for emergency repairs during your vacation. Moisturize hands frequently with non-greasy hand cream to maintain skin elasticity and prevent the dry, aged appearance that travel and climate changes can cause.
Visit Gel Nails by Lina for recommended travel-sized nail care products perfect for cruise and vacation maintenance routines.
How to Remove Acrylic Cruise Nails Safely
- Clip acrylic nails down to a shorter length using nail clippers to reduce the amount of product requiring removal.
- File the shiny top coat layer off completely using a coarse 100-grit file to break the seal.
- Soak ten cotton balls in pure acetone, ensuring they are saturated but not dripping excessively.
- Place one acetone-soaked cotton ball on each nail, covering the entire acrylic surface completely.
- Wrap each finger tightly in aluminum foil, sealing the cotton against the nail to prevent evaporation.
- Wait 20 to 30 minutes, allowing the acetone to break down the acrylic polymer structure gradually.
- Remove foil and cotton from one nail first to test if acrylic has softened sufficiently for removal.
- Gently push softened acrylic off using a wooden cuticle stick, never forcing or prying aggressively.
- Reapply acetone-soaked cotton and foil to any nails where acrylic remains firmly attached to natural nails.
- Buff natural nails gently with a fine buffer to smooth any remaining residue without damaging nail plates.
- Wash hands thoroughly with soap and warm water to remove all acetone traces from skin surfaces.
- Apply cuticle oil and intensive hand cream to rehydrate nails and skin after the drying acetone process.
Nail Health and Safety for 3D Acrylic Designs
Maintaining nail health while wearing acrylic cruise nails requires attention to hygiene and proper application techniques. Ensure your nail technician uses sterilized tools and fresh products to prevent bacterial or fungal infections that can develop under artificial nail enhancements. Watch for signs of green discoloration, unusual odors, or pain around nails, which indicate infection requiring immediate professional medical attention and nail removal.
Allow natural nails to breathe between acrylic applications by taking breaks every two to three months. This rest period prevents long-term thinning and weakening of natural nail plates that continuous enhancement wear can cause. During break periods, apply strengthening treatments and maintain consistent cuticle oil application to restore natural nail resilience and thickness.
Monitor 3D embellishments for sharp edges that might scratch skin or catch on fabrics, causing nail trauma. Keep nails at a practical length that allows normal activities without excessive stress on the nail bed. Drink adequate water and maintain a balanced diet rich in biotin and protein to support healthy nail growth from within during and after wearing acrylic enhancements.
Frequently Asked Questions About Acrylic Cruise Nails
How long do acrylic nails with 3D flowers last on vacation?
Acrylic cruise nails typically last two to three weeks with proper application and maintenance care. The 3D flower embellishments remain secure when properly adhered with quality nail glue and sealed with gel top coat. Swimming, sun exposure, and normal vacation activities should not compromise well-applied acrylic nails if you follow proper aftercare. Schedule your nail appointment two to three days before departure to ensure any immediate lifting issues are caught early.
Can I swim with 3D flower acrylic nails without damage?
Swimming with acrylic cruise nails is completely safe when flowers are properly secured and sealed with quality top coat. Both pool chlorine and ocean saltwater will not damage cured acrylic or properly applied embellishments during normal swimming activities. Rinse hands with fresh water after swimming and reapply cuticle oil to maintain hydration and prevent dryness. Avoid hot tubs immediately after application, as excessive heat within the first 24 hours may affect initial curing.
What is the difference between acrylic and gel nails for cruise vacations?
Acrylic nails offer superior strength and durability for active vacation activities compared to gel extensions. Acrylic creates a harder, more rigid structure that withstands impacts better, while gel nails provide more flexibility and a glossier natural appearance. Acrylic requires acetone for removal, whereas some gel systems soak off more easily with less aggressive solutions. For cruise vacations involving water sports and extended wear time, acrylic typically provides better longevity and damage resistance than gel alternatives.
Why do my acrylic nails lift at the edges during vacation?
Acrylic nail lifting occurs due to inadequate nail preparation, moisture exposure without proper sealing, or natural nail growth. Ensure your technician properly dehydrates natural nails and avoids getting product on surrounding skin during application for optimal adhesion. Frequent water exposure during cruises can penetrate unsealed edges, causing the acrylic to separate from natural nails gradually. Apply cuticle oil daily and avoid prolonged water submersion to minimize lifting risks throughout your vacation.
How can I make my girly acrylic cruise nails last the entire vacation?
Maximize acrylic nail longevity by applying cuticle oil twice daily and wearing gloves during any cleaning activities. Avoid using nails as tools and be gentle when handling luggage, opening containers, or engaging in beach activities. Keep nails at a moderate length to reduce leverage that causes breakage and stress on the nail bed. Bring a small repair kit with nail glue and top coat for immediate fixes if any embellishments loosen during travel.
Conclusion
Girly acrylic cruise nails featuring adorable 3D flower designs create the perfect summer manicure for vacation adventures and tropical getaways. These dimensional floral nail designs combine durability with feminine elegance, providing Instagram-worthy nail art that withstands swimming, sun, and all your holiday activities. With proper application techniques, quality products, and consistent maintenance, your pretty summer nails will remain flawless throughout your entire cruise experience. Book your appointment at Gel Nails by Lina to create your custom girly acrylic cruise nails before your next beach escape.