25 Light Blue Nails That Are Too Pretty Not To Try

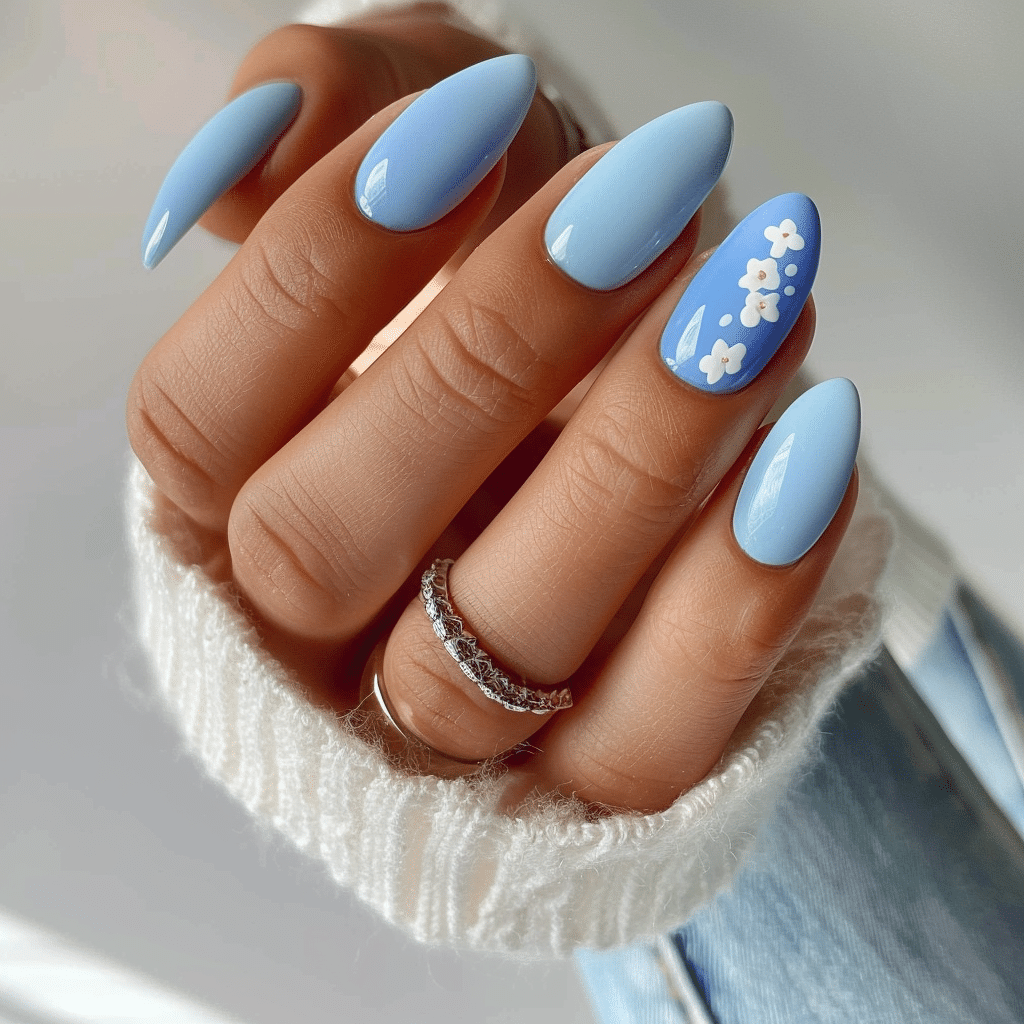
Light blue nails offer a refreshing and versatile aesthetic that works beautifully for any season or occasion.
This delicate shade combines the calming properties of blue with a soft, feminine touch that flatters all skin tones. Whether you prefer minimalist designs or intricate nail art, light blue provides the perfect canvas for creating stunning manicures that stand out.
| Topic | Details |
| Category | Nail Art / Gel Nails |
| Skill Level | Beginner to Advanced |
| Time Needed | 45-90 minutes |
| Tools Needed | UV/LED lamp, gel polish, nail file, base coat, top coat |
| Best For | Anyone seeking elegant, versatile nail designs |
Table of Contents
Why Light Blue Nails Work Perfectly
Light blue nails create a sophisticated appearance because this shade naturally complements the undertones found in various skin types. The color psychology behind light blue evokes feelings of tranquility and confidence, making it an excellent choice for professional settings and special occasions. Unlike darker shades that can appear heavy or dramatic, light blue maintains a fresh appearance that transitions seamlessly from spring through winter.
The versatility of light blue gel polish allows nail technicians to experiment with multiple design techniques without overwhelming the base color. This shade serves as an ideal foundation for chrome accents, delicate floral patterns, and geometric nail art. The reflective properties of gel formulations enhance the luminosity of light blue shades, creating depth and dimension that regular polish cannot achieve.
Professional nail artists appreciate light blue shades because they photograph exceptionally well and maintain their vibrancy throughout the entire wear period. The pigmentation in quality gel formulas ensures even coverage with minimal streaking, while the curing process locks in the color for weeks of chip-free wear.
Tools and Products Needed for Light Blue Nail Designs
| Product | Purpose | Alternatives |
| UV/LED Lamp | Cures gel polish properly | 48W or 72W LED lamp |
| Gel Base Coat | Protects natural nails and ensures adhesion | Rubber base coat for weak nails |
| Light Blue Gel Polish | Main color application | Multiple shades from powder blue to sky blue |
| Gel Top Coat | Seals design and adds shine | Matte or glossy finish options |
| Nail File 180 Grit | Shapes nail edges smoothly | Glass file for natural nails |
| Nail Buffer | Smooths nail surface | 240 grit buffer block |
| Cuticle Oil | Hydrates cuticles and surrounding skin | Vitamin E or jojoba oil |
| Alcohol Wipes | Cleanses nail plate before application | Acetone-free nail cleanser |
| Nail Art Brushes | Creates detailed designs | Dotting tools or striping brushes |
For the best selection of professional gel nail products, visit Gel Nails by Lina for expert recommendations and quality supplies.
Step-by-Step Application Guide for Light Blue Nails
Nail Preparation
- Remove any existing polish using acetone-soaked cotton pads and allow nails to dry completely.
- Push back cuticles gently using a wooden or rubber cuticle pusher at a 45-degree angle.
- File nails into your desired shape using smooth, one-directional strokes from corner to center.
- Buff the nail surface lightly with a 240-grit buffer to remove shine and create texture.
- Wash hands thoroughly with soap and water, then dry completely before proceeding.
- Wipe each nail with an alcohol pad to remove oils, dust, and debris from the surface.
Base Coat Application
- Apply a thin layer of gel base coat starting from the cuticle area and dragging toward the free edge.
- Cap the free edge by running the brush along the nail tip to seal the edge.
- Cure under UV lamp for 60 seconds or LED lamp for 30 seconds according to manufacturer instructions.
- Check for any missed spots or uneven areas before proceeding to color application.
Gel Polish Layers
- Apply the first thin coat of light blue gel polish using steady, even pressure on the brush.
- Start slightly away from the cuticle to prevent flooding and drag the polish toward the free edge.
- Cap the free edge with each coat to maximize longevity and prevent chipping.
- Cure the first color coat for 60 seconds in UV or 30 seconds in LED lamp.
- Apply a second thin coat of light blue gel polish for full opacity and even color saturation.
- Ensure complete coverage without applying thick layers that can cause wrinkling or peeling.
Curing Process
- Cure the second color coat for the full recommended time without removing your hand early.
- Check that all nails have cured properly by gently touching the surface for tackiness.
- Allow nails to cool for 30 seconds before applying any additional design elements or top coat.
Finishing and Top Coat
- Apply a thin layer of gel top coat over the entire nail surface, ensuring complete coverage.
- Cap the free edge thoroughly with top coat to seal the color layers beneath.
- Cure for 60 seconds in UV or 30-45 seconds in LED lamp for a glossy, hardened finish.
- Wipe away the sticky residue layer using an alcohol wipe or gel cleanser if your top coat requires it.
- Apply cuticle oil around each nail and massage gently to hydrate the surrounding skin.
Pro Nail Technician Tips for Perfect Light Blue Nails
- Always apply thin coats rather than thick layers to prevent the gel from wrinkling, peeling, or failing to cure properly through all layers.
- Avoid getting gel polish on the skin or cuticle area, as this creates lifting points where moisture can seep underneath the manicure.
- Clean your brush regularly by wiping it on a lint-free wipe between nails to maintain precise application and prevent color contamination.
- Store light blue gel polishes away from direct sunlight to prevent color shifting and maintain the true shade over time.
- Use a dehydrator or pH balancing primer before base coat application on oily nail beds to ensure maximum adhesion and longevity.
- Allow each layer to cure completely before applying the next to build a strong, durable manicure that resists chips and cracks.
Discover more professional techniques at Gel Nails by Lina to elevate your nail art skills.
Common Gel Nail Mistakes to Avoid
| Mistake | Why It Happens | How to Fix |
| Thick Gel Layers | Applying too much product in one coat leads to incomplete curing and wrinkling | Use thin, even coats and build color gradually with multiple layers |
| Improper Curing Time | Removing hand too early or using insufficient lamp wattage prevents full polymerization | Follow manufacturer cure times and ensure lamp bulbs are replaced regularly |
| Skipping Nail Prep | Rushing through cleaning and buffing creates poor adhesion surfaces | Always cleanse with alcohol and lightly buff to remove natural oils |
| Flooding the Cuticle | Applying polish too close to skin creates lifting and allows moisture penetration | Leave a tiny gap near cuticles and clean edges with a brush before curing |
| Not Capping the Free Edge | Forgetting to seal the nail tip allows gel to chip and peel from the edges | Run the brush along the free edge with each coat including base and top |
Light Blue Nail Design Variations
| Style | Description | Best Occasion |
| Classic Light Blue French Tips | Traditional french manicure with light blue tips instead of white | Professional settings, everyday wear |
| Ombre Blue Fade | Gradient effect from white or clear to light blue | Spring weddings, beach vacations |
| Light Blue Chrome Nails | Mirror-finish powder over light blue base for metallic shine | Evening events, parties |
| Minimalist Blue Line Art | Simple geometric lines or dots in white or navy on light blue | Modern professional looks |
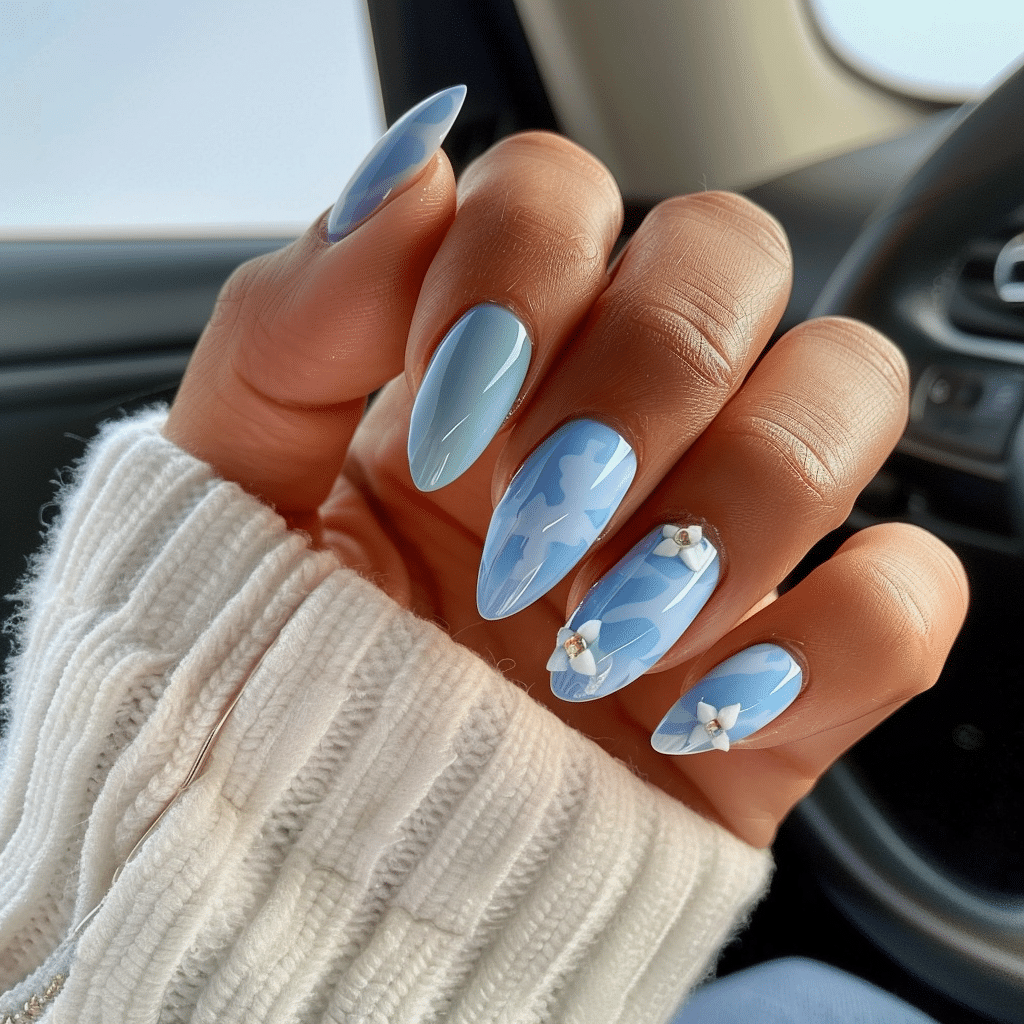
| Floral Light Blue Design | Delicate hand-painted flowers or decals on light blue base | Garden parties, spring celebrations |
| Light Blue Marble Effect | Swirled white veining through light blue for stone appearance | Sophisticated events, photoshoots |
| Glitter Accent Nails | Light blue on most nails with one or two glitter accent nails | Celebrations, festive occasions |
| Matte Light Blue Finish | Soft, non-glossy finish using matte top coat | Trendy casual wear, artistic looks |
Nail Care and Maintenance for Long-Lasting Results
Maintaining your light blue nails requires consistent daily care to preserve the integrity of the gel and protect your natural nails underneath. Apply cuticle oil at least once daily, preferably at night, to keep the skin around your nails hydrated and flexible. This prevents cracking and peeling that can compromise the seal of your gel manicure. Massage the oil into the cuticles and surrounding skin to improve circulation and promote healthy nail growth.
Wear protective gloves when performing household chores, cleaning with chemicals, or doing dishes to shield your light blue nails from harsh substances. Prolonged exposure to water and cleaning agents can weaken the bond between gel layers and cause premature lifting. Keep your hands moisturized with a quality hand cream that does not contain oils that could seep under the gel and create separation.
Avoid using your nails as tools to open packages, scratch surfaces, or pry objects apart, as this creates stress points that lead to cracking and breakage. If you notice any lifting at the edges, resist the urge to peel or pick at the gel, as this removes layers of your natural nail. Instead, apply a small amount of top coat to seal lifted areas temporarily until you can properly maintain or remove the gel.
For expert guidance on maintaining healthy gel nails, explore resources at Gel Nails by Lina for professional care tips.
How to Remove Gel Nails Safely
- File the shiny top coat layer using a 180-grit nail file to break the seal and allow acetone to penetrate.
- Soak cotton pads in pure acetone and place one on each nail, ensuring complete coverage of the gel surface.
- Wrap each fingertip tightly with aluminum foil to hold the cotton in place and trap heat for faster breakdown.
- Wait 10 to 15 minutes without disturbing the wraps to allow the acetone to dissolve the gel layers.
- Remove the foil and cotton from one nail and gently push the softened gel toward the free edge using a wooden cuticle stick.
- Avoid scraping or forcing gel off if it resists, instead rewrap and soak for an additional five minutes.
- Buff away any remaining residue gently once all gel has been removed from the nail surface.
- Wash hands thoroughly with soap and water to remove all acetone traces from skin and nails.
- Apply cuticle oil generously and massage into nails and surrounding skin to restore moisture.
- Allow nails to rest for at least 24 hours before applying a new gel manicure to prevent over-processing.
Nail Health and Safety Considerations
Protecting your natural nails while enjoying beautiful light blue gel manicures requires attention to proper application and removal techniques. Over-filing the nail plate to create texture can thin the nail excessively, leading to weakness, flexibility, and increased risk of breaks. File only the shiny surface layer lightly, just enough to create slight texture for adhesion without removing significant nail material.
Ensure proper ventilation when working with gel products and avoid skin contact with uncured gel polish, as prolonged exposure can lead to sensitization. Use a high-quality UV/LED lamp that cures efficiently without excessive UV exposure, and consider applying broad-spectrum sunscreen to hands before curing to protect skin. Never use a damaged lamp or one with burned-out bulbs, as incomplete curing leaves gel soft and increases the risk of allergic reactions.
Frequently Asked Questions
How long do light blue gel nails last?
Light blue gel nails typically last between two to three weeks with proper application and care. The longevity depends on factors such as nail growth rate, daily activities, and how well you maintain the manicure. Following proper prep techniques and avoiding excessive water exposure helps maximize wear time without chipping or lifting.
How to remove gel nails safely at home?
Remove gel nails safely by filing the top coat, soaking nails in pure acetone for 10 to 15 minutes, and gently pushing off softened gel. Never peel or force gel off, as this removes layers of your natural nail and causes significant damage. Always finish with cuticle oil to restore moisture lost during the acetone soaking process.
What is the difference between gel nails and acrylic nails?
Gel nails cure under UV or LED light and provide a more flexible, natural appearance with a glossy finish. Acrylic nails use a liquid monomer and powder polymer that air-dries to create a harder, more rigid enhancement. Gel nails generally cause less damage to natural nails and offer easier removal than traditional acrylics.
Why do my gel nails peel after a few days?
Gel nails peel prematurely due to improper nail preparation, moisture or oil on the nail plate, or gel application that touches the skin. Insufficient curing time, thick gel layers, or using old products also contribute to peeling. Ensure thorough cleansing, thin coats, complete curing, and proper capping of the free edge to prevent early lifting.
How can I make my gel nails last longer?
Make gel nails last longer by applying thin coats, curing properly, capping free edges with every layer, and avoiding water exposure for two hours after application. Daily cuticle oil application, wearing gloves during chores, and treating nails gently prevents premature chipping. Proper nail preparation including cleansing and light buffing creates the foundation for extended wear.
Conclusion
Light blue nails offer endless possibilities for creating stunning manicures that suit any style preference or occasion. By following proper application techniques, using quality gel products, and maintaining consistent nail care, you can achieve salon-quality results that last for weeks. Whether you choose classic solid color, intricate nail art, or trendy design variations, light blue provides the perfect versatile base. Try these techniques and discover why light blue nails remain a timeless favorite among nail enthusiasts worldwide.