Pink Nails: The Ultimate Guide to Gel Polish, Design Ideas and Care

Pink nails remain the most versatile and universally flattering nail color choice for women across all ages and styles. This timeless shade offers endless variations from soft ballet pink to vibrant hot pink, making it perfect for casual wear, professional settings, and special occasions.
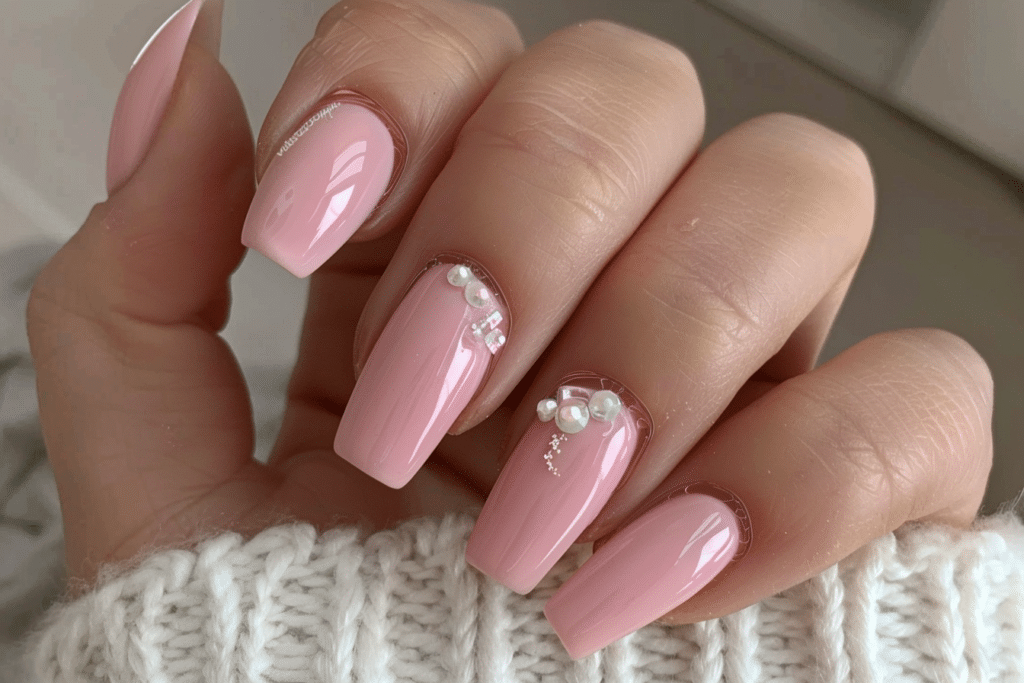
Understanding proper gel application techniques ensures your pink manicure stays chip-free and glossy for weeks while maintaining optimal nail health throughout the process.
| Topic | Details |
|---|---|
| Category | Gel Nails / Nail Art |
| Skill Level | Beginner to Intermediate |
| Time Needed | 45-60 minutes |
| Tools Needed | UV/LED lamp, gel polish, base coat, top coat, nail file, buffer |
| Best For | Anyone seeking durable, glossy pink manicures with professional results |
Table of Contents
Why This Pink Nail Technique Works
Pink gel polish provides superior adhesion and longevity compared to traditional nail lacquer because it bonds directly to the nail plate through UV or LED light curing. The gel formula creates a flexible yet durable layer that moves naturally with your nails, preventing chips and cracks that commonly occur with regular polish. This chemical bonding process ensures the pink pigment stays vibrant and glossy without fading or dulling over time.
The success of pink nails lies in proper nail preparation combined with thin, even gel layers that cure completely under appropriate lighting. Professional nail technicians understand that pink shades, especially lighter tones, require careful application to avoid streaking or patchiness. The reflective properties of quality gel formulas enhance the pink pigment, creating depth and dimension that makes nails appear healthier and more polished than other color options.
Pink tones naturally complement all skin undertones, making them the safest color choice for clients unsure about nail color selection. Cool pink shades enhance cooler skin tones while peachy-pink variations flatter warmer complexions perfectly. This universal appeal combined with gel technology’s durability makes pink nails the most requested service at professional salons worldwide.
Tools and Products Needed
| Product | Purpose | Alternatives |
|---|---|---|
| UV/LED Lamp | Cures gel polish layers | Professional salon curing system |
| Gel Base Coat | Protects natural nail and enhances adhesion | Strengthening base coat formula |
| Pink Gel Polish | Provides color and coverage | Multiple pink shade variations |
| Gel Top Coat | Seals color and adds shine | No-wipe top coat option |
| Nail File (180 grit) | Shapes nail edges | Glass nail file |
| Nail Buffer | Smooths nail surface | 240 grit buffer block |
| Cuticle Pusher | Removes cuticle from nail plate | Wooden orange stick |
| Cuticle Oil | Hydrates and nourishes | Vitamin E oil or jojoba oil |
| Nail Dehydrator | Removes moisture and oils | Isopropyl alcohol 70% |
| Lint-Free Wipes | Cleanses nail surface | Cotton pads without fibers |
Visit Gel Nails by Lina for professional-grade pink gel polish collections and application tools designed for both beginners and experienced nail enthusiasts.
Step-by-Step Application Guide
Nail Preparation
- Remove any existing polish completely using acetone-soaked cotton pads and gentle pressure.
- File your nails into your desired shape using smooth, one-directional strokes from corner to center.
- Push back cuticles gently using a cuticle pusher at a 45-degree angle.
- Buff the nail surface lightly using a 240-grit buffer to remove shine and create texture.
- Wash hands thoroughly with soap and water to remove all debris and oils.
- Wipe each nail with nail dehydrator using lint-free wipes to ensure completely dry surfaces.
Base Coat Application
- Apply a thin layer of gel base coat starting from the cuticle area and sweeping toward the free edge.
- Cap the free edge by running the brush along the nail tip to seal the edge.
- Cure under UV lamp for 60 seconds or LED lamp for 30 seconds according to manufacturer instructions.
- Check that base coat appears smooth and even without any bubbles or thick areas.
Gel Polish Layers
- Apply the first thin layer of pink gel polish using minimal pressure on the brush.
- Start slightly away from the cuticle to prevent flooding and pull color toward the free edge.
- Cap the free edge with pink polish to prevent premature chipping.
- Cure the first pink coat for 60 seconds in UV or 30 seconds in LED light.
- Apply a second thin layer of pink gel polish for full opacity and even coverage.
- Cure the second color coat following the same timing as the first layer.
- Add a third coat only if necessary for lighter pink shades requiring additional coverage.
Curing Process
- Position your hand completely inside the lamp ensuring all nails receive direct light exposure.
- Keep fingers still and flat during the entire curing cycle to prevent smudging.
- Allow the lamp to complete its full cycle without removing your hand early.
- Check each nail after curing to ensure no tacky or uncured spots remain on the surface.
Finishing and Top Coat
- Apply a thin layer of gel top coat covering the entire nail surface and edges.
- Cap the free edge thoroughly with top coat for maximum durability and chip resistance.
- Cure the top coat layer for 60 seconds in UV or 30 seconds in LED lamp.
- Wipe away the sticky residue layer using alcohol and lint-free wipes if using a traditional top coat.
- Apply cuticle oil around each nail and massage into the skin for instant hydration.
- Moisturize hands with hand cream to complete your pink nail manicure service.
Pro Nail Technician Tips
- Apply gel polish in thin layers rather than thick coats to prevent peeling, wrinkling, or incomplete curing that leads to premature lifting.
- Leave a tiny margin between the gel polish and cuticle area to allow for natural nail growth without creating pressure points.
- Cure each layer for the full recommended time regardless of how dry it appears to ensure complete chemical bonding.
- Store pink gel polish bottles upside down for 24 hours before use to prevent pigment separation that causes streaky application.
- Clean the brush between coats by wiping on a lint-free pad to remove excess product and ensure smooth application.
- Avoid touching the nail surface after dehydrating and before applying base coat to prevent oil transfer that compromises adhesion.
Common Gel Nail Mistakes
| Mistake | Why It Happens | How to Fix |
|---|---|---|
| Thick Gel Layers | Applying too much product at once to save time | Use thin coats and build coverage gradually with multiple layers |
| Improper Curing | Removing hand too early or using incorrect lamp wattage | Follow exact timing and ensure lamp bulbs are functioning properly |
| Skipping Nail Prep | Rushing the preparation phase to speed up service | Always buff, dehydrate, and cleanse nails thoroughly before application |
| Flooding the Cuticle | Starting polish too close to the cuticle line | Leave small margin and use gentle pressure when applying near cuticles |
| Not Capping the Edge | Forgetting to seal the free edge with each layer | Run brush along nail tip with every coat including base and top |
Nail Design Variations
| Style | Description | Best Occasion |
|---|---|---|
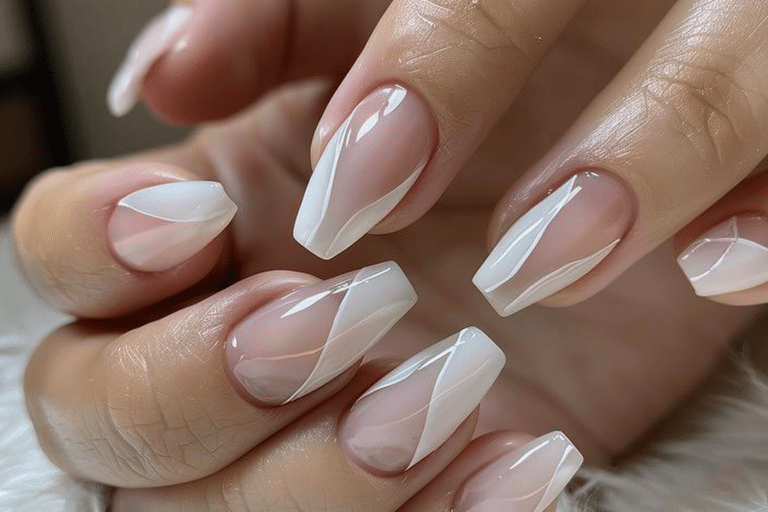
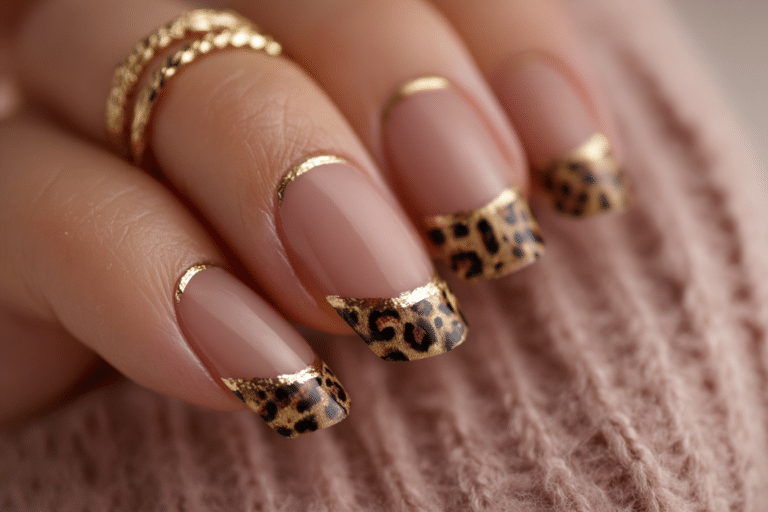
| French Tip With Design | Classic white tips on pink base with accent nail art details | Weddings, bridesmaid nails, professional events |
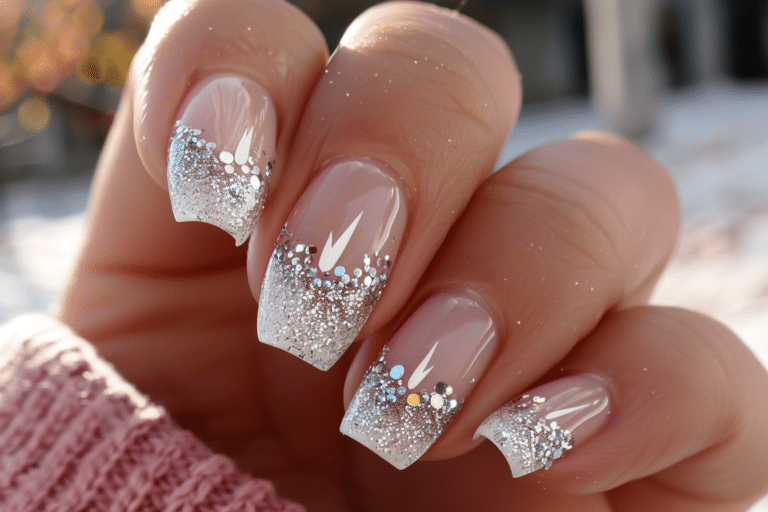
| Pink Prom Nails | Glitter gradients or rhinestone accents on pink gel base | Formal dances, galas, special celebrations |
| Square Nails Summer | Bold pink shades on geometric square nail shapes | Beach vacations, summer parties, casual events |
| Nails 2000s Style | Hot pink chrome or metallic finishes with Y2K aesthetic | Fashion-forward looks, trendy social events |
| Simple Square Nails | Solid light pink on clean square shape for minimalist appeal | Everyday wear, office settings, understated elegance |
| Nail Inspo Summer | Bright pink with tropical designs or ombre sunset effects | Vacation, outdoor festivals, warm weather activities |
| Nails Cute Designs | Soft pink with small hearts, flowers, or playful patterns | Casual outings, romantic dates, fun personal expression |
Explore more pink nail design inspiration and tutorials at Gel Nails by Lina for seasonal trends and step-by-step application guidance.
Nail Care and Maintenance
Maintaining healthy pink nails requires daily cuticle oil application to prevent dryness and brittleness around the nail bed. Apply cuticle oil twice daily, massaging it thoroughly into the skin surrounding each nail to promote circulation and flexibility. This simple habit prevents lifting at the cuticle area and extends the life of your gel manicure significantly while keeping natural nails underneath strong and hydrated.
Wear gloves during household cleaning tasks to protect your pink gel nails from harsh chemicals that can dull the shine and weaken the gel bond. Avoid using your nails as tools to open cans, peel labels, or scratch surfaces, as these actions create stress points that lead to cracking. Instead, use proper implements for daily tasks to preserve the integrity of your manicure and prevent unnecessary damage.
Schedule gel polish changes every two to three weeks to maintain nail health and prevent excessive product buildup. Allow your natural nails to breathe between gel applications by taking occasional breaks and applying strengthening treatments. Proper removal techniques combined with regular maintenance ensure your nails remain strong and healthy while enjoying beautiful pink gel manicures year-round.
How to Remove Gel Nails Safely
- File the shiny top coat layer gently using a coarse nail file to break the seal and allow acetone penetration.
- Soak ten cotton pads with pure acetone and place one on each nail surface completely covering the gel.
- Wrap each finger with small pieces of aluminum foil to secure cotton pads and create heat for better removal.
- Wait 10 to 15 minutes allowing the acetone to dissolve the gel polish layers without forcing or scraping.
- Remove foil wraps and cotton pads, then gently push softened gel off using a wooden cuticle stick.
- Buff away any remaining gel residue carefully without applying excessive pressure to the natural nail plate.
- Wash hands thoroughly with soap and water to remove all acetone traces from skin and nails.
- Apply cuticle oil generously and massage into nails and surrounding skin for immediate rehydration.
- Use a rich hand cream to restore moisture balance after the drying effects of acetone exposure.
Nail Health and Safety
Protecting your natural nails during pink gel applications requires attention to proper preparation techniques that minimize filing and buffing damage. Over-filing the nail surface removes too much of the protective nail plate, creating thin, weak nails prone to breakage and splitting. Use light pressure when buffing and stop once you achieve a slightly matte surface that provides adequate texture for gel adhesion without compromising nail strength.
Monitor your nails for signs of infection including redness, swelling, tenderness, or unusual discharge around the nail bed or cuticle area. Fungal infections can develop when moisture becomes trapped between the natural nail and gel product due to lifting or improper application. If you notice any concerning symptoms, remove the gel polish immediately and consult a dermatologist or healthcare provider for appropriate treatment before reapplying any nail enhancements.
Frequently Asked Questions
How long do gel nails last?
Gel nails typically last two to three weeks without chipping when applied correctly using proper techniques and quality products. The longevity depends on your daily activities, nail growth rate, and how well you maintain the manicure with cuticle oil. Pink gel polish shows less visible wear than darker shades, making it ideal for extending time between salon visits while maintaining a polished appearance.
How to remove gel nails safely at home?
Remove gel nails safely by soaking cotton pads in pure acetone, placing them on each nail, and wrapping with aluminum foil for 10 to 15 minutes. Gently push softened gel off using a wooden stick without forcing or scraping the natural nail surface underneath. Always follow acetone removal with cuticle oil and hand cream to restore moisture balance and prevent dryness or peeling of the surrounding skin.
What is the difference between gel nails and acrylic nails?
Gel nails use a polish formula that cures under UV or LED light while acrylic nails use a liquid and powder mixture that air-dries hard. Gel applications appear more natural, flexible, and glossy compared to the thicker, more rigid structure of acrylics. Pink gel nails offer easier removal, less damage to natural nails, and a lighter feel that many clients prefer for everyday wear.
Why do gel nails peel or lift prematurely?
Gel nails peel when moisture, oils, or debris remain on the nail surface before application, preventing proper adhesion to the natural nail plate. Skipping the dehydration step, applying thick layers, or flooding the cuticle area also causes premature lifting within days of application. Ensure thorough nail preparation, apply thin coats, and leave a small margin at the cuticle to prevent peeling and extend manicure longevity.
How can I make my gel nails last longer?
Make gel nails last longer by applying cuticle oil twice daily, wearing gloves during cleaning tasks, and avoiding nail-biting or picking habits. Ensure each gel layer cures completely during application and cap the free edge with every coat including base, color, and top coat. Proper preparation combined with gentle daily care routines extends your pink gel manicure to three weeks or longer between salon visits.
Find professional gel nail products and detailed tutorials at Gel Nails by Lina to achieve salon-quality results at home.
Conclusion
Pink nails remain the most versatile and timeless choice for gel manicures, offering flattering shades for every skin tone and occasion. Mastering proper application techniques ensures your pink gel polish stays chip-free and glossy for weeks while maintaining optimal nail health. Follow these professional guidelines for nail preparation, thin layer application, and proper curing to achieve salon-quality results. With the right tools, techniques, and maintenance routines, you can enjoy beautiful pink nails that enhance your overall appearance and boost your confidence every day.