


Picture this: it’s a chilly morning, you’re at your desk, and your fingers are freezing. But you can’t wear regular gloves because you need to type, click, or scroll. So you sit there, hands tucked into your sleeves, typing with your knuckles like some kind of winter typist.
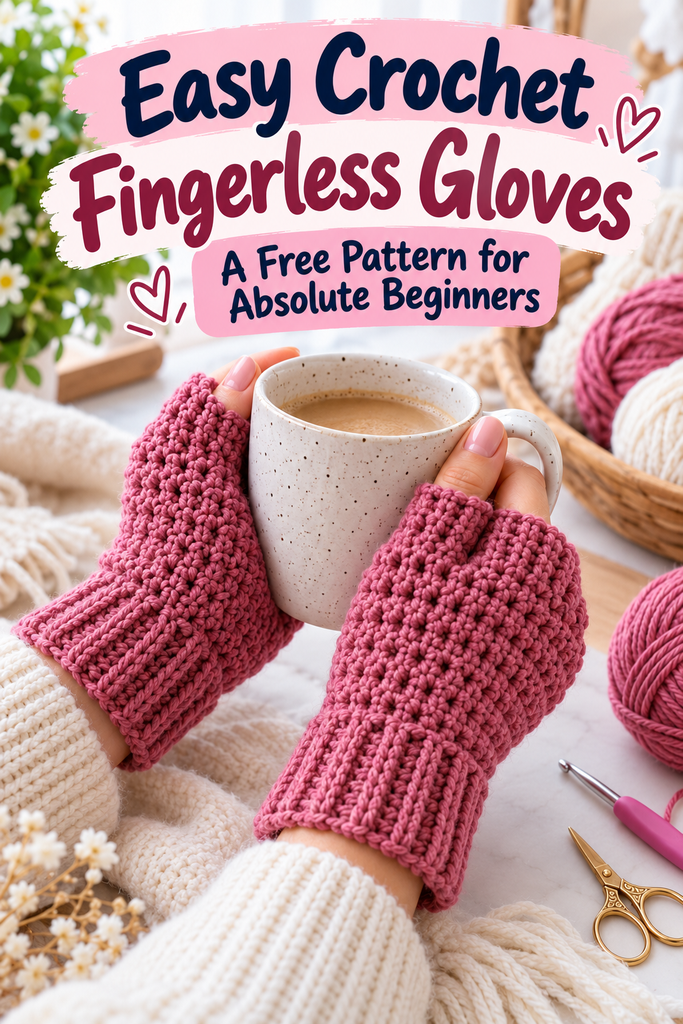
We’ve all been there. And here’s the good news: the fix is something you can make yourself, in an evening, even if you’ve never finished a crochet project in your life.
Fingerless gloves are, honestly, one of the best first projects you can pick. There are no fingers to shape and no tricky increases. It’s one simple stitch and one rectangle, and that’s the whole idea. Let’s make it.
Table of Contents
Key Takeaways
- You only need one stitch (half double crochet) and one rectangle to make a pair.
- A smooth, mid-weight acrylic or wool-blend yarn is the friendliest choice for beginners.
- A pair takes roughly 100 to 150 yards (90 to 140 m) of yarn, so a single skein is plenty.
- Most beginners finish a pair in one evening or a lazy weekend.
- No time or patience for sewing? There’s a no-crochet sock shortcut at the end.
What’s the Point of Fingerless Gloves, Anyway?
It’s a fair question, and a common one. The point is simple: warmth without giving up dexterity.
Your hands and wrists stay cozy, but your fingertips stay free. That’s why they’re a favorite for people who type all day, play instruments, ride bikes, take photos, or game on cold evenings. They’re also popular with anyone who wants to answer a phone without peeling off a glove. And yes, they simply look good, which is part of why they’ve stuck around for so long.
You’ll also hear them called fingerless mitts, wrist warmers, texting gloves, or glovelettes. If they run all the way up the forearm, most people call them arm warmers. Same idea, different length.
Why Crochet Gloves Are Perfect for Beginners
Here’s the thing most pattern writers forget: once you know how to do something, you can’t remember what it was like not to know it. That’s why so many patterns feel like a secret code.
So let’s skip the code. This pattern is deliberately simple. You’ll make a flat rectangle, fold it, and stitch up the side, leaving a gap for your thumb. That’s it.
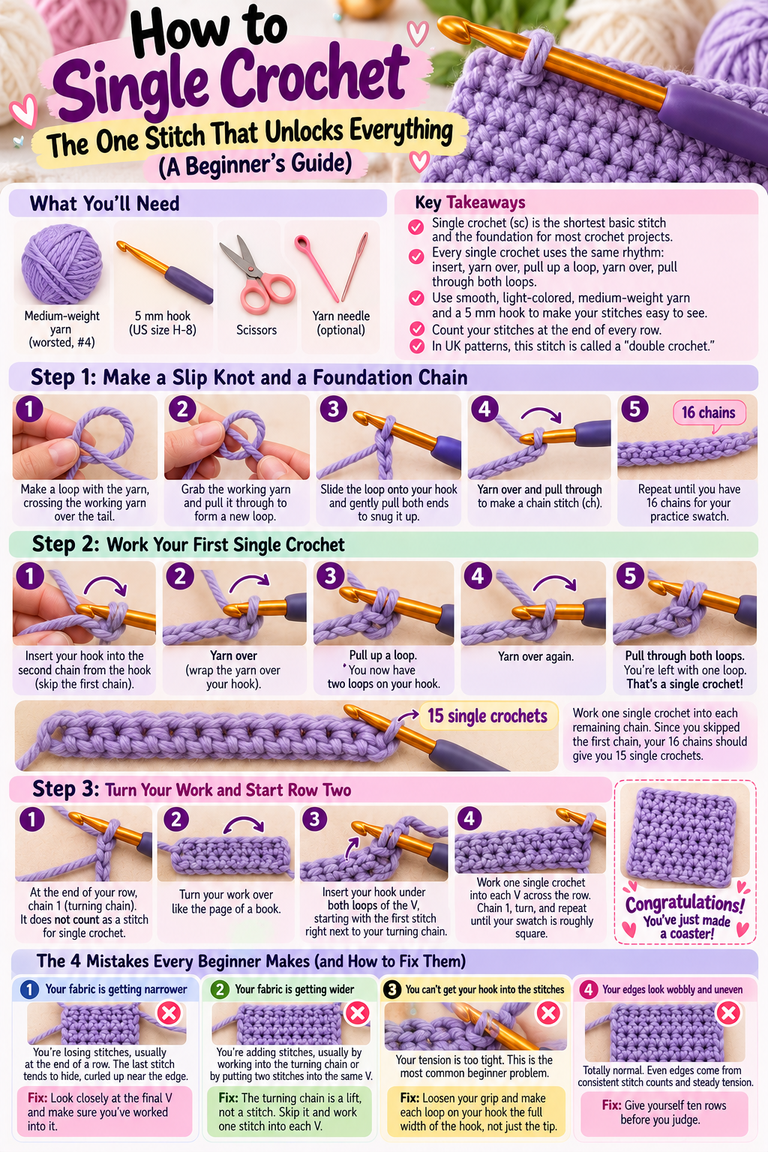
You don’t need to shape a single finger, and you don’t need any fancy techniques. If you can make a chain and a half double crochet, you can make these.
What You’ll Need

- Yarn: about 100 to 150 yards (90 to 140 m) of worsted-weight (medium, category 4) yarn. One 3.5 oz (100 g) skein is more than enough.
- Hook: 5.0 mm (size H-8). If your stitches feel very tight, go up half a size.
- Yarn needle: for sewing the seam and weaving in the ends.
- Scissors and a tape measure (or just your own hand, as you’ll see below).
Which Yarn Is Best for Gloves?
For a first pair, pick something smooth and light-colored. Dark, fuzzy yarn hides your stitches, which makes mistakes hard to spot and even harder to fix.
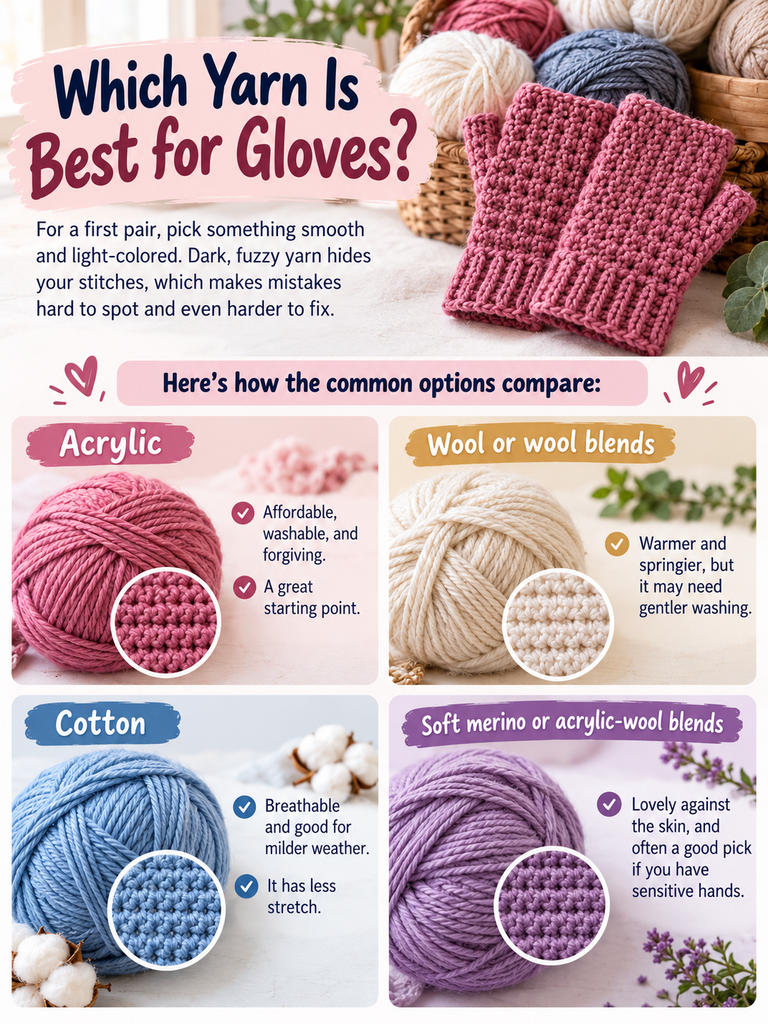
Here’s how the common options compare:
- Acrylic: affordable, washable, and forgiving. A great starting point.
- Wool or wool blends: warmer and springier, but it may need gentler washing.
- Cotton: breathable and good for milder weather, though it has less stretch.
- Soft merino or acrylic-wool blends: lovely against the skin, and often a good pick if you have sensitive hands.
The Free Pattern: Step by Step
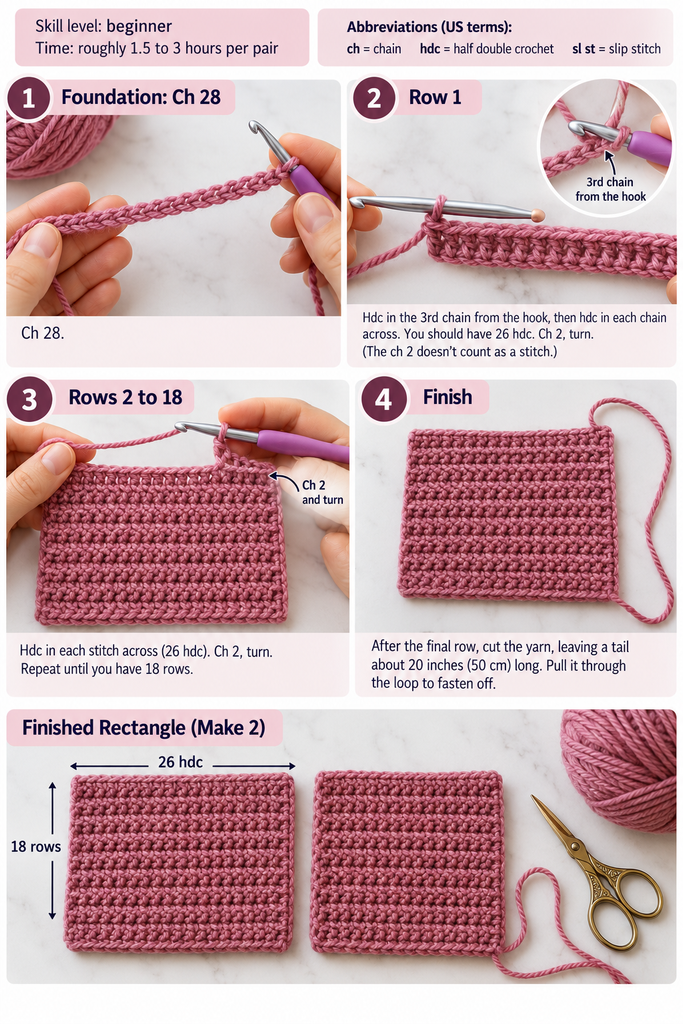
Skill level: beginner. Time: roughly 1.5 to 3 hours per pair, depending on your speed.
Abbreviations (US terms): ch = chain, hdc = half double crochet, sl st = slip stitch.
Make the Rectangle (Make 2)
- Foundation: Ch 28.
- Row 1: Hdc in the 3rd chain from the hook, then hdc in each chain across. You should have 26 hdc. Ch 2, turn. (The ch 2 doesn’t count as a stitch.)
- Rows 2 to 18: Hdc in each stitch across (26 hdc). Ch 2, turn.
- Finish: After the final row, cut the yarn, leaving a tail about 20 inches (50 cm) long. Pull it through the loop to fasten off.
That’s the entire rectangle. Make a second one exactly the same.
That’s the entire rectangle. Make a second one exactly the same.
Test It on Your Own Hand
This is my favorite tip, because you don’t have to trust me. Trust your hand instead.
Partway through your first rectangle, wrap it around your hand just below your knuckles. It should feel snug but not tight, and the two short ends should nearly meet. If it feels loose, remove a couple of stitches from your foundation chain next time. If it feels tight, add two.
Everyone’s tension and hands are different, and this quick check saves you from a pair that doesn’t fit.
Assemble the Gloves
- Fold one rectangle in half so the two side edges (the ones with 18 rows) meet.
- Thread the long tail onto your yarn needle.
- Starting from the wrist end, seam the edges together with a simple whip stitch for about 2 inches (5 cm).
- Now stop seaming and leave a gap of about 2 inches (5 cm). This is your thumb hole.
- Pick up the seam again and continue to the top, toward the knuckles.
- Weave in all loose ends, then repeat with the second glove.
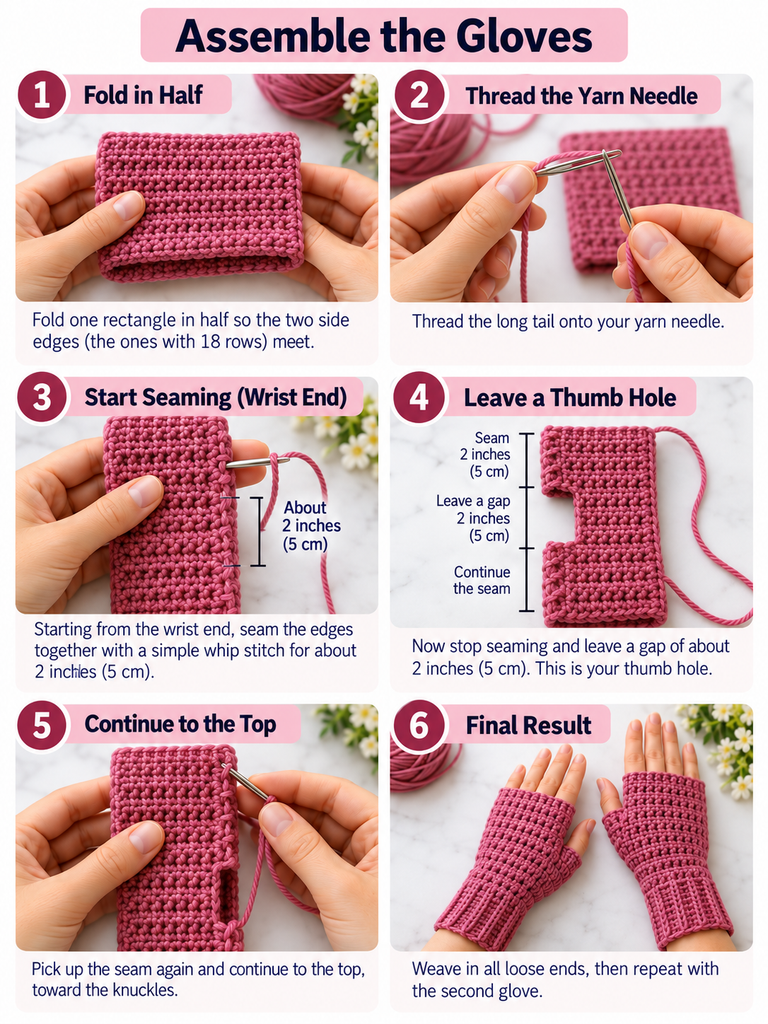
Slip one on. If the thumb gap feels too small or too big, simply unpick a few stitches and adjust. That’s the beauty of a seam: it’s easy to redo.
Common Questions
How long does it take to crochet fingerless gloves?
Most beginners finish a pair in an evening or across a relaxed weekend. Experienced crocheters can finish faster, but there’s no prize for speed here. Enjoy it.
Is it better to crochet or knit gloves?
Honestly, it depends on you. Crochet tends to make a slightly thicker, sturdier fabric, and if you make a mistake it’s usually easier to undo, since you’re only working one loop at a time. Knitting tends to produce a stretchier fabric. For a first project, many people find crochet more forgiving.
Are fingerless gloves easy to knit?
They’re one of the more approachable knitting projects too, especially worked flat in a simple stitch. But if you’re deciding between the two, the rectangle method above is about as easy as it gets.
Are fingerless gloves practical?
Very. They keep your wrists and the backs of your hands warm while leaving your fingers free for typing, tools, instruments, and touchscreens. Not bad for a project made from a rectangle.
Can I make these for arthritic hands?
Many people with sore or stiff hands enjoy soft, gentle fabric around the wrists and hands. If that’s you, choose a soft, stretchy yarn such as a merino or acrylic blend, keep your tension relaxed, and go for a slightly looser fit so nothing pinches. Fingerless designs are also easier to put on and take off. That said, this is a comfort tip and not medical advice, so check with your doctor or a physical therapist if you have specific needs.
Where can I find more free glove patterns?
Once you’ve finished this pair, look for free patterns from yarn brands, crochet blogs, and community pattern sites. Try searching for terms like “fingerless mitts,” “wrist warmers,” or “arm warmers” to find different lengths and stitch style
No Time to Crochet? Try the Sock Hack
Here’s a fun little shortcut for anyone who wants gloves right now, with no hook and no sewing.
Grab a clean, stretchy sock, ideally a long, snug one. Cut off the toe end, and you have a tube. Then cut a small slit for your thumb, about a third of the way up from the cut end. That’s it: instant fingerless gloves.
Cut edges can fray, so if you want them to last, fold the raw edges under and stitch them down with a few quick stitches. It’s not as cozy or as handmade as the crochet version, but it’s a surprisingly good emergency fix, and a fun craft to try with kids.
Make It Your Own
Once you have the basic pair down, you can play around with it:
- Go longer: add more rows for arm warmers that reach your elbows.
- Change the color: stripes are just a color change at the end of a row.
- Add texture: swap in a different stitch once you feel confident.
- Gift them: a handmade pair, with a note, is a wonderful present.
Wrapping Up
Remember that cold morning at the desk, with your hands tucked in your sleeves? A pair of fingerless gloves fixes that. And unlike most fixes, this one comes with the quiet pride of saying, “I made these.”
You don’t need to be an expert. You need a hook, some yarn, one stitch, and a rectangle. The rest is just practice, and every stitch gets easier.
Your Turn
Give this pattern a go and let me know how it goes! Did you make any changes? What color did you choose? Share your finished pair, or any questions, in the comments below. And if a friend keeps complaining about cold hands, send this their way.


One Comment