Ever scrolled past a photo, stopped, scrolled back, and thought, “I need that… but in my fabric”?
That’s exactly what happened to me with this one. A sage-green gingham bag slung over a shoulder, puffy and soft, with the strap knotted into a bow like someone tied it on their way out the door. Nothing flashy. No hardware, no logo screaming at you. Just a bag that looks like real, easy, everyday life, with a little sweetness thrown in.
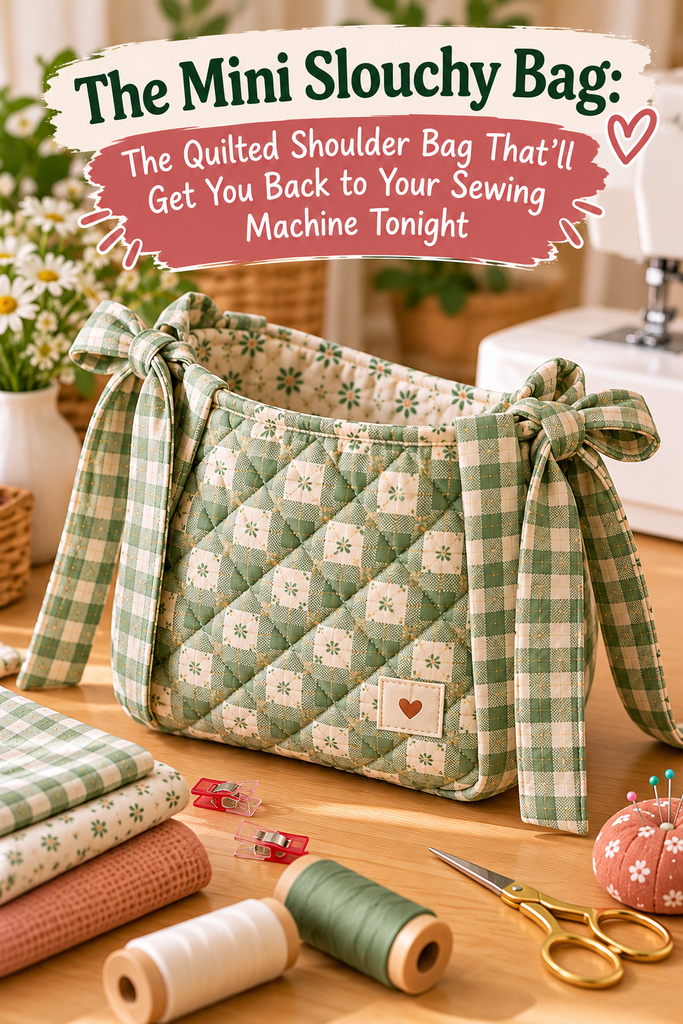
And here’s the best part: you don’t buy it. You make it. It’s called The Mini Slouchy Bag, a sewing pattern from Studio Pattern Co., and I honestly think it’s one of the smartest little projects you can pick up this season. Let me show you why, and then walk you through how it comes together.
Quick Takeaways Before We Dive In
- What it is: A downloadable PDF sewing pattern for a soft, slouchy shoulder bag.
- Skill level: Advanced beginner. Perfect if you’ve sewn a few simple things and want your next step.
- Signature details: A quilted exterior with diamond stitching and adjustable tie straps that knot into bows.
- Suggested fabrics: Linen, cotton, and denim.
- Printing: Includes a print-at-home version and an A0 copyshop file, available in all sizes.
So What Makes This Bag Different From Every Other Tote?
Let’s be honest: the fabric bag world is crowded. There’s a flat rectangle tote with two handles on every corner of the internet. So why this one?
For me, it comes down to two small details that change everything.
First, the quilted exterior. Those crisscrossing diamond lines give the bag body and a soft, pillowy puff, so it looks full and cozy even when there’s barely anything inside. And it’s not just pretty. The padding protects your stuff and makes the fabric sturdier.
Second, the adjustable tie straps. Instead of a fixed strap, the ties knot into bows at the sides of the bag. That means you decide the length: tie them short to tuck the bag under your arm, or leave them long so it hangs loose off your shoulder. And the bows themselves? They’ve become the bag’s whole personality.
Picture it: the same bag tied short with a summer dress, then tied long with a chunky cardigan and white linen trousers (exactly like the photo). One bag, several looks.
“Advanced Beginner”: Is This Really Your Level?
I know that hesitation. “Advanced” sounds scary, “beginner” sounds reassuring, so where do you actually stand?
Here’s my simple test. If you’ve sewn a pillowcase or a basic tote, can sew a reasonably straight line, and have finished a few edges without wanting to throw your machine out the window, you’re ready. The new skills here will mostly be quilting and bagging out a lining (sewing the lining and outer together, then turning everything right side out). Both are worth learning, because they’ll unlock tons of future projects.
Never touched a sewing machine before? I won’t tell you not to try. But sew one small practice piece first, then come back to this one with a little more confidence.
Choosing Your Fabric: This Is Where Your Bag Gets Its Personality
The pattern suggests three fabrics, and each one gives you a completely different bag:
- Linen: Calm, natural, and slightly rumpled in the best way. It softens and wrinkles beautifully with use. Ideal if you love earthy tones and a minimalist vibe.
- Cotton: The easiest to handle and the widest choice of prints, from gingham (like the one pictured) to tiny florals and stripes.
- Denim: For a tougher bag that can take daily abuse, with a relaxed, modern feel.
The bag in the photo is a sage-and-cream gingham, and I’ll admit that combination is having a real moment in home sewing right now. It’s soft, quiet, and goes with almost everything.
A tip from experience: if you go with a check or gingham, give yourself extra time for cutting. Line up the squares between pieces as best you can, because the eye catches a crooked check immediately, especially along the side seams and the top edge.
What You’ll Need
Your pattern will give you exact quantities for your chosen size. As a general shopping list for a bag like this, gather:
- Outer fabric (linen, cotton, or denim)
- Lining fabric (a lightweight cotton works well)
- Batting or fusible fleece for the quilting
- Matching thread
- A fabric marking pen (water- or heat-erasable) and a long ruler
- Pins or sewing clips, fabric scissors or a rotary cutter
- An iron (non-negotiable, trust me)
- Optional: a small woven label for the front, like the one in the photo
How to Make It: Step by Step
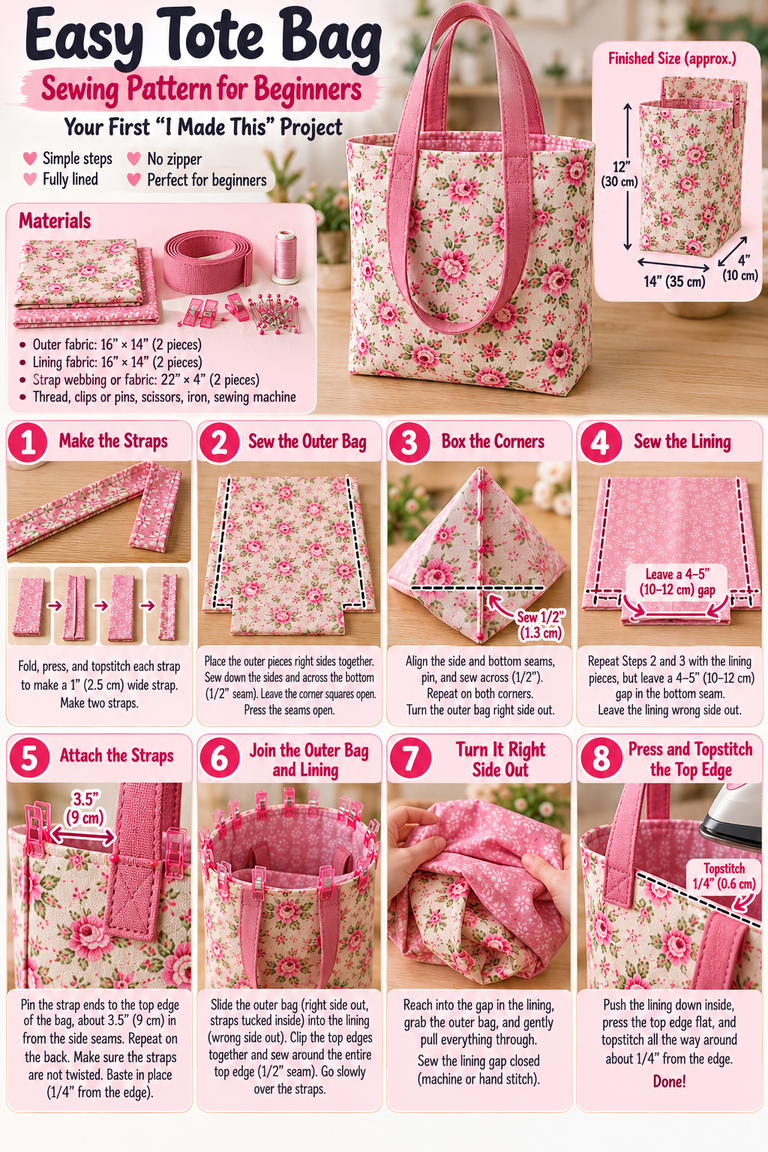
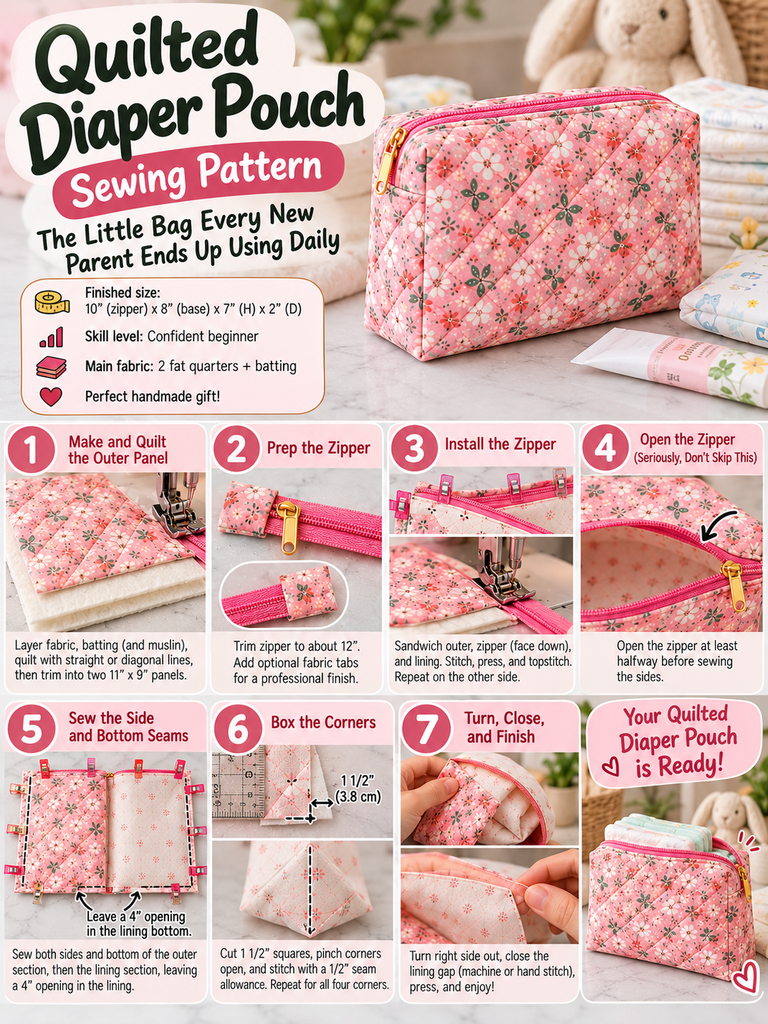
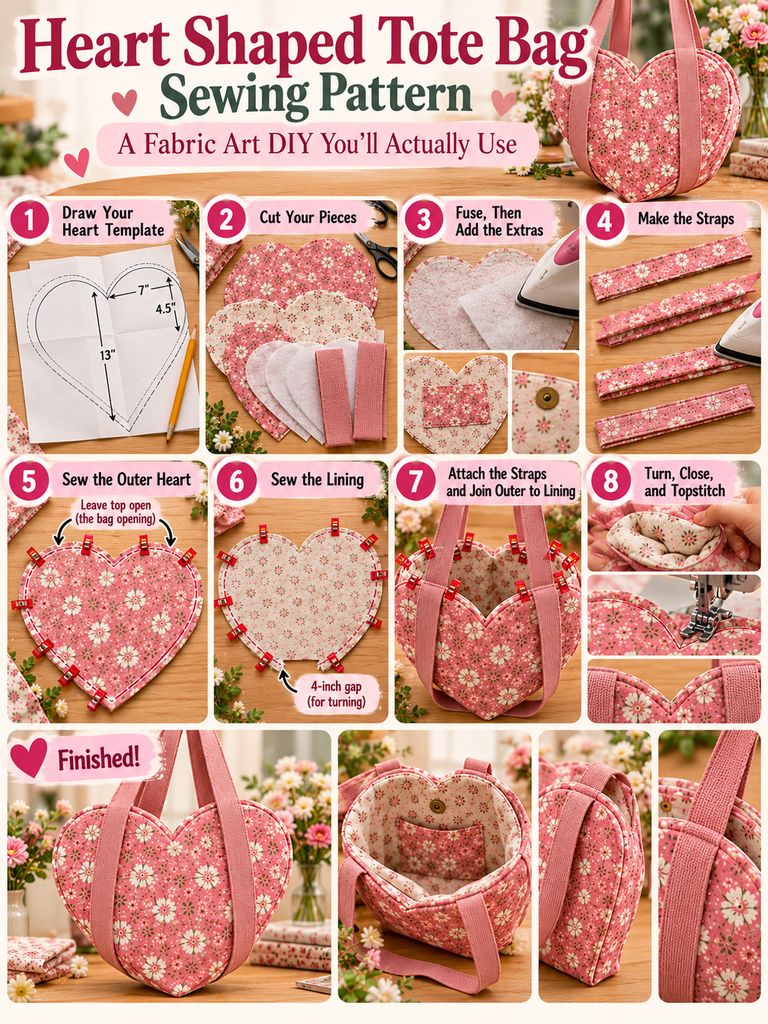
The pattern includes its own detailed instructions and exact piece sizes, so always follow those first. What follows is the overall construction process for a quilted slouchy bag like this one, so you know what to expect before you start and can picture how it all comes together.
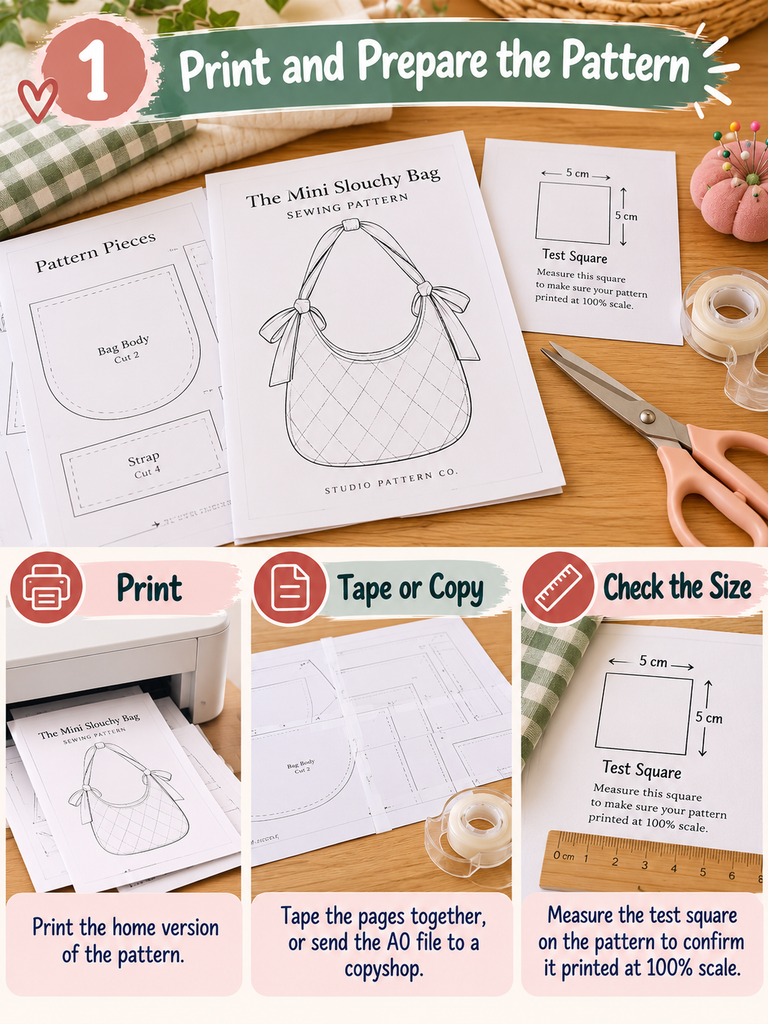
Step 1: Print and Prepare the Pattern
Print the home version and tape the pages together, or send the A0 file to a copyshop. Before cutting anything, check the test square on the pattern to make sure it printed at 100% scale. It’s a two-second check that saves a whole project.
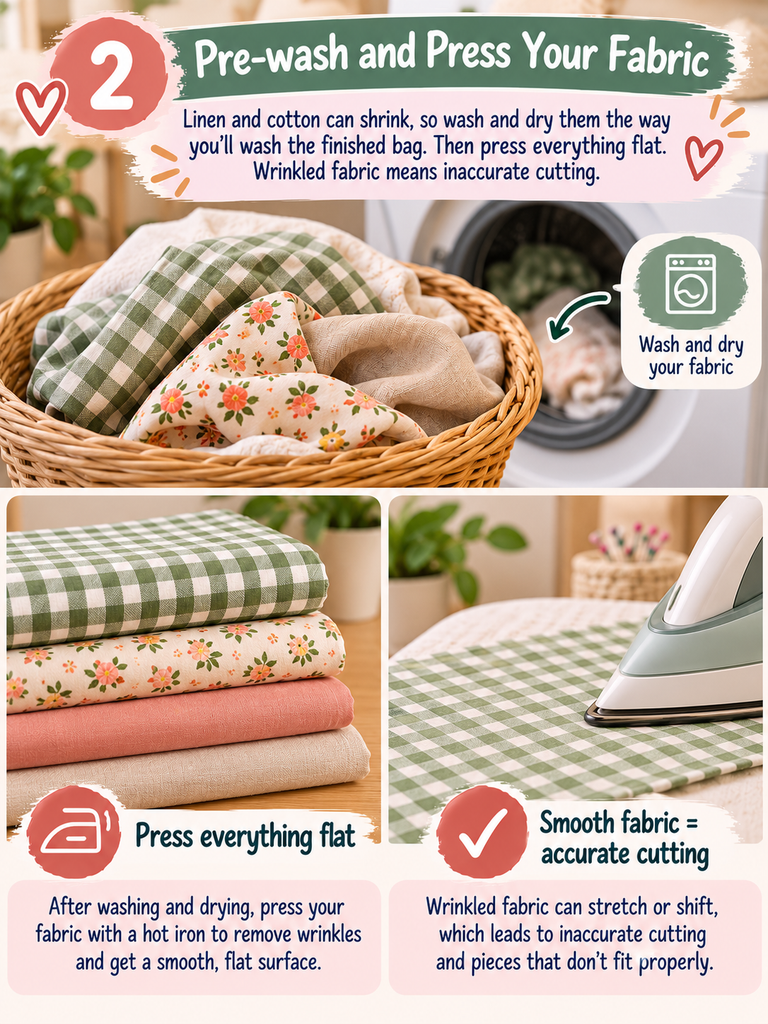
Step 2: Pre-wash and Press Your Fabric
Linen and cotton can shrink, so wash and dry them the way you’ll wash the finished bag. Then press everything flat. Wrinkled fabric means inaccurate cutting.
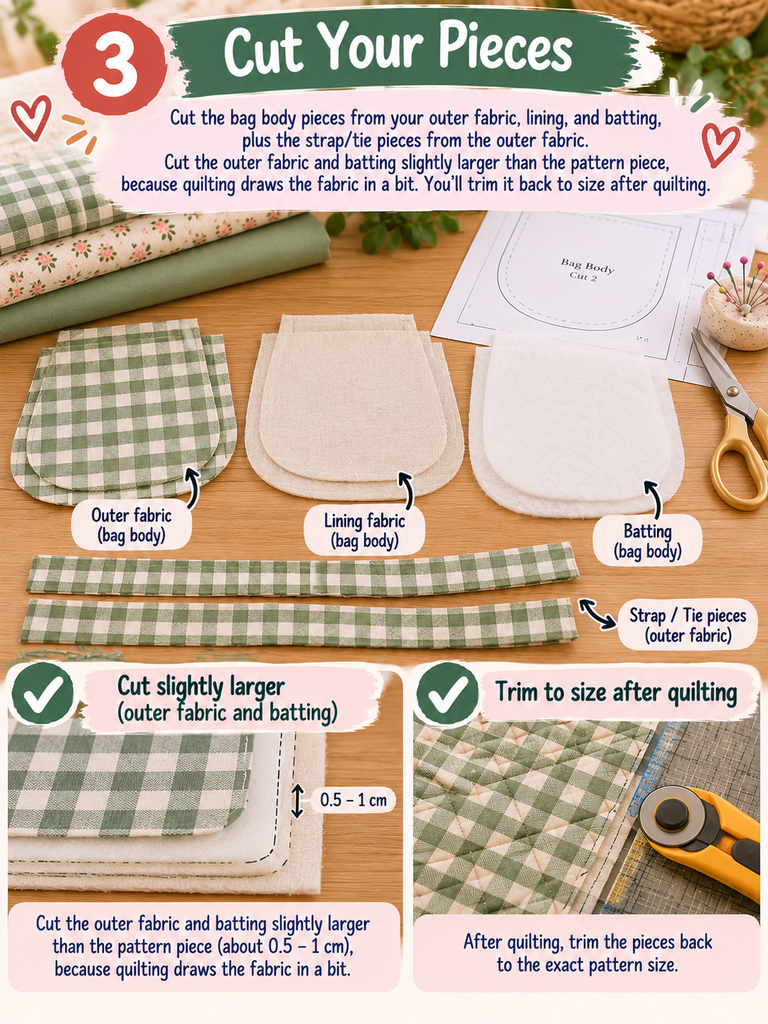
Step 3: Cut Your Pieces
Cut the bag body pieces from your outer fabric, lining, and batting, plus the strap/tie pieces from the outer fabric. Here’s a little trick: cut the outer fabric and batting slightly larger than the pattern piece, because quilting draws the fabric in a bit. You’ll trim it back to size after quilting.
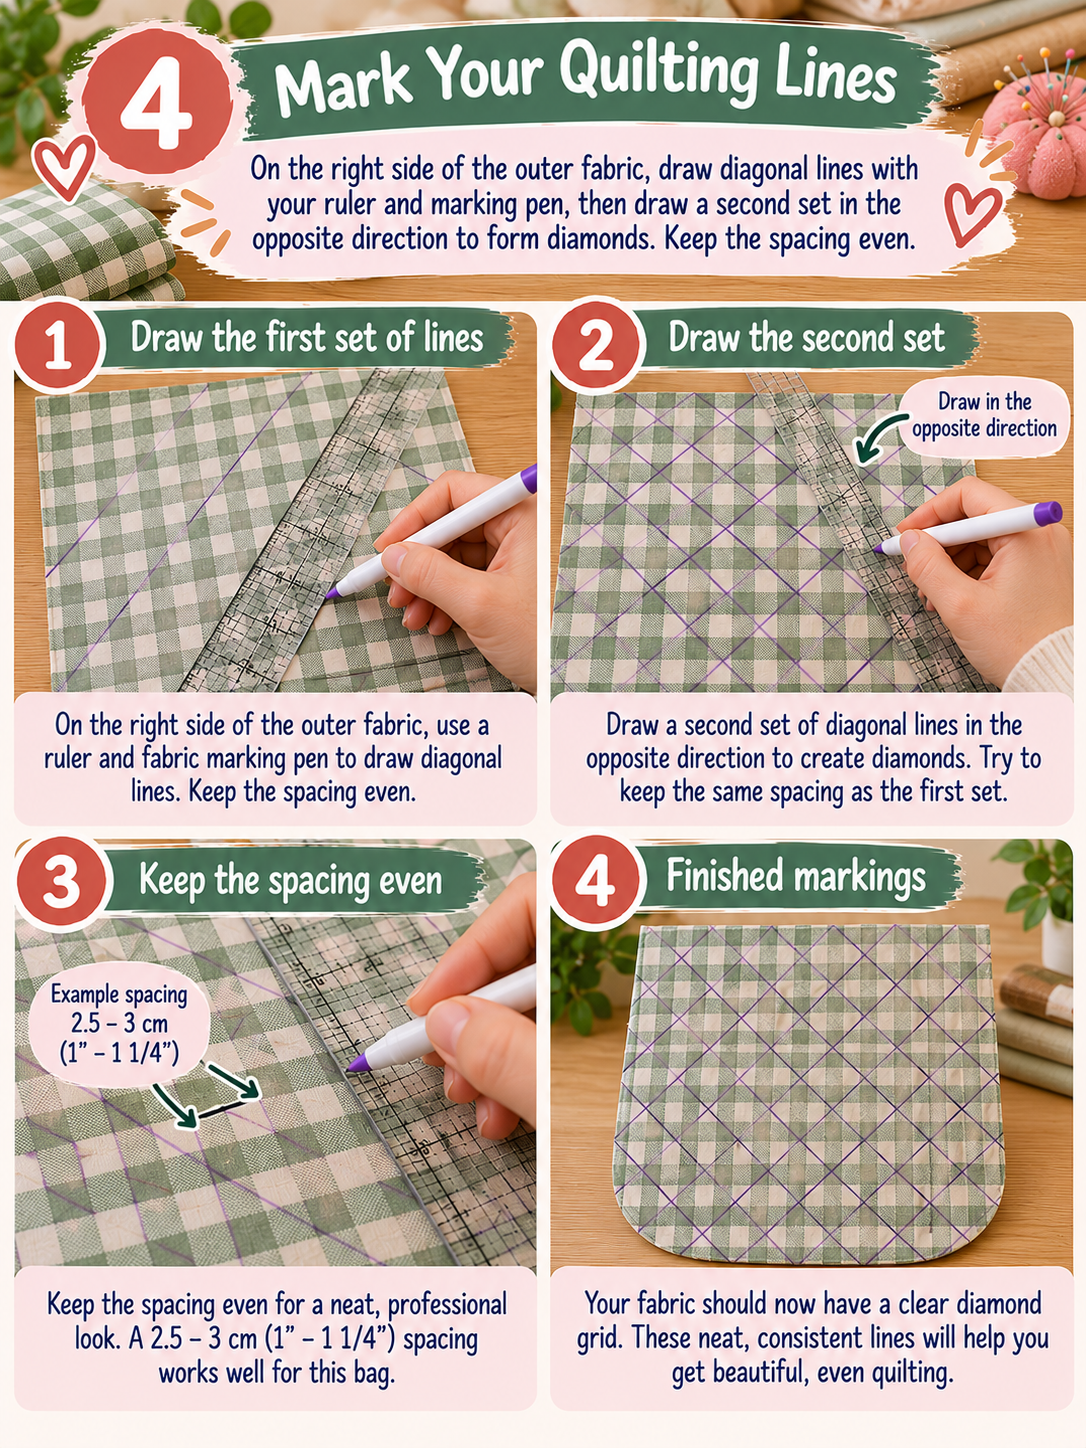
Step 4: Mark Your Quilting Lines
On the right side of the outer fabric, draw diagonal lines with your ruler and marking pen, then draw a second set in the opposite direction to form diamonds. Keep the spacing even. Neat, consistent lines are what make a handmade bag look store-bought.
Step 5: Quilt the Exterior
Layer the batting under the outer fabric (right side up). Pin or clip from the center outward so nothing shifts. Stitch along your marked lines, starting with the middle line and working toward the edges. A slightly longer stitch length and a walking foot, if you have one, help a lot. When you’re done, lay the pattern piece back on top and trim the quilted panel to the exact size.

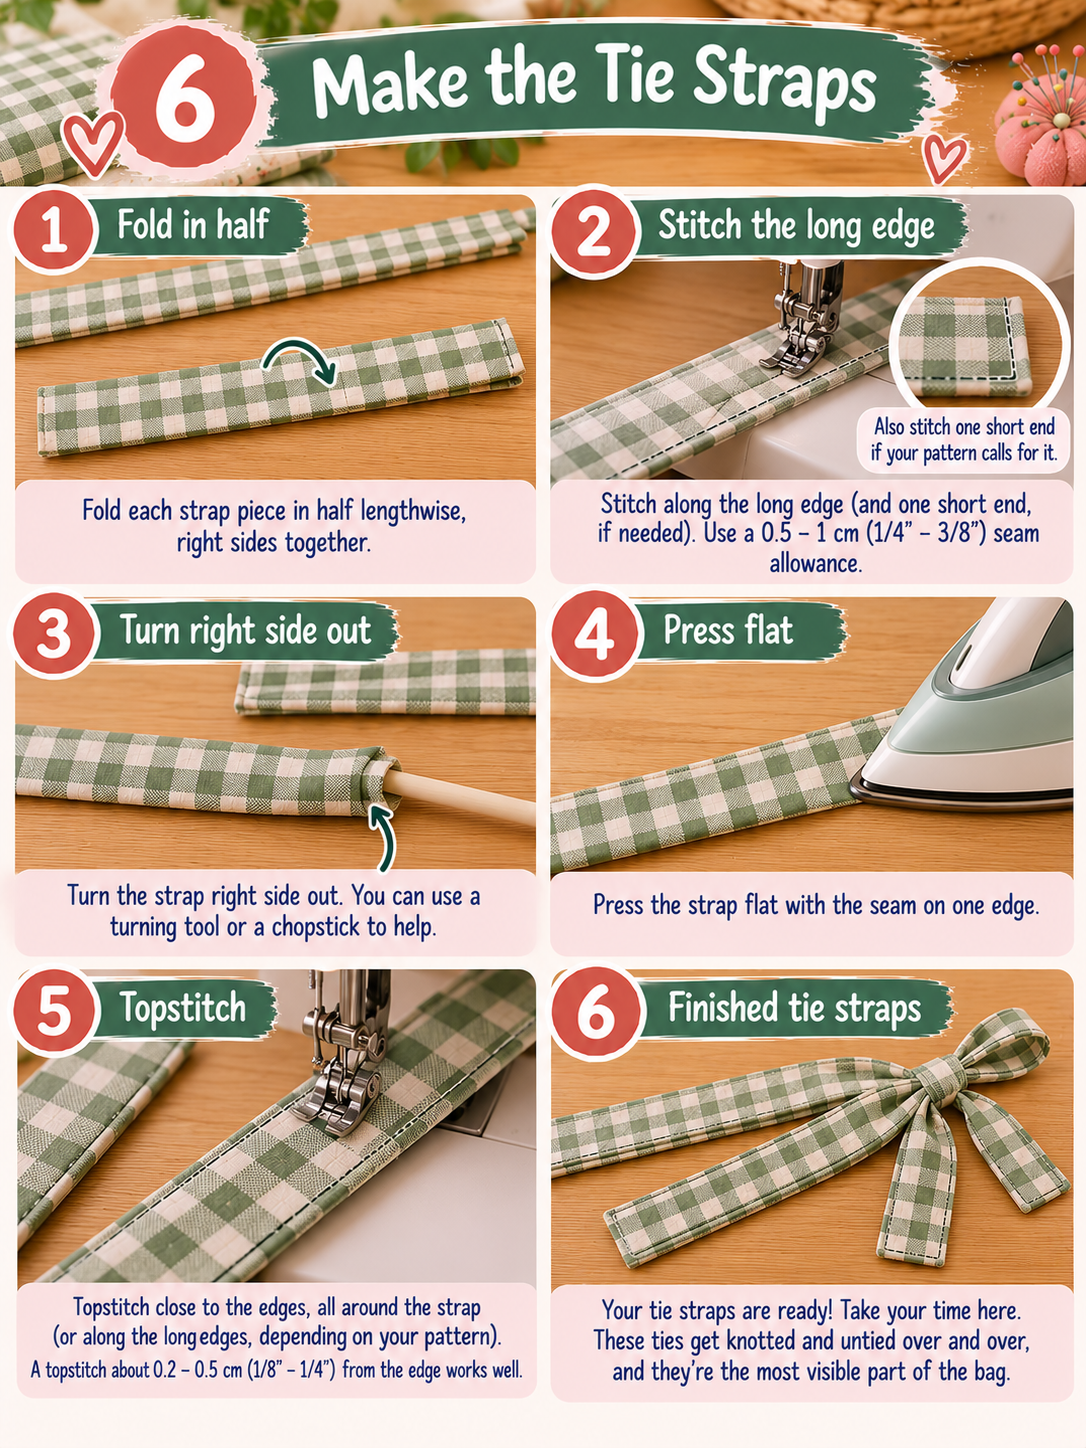
Step 6: Make the Tie Straps
Fold each strap piece in half lengthwise, right sides together, and stitch along the long edge (and one short end, if your pattern calls for it). Turn it right side out, press it flat with the seam on one edge, and topstitch close to the edges. Take your time here: these ties get knotted and untied over and over, and they’re the most visible part of the bag.
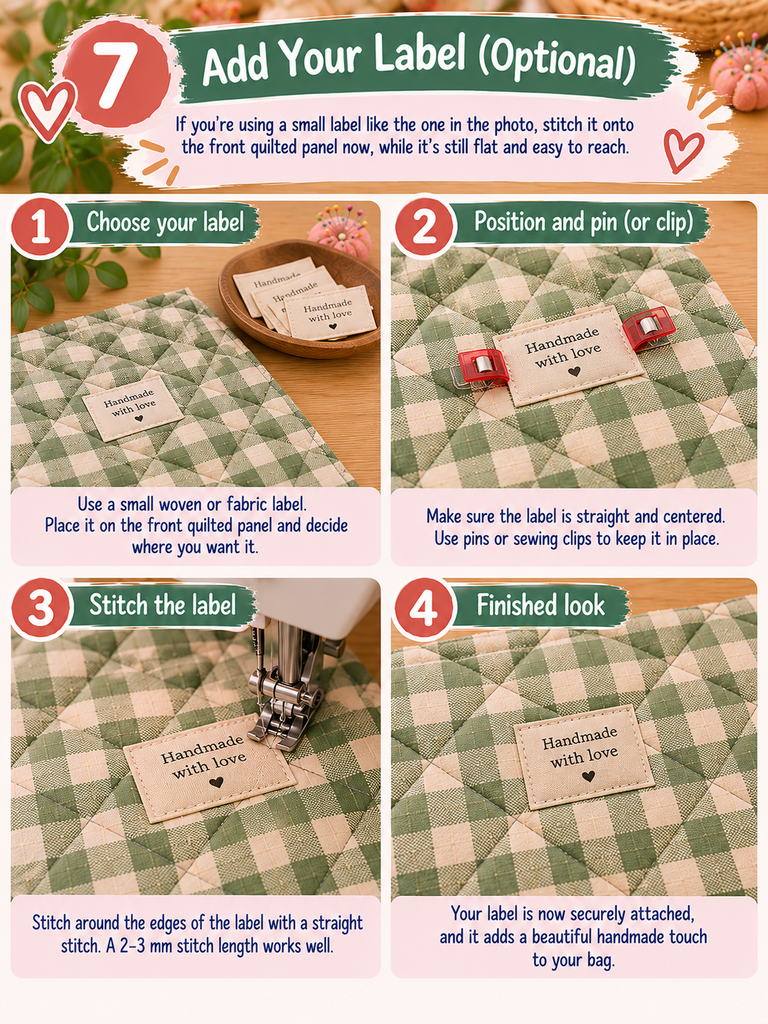
Step 7: Add Your Label (Optional)
If you’re using a small label like the one in the photo, stitch it onto the front quilted panel now, while it’s still flat and easy to reach.
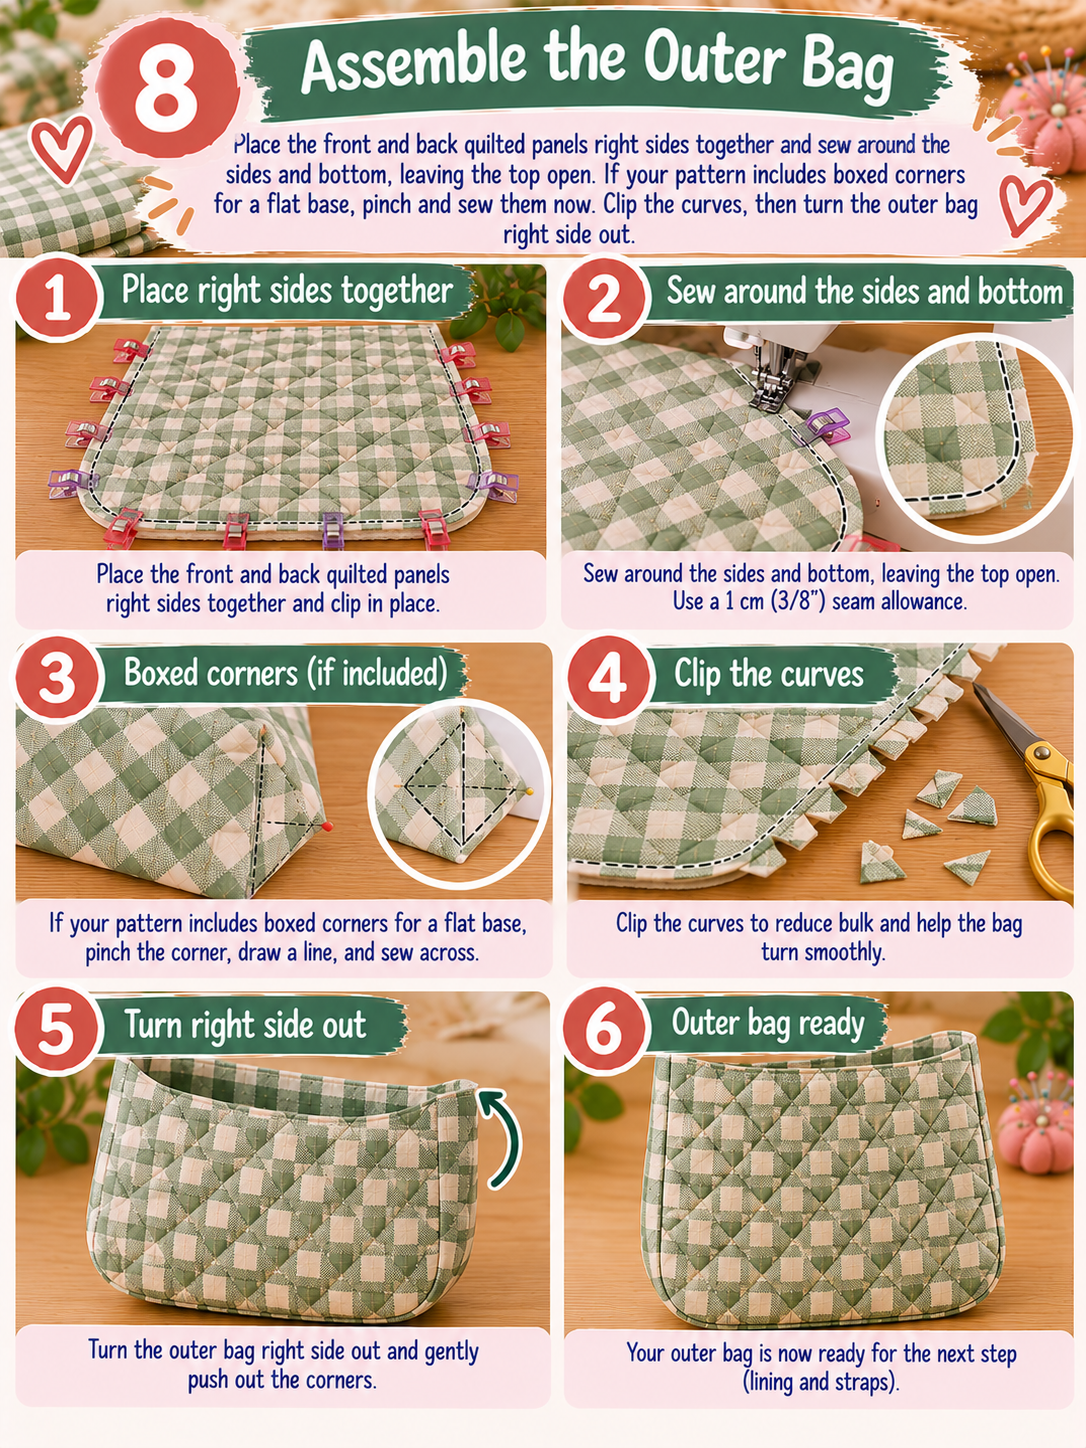
Step 8: Assemble the Outer Bag
Place the front and back quilted panels right sides together and sew around the sides and bottom, leaving the top open. If your pattern includes boxed corners for a flat base, pinch and sew them now. Clip the curves, then turn the outer bag right side out.
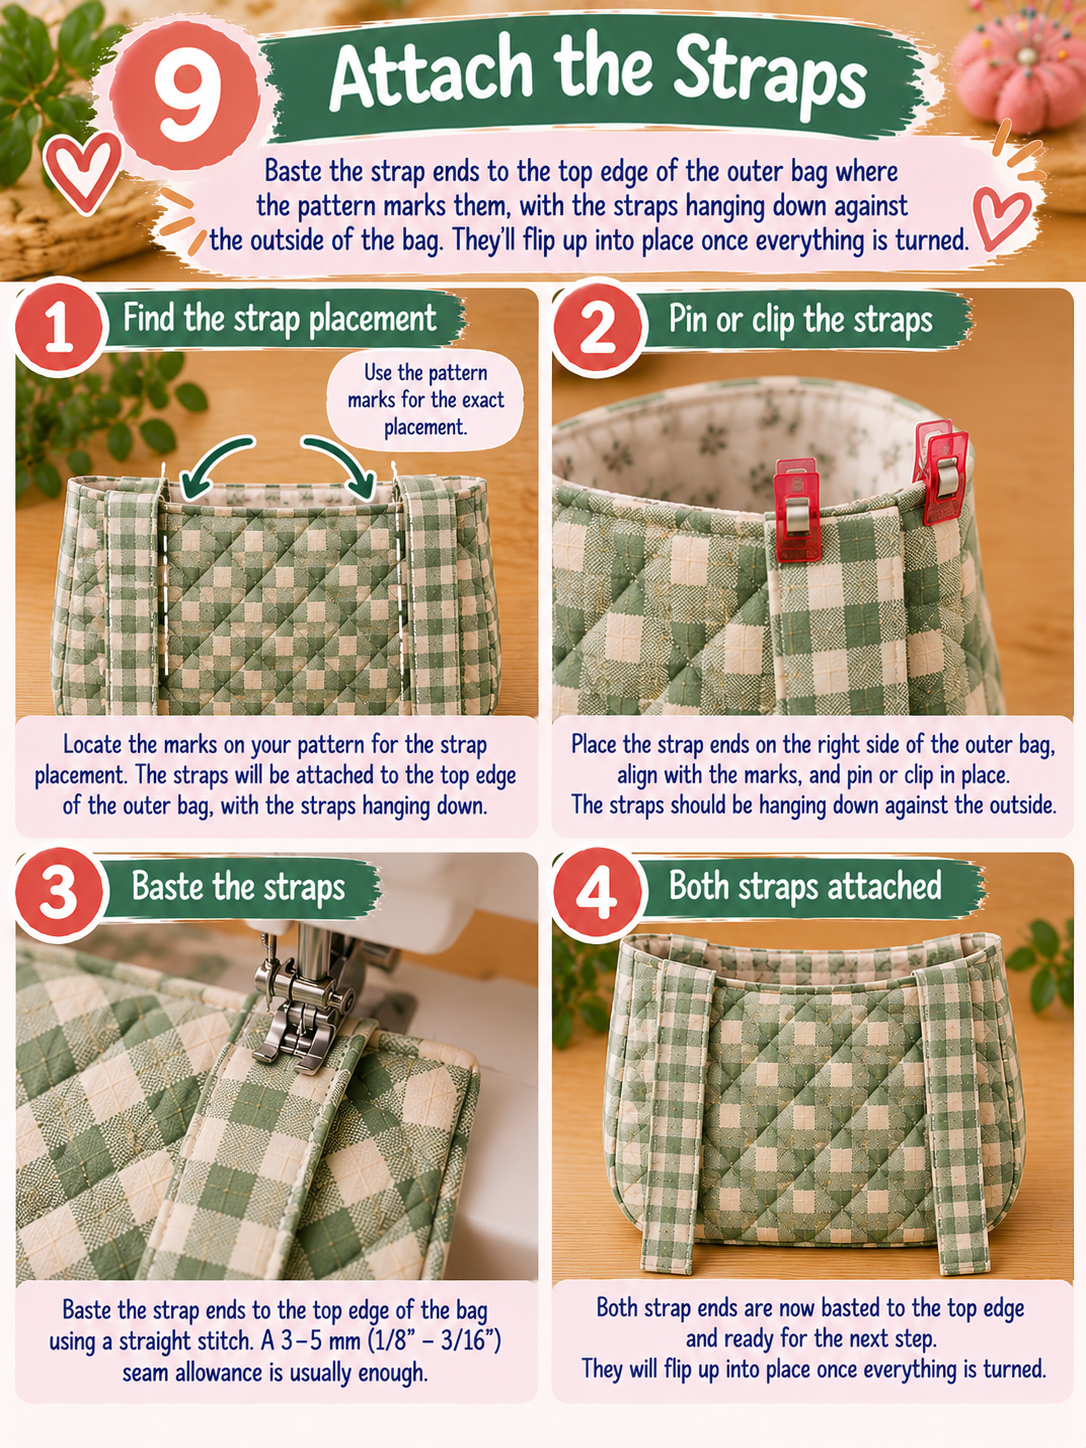
Step 9: Attach the Straps
Baste the strap ends to the top edge of the outer bag where the pattern marks them, with the straps hanging down against the outside of the bag. They’ll flip up into place once everything is turned.
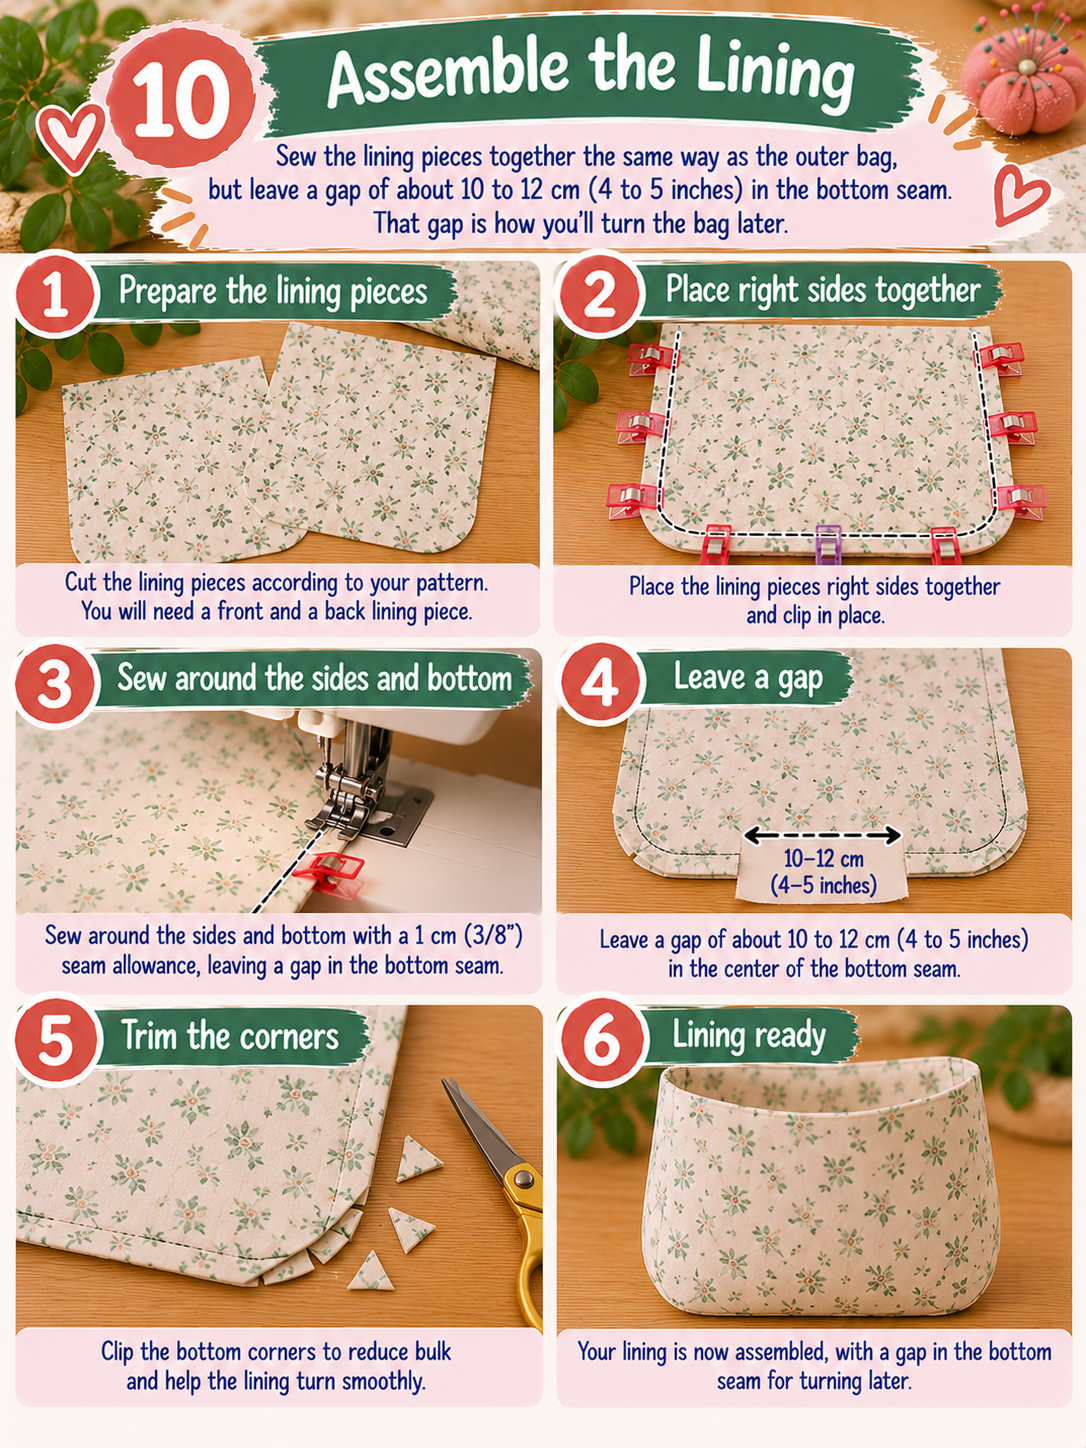
Step 10: Assemble the Lining
Sew the lining pieces together the same way as the outer bag, but leave a gap of about 10 to 12 cm (4 to 5 inches) in the bottom seam. That gap is how you’ll turn the bag later.
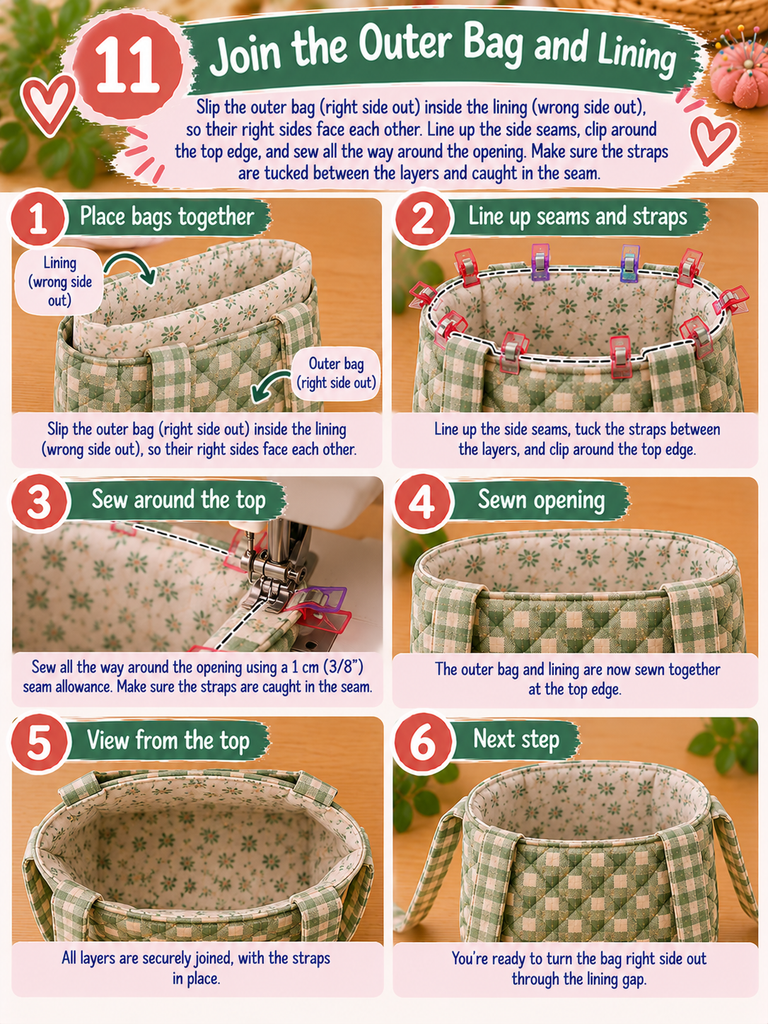
Step 11: Join the Outer Bag and Lining
Slip the outer bag (right side out) inside the lining (wrong side out), so their right sides face each other. Line up the side seams, clip around the top edge, and sew all the way around the opening. Make sure the straps are tucked between the layers and caught in the seam.
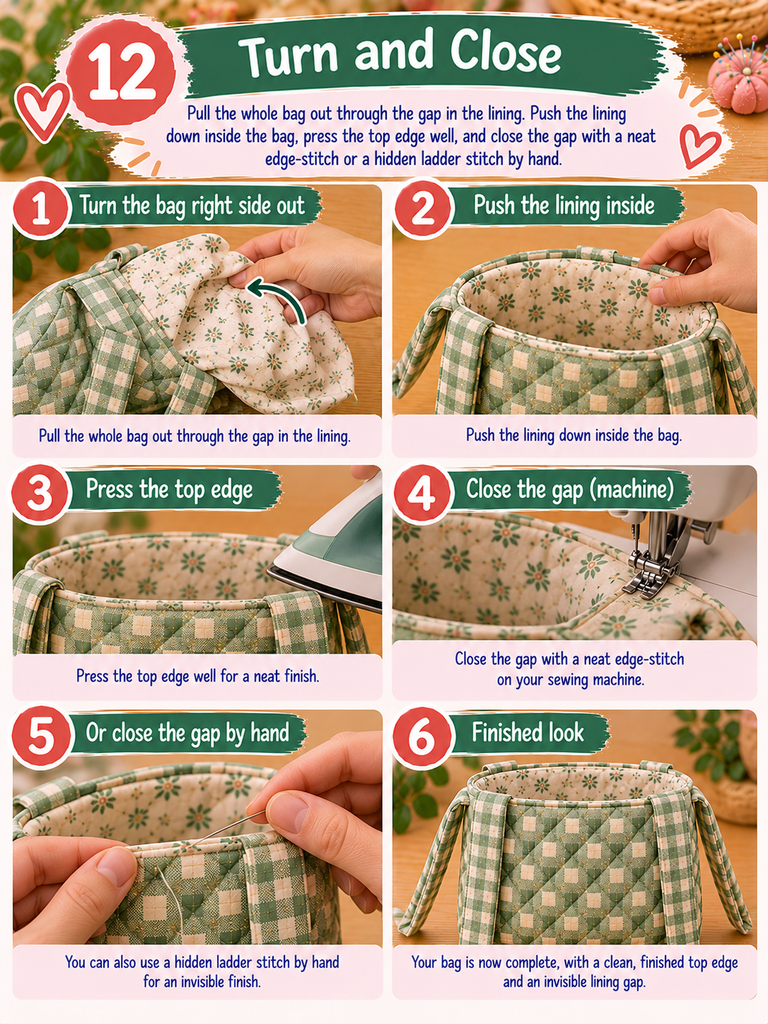
Step 12: Turn and Close
Pull the whole bag out through the gap in the lining. Push the lining down inside the bag, press the top edge well, and close the gap with a neat edge-stitch or a hidden ladder stitch by hand.
Step 13: Topstitch and Tie
Topstitch around the top edge to keep the lining from rolling out and give a crisp finish. Then tie the straps into bows at the length you like. Done! That’s the moment you get to hold it up and admire it.

Little Mistakes I’d Love to Help You Avoid
- Skipping the iron. Pressing between every step is the difference between “homemade” and “handmade.”
- Quilting edge to center. Always work from the middle out, or the layers bunch and pucker.
- Forgetting to trim after quilting. Quilted panels shrink slightly, so re-cut to the pattern before assembling.
- Twisted straps. Double-check they’re lying flat and not twisted before you sew the outer bag and lining together.
Print at Home or Use a Copyshop?
This is the question everyone asks with their first PDF pattern, and the nice thing here is you get both.
The print-at-home version prints on regular paper and you tape the pages together. Great if you have a printer and want to start right now.
The A0 copyshop file prints on one big sheet, so you skip all the trimming, taping, and matching. Personally, I always go for this one when a pattern has large pieces. It’s more accurate and much less fiddly.
Questions You Might Be Asking
Can I use a fabric that isn’t on the list?
You can experiment, but stick to woven fabrics of medium weight for the closest result. Avoid stretchy or very thin fabrics; they’re frustrating to quilt and won’t hold the bag’s shape.
Is it practical for everyday use?
Yes. With its slouchy shape and adjustable ties, it’s the kind of bag you throw your essentials into and go. It suits errands and weekends more than formal occasions.
Would it make a good gift?
Absolutely. A handmade bag in a fabric you picked out with someone in mind is the kind of gift price tags can’t compete with.
Wrapping Up: A Small Bag, a Big Dose of Joy
Let’s go back to that moment you stopped scrolling. What caught you wasn’t just the bag. It was the feeling: simple, warm, quietly pretty.
The Mini Slouchy Bag gives you the chance to make that feeling yourself, in your fabric, your way. A quilted exterior for that cozy puff, tie straps for flexibility, and a skill level that challenges you gently without crushing your spirit.
And every bag you sew carries more than your keys and lip balm. It carries the hours of focus, the patience, and that little burst of pride when someone asks, “Where did you get that?” and you get to smile and say, “I made it.”
Your Turn
Tell me in the comments: which fabric are you picking for yours? Team calm linen, team printed cotton, or team sturdy denim?
And if you make one, please share a photo. Nothing is more inspiring than seeing the same pattern turn into completely different bags in different hands.