Cute Easy Short Acrylic Nails 💅 Simple Almond Nail Inspo You’ll Love

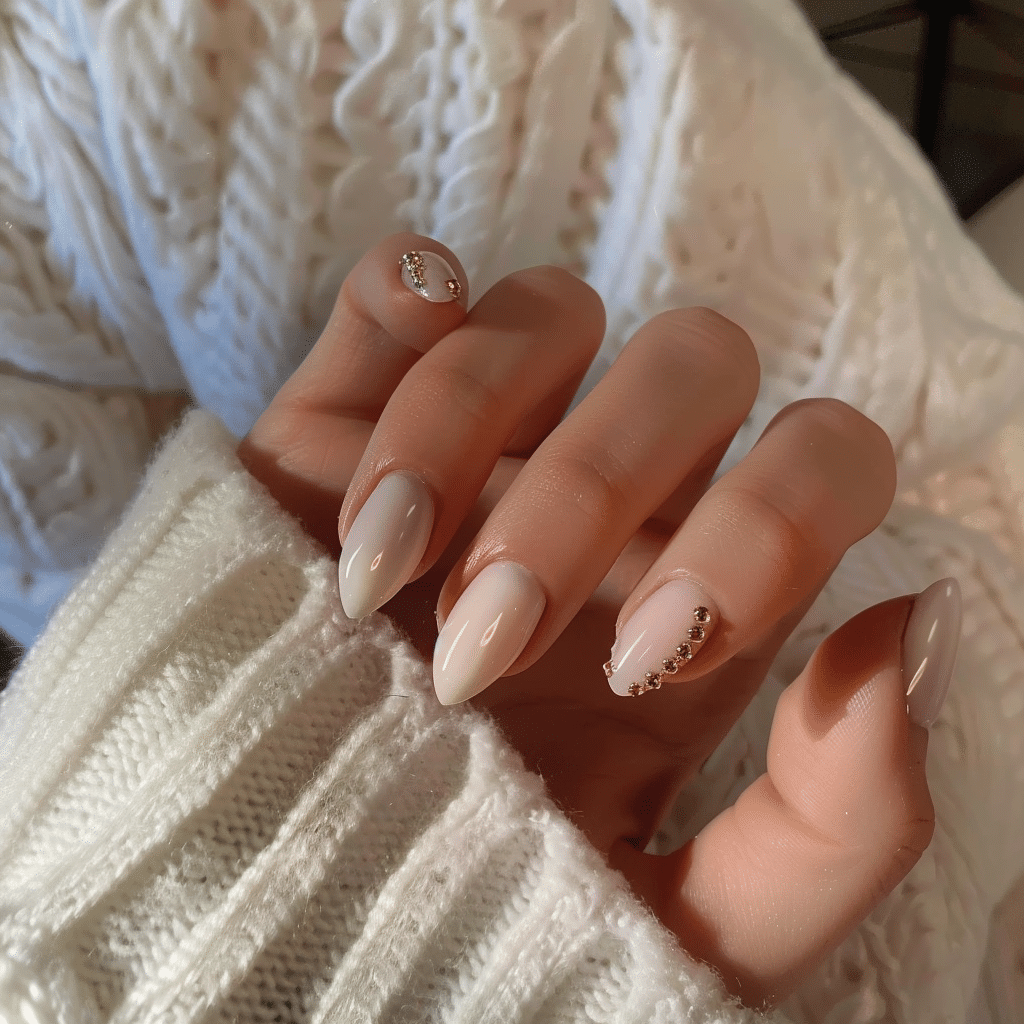
Cute easy short acrylic nails with simple almond shapes offer the perfect balance between elegant sophistication and practical wearability for everyday activities.
This nail style has become increasingly popular among busy professionals, students, and anyone seeking low-maintenance yet stunning nail designs. Short almond nails provide a flattering silhouette that elongates fingers without the impracticality of extra length, making them ideal for typing, household tasks, and active lifestyles.
| Topic | Details |
|---|---|
| Category | Nail Art / Acrylic Nails |
| Skill Level | Beginner to Intermediate |
| Time Needed | 60 to 90 minutes |
| Tools Needed | Acrylic powder, monomer, nail files, buffer, brushes |
| Best For | Active individuals seeking durable, stylish short nails |
Table of Contents
Why This Nail Technique Works
Short almond acrylic nails combine structural integrity with aesthetic appeal, creating a versatile canvas for countless design possibilities. The almond shape naturally tapers toward the tip, creating an optical illusion that makes fingers appear longer and more slender without requiring excessive length. This shape distributes stress evenly across the nail, reducing the likelihood of breakage compared to sharper stiletto or square shapes.
Acrylic application on short nails provides exceptional durability that natural nails cannot match, especially for individuals with weak or brittle nail beds. The acrylic overlay strengthens the entire nail structure while maintaining flexibility, allowing for normal hand movements without discomfort. This technique works particularly well for those transitioning from long nails or recovering from nail damage, as it offers protection while maintaining a polished appearance.
The simplicity of cute easy short acrylic nails makes them accessible to beginners while providing professionals with a foundation for creative expression. Short lengths cure faster, require less product, and minimize the learning curve associated with acrylic application. This efficiency translates to shorter appointment times and reduced product costs, making beautiful nails more achievable for everyone regardless of budget or experience level.
Tools and Products Needed
| Product | Purpose | Alternatives |
|---|---|---|
| Acrylic Powder | Creates nail extension and strength | Dip powder system, gel extensions |
| Acrylic Monomer | Activates powder for application | None for traditional acrylic |
| Nail Primer | Ensures proper adhesion | Dehydrator and pH bond |
| Nail Files (100/180 grit) | Shapes and refines nail structure | Electric nail file |
| Nail Buffer | Smooths surface for polish | Fine grit file |
| Acrylic Brush | Applies acrylic mixture | Size 8 or 10 kolinsky brush |
| Cuticle Oil | Maintains nail health | Vitamin E oil, jojoba oil |
| Top Coat | Seals and protects design | Gel top coat with UV lamp |
| Base Coat | Protects from staining | Ridge filler base |
For additional nail care products and professional recommendations, visit Gel Nails by Lina for curated selections suited to various skill levels and nail types.
Step-by-Step Application Guide
Nail Preparation
- Remove any existing polish using acetone-based nail polish remover and cotton pads.
- Push back cuticles gently using a wooden or rubber cuticle pusher to create a clean application area.
- File natural nails to your desired short length, ensuring all nails match in size.
- Buff the nail surface lightly to remove shine and create texture for better adhesion.
- Wash hands thoroughly with soap and water, then dry completely to remove oils and debris.
- Apply nail dehydrator to all nails and allow to air dry for thirty seconds.
- Apply acid-free primer sparingly to the natural nail, avoiding skin contact completely.
Acrylic Application Process
- Pour acrylic monomer into a small dappen dish, using only the amount needed for application.
- Dip your acrylic brush into monomer, then wipe excess on the dish rim.
- Touch the brush tip to acrylic powder to create a small, smooth bead.
- Place the bead near the cuticle area, then gently press and stroke toward the free edge.
- Work quickly but carefully to smooth the acrylic before it begins to set.
- Create a thin layer at the cuticle, slightly thicker at the stress area, tapering toward the tip.
- Allow the acrylic to cure completely for two to three minutes until fully hardened.
- Repeat the process on remaining nails, working on one hand at a time for consistency.
Shaping the Almond Nail
- File the sides of each nail at an angle, creating a gentle taper toward the center.
- Shape the free edge into a soft point, avoiding overly sharp or aggressive angles.
- Check symmetry by viewing nails straight on, ensuring both sides mirror each other perfectly.
- Refine the shape with a fine grit file, smoothing any rough edges or uneven areas.
- Buff the entire nail surface using a medium grit buffer to remove file marks.
- Dust off nail debris using a clean brush or lint-free wipe dampened with alcohol.
Design Application
- Apply a thin layer of base coat to protect the acrylic from pigment staining.
- Choose your desired nail polish color and apply the first thin, even coat.
- Allow the first coat to dry for two minutes before applying the second layer.
- Add simple designs like dots, stripes, or accent nails using nail art brushes or tools.
- Let all polish dry completely for five to ten minutes before applying top coat.
- Seal everything with a generous layer of high-quality top coat for lasting shine.
Finishing and Aftercare
- Apply cuticle oil generously around the entire nail and massage into surrounding skin.
- Allow nails to cure fully for at least one hour before exposing them to water.
- Avoid using nails as tools for opening or scratching during the first twenty-four hours.
- Moisturize hands and cuticles daily to maintain flexibility and prevent lifting.
Pro Nail Technician Tips
- Keep your acrylic beads consistently sized throughout application to ensure even thickness and prevent weak spots that could lead to breaking or lifting issues.
- Work in a well-ventilated area when applying acrylics, as monomer fumes can be strong and potentially irritating to respiratory systems over extended exposure periods.
- Avoid applying acrylic too close to the cuticle area, leaving a small gap to prevent lifting and allow for natural nail growth without immediate fill requirements.
- Cap the free edge with acrylic or top coat by running the brush over the tip to seal and protect against water penetration and chipping.
- Store acrylic products in cool, dark places away from direct sunlight to maintain proper consistency and prevent premature hardening or separation of components.
- Clean your acrylic brush immediately after use with monomer and shape the bristles to maintain optimal performance for future applications and ensure longevity of tools.
Common Acrylic Nail Mistakes
| Mistake | Why It Happens | How to Fix |
|---|---|---|
| Thick, Bulky Application | Using too much product or improper bead consistency | Use smaller beads and practice proper liquid-to-powder ratio |
| Lifting at Cuticles | Improper nail prep or application too close to skin | Ensure thorough dehydration and maintain small gap at cuticle |
| Uneven Surface Texture | Working too slowly or inconsistent product application | Work quickly and use consistent pressure when smoothing acrylic |
| Air Bubbles in Acrylic | Tapping brush in powder or contaminated monomer | Dip brush smoothly and change monomer regularly during application |
| Yellowing Over Time | UV exposure or using low-quality products | Apply UV-protective top coat and invest in professional-grade materials |
Cute Easy Short Acrylic Nail Design Variations
| Style | Description | Best Occasion |
|---|---|---|
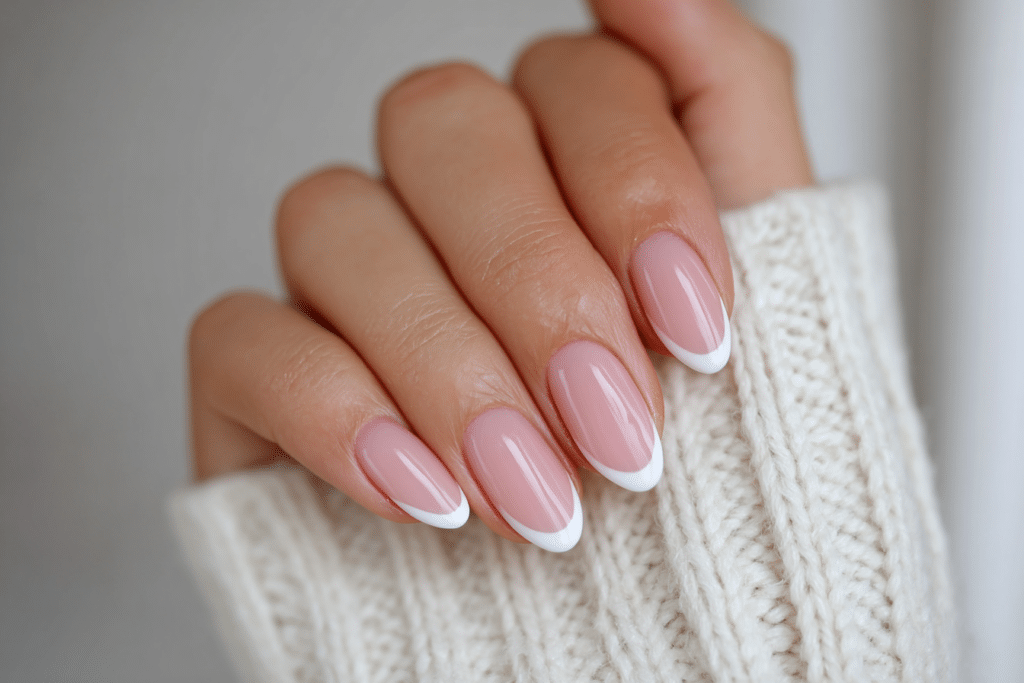
| Simple French Tips | Classic white tips with nude or pink base on almond shape | Professional settings, weddings, daily wear |
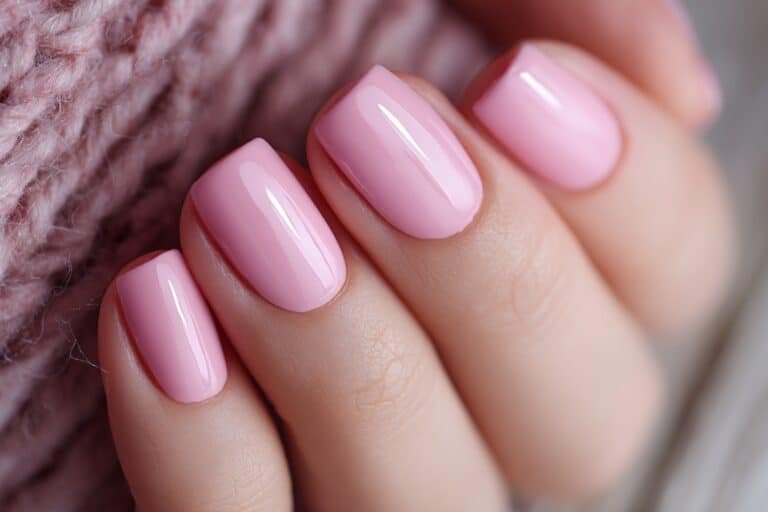
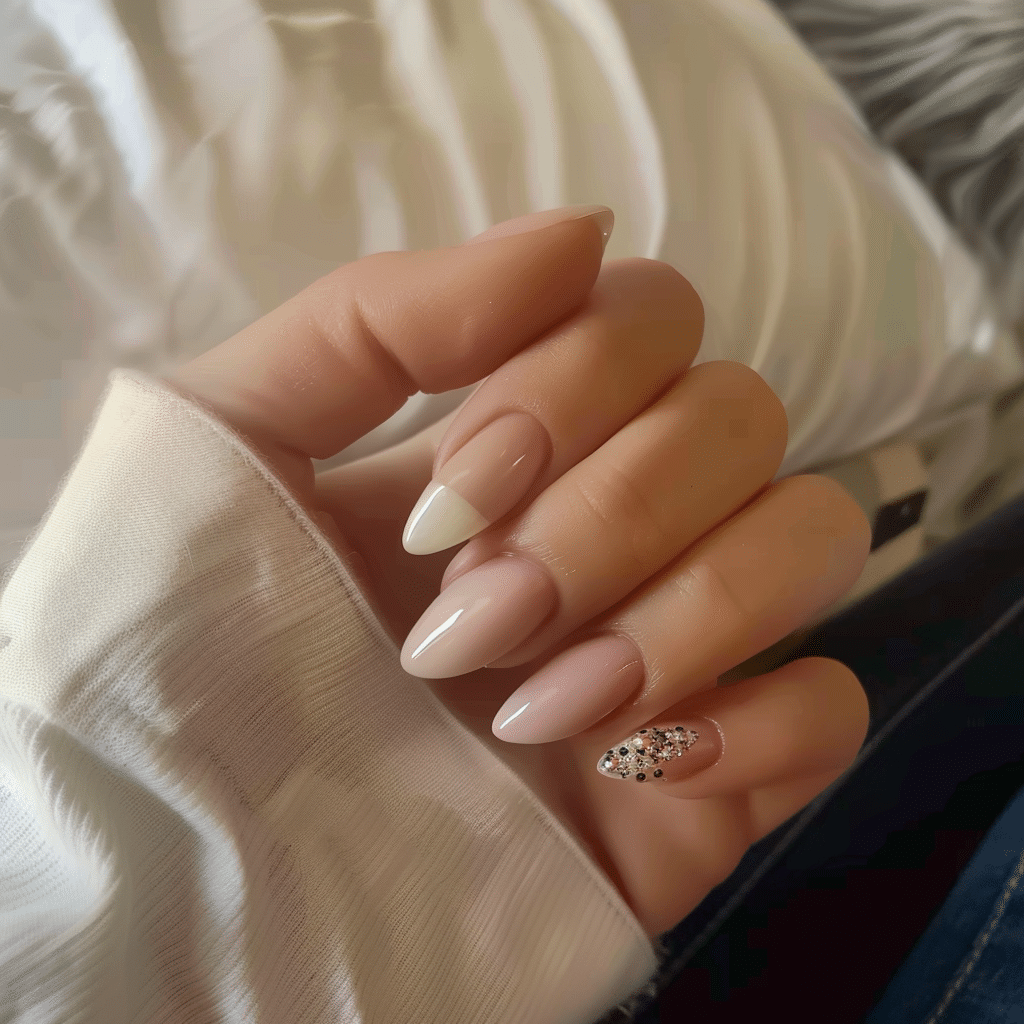
| Nude Minimalist | Single neutral color with optional accent nail detail | Office environments, conservative events |
| Pastel Ombre | Soft color gradients blending two complementary shades | Spring celebrations, casual outings |
| Cheetah Print Accent | One or two nails featuring trendy animal print design | Fashion events, nights out, casual styling |
| Cheer Spirit Nails | Team colors with stripes, stars, or glitter accents | Sports events, school spirit days, competitions |
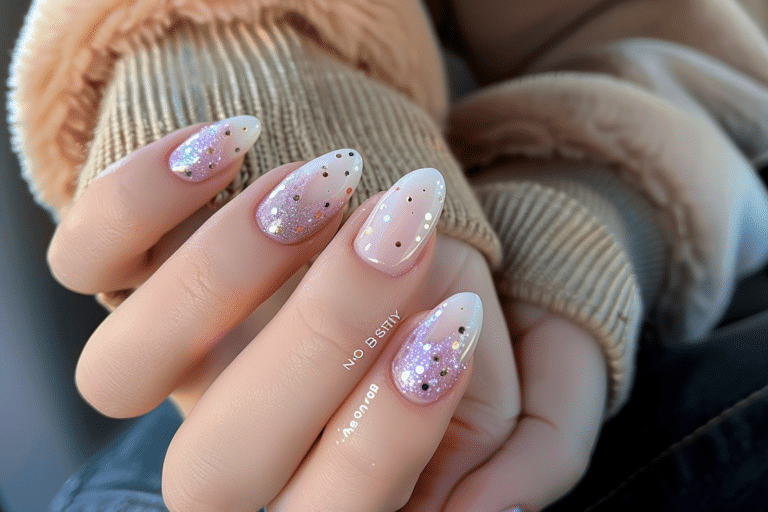
| Subtle Glitter Tips | Fine glitter concentrated at free edge for sparkle | Parties, celebrations, holiday gatherings |
| Single Rhinestone Accent | One small crystal placed strategically on accent nail | Date nights, special occasions, elegant events |
Explore more design inspiration and tutorials at Gel Nails by Lina, where you will find seasonal collections and trending nail art ideas perfect for short almond nails.
Nail Care and Maintenance
Maintaining cute easy short acrylic nails requires consistent daily care to preserve their appearance and protect your natural nails underneath. Apply cuticle oil at least twice daily, particularly before bedtime, to keep the surrounding skin supple and prevent the acrylic from lifting due to dryness. Hydrated cuticles create a flexible seal around the nail enhancement, reducing the entry points for moisture and bacteria that could compromise the integrity of your manicure.
Wear protective gloves when performing household chores involving water, cleaning chemicals, or prolonged moisture exposure. Excessive water contact causes acrylic to expand and contract, weakening the bond with your natural nail and potentially leading to lifting or separation. Schedule fill appointments every two to three weeks to maintain proper structure as your natural nails grow, preventing stress cracks and maintaining the beautiful almond shape.
Avoid using your nails as tools for opening packages, scraping labels, or prying objects, as these actions place unnecessary stress on the enhancement and natural nail. Instead, use appropriate tools designed for these tasks to preserve your manicure investment. Pay attention to any signs of lifting, discoloration, or discomfort, addressing issues promptly to prevent further damage or potential infections beneath the acrylic layer.
How to Remove Acrylic Nails Safely
Safe acrylic removal protects your natural nails from damage and prepares them for future enhancements or recovery periods. Begin by filing down the top layer of acrylic to break the seal of the top coat, which allows acetone to penetrate more effectively. Use a coarse file and work carefully to remove bulk without filing into your natural nail plate, stopping when you feel the texture change from hard acrylic to softer natural nail.
- Trim acrylic nails as short as safely possible using nail clippers designed for artificial nails.
- File the shiny top coat layer completely to allow acetone penetration through the enhancement.
- Soak cotton balls in pure acetone and place one on each nail bed.
- Wrap each fingertip with aluminum foil to secure cotton and prevent acetone evaporation.
- Wait fifteen to twenty minutes, allowing acetone to dissolve the acrylic structure completely.
- Remove foil and cotton, then gently push softened acrylic off using a wooden cuticle pusher.
- Repeat soaking process if acrylic remains, never forcing or prying stubborn product off nails.
- Buff natural nails gently after removal to smooth surface without excessive thinning.
- Apply nourishing cuticle oil and hand cream to rehydrate nails and surrounding skin immediately.
Nail Health and Safety
Maintaining healthy nails while wearing acrylic enhancements requires attention to proper application techniques and recognition of potential warning signs. Over-filing the natural nail during preparation removes too much of the protective nail plate, creating weak, thin nails susceptible to breakage and infection. Professional nail technicians recommend minimal buffing, just enough to remove shine without aggressive reduction of nail thickness or structure.
Monitor for signs of nail infections such as redness, swelling, pain, or green discoloration beneath the acrylic, which may indicate bacterial or fungal growth. If you notice any of these symptoms, remove enhancements immediately and consult a dermatologist for appropriate treatment. Infections thrive in moist environments trapped between the natural nail and enhancement, making proper application and maintenance critical for prevention.
Allow your natural nails to breathe between acrylic applications, taking breaks every three to four months to assess nail health and apply strengthening treatments.
Frequently Asked Questions
How long do acrylic nails last on short almond nails?
Short acrylic almond nails typically last two to three weeks before requiring a fill appointment to address natural nail growth. The shorter length experiences less stress from daily activities, potentially extending wear time compared to longer enhancements. Proper application technique, quality products, and diligent aftercare significantly impact longevity, with some individuals maintaining beautiful nails for up to four weeks before needing maintenance.
How do I remove short acrylic nails safely at home?
Safe home removal requires soaking nails in pure acetone for fifteen to twenty minutes until the acrylic softens completely. Wrap acetone-soaked cotton balls around each nail with aluminum foil to maximize penetration and prevent evaporation during the soaking process. Never force or pry acrylic off nails, as this causes severe damage to the natural nail plate underneath the enhancement.
What is the difference between acrylic nails and gel nails?
Acrylic nails use a liquid monomer and powder polymer that air-dry into a hard protective layer, while gel nails require UV or LED light curing to harden. Acrylics typically offer more durability and strength for short nails, while gels provide a more natural appearance and flexibility. Removal processes differ significantly, with acrylics requiring acetone soaking and gels needing filing or specialized removal solutions depending on the specific gel type used.
Why do my acrylic nails keep lifting at the cuticles?
Lifting occurs primarily due to inadequate nail preparation, moisture exposure, or application too close to the cuticle area. Natural oils on the nail plate prevent proper adhesion if not removed completely during the dehydration and priming steps. Maintaining a small gap between the acrylic and cuticle allows for natural growth without immediate stress on the enhancement bond.
How can I make my short acrylic nails last longer?
Extend acrylic nail longevity by applying cuticle oil twice daily, wearing gloves during water exposure, and avoiding using nails as tools. Schedule regular fill appointments every two to three weeks to maintain structural integrity as natural nails grow underneath. Keep nails at a consistent short length to minimize stress from daily activities, and choose quality products applied by experienced technicians for optimal results and durability.
For more tips on maintaining beautiful nails between salon visits, check out the comprehensive guides at Gel Nails by Lina for expert advice and product recommendations.
Conclusion
Cute easy short acrylic nails in simple almond shapes offer the perfect combination of durability, elegance, and practicality for modern lifestyles. This versatile nail style accommodates countless design possibilities while maintaining functionality for daily activities. Whether you prefer minimalist nude tones, chic cheetah accents, or spirited cheer-inspired designs, short almond acrylics provide the ideal canvas for expressing your personal style. With proper application techniques, consistent maintenance, and attention to nail health, you can enjoy beautiful, long-lasting manicures that enhance your confidence and complement any occasion. Start your short acrylic nail journey today and discover why this timeless style continues to captivate nail enthusiasts worldwide.