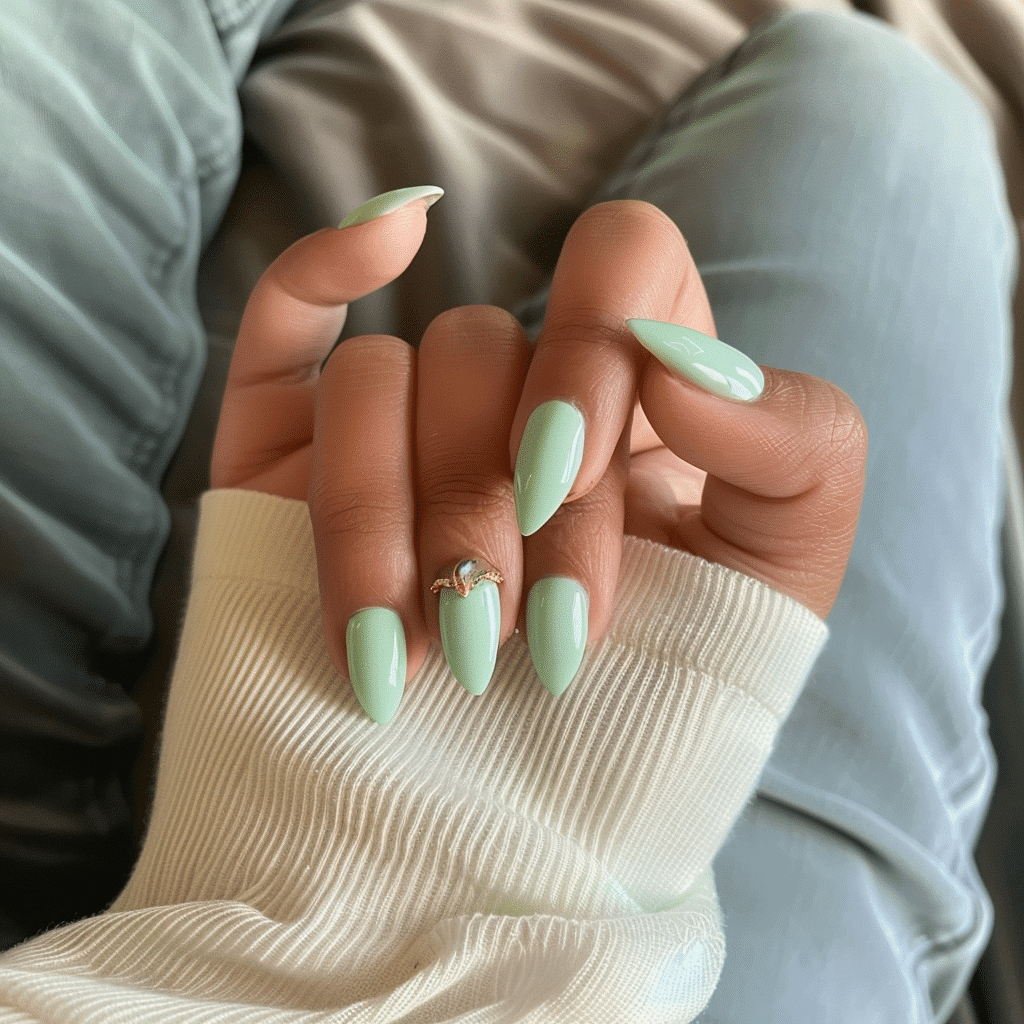
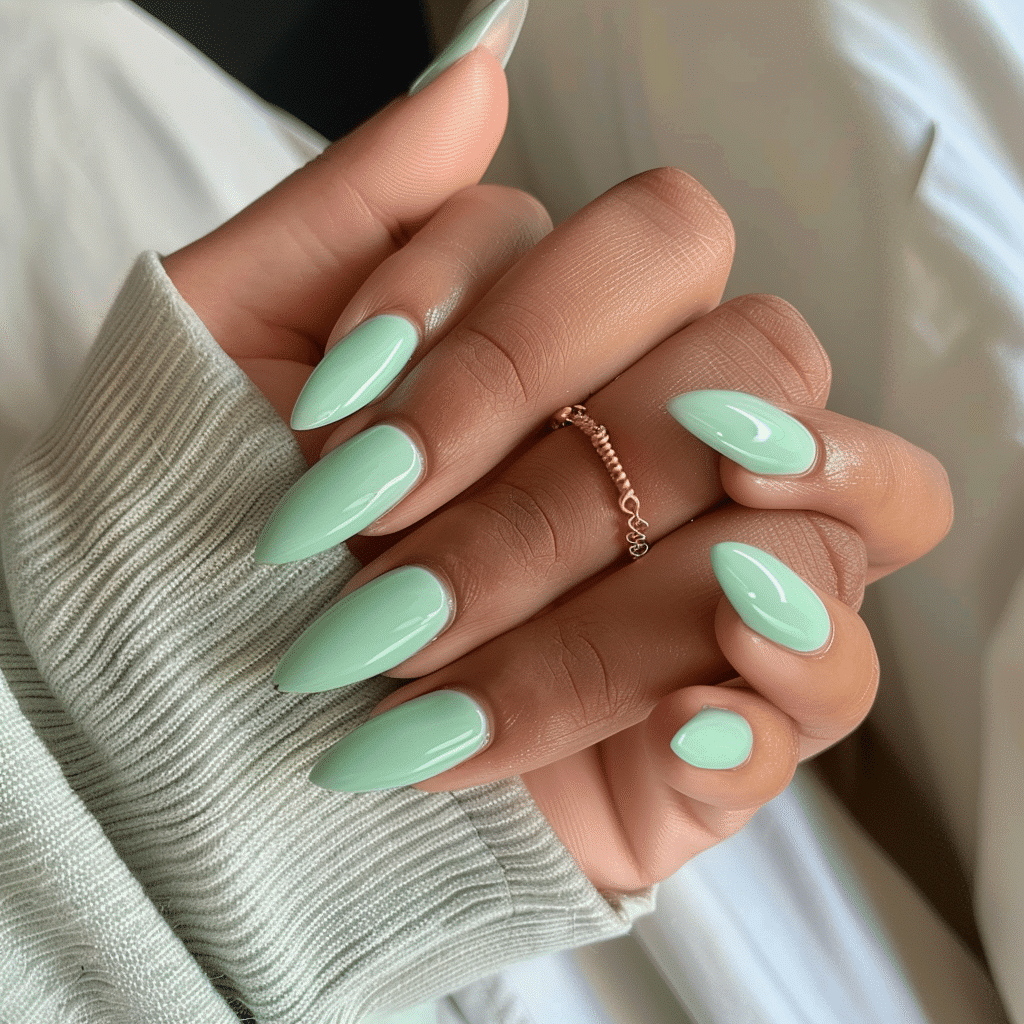
Cute Mint Green Nails 💚 Simple Almond Solid Color Nail Inspo for Spring & Summer

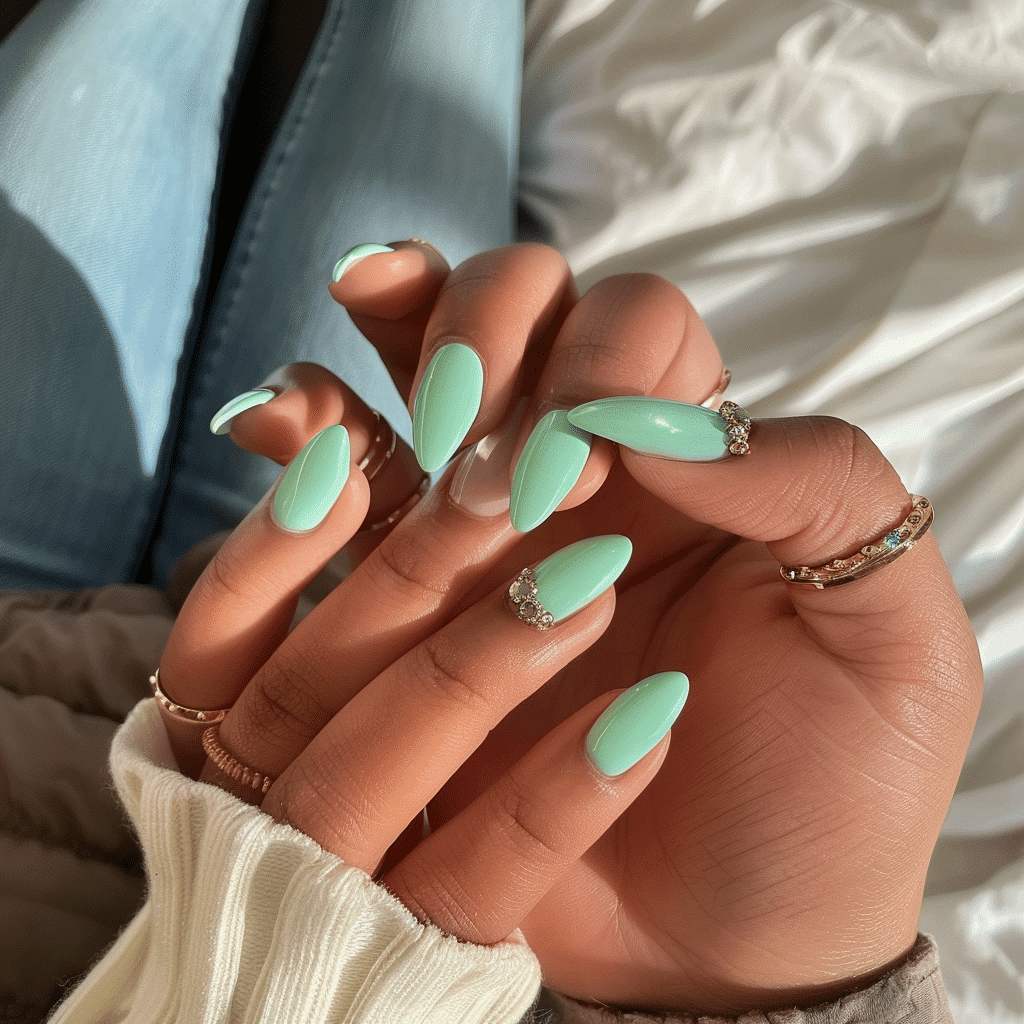
Cute mint green nails in simple almond solid colors represent the perfect spring and summer nail inspiration for those seeking fresh, elegant manicures. This timeless color choice combines the softness of pastel tones with the sophisticated shape of almond nails, creating a versatile look suitable for any occasion
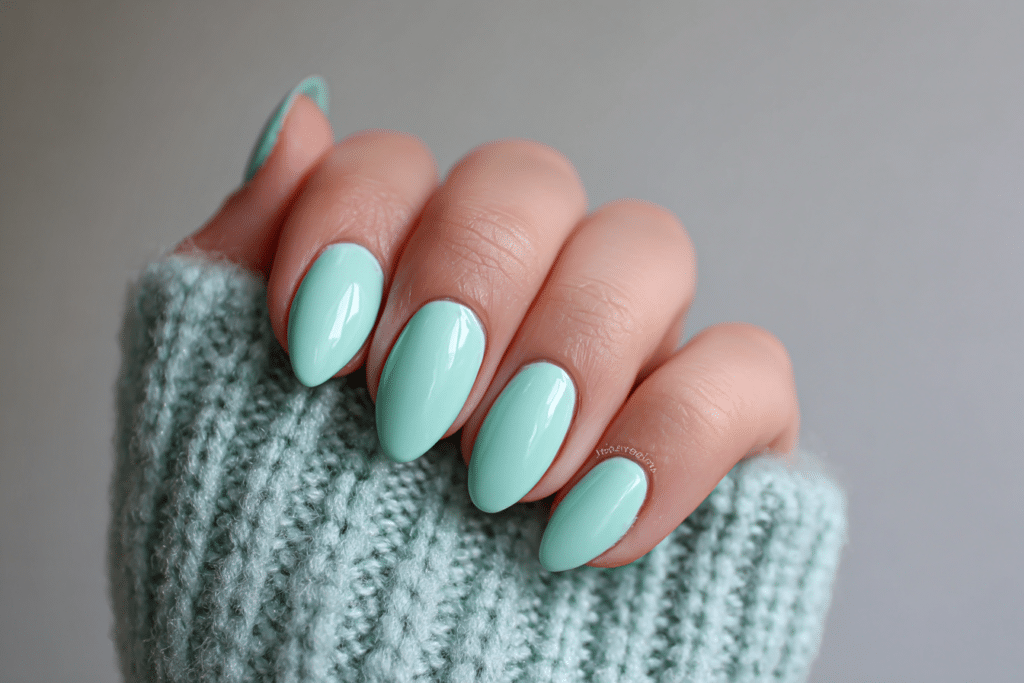
The mint green shade evokes feelings of renewal and tranquility while maintaining a modern, chic aesthetic that complements various skin tones and personal styles.
| Topic | Details |
|---|---|
| Category | Gel Nails / Nail Art |
| Skill Level | Beginner to Intermediate |
| Time Needed | 60 to 90 minutes |
| Tools Needed | UV/LED lamp, gel polish, nail file, buffer, base coat, top coat |
| Best For | Anyone seeking fresh spring and summer nail colors with simple elegance |
Table of Contents
Why This Nail Technique Works
The combination of mint green solid color polish with almond-shaped nails creates a harmonious balance between contemporary style and classic elegance. Almond nails naturally elongate the fingers, providing a flattering silhouette that makes hands appear more graceful and refined. The tapered shape mimics the natural curve of the cuticle, reducing the risk of breakage compared to more dramatic shapes like stiletto or coffin nails.
Mint green as a solid color choice offers exceptional versatility for spring and summer wardrobes. This pastel shade complements both warm and cool undertones, making it universally flattering across different skin tones. The solid color application ensures durability and eliminates the complexity of intricate nail art, which can chip or fade more quickly. Single-color manicures also provide better polish adhesion, resulting in longer-lasting wear that can endure up to three weeks with proper gel application.
From a psychological perspective, mint green evokes feelings of freshness, calmness, and renewal. This makes it ideal for the transitional seasons when people seek lighter, brighter aesthetics after darker winter tones. The simplicity of solid color nails also aligns with minimalist beauty trends, offering a polished appearance without overwhelming visual complexity. Professional nail technicians recommend this style for clients who want sophisticated results without frequent maintenance appointments.
Tools and Products Needed
| Product | Purpose | Alternatives |
|---|---|---|
| UV/LED Lamp | Cures gel polish for long-lasting results | 48W lamp or 36W lamp with longer cure times |
| Mint Green Gel Polish | Primary color for solid manicure | Regular polish with quick-dry top coat |
| Base Coat | Protects natural nails and improves adhesion | Ridge-filling base coat for uneven nails |
| No-Wipe Top Coat | Seals color and adds high-gloss finish | Regular top coat with alcohol wipe |
| 180-Grit Nail File | Shapes nails into almond form | Glass file for sensitive nails |
| 240-Grit Buffer | Smooths nail surface for better adhesion | 4-way buffer block |
| Cuticle Pusher | Removes excess cuticle from nail plate | Orangewood stick |
| Cuticle Oil | Hydrates cuticles and surrounding skin | Vitamin E oil or jojoba oil |
| Nail Dehydrator | Removes oils for better polish adhesion | Rubbing alcohol on lint-free wipe |
| Lint-Free Wipes | Cleanses nails without leaving residue | Cotton pads with minimal fibers |
For high-quality gel products and professional tools, visit Gel Nails by Lina for curated recommendations and expert guidance on selecting the best materials for your mint green almond nails.
Step-by-Step Application Guide
Nail Preparation
- Remove any existing polish completely using acetone-soaked cotton pads and allow nails to dry for five minutes.
- Wash hands thoroughly with soap and warm water to eliminate oils, lotions, and debris from the nail surface.
- Push back cuticles gently using a cuticle pusher at a 45-degree angle to expose the entire nail plate.
- File nails into the desired almond shape by tapering the sides toward the center and creating a gentle rounded point.
- Buff the nail surface lightly with a 240-grit buffer using horizontal strokes to remove shine and create texture for adhesion.
- Wipe nails with nail dehydrator or rubbing alcohol on a lint-free wipe to remove all oils and dust particles.
Base Coat Application
- Apply a thin layer of base coat starting from the cuticle area and pulling toward the free edge in smooth strokes.
- Cap the free edge by running the brush along the tip of the nail to seal and prevent lifting.
- Ensure base coat coverage is even and thin, avoiding flooding the cuticle or sidewalls with excess product.
- Cure under UV/LED lamp according to manufacturer instructions, typically 30 to 60 seconds for LED lamps.
Gel Polish Layers
- Apply the first coat of mint green gel polish in a thin, even layer covering the entire nail surface.
- Use three strokes for application: center, left side, and right side for complete, streak-free coverage.
- Cap the free edge with color to ensure the polish wraps around the tip for longevity.
- Cure the first color coat under the lamp for the recommended time, usually 60 seconds for LED lamps.
- Apply a second thin coat of mint green gel polish using the same three-stroke technique for opaque color saturation.
- Cap the free edge again and cure for the full recommended time to set the color completely.
Curing Process
- Ensure your UV/LED lamp is functioning properly and emitting adequate light intensity for complete polymerization.
- Position your hand fully inside the lamp with nails flat and centered under the light source.
- Remain still during the entire curing cycle to prevent shifting that could cause uneven curing or smudging.
- Allow the lamp cycle to complete without removing your hand prematurely, as partial curing causes peeling and weakness.
Finishing and Top Coat
- Apply a thin layer of no-wipe top coat over the entire colored surface, ensuring complete edge-to-edge coverage.
- Cap the free edge thoroughly with top coat to seal all layers and provide maximum chip resistance.
- Cure the top coat for the full recommended time, typically 60 seconds for LED or 120 seconds for UV lamps.
- Apply cuticle oil around the nail bed and massage gently to hydrate the skin and enhance shine.
- Avoid water contact and heavy hand use for at least one hour after application to allow complete curing and hardening.
For detailed video tutorials and additional technique guidance, explore the resources available at Gel Nails by Lina, where professional nail artists share insider secrets for perfect application.
Pro Nail Technician Tips
- Always apply gel polish in thin layers rather than thick coats, as thin applications cure more completely and prevent wrinkling or peeling that occurs with heavy product buildup.
- Wait 10 to 15 seconds after applying each layer before curing to allow the gel to self-level, which eliminates brush strokes and creates a smoother finish.
- Clean the nail plate thoroughly with a lint-free wipe and nail dehydrator before applying base coat to ensure maximum adhesion and prevent premature lifting at the cuticle line.
- Maintain a 1-millimeter gap from the cuticle when applying gel polish to prevent flooding, which causes lifting and creates an unprofessional appearance around the nail bed.
- Replace your UV/LED lamp bulbs every six months or according to manufacturer guidelines, as degraded bulbs produce insufficient curing power that compromises polish durability.
- Store gel polish bottles upside down for 24 hours before use to ensure pigments mix evenly, which prevents streaking and inconsistent color application on the nail surface.
Common Gel Nail Mistakes
| Mistake | Why It Happens | How to Fix |
|---|---|---|
| Thick Gel Layers | Applying too much product at once to achieve color saturation quickly | Use two to three thin coats instead of one thick layer for proper curing |
| Improper Curing | Insufficient lamp wattage or removing nails before cycle completes | Invest in quality 48W LED lamp and cure for full recommended time |
| Skipping Nail Prep | Rushing through dehydration and buffing steps to save time | Always buff lightly and use dehydrator to remove oils before base coat |
| Flooding the Cuticle | Starting polish application too close to the cuticle area | Leave 1-millimeter gap and use cleanup brush with acetone for precision |
| Not Capping the Edge | Forgetting to seal free edge with each product layer | Run brush along tip with every coat including base, color, and top coat |
Nail Design Variations for Cute Mint Green Nails
| Style | Description | Best Occasion |
|---|---|---|
| Classic Mint Solid | Pure mint green coverage on all nails for clean, simple elegance | Daily wear, professional settings, casual outings |
| Mint French Tips | Natural or nude base with mint green tips for a fresh twist on classic French manicure | Weddings, formal events, spring celebrations |
| Mint and White Accent | Mint green on most nails with one or two white accent nails for subtle contrast | Beach vacations, summer parties, brunch events |
| Mint Ombre Fade | Gradient transition from white to mint green for dimensional color effect | Special occasions, photo shoots, creative environments |
| Minimalist Mint Art | Mint green base with delicate white dots or thin line details on accent nails | Date nights, girls’ outings, semi-formal events |
| Matte Mint Finish | Mint green with matte top coat instead of glossy for modern, sophisticated look | Fashion events, trendy gatherings, artistic settings |
Nail Care and Maintenance
Maintaining cute mint green nails requires consistent care routines that preserve both the gel manicure and natural nail health underneath. Apply cuticle oil twice daily, morning and evening, to keep the nail bed hydrated and prevent the gel from lifting at the edges. The oil creates a protective barrier that maintains flexibility in both the natural nail and gel overlay, reducing the risk of cracking or peeling. Focus application around the cuticle line and massage gently to improve blood circulation, which promotes stronger natural nail growth.
Wear protective gloves during household cleaning, dishwashing, or any activities involving prolonged water exposure or harsh chemicals. While gel polish is durable, constant water contact can weaken the bond between layers and cause premature lifting. Avoid using your nails as tools to open cans, scratch surfaces, or peel stickers, as this creates stress points that lead to chips and breaks. Instead, use proper implements for these tasks to preserve your mint green almond nails throughout their entire wear period.
Schedule gel manicure maintenance every two to three weeks to prevent overgrowth that creates leverage points for lifting and breaking. As natural nails grow, the gap between the cuticle and gel polish increases, making the manicure appear unkempt and more susceptible to damage. Regular maintenance appointments allow your nail technician to assess nail health, address any lifting issues promptly, and refresh your mint green color before significant wear occurs. Between appointments, monitor your nails daily for signs of lifting or separation and address issues immediately to prevent moisture from entering beneath the gel.
Visit Gel Nails by Lina for comprehensive guides on maintaining your solid color manicures and extending the life of your beautiful mint green almond nails with professional care techniques.
How to Remove Gel Nails Safely
Safe gel nail removal protects natural nails from damage and maintains their strength for future manicures. Begin by filing the shiny top coat layer with a 180-grit file to break the seal and allow acetone to penetrate the gel layers more effectively. Use gentle back-and-forth motions without applying excessive pressure that could damage the natural nail underneath. This step significantly reduces soaking time and prevents over-exposure to acetone, which can dehydrate nails and surrounding skin.
Soak cotton pads in pure acetone and place them directly on each nail, ensuring complete coverage of the gel surface. Wrap each fingertip with aluminum foil to secure the cotton and create heat that accelerates the breakdown of gel polish molecules. Allow nails to soak for 10 to 15 minutes, checking progress periodically by gently pressing on the gel to see if it has softened sufficiently for removal. Avoid extending soak time beyond 20 minutes, as prolonged acetone exposure weakens natural nails.
After soaking, use an orangewood stick or cuticle pusher to gently scrape softened gel from the nail surface using light pressure and smooth strokes from cuticle to tip. Never force or pry stubborn gel, as this removes layers of the natural nail and causes thinning and weakness. If gel remains firmly attached, rewrap the nail and soak for an additional five minutes before attempting removal again. Once all gel is removed, wash hands thoroughly with soap and water to eliminate acetone residue.
Finish the removal process by buffing nails lightly with a fine-grit buffer to smooth any remaining rough patches, then apply cuticle oil and hand cream generously to restore moisture.
Nail Health and Safety
Protecting natural nail health while enjoying cute mint green nails requires awareness of potential risks and implementation of preventive measures. Over-filing the nail surface removes protective layers that shield against infection and structural damage, leading to thin, weak nails prone to tearing and peeling. Always use light pressure when buffing and limit surface preparation to gentle shine removal rather than aggressive abrasion. Professional nail technicians recommend filing in one direction rather than using sawing motions, which creates microscopic tears in the nail plate.
Monitor nails for signs of fungal infection, including discoloration, thickening, or separation from the nail bed, which can develop when moisture becomes trapped beneath gel polish. recommends keeping nails clean and dry, avoiding artificial nail products if you have compromised immunity, and never ignoring persistent nail problems that could indicate underlying health conditions.
Practice proper sanitation by ensuring all tools are cleaned and disinfected before use, whether performing home manicures or visiting professional salons. Disposable files and buffers eliminate cross-contamination risks, while reusable metal tools should be sterilized with hospital-grade disinfectants or autoclaves between uses. Never share nail tools with others, as this transmits bacteria and fungi that cause infections requiring medical treatment. Maintaining these safety standards ensures your mint green almond nails enhance your appearance without compromising your health.
Frequently Asked Questions
How long do gel nails last?
Gel nails typically last two to three weeks with proper application and care before requiring maintenance or removal. The longevity depends on factors including nail preparation quality, gel product formulation, daily activities, and natural nail growth rate. Solid color applications like mint green often last longer than intricate designs because they lack multiple product layers that create weak points. To maximize wear time, apply cuticle oil daily, avoid prolonged water exposure, and refrain from using nails as tools for opening or scratching.
How to remove gel nails safely at home?
Removing gel nails safely at home requires filing the top coat, soaking nails in acetone-saturated cotton pads wrapped in foil for 10 to 15 minutes, then gently scraping softened gel with an orangewood stick. Never peel or force gel off, as this removes natural nail layers and causes significant damage requiring weeks to heal. After removal, hydrate nails thoroughly with cuticle oil and hand cream, and allow at least 24 hours before applying new gel polish. Professional removal at a salon ensures proper technique and minimizes damage risk for those uncomfortable with home removal.
What is the difference between gel nails and acrylic nails?
Gel nails cure under UV or LED light and offer a more natural, flexible finish, while acrylic nails air-dry after mixing liquid monomer and powder polymer to create a hard, durable extension. Gel applications like solid mint green colors provide a glossy appearance without strong chemical odors and generally cause less damage to natural nails during removal. Acrylics offer superior strength for those with weak nails or who desire significant length extensions, but they require more aggressive filing during application and removal. Choose gel for natural-looking solid colors and acrylics for dramatic length and structural support.
Why do gel nails peel or lift prematurely?
Gel nails peel or lift prematurely due to inadequate nail preparation, oil contamination, improper curing, or application technique errors that compromise adhesion. Skipping the buffing step leaves the nail surface too smooth for gel to grip properly, while flooding the cuticle area allows moisture to penetrate beneath the polish. Thick gel layers prevent complete curing even under proper lamp exposure, creating soft spots that separate from the nail. To prevent lifting, always cleanse nails with dehydrator, apply thin product layers, maintain proper cuticle margins, and cure for the full recommended time.
Conclusion
Cute mint green nails in simple almond solid colors offer the perfect combination of elegance, versatility, and timeless spring and summer style. This approachable nail design suits all skill levels while delivering professional results that complement any wardrobe or occasion. By following proper application techniques, maintaining consistent nail care routines, and using quality products from trusted sources like Gel Nails by Lina, you can achieve salon-quality mint green almond nails that last up to three weeks. Embrace this fresh, sophisticated look and enjoy the confidence that comes from beautifully manicured nails perfect for the warmer seasons ahead.