A hat is one of the best first projects you can pick. It’s small, it works up fast, and you can wear (or gift) the result within an afternoon or two. Better still, the whole thing is built from one simple idea: crochet a flat circle, then keep going in rounds until it becomes a cup shape that fits a head.

This guide gives you a complete free pattern for a classic beanie, plus straight answers to the questions beginners ask most: Which stitch is best? How much yarn do I need? How long will it take? And if you get hooked, how much can you charge for a handmade hat?
Table of Contents
Quick Overview
- Skill level: Beginner
- Stitches used: Magic ring, half double crochet (hdc), slip stitch
- Time: Roughly 2 to 4 hours for most beginners (it varies a lot by speed)
- Yarn: About 150 to 200 yards of medium (#4 worsted) weight yarn for an adult size
- Hook: 5.5 mm (I-9), or a size that gives you a snug, firm fabric
What You’ll Need
- Worsted weight (#4) yarn. Acrylic, cotton blends, and wool blends are all fine. Pick a smooth, light color so you can see your stitches.
- A 5.5 mm crochet hook
- Scissors
- A yarn needle for weaving in the ends
- A stitch marker (a bobby pin or scrap of yarn works too)
- A tape measure

These yardage figures are estimates. They depend on your tension, your yarn, and how long you make the hat. If you’re unsure, buy one extra skein from the same dye lot.
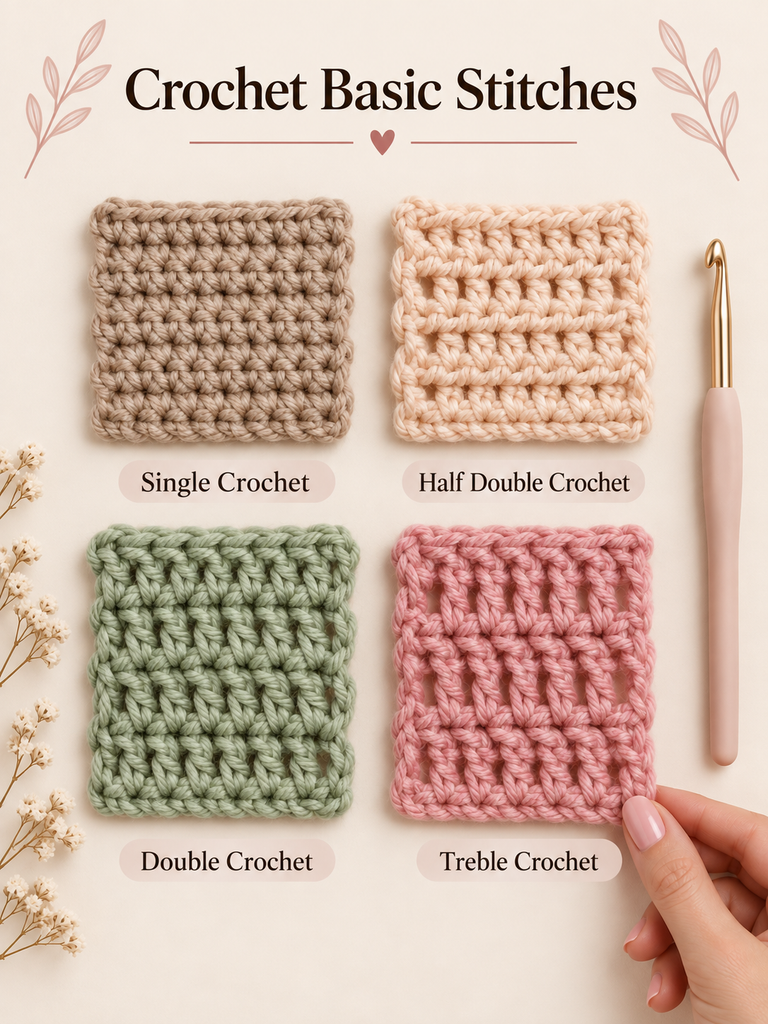
Why Half Double Crochet Is a Great Hat Stitch
If you’re wondering what the best crochet stitch for a hat is, there’s no single right answer, but half double crochet is a strong beginner choice for three reasons.
- It’s taller than single crochet, so it works up faster.
- It’s shorter and denser than double crochet, so the fabric is warm and doesn’t have big holes.
- It’s easy to count, which matters when you’re working in a circle.
Some other options once you feel comfortable:
- Single crochet: very dense and sturdy, but slower.
- Double crochet: fastest and a bit airy, good for lighter hats.
- Textured stitches such as bobbles, puffs, and clusters: pretty, but they tend to use a lot more yarn (they are the classic “yarn eaters”), so budget extra if you try them.
Know the Abbreviations
This pattern uses US crochet terms.
- ch: chain
- sl st: slip stitch
- hdc: half double crochet (yarn over, insert hook, yarn over and pull through the stitch, yarn over and pull through all three loops)
- inc: two hdc in the same stitch
- st(s): stitch(es)
- *…*: repeat the instructions between the asterisks
Choose Your Size
The easiest way to size a hat is by the number of stitches in your final increase round. These are approximate and based on a typical worsted hdc gauge of about 13 stitches per 4 inches. Your own gauge may differ, so check your work against a head or a hat that fits.
- 48 stitches: toddler or small child (about 15 inches around)
- 60 stitches: average adult (about 18 to 19 inches around, with a little stretch)
- 72 stitches: large adult (about 22 inches around)
A well-fitting beanie is usually a couple of inches smaller than the head it’s covering, so it stays put.
The Pattern: Basic Beanie, Worked From the Top Down
You’ll work in joined rounds. After each round, slip stitch to the first stitch, then chain 1 (this chain does not count as a stitch).
Round 1: Start the Crown
Make a magic ring. Chain 1, then work 12 hdc into the ring. Pull the tail to close the ring tightly. Slip stitch to the first hdc. (12 stitches)

Round 2
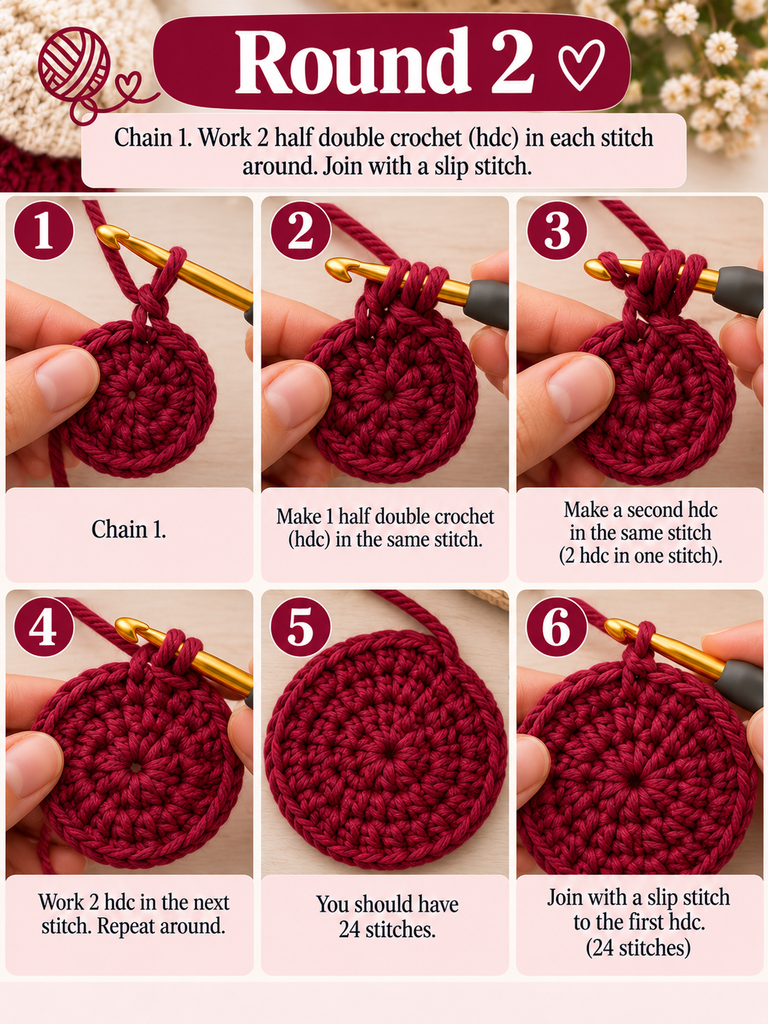
Ch 1. Work 2 hdc in each stitch around. Join. (24 stitches)
Round 3
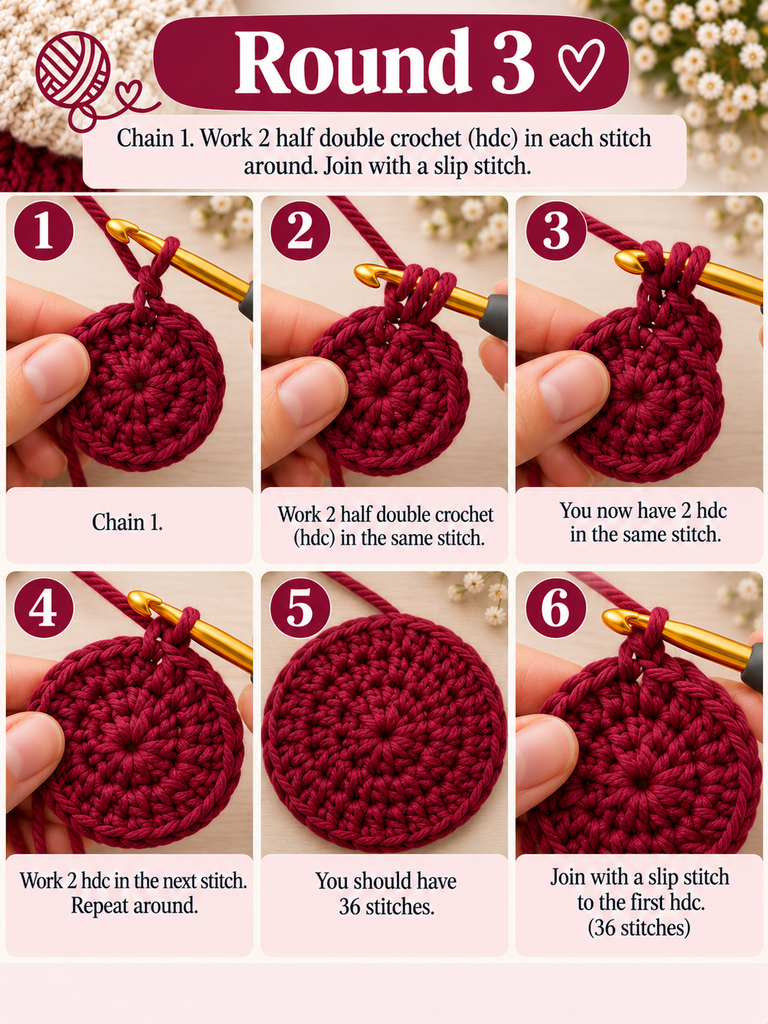
Ch 1. *Hdc in the next stitch, inc in the next stitch.* Repeat around. Join. (36 stitches)
Round 4
Ch 1. *Hdc in the next 2 stitches, inc in the next stitch.* Repeat around. Join. (48 stitches)
For the 48-stitch size, stop increasing here and skip to Round 6.
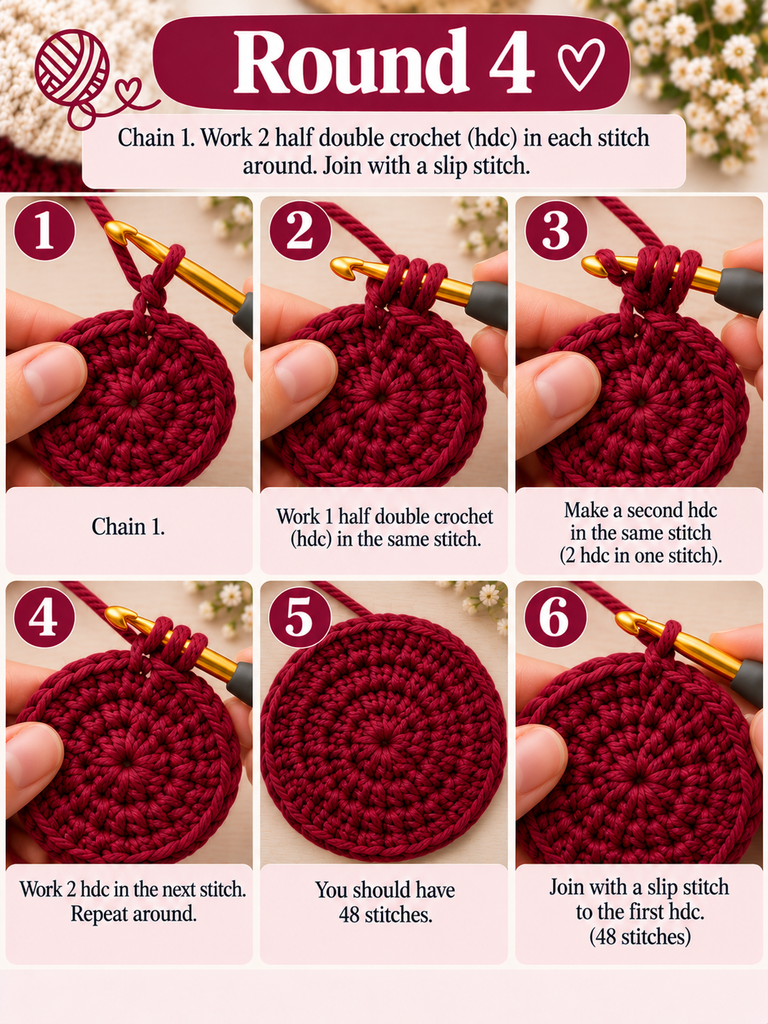
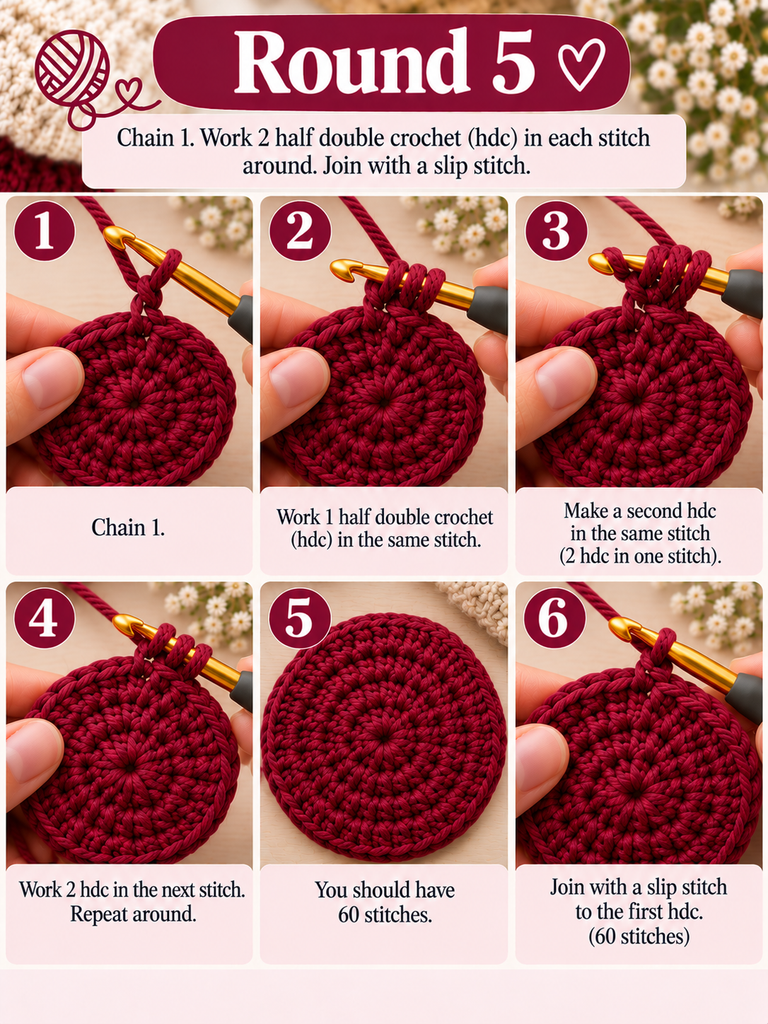
Round 5
Ch 1. *Hdc in the next 3 stitches, inc in the next stitch.* Repeat around. Join. (60 stitches)
For the 72-stitch size, add one more round: *hdc in the next 4 stitches, inc in the next stitch.* Repeat around. Join. (72 stitches)
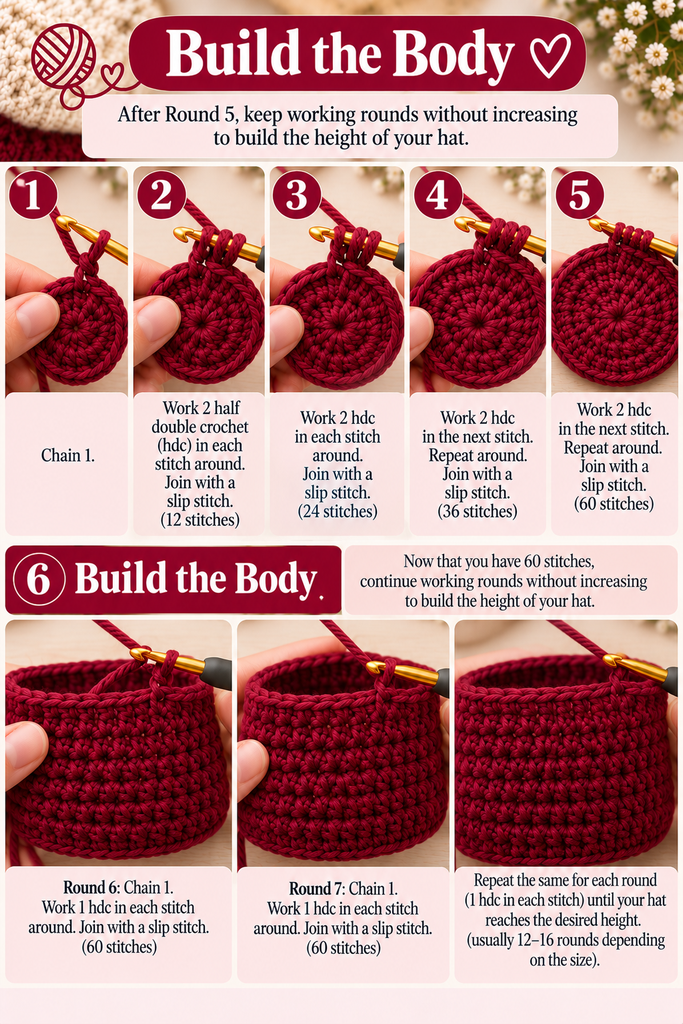
Rounds 6 and Beyond: Build the Body
Ch 1. Hdc in each stitch around. Join. Repeat this round until the hat measures about 7 to 8 inches from the center of the crown to the edge for an adult (about 6 inches for a toddler). For an adult hat, that’s usually somewhere around 10 to 12 plain rounds after your last increase, but measure rather than trusting the count.
Optional Brim
For a snugger edge, work 2 to 3 rounds of hdc into the back loop only (the loop farthest from you). This creates a ribbed-looking band that hugs the head and can be folded up.

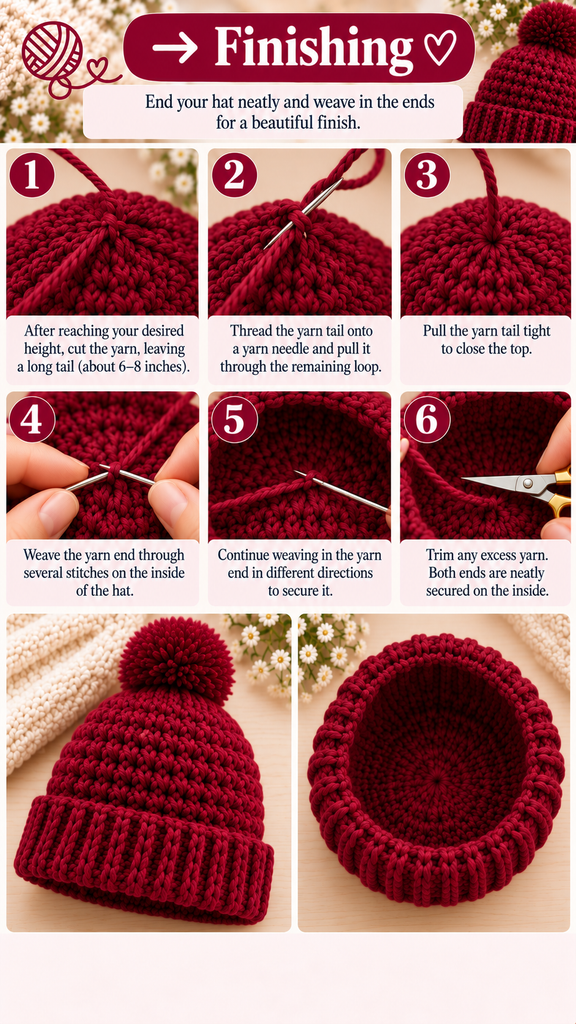
Finishing
Slip stitch into the next stitch, cut the yarn, and pull the tail through. Thread it onto your yarn needle and weave in all ends. If you want a pom-pom, add one now.
Beginner Tips That Save Frustration
- Mark your first stitch. It’s the easiest way to keep track of where each round begins.
- Count every round. Running totals of 12, 24, 36, 48, 60 mean you’re on track. If you’re off, fix it right away.
- If the crown ruffles, you have too many stitches. If it curls up into a bowl, you have too few.
- Try it on as you go, or measure against a hat that fits.
- Don’t pull too tight. Loose, relaxed tension is easier to work and makes a more comfortable hat.
Common Questions About Crochet Hats
What is the easiest crochet hat for a beginner?
A plain beanie in half double crochet or single crochet, worked in the round, is about as easy as it gets. No shaping beyond the increase rounds is needed.
How many yards of yarn does it take to make a crochet hat?
For an adult hat in worsted weight yarn, expect roughly 150 to 200 yards. Child sizes use less, and chunky yarn, bulky stitches, or a long slouchy shape use more. Check the label on your yarn ball and add a little extra for safety.
How many hours does it take to crochet a hat?
Most beginner hats take a few hours. Experienced crocheters often finish one much faster, especially in chunky yarn. Expect your first one to take longer as you learn.
Can I use double crochet instead of half double?
Yes. Double crochet works faster and gives a looser fabric. You’ll need to adjust the stitch counts because the stitches are taller, so be ready to rework your increase rounds.
Turning a Hobby Into Income: Pricing and Selling
Lots of people start with a beanie and end up wondering whether they could sell them. If you’re curious, here’s a straightforward way to think about pricing a handmade hat.
- Materials: the cost of the yarn, plus any extras like pom-poms or labels
- Time: the hours you spent, multiplied by the hourly wage you’d like to earn
- Overhead: fees, packaging, shipping supplies, photos, and so on
Add those together and you have a minimum price. Many beginners undercharge, and then burn out. Look at similar listings on marketplaces like Etsy and in local craft fairs to see what the market will bear for your skill level and quality.
As for what sells, simple, wearable items tend to do well: beanies, headbands, ear warmers, and baby hats. Neutral colors, good photos, and a clear listing with sizing information help a lot. I can’t promise what’s trending at any given moment, so check current listings in your own niche before you commit to a big batch.
Where to Go From Here
Once you’ve made one beanie, you’ve learned the foundation for dozens of projects. Try these next:
- A slouchy hat, by working extra plain rounds
- A striped beanie, changing colors every two rounds
- A ribbed brim using back-loop hdc
- Ear flaps, a pom-pom, or a different stitch pattern
Final Thoughts
A crochet hat looks more complicated than it is. Learn a magic ring, a half double crochet, and how to space your increases, and you can make something genuinely wearable. Don’t worry if your first attempt is a little wonky. Every crocheter’s first hat is, and the second one is always better.
Your Turn
Grab a skein, pick up your hook, and make your first beanie this week. Tell us in the comments which size you made, what yarn you used, and where you got stuck. And if you’d like a follow-up on a slouchy hat, a striped version, or a kid’s size, let us know which one you want to see next.