

I still remember my first crochet project. It was supposed to be a scarf. Three weeks later it was a lopsided trapezoid that got wider every row, and it lived in a drawer until I quietly threw it out.
Here’s what nobody told me back then: a scarf is a terrible first project. It’s long, it’s repetitive, and you don’t see a finished result until you’ve lost all motivation. A headband, on the other hand? You can start it after dinner and wear it to work the next morning.
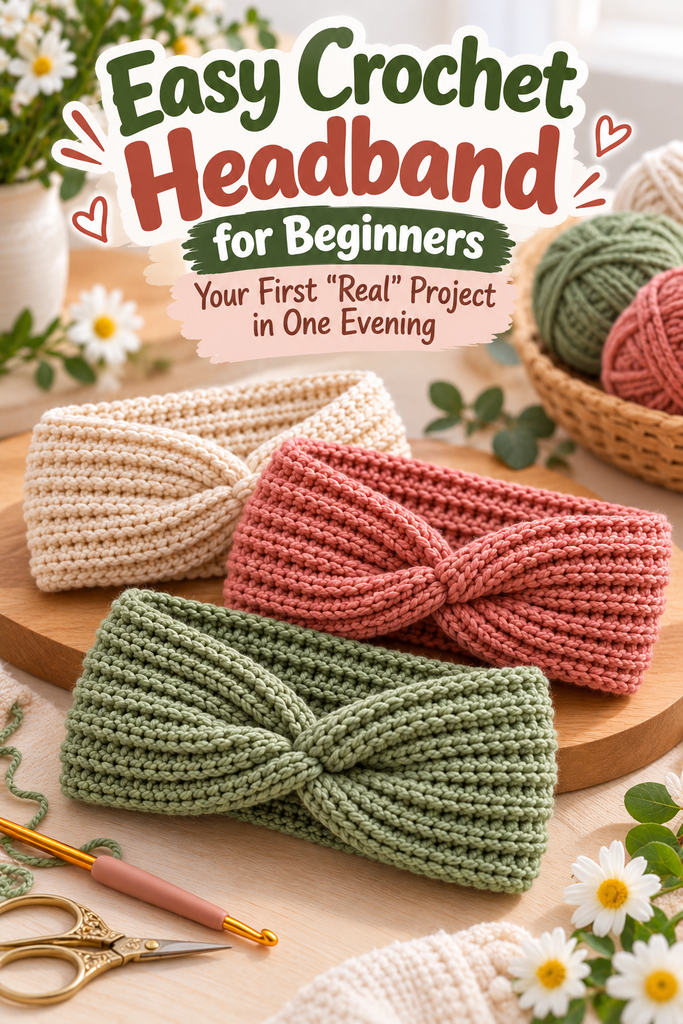
That’s exactly what we’re making today. One hook, one ball of yarn, one stitch you’ll repeat until it becomes muscle memory. And at the end, something you’ll actually want to wear.
Table of Contents
Key Takeaways
- A ribbed headband uses just one main stitch (half double crochet), so it’s ideal for true beginners.
- You need about 80–120 yards of worsted weight yarn and a 5.0 mm (H-8) hook.
- Make the band about 2 inches shorter than your head circumference so it stays put.
- Working in the back loop only creates that stretchy, store-bought ribbed look.
- A simple fold-and-sew trick turns a plain band into a trendy twisted headband.
Why a Headband Is the Perfect First Crochet Project
Think of it like learning to drive in an empty parking lot instead of on the highway. A headband gives you everything you need to practice, with none of the pressure.
It’s small, so mistakes are cheap. If you mess up a row, ripping back costs you five minutes, not five evenings. It’s worked in flat rows, so you don’t have to wrestle with rounds or counting increases. And because the ribbed texture is forgiving, slightly uneven tension disappears into the fabric.
Honestly, the biggest benefit is psychological. Finishing something fast gives you the confidence to try the next thing. I’ve watched friends who “aren’t crafty” finish one of these and immediately ask, “Okay, what can I make next?”
What You’ll Need (It’s Less Than You Think)
- Yarn: About 80–120 yards of worsted weight (category #4) yarn. Acrylic is cheap and easy to wash; a wool blend is warmer and has a lovely bounce.
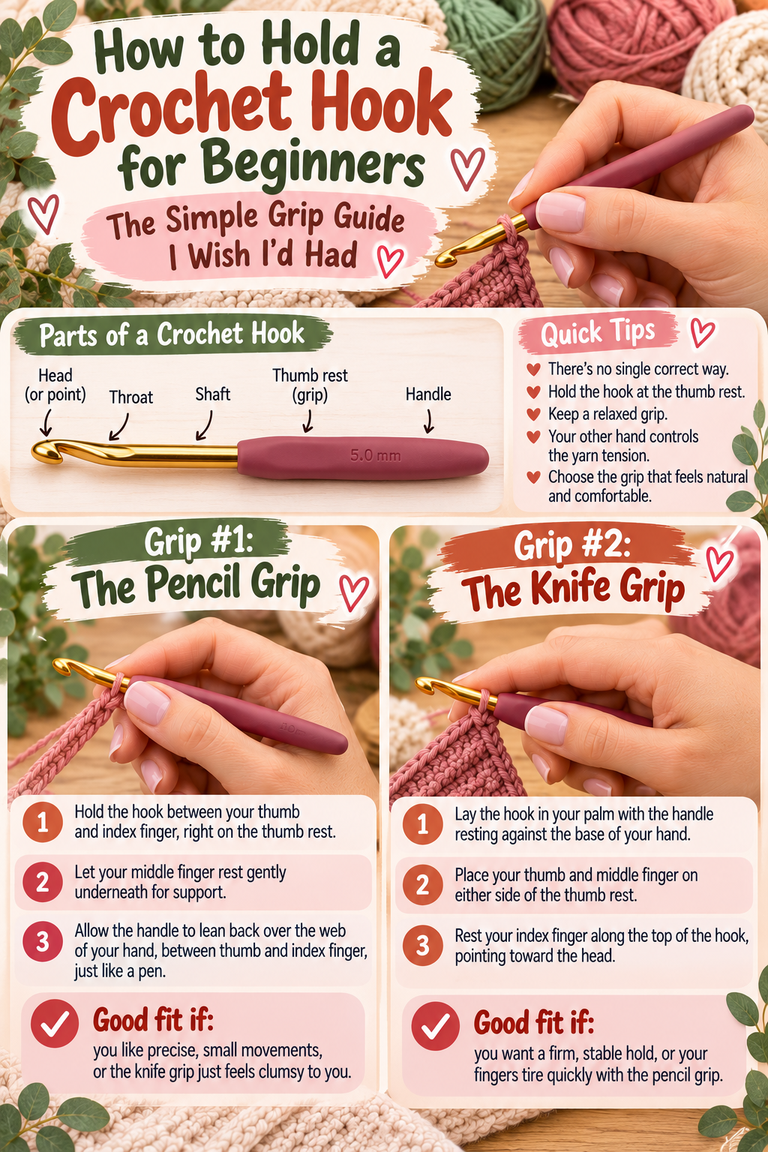
- Hook: 5.0 mm (US H-8). If your stitches feel tight and hard to work into, go up to 5.5 mm (I-9).
- Yarn needle: A blunt tapestry needle for sewing the ends together.
- Scissors and a measuring tape.
A little tip from experience: pick a light, solid color for your first try. Dark and fuzzy yarns look gorgeous, but they hide your stitches, and as a beginner you really want to see where your hook is going.
Crochet Terms Made Simple
This pattern uses US crochet terms. Don’t let the abbreviations scare you. There are only four you need:
- ch (chain): the foundation loops you make to start.
- hdc (half double crochet): yarn over, insert hook, yarn over and pull up a loop, yarn over and pull through all three loops on your hook.
- BLO (back loop only): instead of going under both loops at the top of a stitch, slide your hook under just the one farthest from you.
- sl st (slip stitch): insert hook, yarn over, pull straight through everything.
If you can do a half double crochet, you can make this headband. That’s genuinely it.
Find Your Size Before You Start
Wrap your measuring tape around your head where the headband will sit, over the ears and across the middle of your forehead. Then use this rough guide:
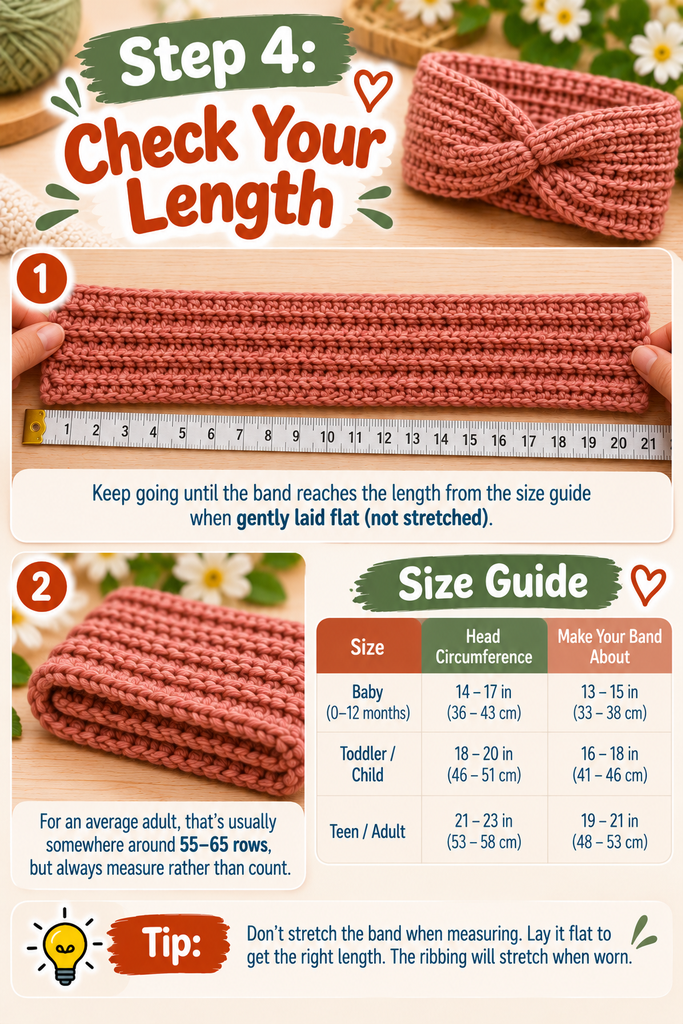
- Baby (0–12 months): head 14–17″, make band about 13–15″
- Toddler/Child: head 18–20″, make band about 16–18″
- Teen/Adult: head 21–23″, make band about 19–21″
Why shorter? Ribbing stretches. A band that matches your head exactly will slowly slide down over your eyebrows by lunchtime. Trust me, I’ve been there.
The Easy Ribbed Crochet Headband Pattern
We’re working the headband sideways. Your starting chain sets the width of the band, and the number of rows sets the length. That’s what gives us vertical ribs that look just like knitting.
Finished width: about 4 inches (adjust in Step 1 if you want it narrower or wider).
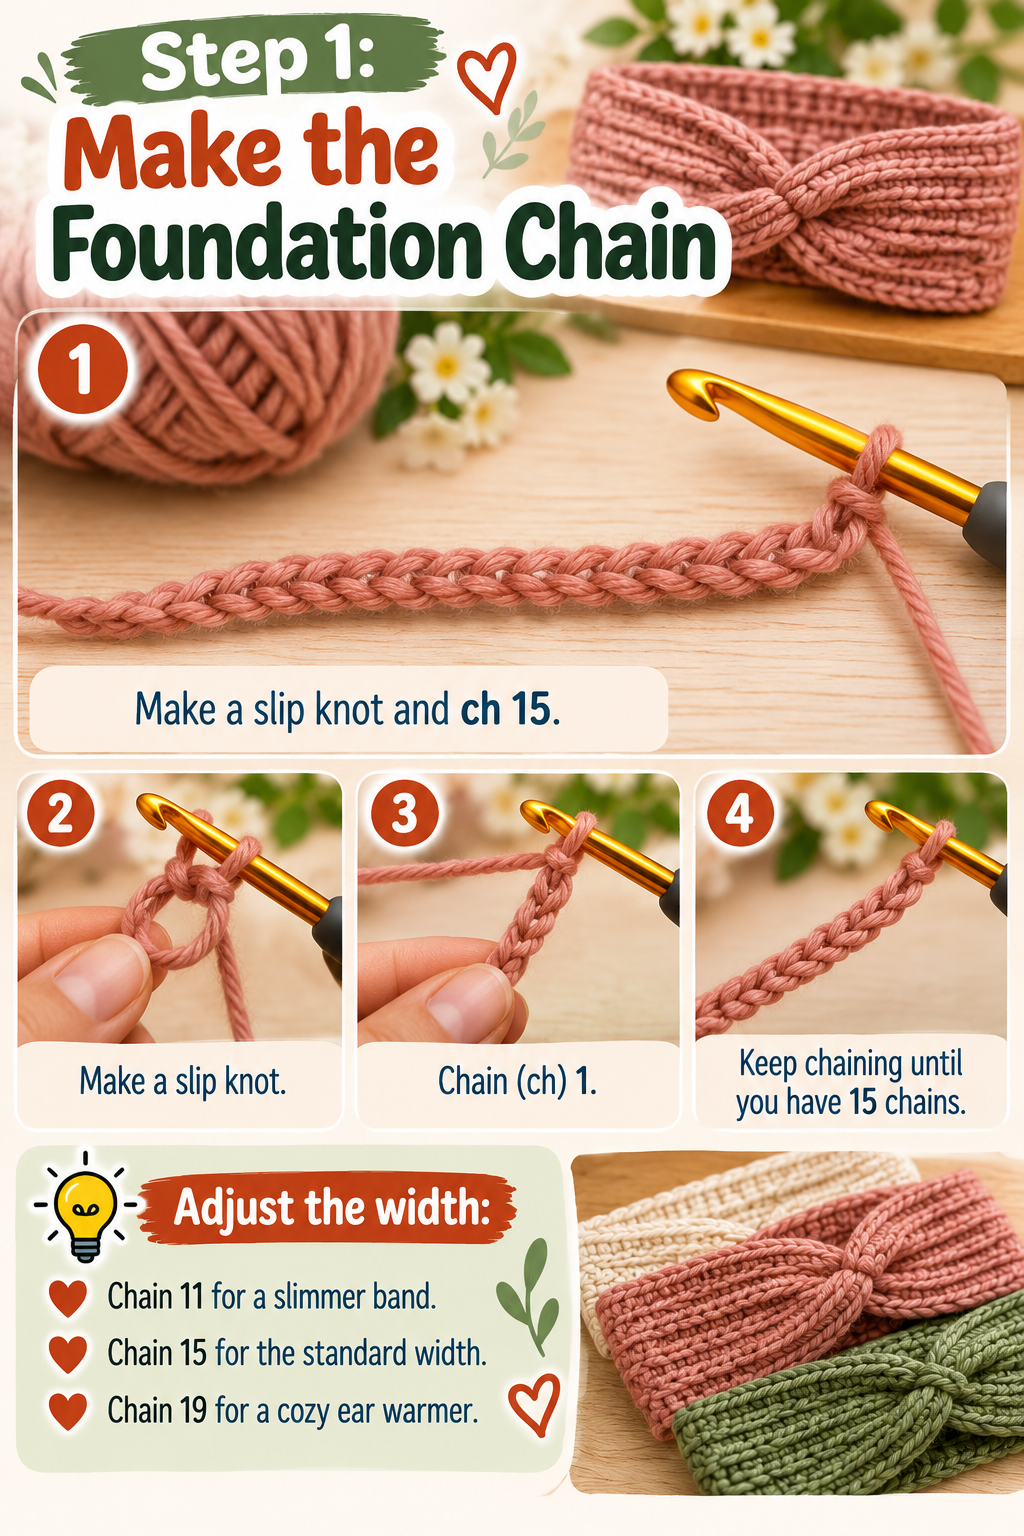
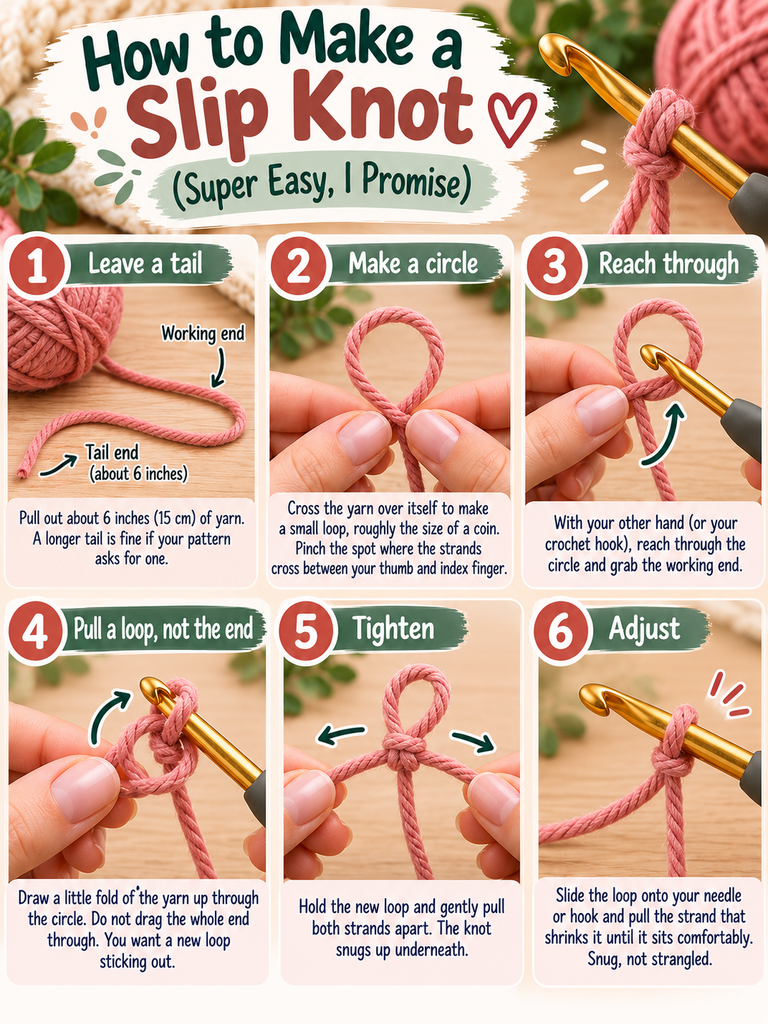
Step 1: Make the Foundation Chain
Make a slip knot and ch 15. Want a slimmer band? Chain 11. Want a cozy ear warmer? Chain 19.
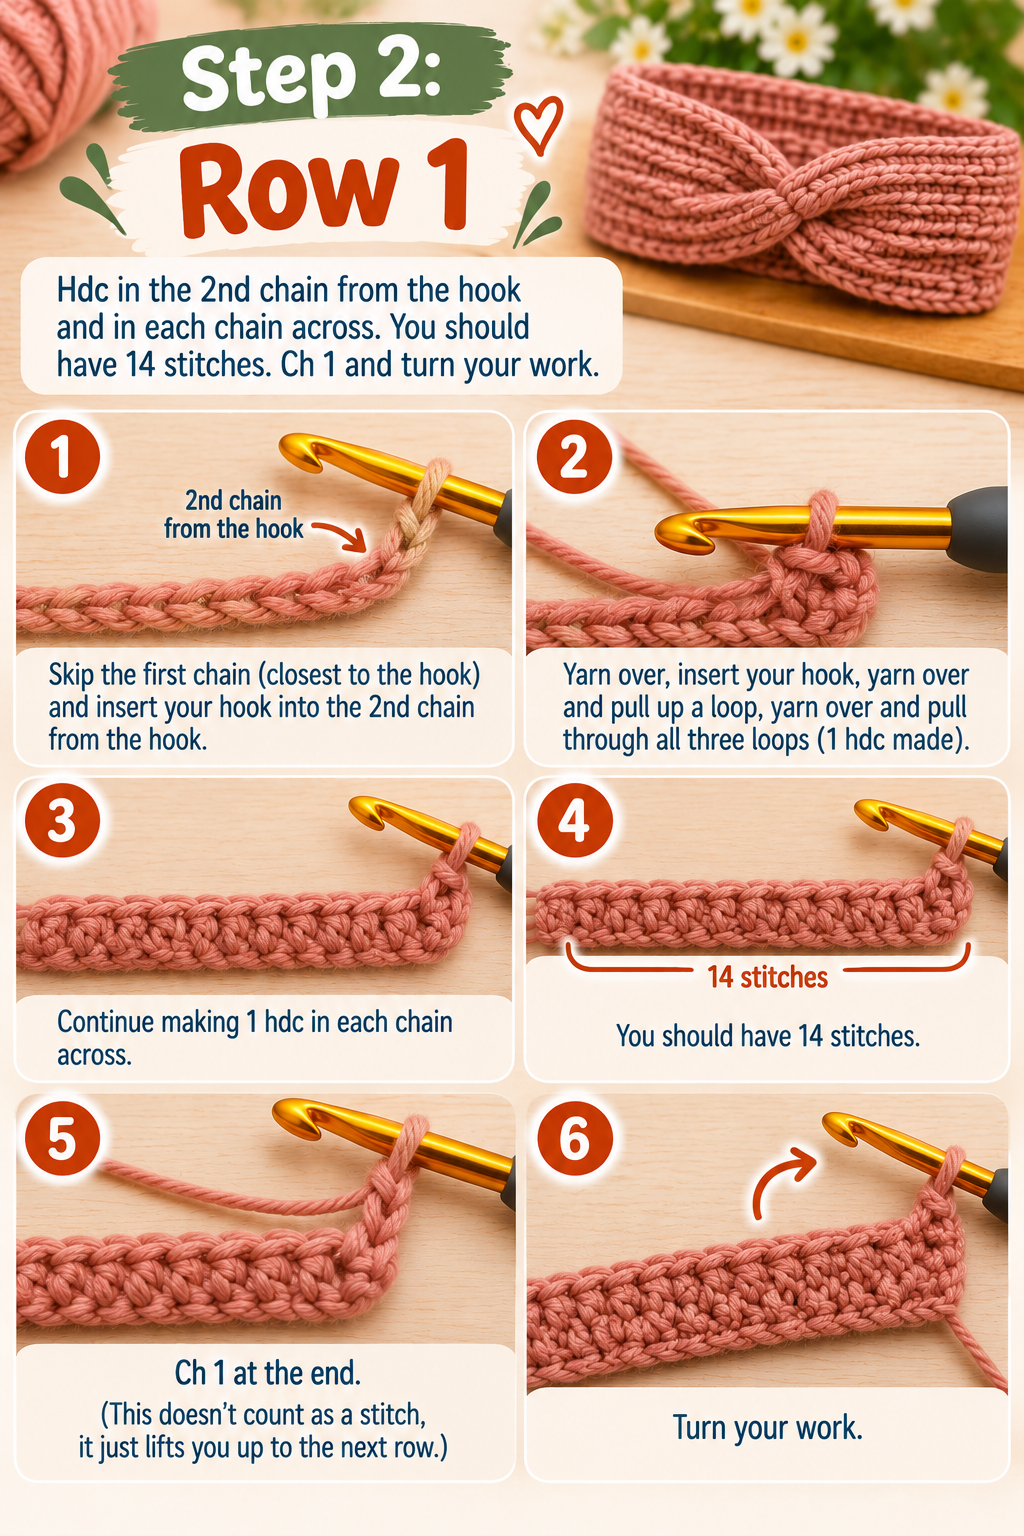
Step 2: Row 1
Hdc in the 2nd ch from the hook and in each ch across. You should have 14 stitches. Ch 1 and turn your work. (That ch 1 doesn’t count as a stitch, it just lifts you up to the next row.)
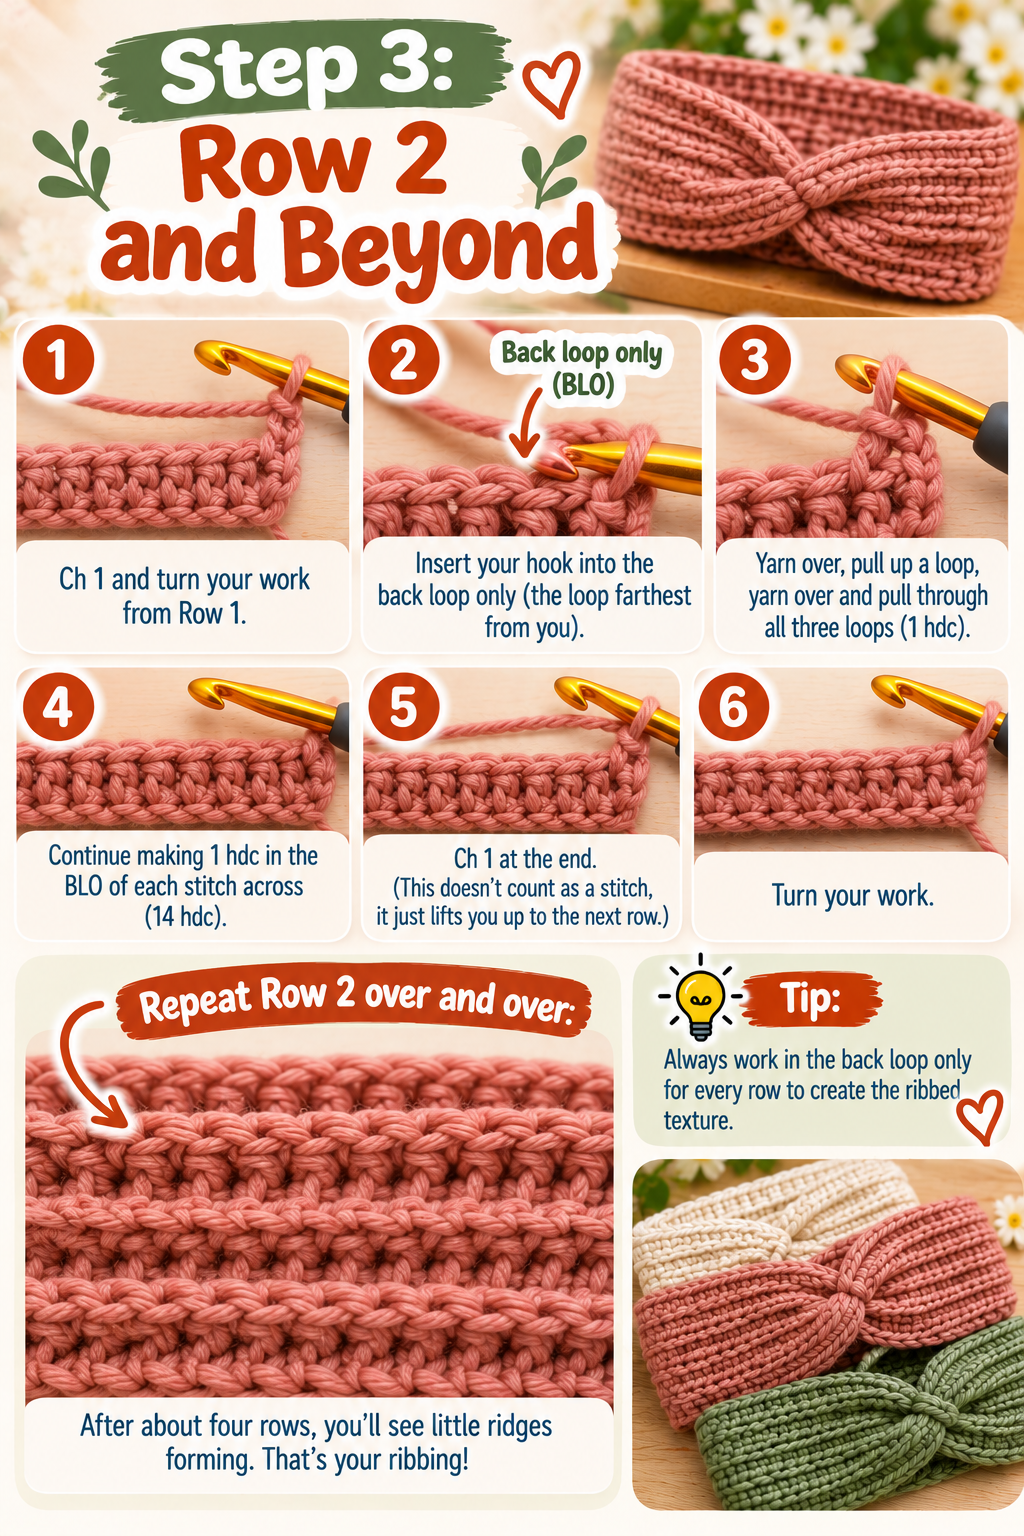
Step 3: Row 2 and Beyond
Hdc in the BLO of each stitch across (14 hdc). Ch 1, turn.
Repeat this row over and over. After about four rows, you’ll see little ridges forming. That’s your ribbing, and it’s honestly one of the most satisfying moments for a new crocheter.
Step 4: Check Your Length
Keep going until the band reaches the length from the size guide when gently laid flat (not stretched). For an average adult, that’s usually somewhere around 55–65 rows, but always measure rather than count.
Step 5: Join the Ends
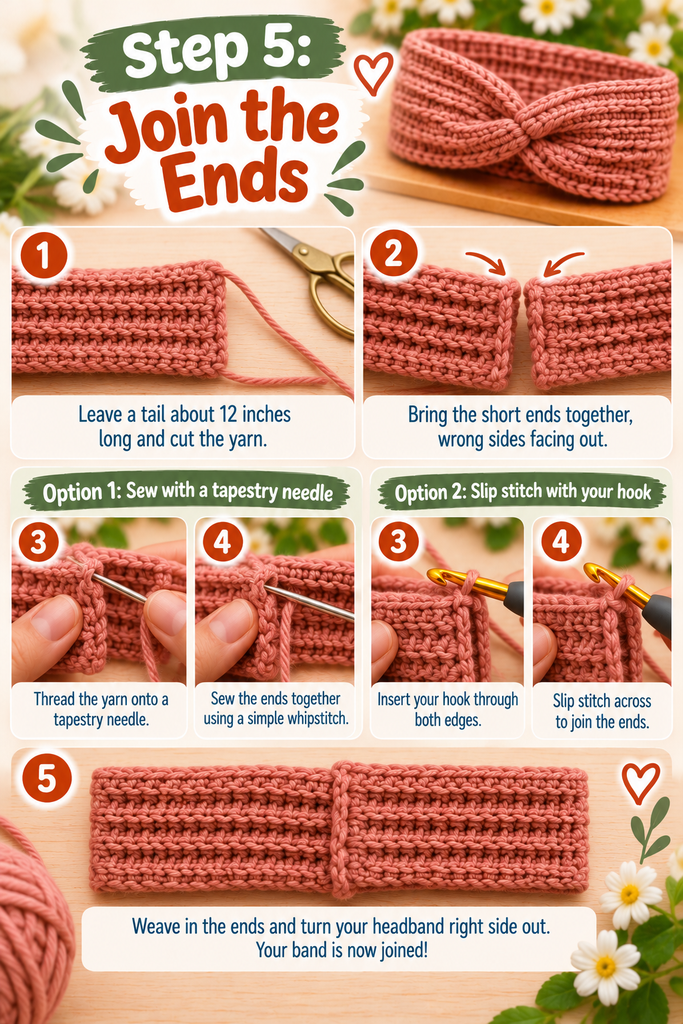
Leave a tail about 12 inches long and cut the yarn. Bring the short ends together, wrong sides facing out, and sew them with your tapestry needle using a simple whipstitch. Or, if you prefer, slip stitch them together with your hook.
Step 6: Finish
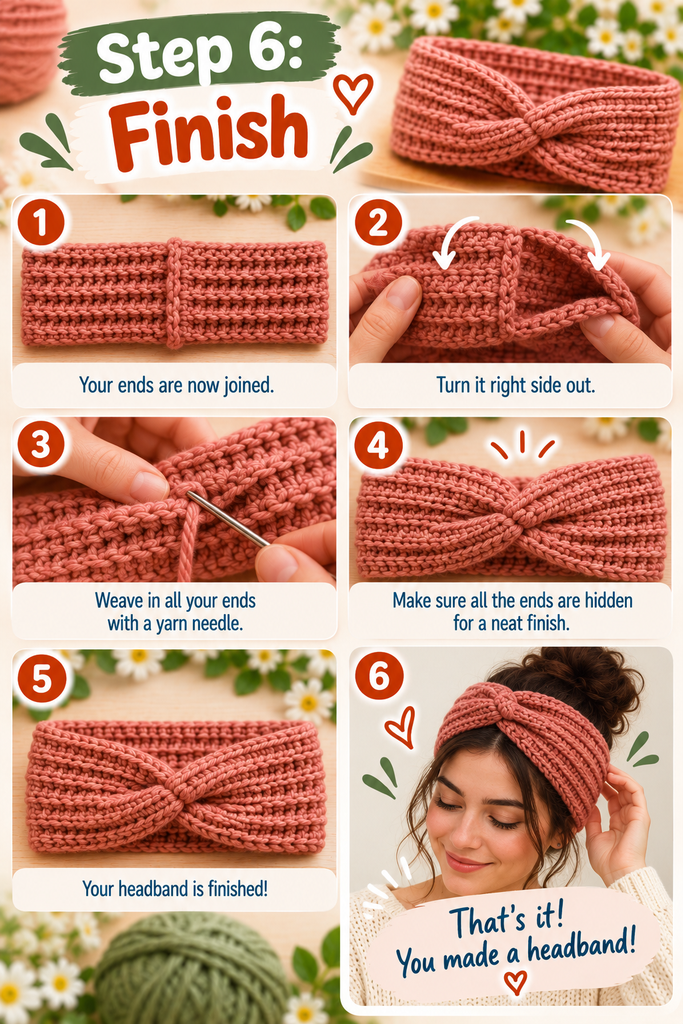
Turn it right side out, weave in all your ends, and try it on. That’s it. You made a headband.
Level Up: The Twisted Headband Variation
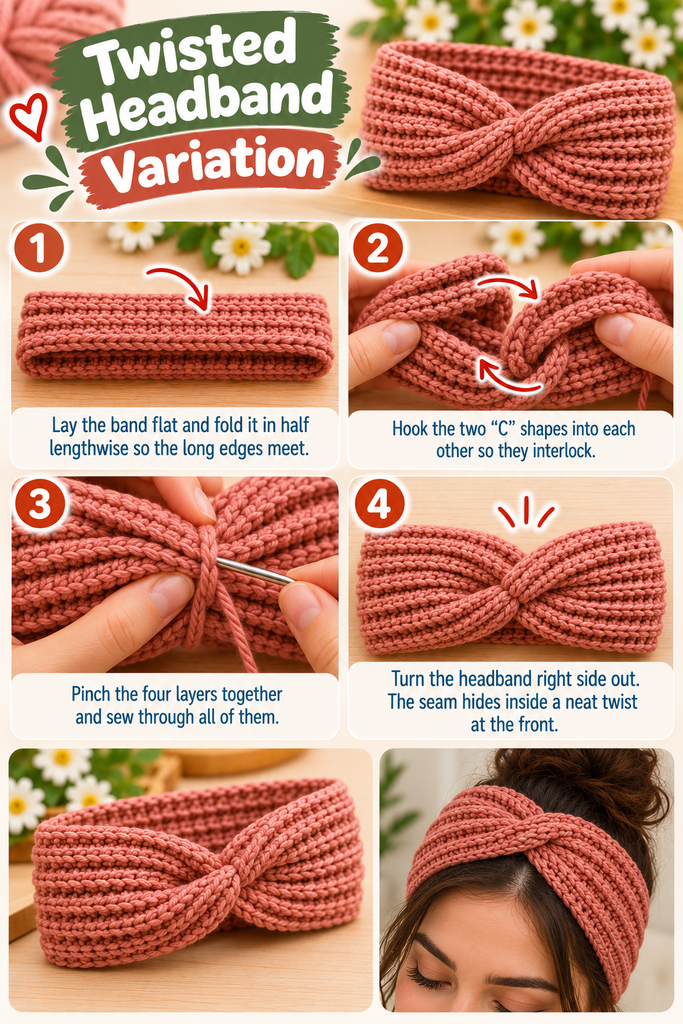
Want that turban-style twist you see all over Pinterest? It looks complicated, but it’s really just a clever fold. Follow Steps 1–4, then instead of joining the ends straight:
- Lay the band flat and fold it in half lengthwise so the long edges meet, making each end look like a “C”.
- Hook the two “C” shapes into each other so they interlock.
- Pinch the four layers together and sew through all of them.
- Turn the headband right side out, and the seam hides inside a neat twist at the front.
The first time I did this I genuinely thought I’d done it wrong, because it looks like a mess until you flip it. Then suddenly it’s there. Give it a second.
Common Beginner Mistakes (and How to Fix Them)
“My headband is getting wider (or narrower).” This is the number one issue, and it means you’re adding or skipping stitches at the ends of rows. Count your stitches after every row for the first ten rows. Placing a stitch marker in the first and last stitch helps enormously.
“My edges look wobbly.” Totally normal for your first project. The very last stitch of a row is the easiest to miss because it hides behind the turning chain. Look for it on purpose.
“It’s too stiff and doesn’t stretch.” Your tension is probably tight. Go up a hook size and try to relax your grip. You’re holding yarn, not a steering wheel in traffic.
“I can’t tell which loop is the back loop.” Hold the work so the top of the row faces you. The loop closest to your body is the front; the one on the far side is the back. Once you see it, you can’t unsee it.
Make It Your Own
Once you’ve made one, the fun really begins. A few easy ideas:
- Stripes: change colors every 8 or 10 rows for a bold, sporty look.
- Button band: skip the seam, add a large button on one end, and slip it through the stitches on the other. Great for gifts when you don’t know the exact head size.
- Summer version: swap to cotton yarn and a narrower width for a workout or hair-wrap band.
- Gift sets: one ball of yarn often makes two headbands, which is perfect for matching parent-and-kid sets.
Frequently Asked Questions
How long does it take to crochet a headband?
For a complete beginner, plan on two to four hours. By your second or third one, you’ll likely finish in about an hour and a half.
What’s the best yarn for a beginner crochet headband?
A smooth, light-colored worsted weight yarn in acrylic or a wool blend. Avoid fuzzy, very dark, or novelty yarns until you’re comfortable reading your stitches.
Can I make this headband without a sewing needle?
Yes. Simply slip stitch the two short ends together with your hook. It creates a slightly thicker seam, but it works perfectly well.
Is a crochet headband warm enough for winter?
Made wider (chain 19 or more) in a wool blend, it makes a surprisingly cozy ear warmer, and it won’t flatten your hair the way a beanie does.
Final Thoughts: Your First Win Matters
Remember that sad trapezoid scarf of mine? What finally got me hooked (sorry, I had to) wasn’t some impressive pattern. It was a simple headband just like this one, finished in a single evening and worn the next day.
That’s the real value of this project. It’s not just a headband. It’s proof that you can do this. Every row of half double crochet is quietly teaching you tension, counting, and reading your stitches, the same skills you’ll use for hats, blankets, and sweaters down the road.
So grab a hook, pick a color you love, and give yourself one evening.
When you finish yours, I’d love to see it. Drop a comment below with the yarn and color you chose, or tell me where you got stuck. Chances are someone else is stuck in the same spot, and your question might be exactly what they need. Happy crocheting!

One Comment