Blueberry French Tip Nails: The Complete Guide

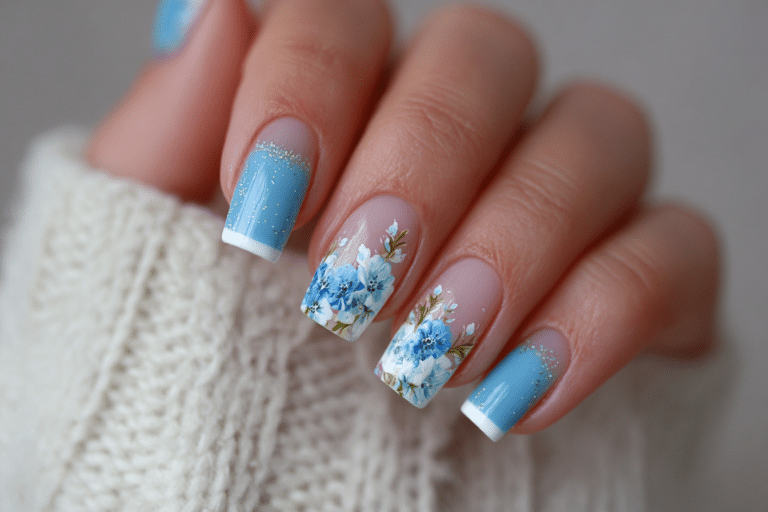
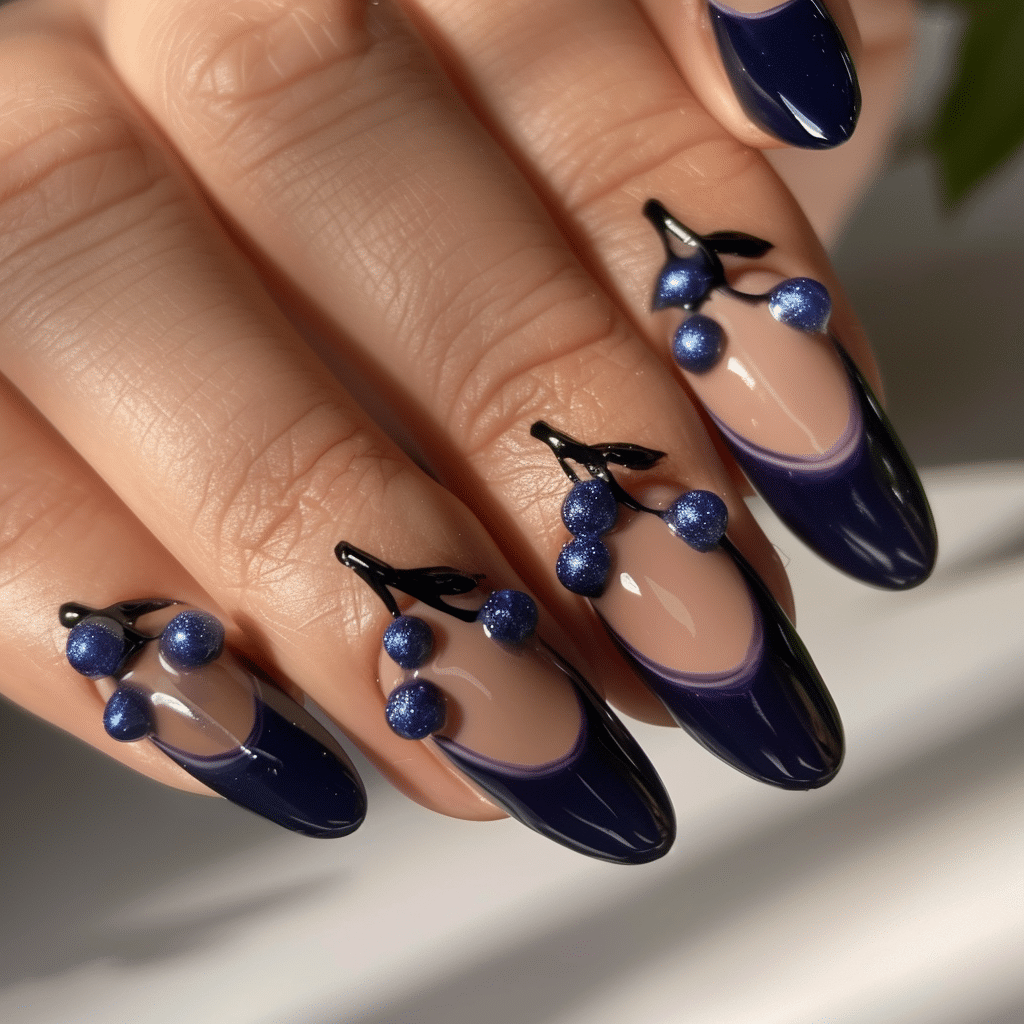
Blueberry French tip nails are a contemporary twist on the classic French manicure, featuring rich blue tones that mimic the deep purple-blue hues of fresh blueberries.
This elegant nail design combines traditional French tip techniques with modern color palettes, creating a sophisticated look that works for both casual and formal occasions. The versatile style has gained popularity among nail enthusiasts for its ability to add color while maintaining professional elegance.
| Topic | Details |
| Category | Nail Art / Gel Nails |
| Skill Level | Intermediate |
| Time Needed | 45-60 minutes |
| Tools Needed | UV/LED lamp, gel polish, nail file, brush, base coat, top coat |
| Best For | Those seeking colorful yet sophisticated nail designs |
Table of Contents
Why This Nail Technique Works
The blueberry French tip technique works exceptionally well because it balances tradition with creativity, offering a fresh perspective on nail art. The deep blue shades create visual interest without overwhelming the natural nail bed, making hands appear elegant and well-groomed. This color choice flatters all skin tones, from fair to deep complexions, because blue undertones create a universally appealing contrast.
Gel polish formulations make this technique particularly effective for longevity and shine. The gel medium provides superior adhesion compared to traditional polish, ensuring your blueberry tips remain chip-free for two to three weeks. The curing process under UV or LED light creates a hard, glossy finish that mimics the lustrous appearance of fresh blueberries. This durability makes the design practical for busy individuals who want beautiful nails without frequent maintenance.
From a design perspective, the French tip structure naturally draws attention to the fingertips, elongating the appearance of shorter nails. When executed with blueberry tones, this technique adds depth and dimension that flat, single-color manicures cannot achieve. The color gradient from natural nail bed to vibrant blue tip creates a sophisticated ombre effect that works beautifully in professional and social settings.
Tools and Products Needed
| Product | Purpose | Alternatives |
| UV/LED Lamp | Cures gel polish for lasting wear | 48W LED lamp recommended |
| Gel Base Coat | Protects natural nail and improves adhesion | Peel-off base for easy removal |
| Blueberry Blue Gel Polish | Creates the signature French tip color | Deep purple-blue or navy shades |
| Sheer Pink or Nude Gel | Covers the nail bed for natural look | Clear gel with natural nail showing |
| Gel Top Coat | Seals design and adds shine | No-wipe top coat for convenience |
| Nail File (180 grit) | Shapes nails and smooths edges | Glass file for gentler filing |
| Nail Buffer | Removes shine for better adhesion | 240 grit buffer block |
| Cuticle Pusher | Pushes back cuticles safely | Orange wood stick |
| Lint-Free Wipes | Cleanses nails and removes sticky layer | Cotton pads with acetone |
| Cuticle Oil | Hydrates cuticles post-application | Jojoba or vitamin E oil |
| Nail Brush or Striping Brush | Creates precise French tip line | Thin detail brush |
For professional-quality gel nail supplies and detailed tutorials, visit Gel Nails by Lina for expert recommendations and technique guides.
Step-by-Step Application Guide
Nail Preparation
- Remove any existing nail polish using acetone and lint-free wipes to ensure a clean surface.
- File your nails into your desired shape, whether square, round, oval, or almond, using smooth strokes in one direction.
- Gently push back cuticles using a cuticle pusher, taking care not to damage the delicate skin.
- Lightly buff the nail surface with a 240-grit buffer to remove natural oils and create texture for adhesion.
- Cleanse nails thoroughly with a lint-free wipe soaked in rubbing alcohol or nail cleanser to remove all dust and oils.
- Allow nails to air dry completely for 30 seconds before proceeding to base coat application.
Base Coat Application
- Apply a thin, even layer of gel base coat to each nail, ensuring coverage from cuticle to free edge.
- Cap the free edge by running the brush along the nail tip to prevent lifting and peeling.
- Cure nails under your UV/LED lamp according to manufacturer instructions, typically 30-60 seconds for LED or 2 minutes for UV.
- Check that the base coat is completely cured by gently touching the surface; it should feel smooth and dry.
Gel Polish Layers
- Apply a sheer pink or nude gel polish to the entire nail as your base color, keeping the layer thin.
- Cure the first color layer completely under your lamp for the recommended time to prevent wrinkling.
- Apply a second coat of the base color if needed for opacity, then cure again thoroughly.
- Using a thin nail art brush or striping brush, carefully paint the blueberry blue gel polish along the free edge of each nail.
- Create a smooth curve or straight line depending on your preferred French tip style, starting from one side and sweeping across.
- Keep the blueberry tip thickness consistent across all nails for a professional, uniform appearance.
- Cure the blueberry French tip layer completely before proceeding to avoid smudging or color bleeding.
- Apply a second coat of blueberry blue to the tips if greater color intensity is desired, then cure again.
Curing Process
- Ensure each gel layer is cured for the full recommended time to prevent premature peeling or chipping.
- Position your hand correctly in the lamp so all nails receive even light exposure for complete polymerization.
- Avoid moving your hand during the curing cycle to prevent gel from shifting or creating uneven surfaces.
- Allow the lamp to complete its full cycle before removing your hand to ensure thorough curing.
Finishing and Top Coat
- Apply a generous layer of gel top coat over the entire nail, including the French tip design and free edge.
- Cap the free edge carefully with top coat to seal the design and prevent water penetration.
- Cure the top coat layer under your lamp for the full recommended time, usually 60 seconds for LED lamps.
- If using a top coat with a sticky inhibition layer, cleanse nails with rubbing alcohol and a lint-free wipe for a glossy finish.
- Apply cuticle oil around each nail and massage gently to hydrate the surrounding skin and enhance shine.
- Allow nails to rest for five minutes before exposing them to water or performing tasks to ensure complete hardening.
Pro Nail Technician Tips
- Use a striping brush dipped in nail cleanser to clean up any mistakes around the cuticle area before curing for perfect edges.
- Apply thin layers of gel polish rather than thick coats to prevent wrinkling, bubbling, or incomplete curing that leads to peeling.
- Wait 10-15 seconds between applying gel and curing to allow the product to self-level for a smoother, more professional finish.
- Maintain consistent tip thickness across all nails by using guide stickers or measuring the same distance from the free edge on each finger.
- Dehydrate the nail plate thoroughly before base coat application by using a nail prep solution or rubbing alcohol to remove all moisture and oils.
- Invest in quality gel polish brands that offer true-to-bottle color payoff, as cheaper formulas often require multiple coats and cure inconsistently.
Learn more advanced techniques and professional secrets at Gel Nails by Lina, where expert nail artists share their industry knowledge.
Common Gel Nail Mistakes
| Mistake | Why it Happens | How to Fix |
| Thick Gel Layers | Attempting to achieve opacity in one coat instead of building color gradually | Apply multiple thin coats, curing between each layer for proper polymerization |
| Improper Curing | Removing hands too early or using insufficient lamp wattage for complete hardening | Use a 48W or higher LED lamp and cure for full recommended time per product |
| Skipping Nail Prep | Rushing through preparation steps to save time compromises adhesion | Always buff, cleanse, and dehydrate nails thoroughly before base coat application |
| Flooding the Cuticle | Applying gel too close to the cuticle area causes lifting and premature peeling | Leave a tiny gap between gel and cuticle, capping edges without touching skin |
| Uneven French Tip Lines | Freehand application without guides creates inconsistent curves and angles | Use French tip guides or striping tape for perfectly symmetrical lines across all nails |
Blueberry French Tip Nail Design Variations
| Style | Description | Best Occasion |
| Classic Blueberry Tips | Traditional curved French tip with solid blueberry blue color | Professional settings, everyday wear |
| Ombre Blueberry Fade | Gradient transition from natural nail bed to deep blue tips | Weddings, formal events, date nights |
| Blueberry Chrome Tips | Metallic chrome powder applied over blueberry French tips for reflective finish | Evening events, parties, celebrations |
| Glitter Accent Blueberry | Blueberry tips with silver or holographic glitter on accent nails | Holidays, festivals, special occasions |
| Reverse Blueberry French | Blueberry color at the cuticle line instead of tips for modern twist | Fashion-forward events, artistic gatherings |
| Thin Line Blueberry Tips | Minimalist design with very thin blueberry line at the free edge | Minimalist style lovers, office-appropriate |
| Double Blueberry French | Two parallel lines of blueberry blue separated by negative space | Summer events, beach vacations, casual outings |
Nail Care and Maintenance
Proper care extends the life of your blueberry French tip manicure and maintains nail health throughout wear. Apply cuticle oil daily, massaging it into the nail beds and surrounding skin to prevent dryness and maintain flexibility. This practice reduces the likelihood of lifting at the cuticle area and keeps your manicure looking fresh. Hydrated cuticles also prevent hangnails and painful tears that can compromise the seal around your gel polish.
Wear gloves when performing household chores involving water, cleaning chemicals, or prolonged moisture exposure. Excessive water contact causes nails to expand and contract, which can break the gel seal and lead to lifting. Harsh chemicals found in cleaning products can also break down the gel formula prematurely, dulling the shine and causing discoloration. Protecting your nails during these activities preserves both the appearance and longevity of your blueberry French tips.
Avoid using your nails as tools to open cans, scrape labels, or perform similar tasks that create pressure on the free edge. These actions can cause the gel to crack or peel away from the natural nail, requiring early removal. Instead, use proper tools for these tasks and treat your manicure as the delicate art it is. When you notice any lifting or chipping, address it promptly by visiting a nail technician rather than picking at the gel, which damages the natural nail underneath.
For comprehensive nail care guides and maintenance tips, explore the resources available at Gel Nails by Lina to keep your manicures looking salon-fresh.
How to Remove Gel Nails Safely
Safe removal of blueberry French tip gel nails protects your natural nails from damage and maintains their health for future manicures. Begin by lightly buffing the shiny top coat layer with a 180-grit file to break the seal and allow acetone to penetrate more effectively. Take care not to file aggressively, as you only need to remove the glossy surface without thinning the gel significantly.
Soak cotton pads in pure acetone and place one on each nail, ensuring complete coverage of the gel polish. Wrap each finger tightly with aluminum foil to create a seal that holds the acetone-soaked cotton against the nail surface. This method traps heat and increases acetone effectiveness, softening the gel for easier removal. Allow nails to soak for 10-15 minutes without disturbing the wraps.
After soaking, gently remove the foil wraps and use an orange wood stick to push off the softened gel polish. The gel should slide off easily without force; if resistance occurs, rewrap and soak for an additional five minutes. Never force or pry gel off the nail, as this removes layers of the natural nail plate and causes significant damage. Repeat the soaking process as needed until all gel is removed completely.
Nail Health and Safety
Maintaining nail health while enjoying blueberry French tip manicures requires attention to proper application and removal techniques. Over-filing the natural nail to create texture for gel adhesion removes protective layers and causes thinning, weakness, and increased sensitivity. Use a light touch when buffing, focusing only on removing the natural shine rather than aggressively abrading the nail surface. Healthy nails should maintain their natural thickness and flexibility throughout your gel manicure routine.
Watch for signs of nail damage such as brittleness, peeling layers, white spots, or increased sensitivity, which indicate the need for a break from gel applications. Give nails a rest period of one to two weeks between gel manicures to allow natural regeneration and repair. During this time, apply strengthening treatments and keep nails short to prevent breakage while they recover their natural strength and resilience.
If you experience persistent redness, swelling, pain, or discharge around the nail area, discontinue gel applications and consult a dermatologist immediately. These symptoms may indicate infection or allergic reaction to gel products that requires medical treatment. Never ignore warning signs or attempt to cover nail problems with additional gel applications, as this can worsen conditions and lead to permanent nail damage or loss.
Frequently Asked Questions
How long do gel nails last?
Gel nails typically last two to three weeks with proper application and care before requiring maintenance or removal. The longevity depends on factors including nail growth rate, daily activities, and how well you maintain the manicure with cuticle oil and protective measures. Most people schedule gel manicure appointments every two weeks to maintain a fresh appearance and prevent excessive growth at the cuticle line. Proper preparation and quality products from sources like Gel Nails by Lina significantly extend wear time.
How to remove gel nails safely at home?
Remove gel nails safely by soaking cotton pads in acetone, placing them on each nail, and wrapping fingers in aluminum foil for 10-15 minutes. After soaking, gently push off softened gel with an orange wood stick, never forcing or peeling the product off forcefully. If gel does not slide off easily, resoak for additional time rather than scraping or pulling, which damages the natural nail. Always finish with cuticle oil application to rehydrate nails after acetone exposure.
What is the difference between gel nails and acrylic nails?
Gel nails cure under UV or LED light and offer a more flexible, natural-looking finish with glossy shine, while acrylic nails air-dry and create a harder, more rigid enhancement. Gel formulas typically smell less strong than acrylic and cause fewer allergy concerns for sensitive individuals. Acrylics provide greater strength for very weak or damaged nails, whereas gel polish works better for those seeking a lightweight, natural feel. Removal processes differ significantly, with gel requiring acetone soaking and acrylic needing filing or soaking in specialized solutions.
Why do my gel nails peel after a few days?
Gel nails peel prematurely due to inadequate nail preparation, moisture or oil on the nail plate during application, or failure to cap the free edge properly. Skipping the buffing step prevents proper adhesion, while thick gel layers may not cure completely and separate from the natural nail. Ensure thorough cleansing with alcohol or nail prep solution before base coat application, apply thin layers, and always seal the free edge. Exposure to excessive water or chemicals without glove protection also causes early lifting and peeling
How can I make my gel nails last longer?
Make gel nails last longer by applying cuticle oil daily, wearing gloves during household chores, and avoiding using nails as tools for opening or scraping. Proper nail preparation including buffing, cleansing, and dehydrating creates superior adhesion that resists lifting. Choose quality gel products that cure completely and maintain their bond throughout wear, and ensure each layer is cured for the full recommended time. Schedule fills or new applications every two to three weeks before significant lifting occurs to maintain optimal nail health and appearance.
Conclusion
Blueberry French tip nails offer a stunning modern alternative to traditional French manicures, combining elegance with contemporary color trends. By following proper application techniques, using quality gel products, and maintaining careful nail care routines, you can achieve salon-quality results that last for weeks. This versatile design flatters all nail shapes and skin tones while providing endless opportunities for creative variations. Whether you prefer classic simplicity or embellished glamour, the blueberry French tip technique delivers sophisticated style that transitions beautifully from professional to social settings. Try this beautiful nail art trend and discover why it has become a favorite among nail enthusiasts worldwide.