It was 9:40 on a gray October morning. Twelve little ones, one craft table, and a stack of paper plates I’d grabbed on my way in. Ten minutes later, the room looked like a sunflower field had exploded in it, and every single child was holding up a plate and shouting, “Look at MINE!”
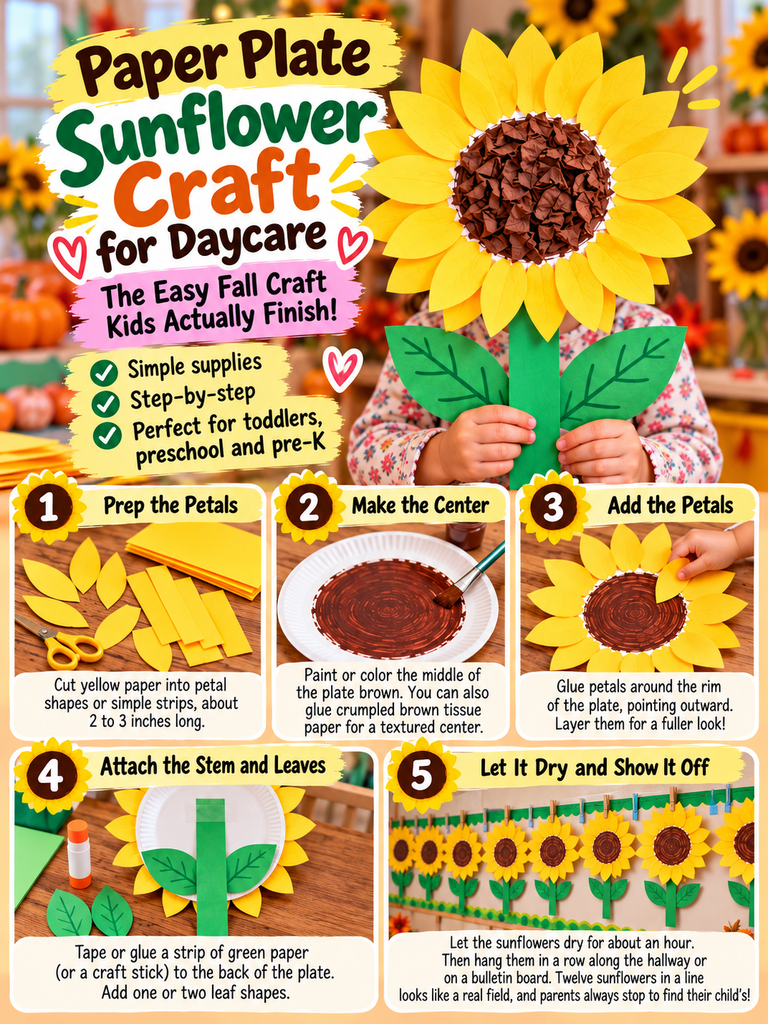
That’s the magic of the paper plate sunflower craft. It’s cheap, it’s forgiving, and it works whether you’ve got wobbly two-year-olds or confident pre-K kids who want to count every petal. If you need an easy fall craft for kids that doesn’t require a trip to the craft store or an hour of cleanup, you’re in the right place.
Table of Contents
Key Takeaways
- You probably already have everything you need: paper plates, yellow paper, glue, and something brown for the center.
- The craft takes about 15 to 25 minutes and adapts easily for toddlers, preschoolers, and pre-K.
- It quietly builds fine motor skills: tearing, gluing, pinching, and placing.
- Skip real sunflower seeds for younger groups. They’re a choking hazard and a potential allergen.
- With a few small tweaks, it becomes a counting, color, or science lesson too.
Why Sunflowers Make the Perfect Fall Craft
Here’s the thing about fall crafts: leaves and pumpkins get a lot of love, and by mid-October, kids have glued a lot of orange paper. Sunflowers feel fresh. They’re big, bold, and happy, and they bridge the gap between late summer and the harvest season beautifully.
There’s also a fun fact hiding in there that kids love. That big brown center of a sunflower isn’t one flower at all. It’s made of hundreds of tiny flowers packed tightly together, and each one can turn into a seed. Tell a group of four-year-olds that and watch their eyes go wide.
And honestly? A paper plate is the perfect base. It’s sturdy, it’s round, and little hands can’t really “mess it up.” That last part matters more than any of us like to admit.
What You’ll Need
Before you start, gather everything onto a tray per table. Trust me, passing supplies mid-craft with glue-covered fingers is how chaos begins.
- Paper plates (one per child; plain, uncoated ones take glue and paint best)
- Yellow construction paper or tissue paper for petals (orange too, if you want a sunset look)
- Brown paint, brown crayon, or brown tissue paper for the center
- Green construction paper for the stem and leaves (or a craft stick painted green)
- Glue sticks for toddlers, or liquid school glue for older kids
- Child-safe scissors (for pre-K only)
- Optional extras: yellow cupcake liners, brown pom-poms, a hole punch for “seeds,” googly eyes for silly sunflowers
A quick note on real seeds: I know, glued-on sunflower seeds look fantastic. But for under-threes, they’re a choking risk, and sunflower seed allergies are real. If your daycare has any allergy plan in place, check it first. Crumpled brown tissue paper or fingerprint dots give that same textured look without the worry.
How to Make a Paper Plate Sunflower: Step by Step
I’ll walk you through the version that works best for a mixed-age group. Adjust as you go (more on that in the next section).
Step 1: Prep the Petals
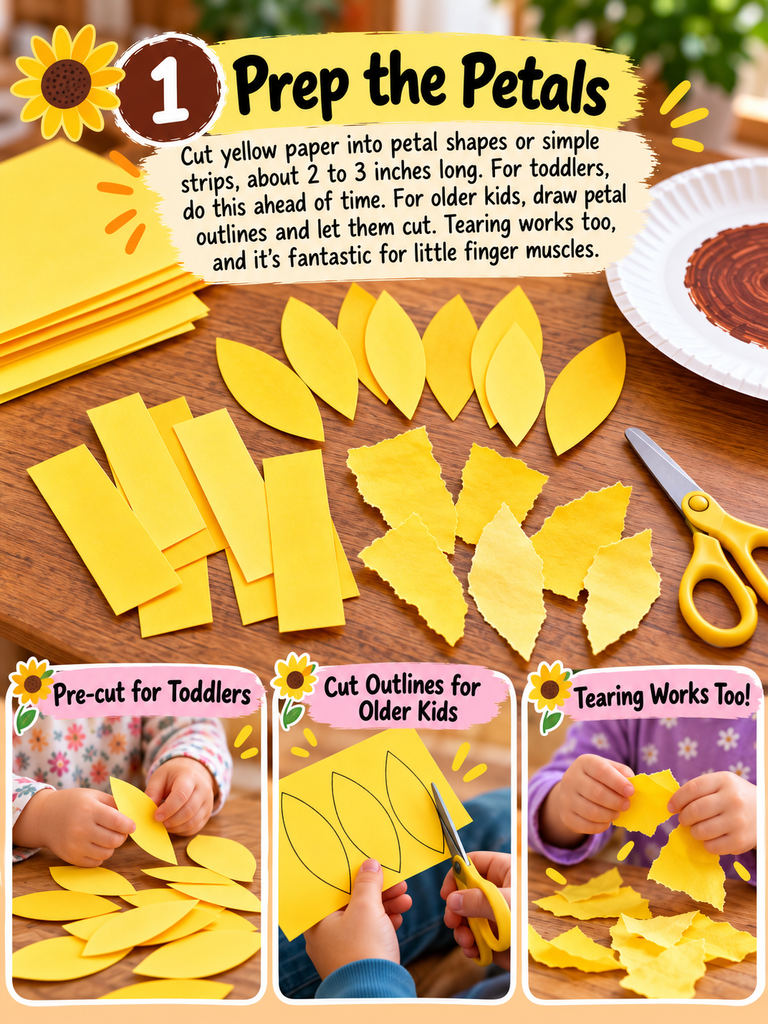
Cut yellow paper into petal shapes or simple strips, about 2 to 3 inches long. For toddlers, do this ahead of time. For older kids, draw petal outlines and let them cut. Tearing works too, and it’s fantastic for little finger muscles.
Step 2: Make the Center
Have the children paint or color the middle of the plate brown. You can trace a circle about the size of a coffee mug to give them a target. Want texture? Let them crumple small squares of brown tissue paper and glue them in, or press brown-painted fingertips all over the center for a “seed” pattern.

Step 3: Add the Petals
Now the fun part. Kids glue petals around the rim of the plate, pointing outward. Some will make a perfect ring. Some will layer them in a wild, overlapping tangle. Both are gorgeous. Real sunflowers aren’t tidy either.

Step 4: Attach the Stem and Leaves
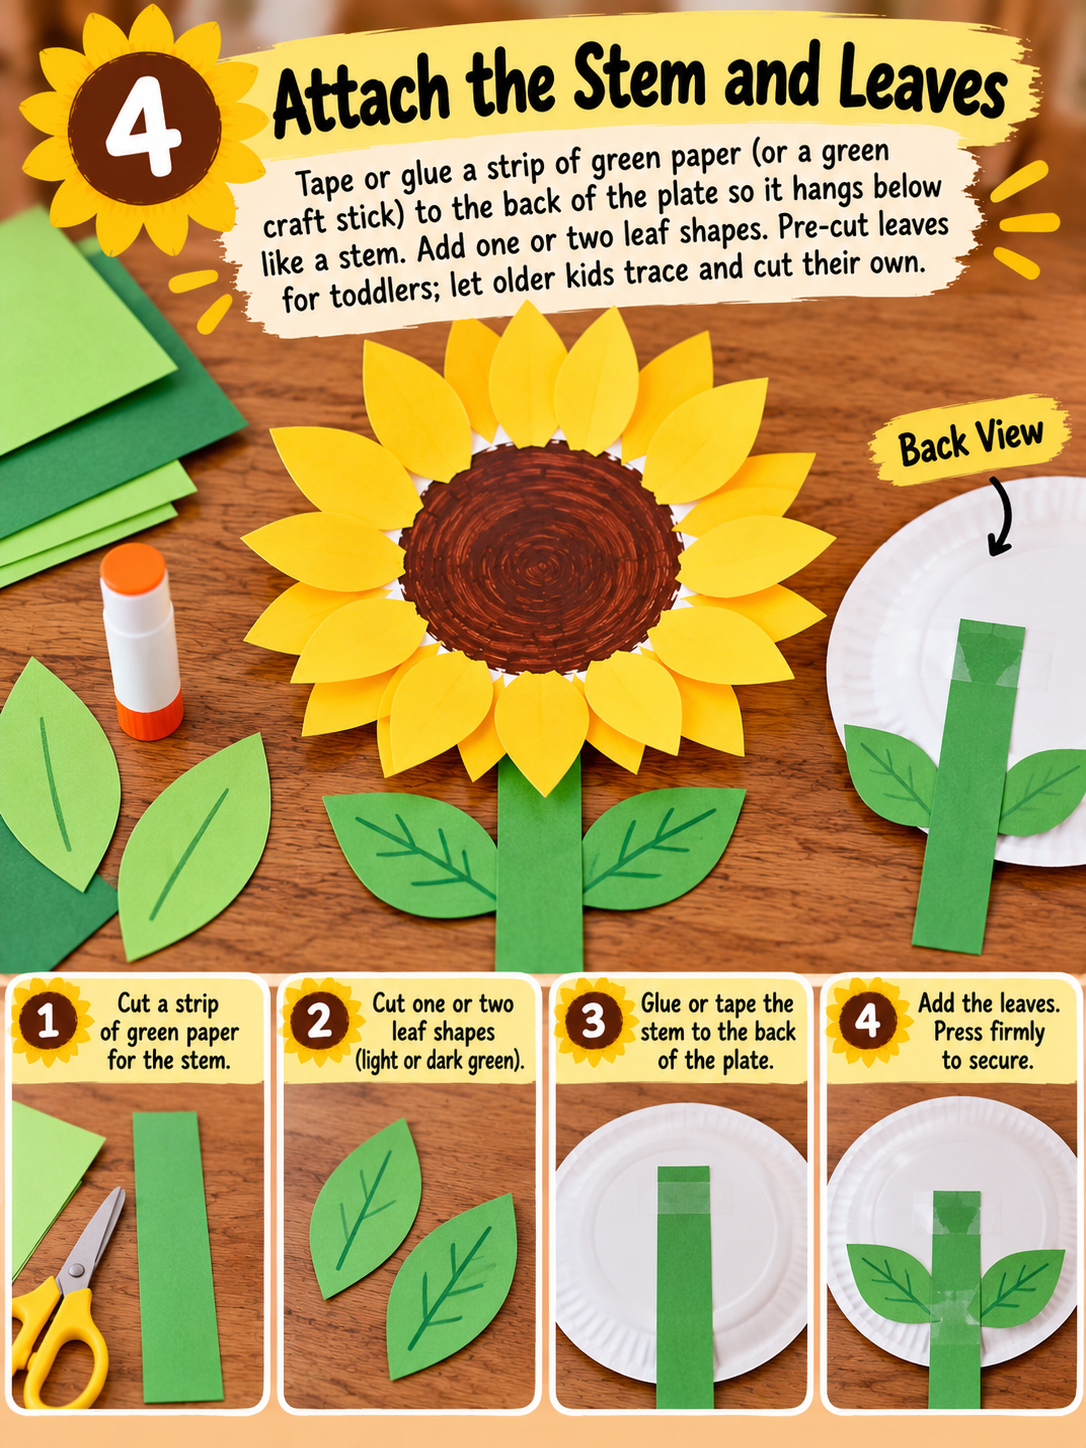
Tape or glue a strip of green paper (or a green craft stick) to the back of the plate so it hangs below like a stem. Add one or two leaf shapes. Pre-cut leaves for toddlers; let older kids trace and cut their own.
Step 5: Let It Dry and Show It Off
Lay the sunflowers flat for about an hour if you used paint or liquid glue. Then hang them in a row along the hallway or on a bulletin board. Twelve sunflowers in a line looks like a real field, and parents always stop to find their child’s.

Adapting the Craft for Every Age Group
You might be wondering how one craft can work for a room full of different abilities. The trick is changing what the child does, not the end product.
Toddlers (Ages 1 to 2)
Keep it sensory and simple. Pre-cut everything. Use glue sticks or put a layer of glue on the plate yourself so they just press petals down. Fingerprint painting the center is a winner here; most toddlers love the squishy feel of paint. Expect five minutes of focus, and celebrate every one of them.
Preschoolers (Ages 3 to 4)
Let them tear their own petals from yellow paper strips. Introduce liquid glue with a cotton swab for dabbing. They can crumple tissue paper for the center and choose where each piece goes. This is the age where you’ll hear the best commentary (“My sunflower is sleepy”).
Pre-K (Ages 4 to 5)
Hand them the scissors. Have them trace and cut petals and leaves themselves. Ask them to count the petals as they glue, or make a pattern: yellow, orange, yellow, orange. They can write their name on the stem, too, which doubles as handwriting practice without it feeling like work.
The Learning Hiding Inside This Craft
Let’s be honest, sometimes a craft is just a craft, and that’s fine. But this one sneaks in a surprising amount of development.
Fine motor skills: Tearing paper, pinching tissue, squeezing glue, and placing petals all strengthen the small hand muscles kids will later use for holding pencils and buttoning coats.
Math: Counting petals, comparing who has more or fewer, and building color patterns all come naturally.
Science: Talk about how sunflowers grow from a single seed, how young sunflower buds follow the sun across the sky, and how birds and squirrels love to eat the seeds in fall.
Language: Ask open questions while they work. “What color is your center?” “How does the paper feel when you crumple it?” “Where would your sunflower like to grow?” You’ll be amazed at the stories that come out.
Tips I Wish Someone Had Told Me Sooner
After plenty of sticky afternoons, here’s what actually makes this craft run smoothly:
- Pre-cut more petals than you think you need. Kids always want “just a few more.”
- Write names on the back of the plate first. Twelve identical-ish sunflowers drying on a table become a mystery fast.
- Use a small dish of glue and a cotton swab instead of handing over the bottle. Less waste, fewer puddles.
- Lay down a tablecloth or newspaper. Brown paint finds its way everywhere.
- Don’t fix their work. I know it’s tempting to straighten a crooked petal. Resist. The crooked petals are the point.
Fun Variations to Try
Once your group has made the classic version, mix it up:
- Cupcake liner sunflower: Flatten yellow cupcake liners and use them as petals for a ruffled, 3D look.
- Handprint sunflower: Trace each child’s hand on yellow paper, cut out several, and use the handprints as petals. Parents adore this one as a keepsake.
- Sunflower face: Add googly eyes and a drawn smile to the center for a silly character.
- Class sunflower field: Give each sunflower a different stem length and line them up on a wall with a painted blue sky behind them.
- Story time pairing: Read a picture book about sunflowers or seeds growing before you start. It gives kids context and gets them excited.
Frequently Asked Questions
How long does this craft take?
Plan for 15 to 25 minutes of hands-on time, plus about an hour of drying time if you used paint or liquid glue.
Can I use real sunflower seeds?
For older children with no allergy concerns, yes, as long as they’re closely supervised. For toddlers and young preschoolers, skip them. Use crumpled tissue paper, brown pom-poms, or fingerprint paint instead.
What if I don’t have paper plates?
Cut a circle from cardboard or cardstock. A cereal box works perfectly and is a great way to talk about reusing materials.
Is this good for a large group?
Absolutely. Prep petal trays the day before and run the craft in small groups of four to six. Everyone gets more help, and you stay sane.
Bringing a Little Sunshine Into Fall
Remember that gray October morning I started with? By lunchtime, the hallway outside our room was lined with crooked, glittery, gloriously imperfect sunflowers. One little boy dragged his dad over at pickup and said, “That’s mine. It’s the happiest one.” It wasn’t the neatest. But he was right.
That’s what this paper plate sunflower craft gives you: a simple, low-cost activity that kids can actually finish, feel proud of, and learn from without even noticing. It brings a little sunshine into the shorter days of fall, and some days, that’s exactly what a classroom needs.
Your Turn
Have you tried this craft with your group? I’d love to hear how it went. Did your toddlers eat the tissue paper? (It happens.) Did a pre-K kid insist on rainbow petals? Share your photos and stories in the comments below, and if you’ve got a twist on the classic sunflower, tell us. Some of my favorite ideas have come straight from other teachers and parents.
And if you’re planning the rest of your fall activities, save this post so you can find it next season.