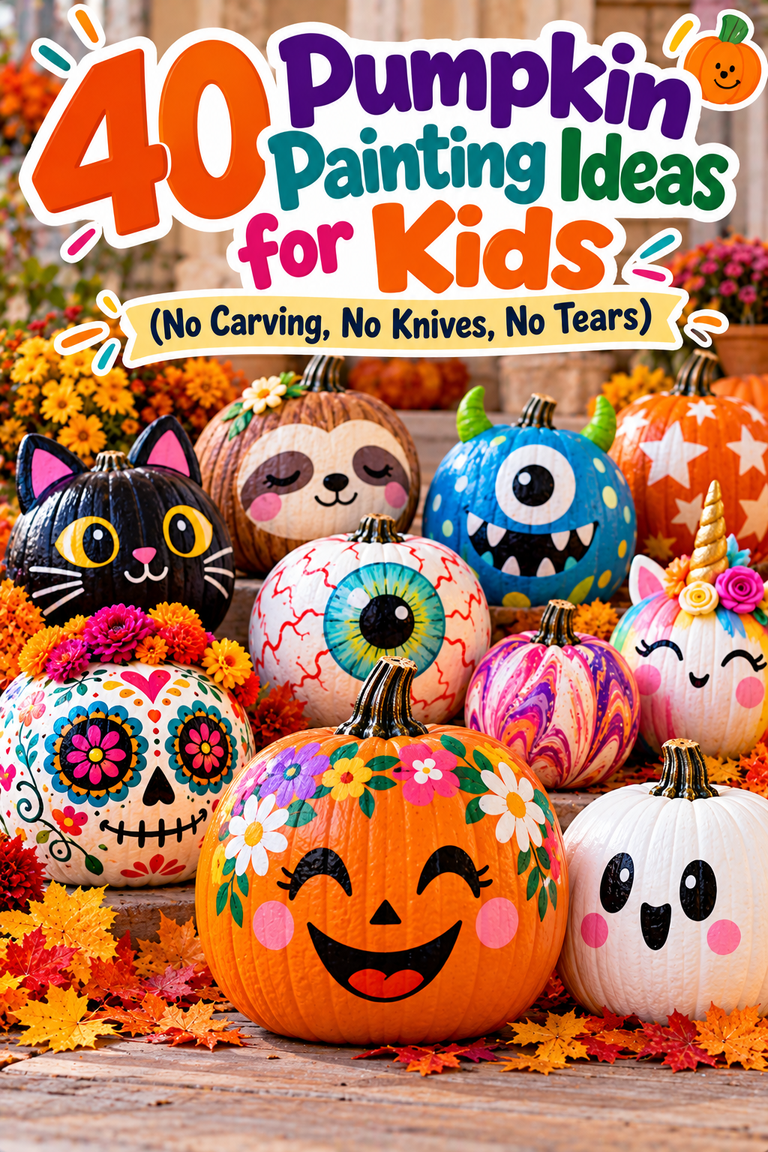
Last October, my kitchen table looked like a crime scene. Black paint on the placemats, googly eyes stuck to the dog, and one very proud six-year-old holding up a lopsided bat that she insisted was “the scariest one in the whole world.”
Then we tied a string to it, ran it across the hallway, and let it go.

The squeal she made when that bat zipped from the bedroom door to the bathroom? Worth every drop of paint on the floor.
That’s the magic of the paper plate flying bat. It’s cheap, it’s fast, and unlike most crafts that end up forgotten in a drawer, this one gets played with. Let me show you exactly how to make one, plus the little trick that turns a flat decoration into something that swoops.
Table of Contents
Key Takeaways
- You need one paper plate, black paint, scissors, glue, googly eyes, a drinking straw, and string. That’s it.
- Folding the plate in half before cutting gives you perfectly matching wings every time.
- A straw taped to the bat’s back plus a length of string creates a “zip line” so the bat genuinely flies.
- The whole project takes about 30 minutes, most of it waiting for paint to dry.
- It works for toddlers (with help) all the way up to tweens who want to get creative.
Why This Craft Beats Most Halloween Projects
Here’s the thing about seasonal crafts: kids love making them, but the excitement usually ends the moment the glue dries. A paper plate bat is different because the finished product does something.
Movement changes everything. A child who’s bored after ten minutes of coloring will happily launch a bat down a string fifty times in a row. And honestly? So will most adults. I’ve watched grandparents at a family party fight over whose turn it was.
There’s a quiet learning bonus, too. Bats are the only mammals capable of true powered flight, and their wings are actually stretched skin over long finger bones. (That’s where their scientific name, Chiroptera, comes from: it means “hand-wing.”) Tell a kid that while they’re cutting out wing shapes and watch their face light up.
What You’ll Need
Before you start, gather everything in one spot. Trust me, hunting for the scissors with paint-covered hands is not fun.
- 1 paper plate (the plain, uncoated kind takes paint best)
- Black paint (acrylic or washable tempera) and a brush or sponge
- Scissors
- Googly eyes, or white paper and a marker to draw your own
- Glue stick or white glue
- A drinking straw (paper or plastic, cut to about 2 inches)
- Tape
- String or yarn, roughly 6 to 10 feet long
- Optional: red or orange paper for a mouth, white paper for fangs, glitter, or glow-in-the-dark paint
Short on black paint? A black marker or black construction paper glued over the plate works fine. It just takes a little more patience.
Step-by-Step: How to Make Your Paper Plate Flying Bat
Step 1: Paint the Plate
Paint the bottom (the bumpy side) of the plate completely black. If you want it to look good from every angle, flip it once dry and paint the other side too.
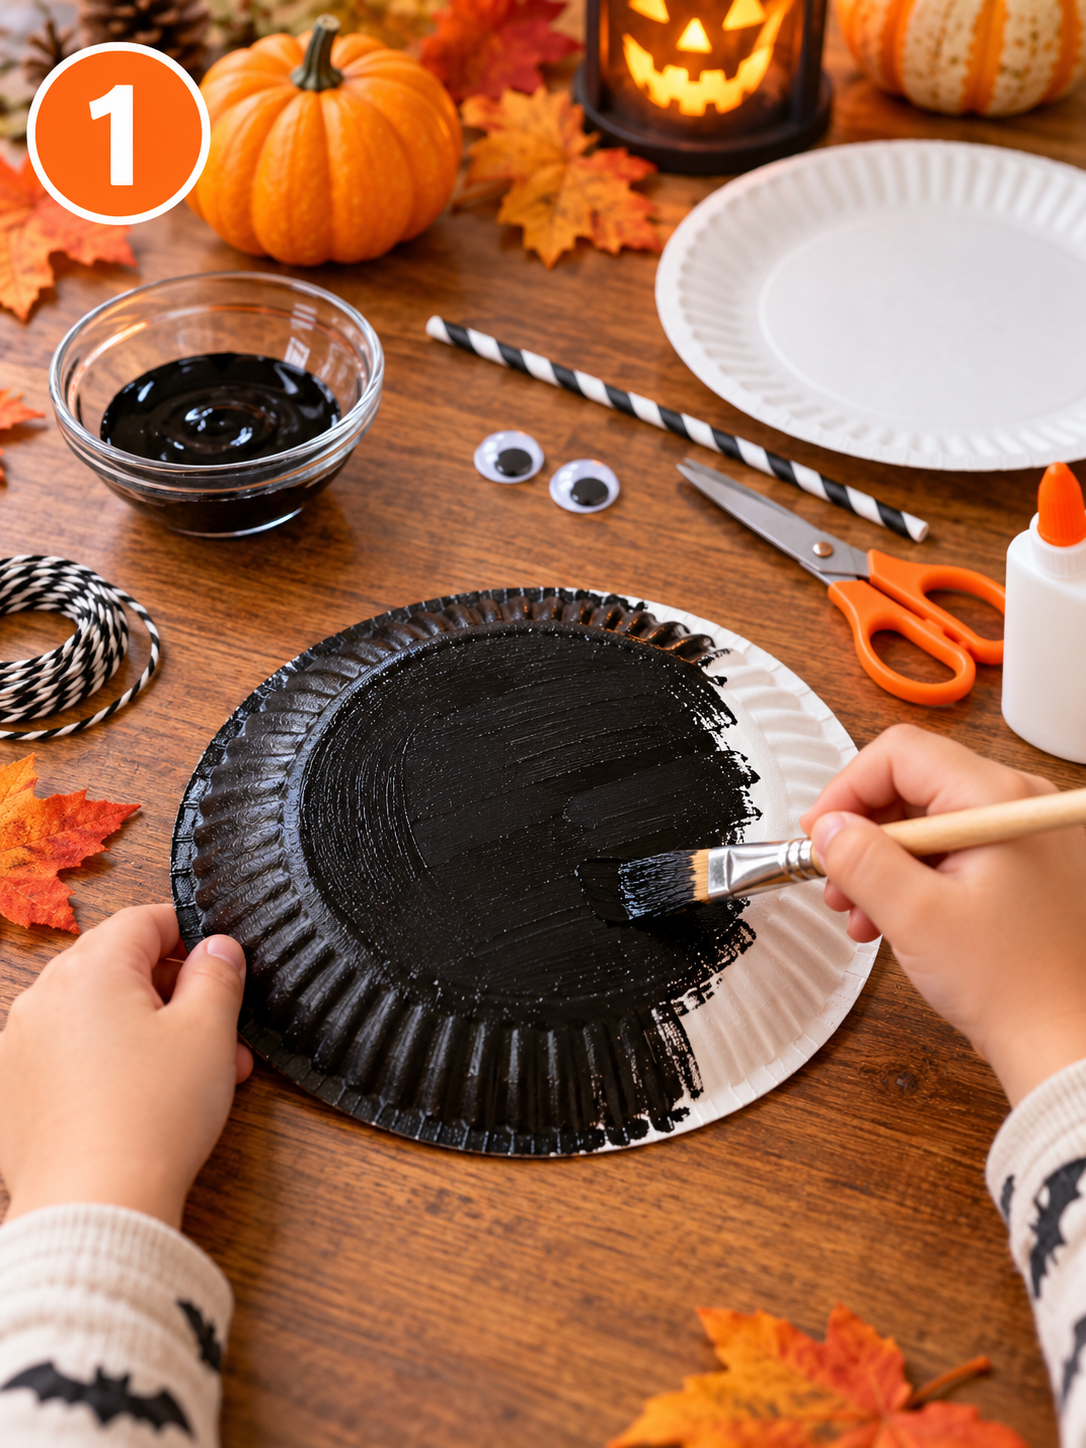
Let it dry fully. Twenty minutes is usually enough for tempera; this is a great time for a snack break.
Step 2: Fold It in Half
Once dry, fold the plate in half with the painted side facing out. This is the secret to symmetrical wings. Whatever you cut on one side will mirror perfectly on the other.

Step 3: Cut the Wings
Along the open, curved edge, cut two or three scallops (little half-moon bites). That gives you the classic jagged bat-wing silhouette.
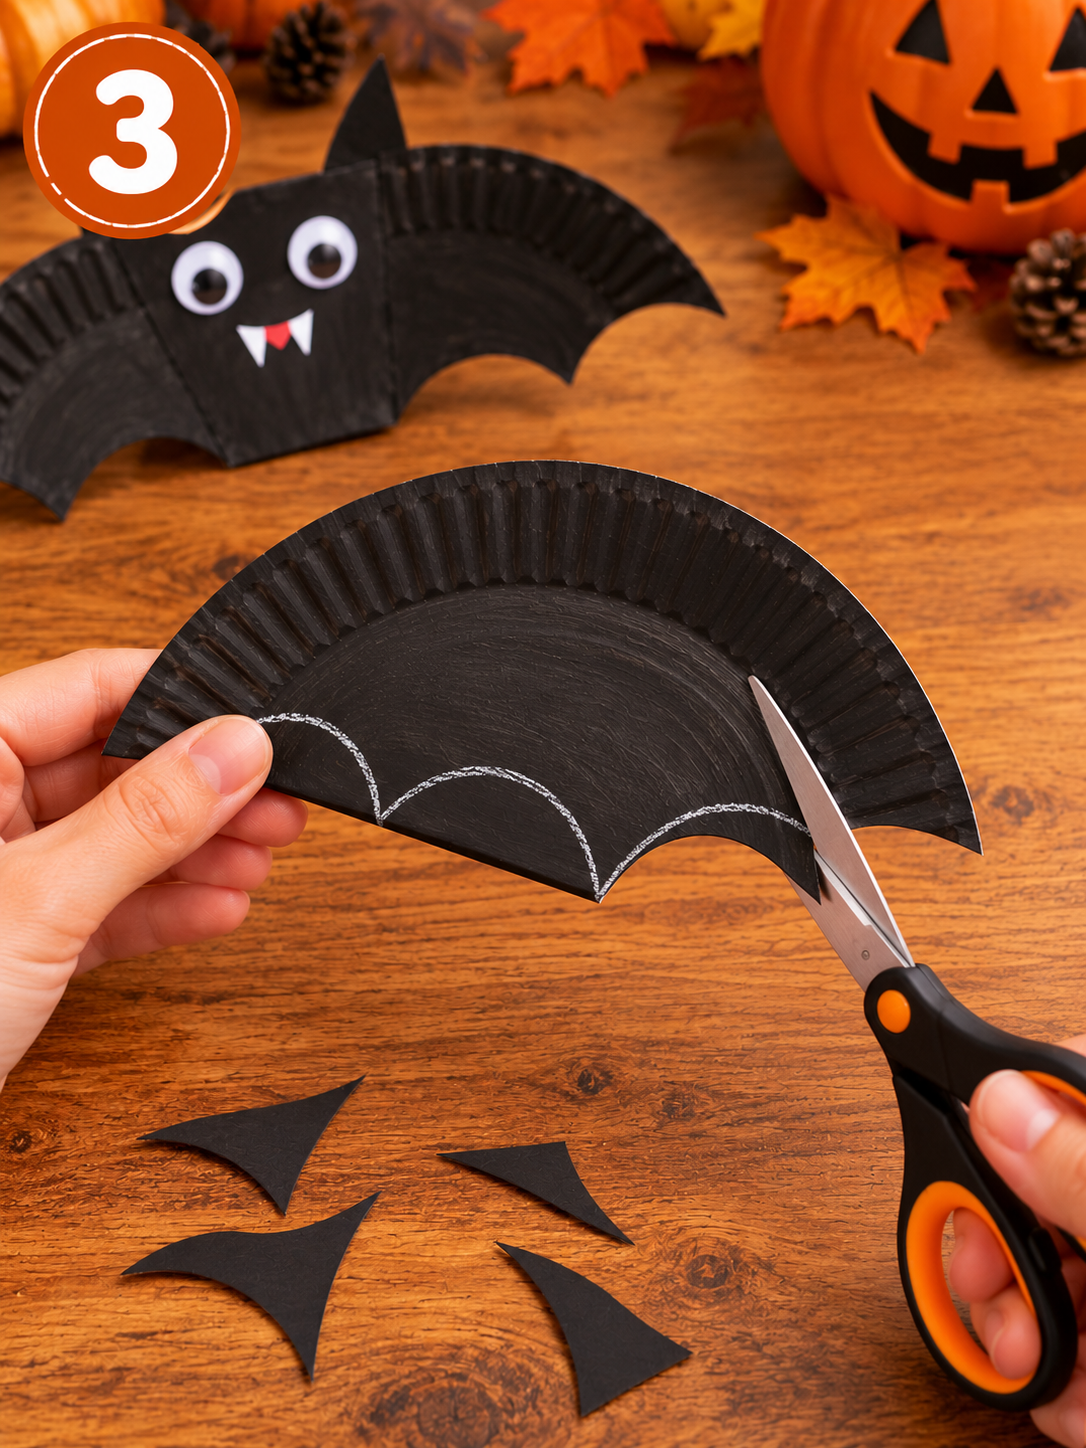
Leave a small section near the fold uncut. That’s your bat’s body.
Tip for little ones: draw the scallops on with a white crayon first so they have a line to follow.
Step 4: Add the Face
Open the plate back up and find the center along the fold. Glue on two googly eyes right at the top. Add a tiny triangle of white paper for fangs, or a small red smile if your kid prefers a friendly bat.
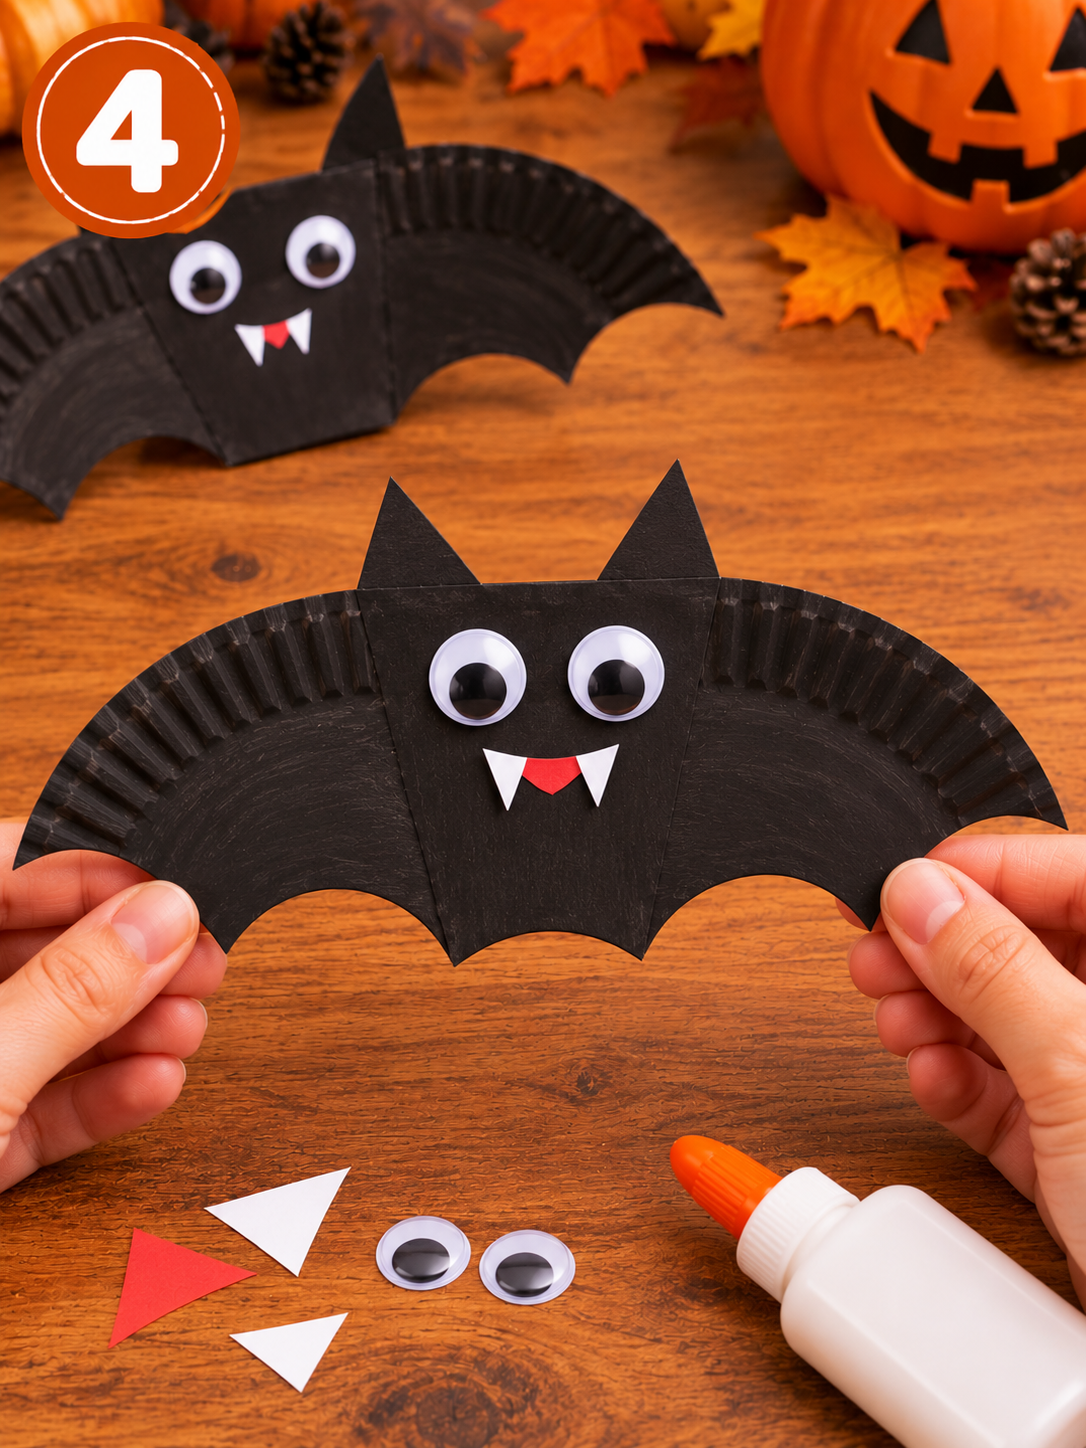
Want ears? Cut two small triangles from leftover plate scraps and glue them just above the eyes.
Step 5: Build the Flight Path
This is where it gets fun. Tape the short piece of straw horizontally across the back of the bat, right along the center fold.
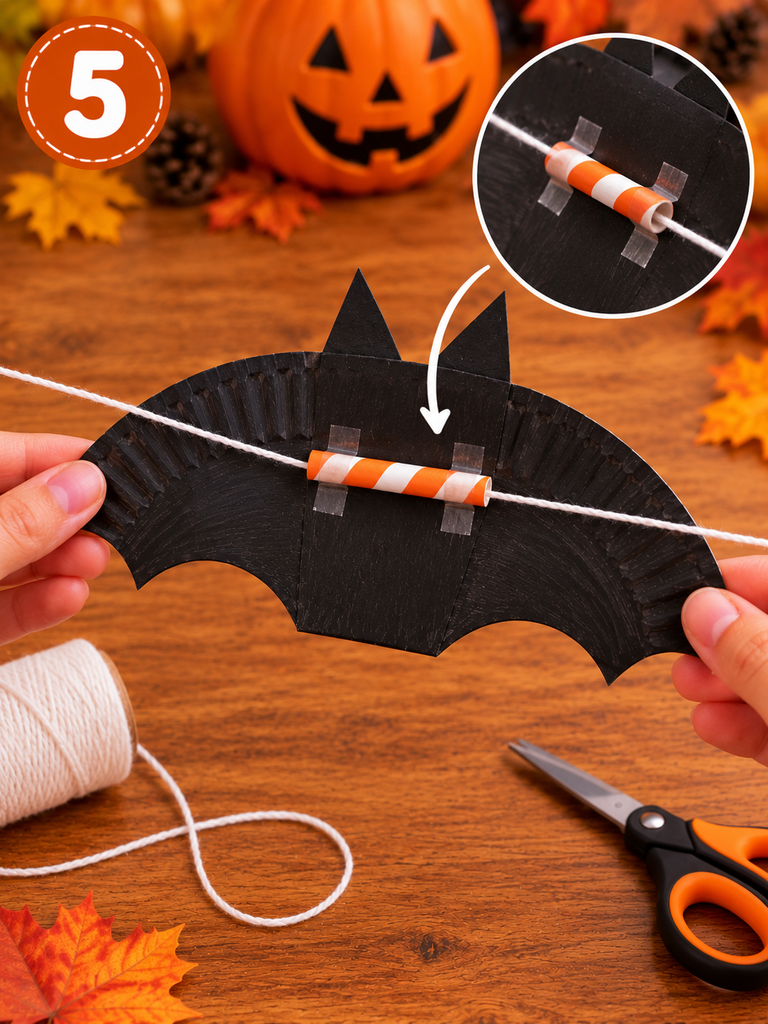
Thread your string through the straw. Tie one end to a doorknob, chair, or banister, and hold the other end (or tie it lower down on the other side of the room).
Step 6: Let It Fly
Slide the bat to the high end of the string, then let go. Gravity does the rest, and your bat swoops down the line. Lift the string higher for a faster flight, lower it for a lazy glide.

Make It Your Own: Fun Variations
Once your kids have made one, they’ll want to make five. Here are a few twists that keep it fresh:
Flapping bat. Instead of a zip line, punch a hole at the top of each wing tip, tie string to both, and connect them to a single pull string. Tug it gently and the wings flap.
Glow-in-the-dark bat. Brush glow paint along the wing edges. Hang a few from the ceiling and turn off the lights. Instant spooky bedroom.
Bat mobile. Make bats in different sizes using small dessert plates and large dinner plates, then hang them from a hanger or a stick.
Bat races. Set up two parallel strings and race bats side by side. You’ll be surprised how competitive this gets.
Tips I Wish I’d Known the First Time
After more bat-making sessions than I can count, a few lessons stand out:
- Lay down newspaper or an old tablecloth. Black paint goes everywhere. Everywhere.
- Don’t over-glue the eyes. A huge blob takes forever to dry and makes the bat front-heavy.
- Keep the straw centered. If it’s off to one side, the bat tilts and spins on the string. (Fun, but not what you’re going for.)
- Smooth string flies best. Fishing line or slick yarn beats fuzzy yarn every time.
- Supervise scissors and string with young kids, and take strings down after playtime so no one gets tangled.
Adapting It for Different Ages
Ages 2–4: You handle the cutting and the zip line. They handle painting and sticking on eyes. Expect abstract art, and embrace it.
Ages 5–8: Most kids this age can cut the scallops themselves if you draw guide lines. They’ll love naming their bats, too.
Ages 9 and up: Challenge them. Can they make a bat that flies farther? What happens if you add weight with a paper clip? Suddenly it’s a mini physics experiment.
Final Thoughts
That lopsided bat my daughter made last year? It’s still hanging in her room. One wing is a little crooked, and an eye fell off in March, but she won’t let me replace it.
That’s really the point. The paper plate flying bat isn’t about perfection. It’s about thirty minutes of laughing, a little mess, and a moment of pure delight when something you made with your own hands takes off across the room.
So grab a paper plate, find the black paint, and clear the hallway. You’ve got a bat to launch.
Have you made a flying bat with your kids? I’d love to hear how it went. Drop a comment below with your favorite twist, or share a photo of your bat mid-flight. And if your bat ended up on the dog too, you’re in good company.