25 Stunning Summer Vacation Nail Ideas

Summer vacation nail ideas transform ordinary manicures into vibrant expressions of warmth, relaxation, and personal style.
These designs range from tropical patterns and ocean-inspired blues to minimalist elegance and bold statement nails. Whether you are heading to the beach or exploring new cities, the right nail design enhances your vacation experience and complements your summer wardrobe perfectly.
| Topic | Details |
|---|---|
| Category | Nail Art / Gel Nails |
| Skill Level | Beginner to Advanced |
| Time Needed | 45-90 minutes per manicure |
| Tools Needed | UV/LED lamp, gel polish, nail file, buffer, base coat, top coat |
| Best For | Summer travelers, beach vacations, resort getaways, festival attendees |
Table of Contents
Why Summer Vacation Nail Designs Work
Summer vacation nail designs work exceptionally well because they combine durability with visual appeal for extended travel periods. Gel polish formulations provide chip-resistant wear for two to three weeks, which covers most vacation durations without requiring touch-ups. The cured polymer structure of gel nails withstands exposure to chlorine, saltwater, and sun exposure better than traditional polish.
The psychological impact of vacation nail art extends beyond aesthetics to enhance mood and confidence during travel. Bright colors and tropical patterns trigger positive emotional responses and complement the relaxed vacation mindset. Professional nail technicians recommend vacation designs because they photograph well in travel pictures and require minimal maintenance while away from home.
Color selection plays a crucial role in successful vacation nail designs because certain shades complement summer skin tones and vacation settings. Coral, turquoise, sunny yellow, and crisp white reflect light beautifully in beach photography and coordinate with summer fashion trends. These colors also mask minor imperfections that may occur during active vacation activities better than darker or high-contrast shades.
Tools and Products Needed
| Product | Purpose | Alternatives |
|---|---|---|
| UV/LED Lamp | Cures gel polish layers for lasting wear | Professional salon curing services |
| Gel Base Coat | Creates adhesion layer and protects natural nails | Peel-off base for temporary designs |
| Summer Gel Polish Colors | Provides vibrant vacation-appropriate shades | Regular polish with quick-dry top coat |
| Detail Brushes | Creates intricate patterns and nail art | Toothpicks or dotting tools |
| Nail File (180 grit) | Shapes nails and prepares surface | Glass file for gentler filing |
| Nail Buffer | Smooths nail surface for even application | Fine grit sanding block |
| Gel Top Coat | Seals design and adds glossy finish | Matte top coat for different texture |
| Cuticle Oil | Maintains nail hydration during travel | Vitamin E oil or coconut oil |
| Nail Cleanser | Removes sticky layer and preps nails | Isopropyl alcohol |
Quality tools make significant differences in application results and design longevity. Investing in professional-grade gel polish ensures consistent color payoff and proper curing. For comprehensive guidance on selecting the right products, visit Gel Nails by Lina for expert recommendations and tutorials.
Step-by-Step Application Guide
Nail Preparation
- Remove any existing polish using acetone-soaked cotton pads and allow nails to dry completely for five minutes.
- Trim nails to your desired length using sharp nail clippers and file edges into your preferred shape.
- Push back cuticles gently using a wooden cuticle pusher to create a clean nail bed surface.
- Buff the nail surface lightly using a buffer block to remove shine and create texture for adhesion.
- Cleanse nails thoroughly with nail cleanser or isopropyl alcohol to remove oils and dust particles.
Base Coat Application
- Apply a thin layer of gel base coat starting from the cuticle area and brushing toward the tip.
- Cap the free edge by running the brush along the nail tip to seal and prevent chipping.
- Cure nails under the UV/LED lamp for the time specified by your base coat manufacturer.
- Check for any uncured spots or missed areas before proceeding to color application.
Gel Polish Layers
- Select your primary summer vacation color and wipe the brush to remove excess product for thin application.
- Apply the first color coat in three strokes: one down the center and one on each side.
- Cure the first color layer under the lamp for 30 to 60 seconds depending on your gel formula.
- Apply a second thin color coat for opacity and even coverage across all nails.
- Cure the second layer completely before adding any nail art designs or accent elements.
- Create vacation nail art using detail brushes, dotting tools, or nail stickers for themed designs.
- Cure each decorative element separately to prevent smudging or color bleeding between layers.
Curing Process
- Position your hand completely inside the lamp with nails facing the light source directly.
- Set the timer according to your specific gel polish brand recommendations for proper polymerization.
- Keep your hand steady during the entire curing cycle to prevent movement and incomplete curing.
- Allow the lamp to complete its full cycle before removing your hand to ensure thorough hardening.
Finishing and Top Coat
- Apply a generous layer of gel top coat over the entire nail including all art and decorative elements.
- Cap the free edge again with top coat to seal everything and maximize wear time.
- Cure the top coat layer for the full recommended time to achieve maximum hardness and shine.
- Cleanse nails with cleanser to remove the sticky inhibition layer if your top coat requires it.
- Apply cuticle oil around each nail and massage gently to hydrate the surrounding skin.
Pro Nail Technician Tips
- Apply gel polish layers as thin as possible because multiple thin coats cure more completely than single thick applications and prevent wrinkling or peeling during vacation activities.
- Avoid getting gel polish on your cuticles or skin because this causes lifting at the edges and reduces the overall lifespan of your vacation manicure significantly.
- Cure each layer for the full recommended time even if the surface feels dry because insufficient curing leads to premature chipping and dulling of the color intensity.
- Choose lighter colors for vacation nails if you plan extensive sun exposure because darker shades can absorb more heat and occasionally cause discomfort during prolonged outdoor activities.
- Pack a small bottle of cuticle oil in your travel bag and apply it daily to maintain nail flexibility and prevent the gel from becoming brittle in dry climates.
- Schedule your vacation manicure two to three days before departure to allow proper curing time and identify any potential lifting issues before you leave home.
Common Gel Nail Mistakes
| Mistake | Why it Happens | How to Fix |
|---|---|---|
| Thick gel layers | Rushing application or not wiping excess product from brush | Apply multiple thin coats instead of one thick layer for proper curing |
| Improper curing | Using wrong lamp wattage or removing hand too early | Verify lamp compatibility and cure for full recommended time |
| Skipping nail prep | Rushing the process or underestimating importance of dehydration | Always cleanse, buff, and remove oils before base coat application |
| Flooding the cuticle | Applying too much product or starting too close to cuticle line | Leave small gap near cuticle and clean up excess with brush before curing |
| Over-filing nails | Excessive buffing damages nail plate and causes weakness | Use light pressure and buff only enough to remove shine |
Vacation Nail Design Variations
| Style | Description | Best Occasion |
|---|---|---|
| Tropical Palm Trees | Green palm fronds on sunset gradient backgrounds with beach silhouettes | Caribbean vacations, resort stays, beach weddings |
| Ocean Wave Nails | Blue and white swirled patterns mimicking ocean water movement | Coastal trips, sailing adventures, lakeside retreats |
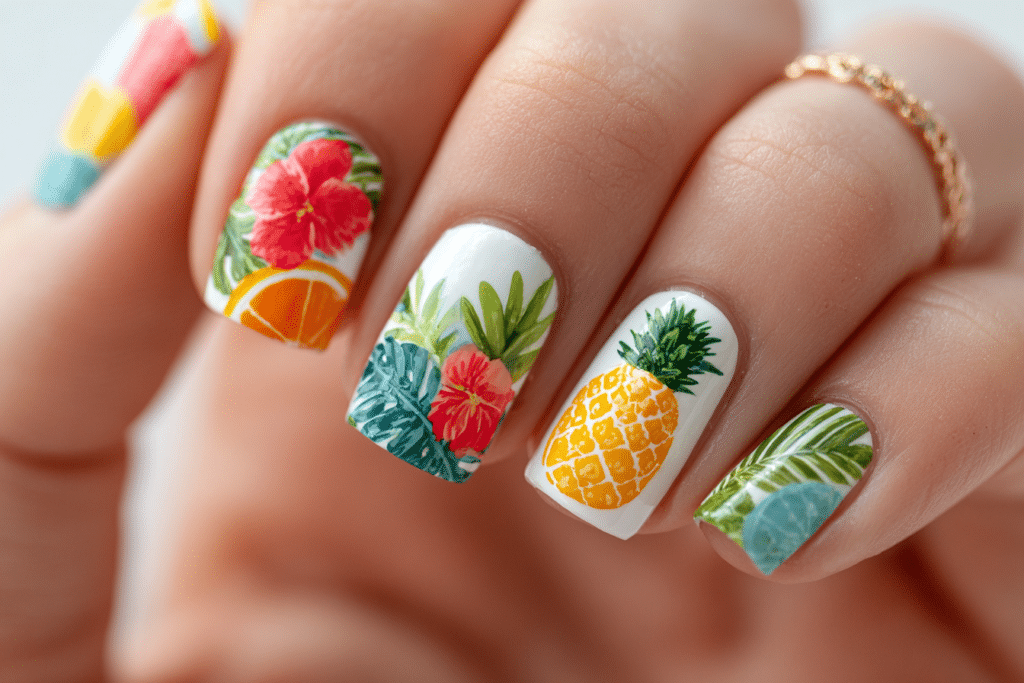
| Fruit Accent Nails | Watermelon, pineapple, and citrus designs on neutral base colors | Summer festivals, poolside parties, tropical destinations |
| Seashell Chrome | Iridescent chrome powder over pastel bases with shell decals | Beach vacations, cruise ships, seaside dining |
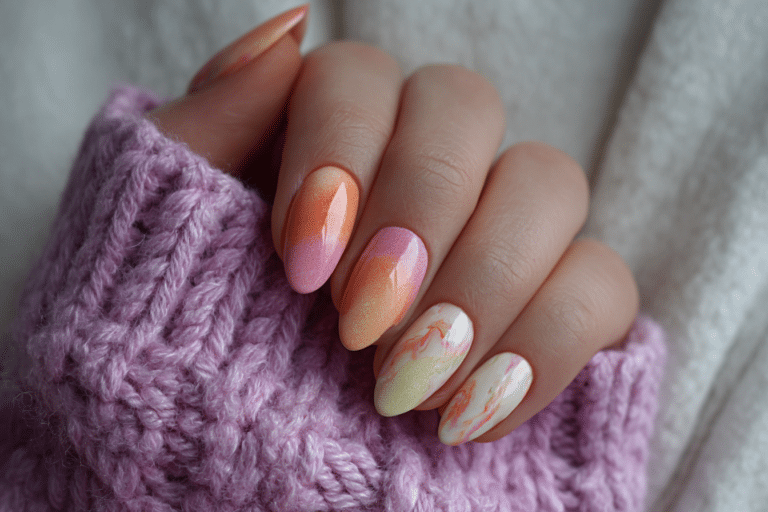
| Sunset Ombre | Orange, pink, and purple gradient fading from cuticle to tip | Evening events, romantic getaways, photography sessions |
| Nautical Stripes | Navy and white horizontal stripes with anchor or rope details | Boat trips, harbor visits, coastal cities |
| Flamingo Pink | Bright pink with flamingo silhouettes or tropical flower accents | Pool parties, resort vacations, summer celebrations |
| Starfish and Sand | Beige base with textured sand effect and small starfish charms | Beach combing, coastal walks, casual summer outings |
| Turquoise Glitter | Sparkly turquoise with holographic glitter in various sizes | Night events, festivals, vibrant vacation destinations |
| Coral Reef Design | Colorful coral patterns with aqua backgrounds and gold accents | Snorkeling trips, aquarium visits, ocean conservation events |
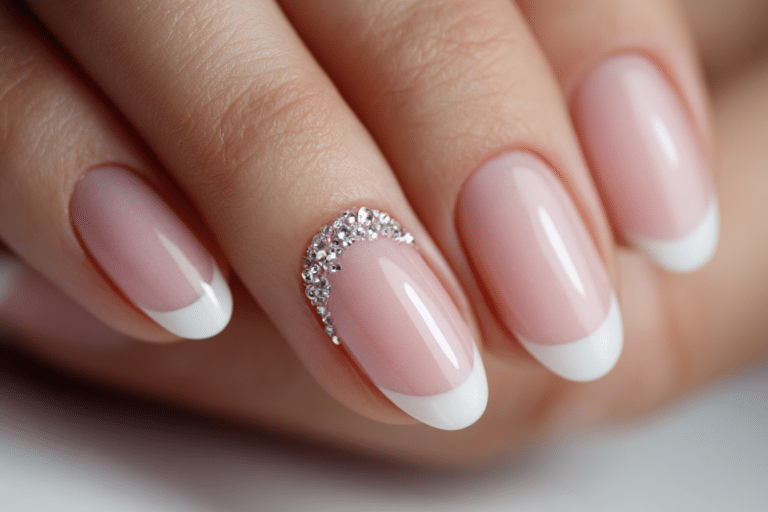
| Minimalist Beach | Nude base with single thin line drawings of waves or sun | Professional vacations, elegant resorts, understated style |
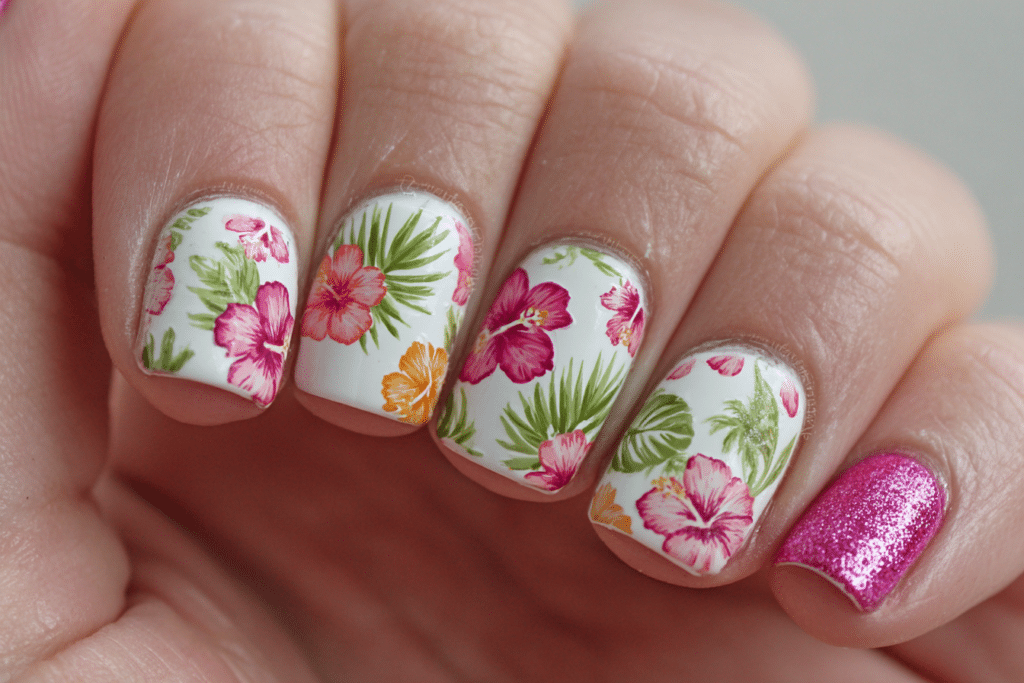
| Hibiscus Flowers | Hand-painted tropical flowers in red, pink, or yellow shades | Hawaiian vacations, garden parties, tropical celebrations |
| Mermaid Scales | Iridescent scale pattern using stencils or freehand technique | Fantasy themes, coastal trips, mermaid enthusiasts |
| Coconut White | Clean white tips with palm tree or coconut small details | Clean aesthetic lovers, versatile vacation wear, photo opportunities |
| Beach Umbrella | Colorful striped umbrella designs on sandy beige backgrounds | Family vacations, nostalgic themes, playful summer vibes |
| Tie-Dye Swirls | Multiple summer colors swirled together in abstract patterns | Festival vacations, bohemian style, artistic travelers |
| Dolphin Accents | Blue base with dolphin silhouettes jumping through waves | Marine life lovers, aquatic adventures, family trips |
| Sunshine Yellow | Bright yellow with small sun designs or gold foil accents | Happy themes, optimistic travelers, warm destinations |
| Anchor Details | Classic navy with white anchor symbols and rope borders | Sailing trips, nautical themes, maritime destinations |
| Beach Glass | Translucent colors with shattered glass effect or cellophane texture | Unique style seekers, artistic vacations, modern aesthetics |
| Sand Dollar Art | White or cream with delicate sand dollar stamps or drawings | Peaceful beaches, shell collectors, natural beauty lovers |
| Geometric Summer | Triangular patterns in summer colors creating modern designs | Contemporary style, city vacations, trendy destinations |
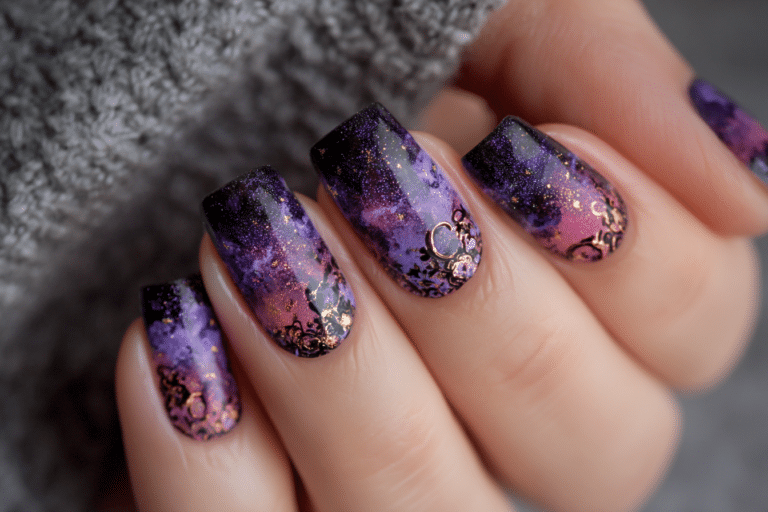
| Lavender Sunset | Purple and lavender gradients with silhouette palm trees | Romantic getaways, Instagram-worthy nails, dreamy aesthetics |
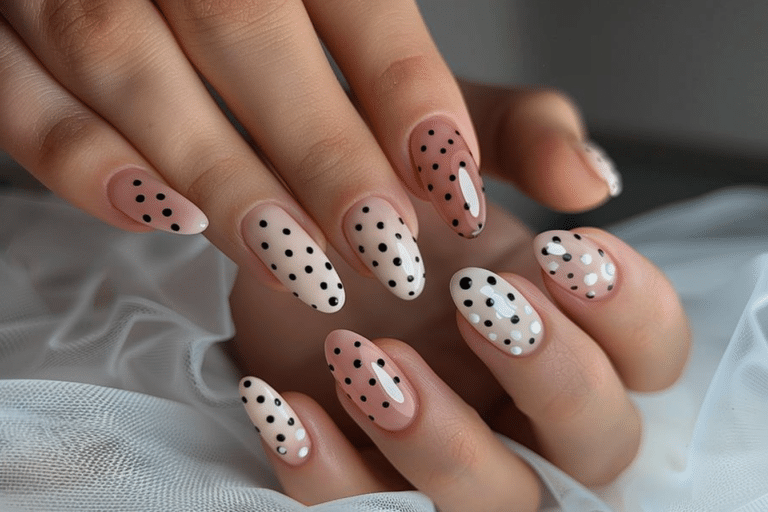
| Beach Ball Dots | Multicolored dots arranged in beach ball patterns on white | Fun-loving travelers, retro themes, playful vacation moods |
| Coral and Gold | Coral pink base with gold foil accents and metallic details | Elegant beach events, upscale resorts, sophisticated travelers |
Each design variation offers unique visual appeal suited to different vacation styles and personal preferences. For more inspiration and detailed tutorials on creating these looks, explore the comprehensive guides available at Gel Nails by Lina.
Nail Care and Maintenance During Vacation
Maintaining your summer vacation nails requires consistent hydration and protection from environmental stressors. Apply cuticle oil at least once daily, preferably before bed, to keep the nail bed flexible and prevent the gel from lifting at the edges. The oil creates a protective barrier that helps maintain moisture balance even in humid or dry climates.
Protect your manicure from excessive water exposure by wearing gloves during dishwashing or extended swimming sessions. While gel polish withstands water better than traditional polish, prolonged submersion can weaken the bond between layers. After swimming in chlorinated pools or saltwater, rinse your hands with fresh water and reapply cuticle oil to counteract drying effects.
Avoid using your nails as tools to open cans, scratch labels, or pry objects because this creates stress points that lead to cracking. The pressure applied during these actions can cause the gel to separate from the natural nail or create fractures in the polish layers. Carry small tools in your travel bag to handle tasks that might compromise your manicure integrity.
Monitor your nails daily for signs of lifting, especially around the cuticle area where growth becomes noticeable after one week. If you notice any lifting, apply a small amount of clear gel polish to the affected area and cure it to prevent water from getting underneath the manicure. This quick fix extends wear time and prevents premature removal during your vacation.
How to Remove Gel Nails Safely
- File the shiny top coat layer using a coarse nail file to break the seal and allow acetone penetration.
- Soak cotton pads in pure acetone and place them directly on each nail covering the entire surface.
- Wrap each finger with aluminum foil to hold the cotton pad in place and prevent acetone evaporation.
- Wait fifteen to twenty minutes allowing the acetone to dissolve the gel polish layers completely.
- Remove the foil wraps and gently push softened gel off the nail using a wooden cuticle pusher.
- Avoid forcing or scraping gel that has not fully dissolved because this damages the natural nail plate.
- Soak any remaining gel for an additional five minutes and repeat the gentle removal process.
- Buff nails lightly to smooth any rough patches left after gel removal and wash hands thoroughly.
- Apply a nourishing cuticle oil and hand cream to restore moisture lost during the acetone soak.
- Wait at least two days before applying new gel polish to allow nails to recover and rehydrate naturally.
Nail Health and Safety
Maintaining nail health during frequent gel manicures requires giving your nails periodic breaks between applications. Continuous gel wear without rest periods can lead to nail thinning, brittleness, and increased susceptibility to fungal infections. Schedule one week of bare nails every three months to allow natural regeneration and assess underlying nail health.
Proper sanitation of tools prevents bacterial and fungal infections that compromise nail integrity. Clean all reusable tools with isopropyl alcohol before each use and replace disposable items regularly. Never share nail tools with others, even family members, because this transfers microorganisms that cause infections.
Watch for signs of nail damage including discoloration, unusual thickness, separation from the nail bed, or persistent pain. These symptoms may indicate allergic reactions to gel products or underlying health conditions requiring medical attention. According to dermatologists, discontinuing gel applications and consulting a healthcare provider prevents progression of potential nail disorders.
Frequently Asked Questions
How long do gel nails last during summer vacation?
Gel nails typically last two to three weeks during summer vacation with proper application and care. The longevity depends on factors including nail preparation quality, gel polish brand, and exposure to water and sun. Applying cuticle oil daily and avoiding harsh chemicals helps maximize wear time while traveling.
How do I remove gel nails safely while on vacation?
Remove gel nails safely by soaking them in acetone for fifteen to twenty minutes using cotton pads wrapped in foil. Gently push off softened gel with a wooden cuticle stick without forcing or scraping. Pack a small acetone bottle and foil squares in your travel kit for emergency removal needs during extended trips.
What is better for vacation nails: gel or acrylic?
Gel nails work better for vacation because they offer natural flexibility and easier removal than acrylics. Gel polish withstands water exposure better and requires less maintenance during travel. Acrylic nails provide more length and strength but need professional fills every two weeks and feel heavier during active vacation activities.
Why do my gel nails peel during beach vacations?
Gel nails peel during beach vacations primarily due to improper nail preparation or excessive water exposure weakening the bond. Saltwater and chlorine can penetrate gaps at the cuticle line if the edges were not properly sealed. Ensuring complete curing and applying top coat to seal edges prevents premature peeling in humid environments.
How can I make my vacation gel nails last longer?
Make vacation gel nails last longer by applying cuticle oil twice daily and wearing gloves during cleaning activities. Avoid using nails as tools and rinse hands after swimming to remove chemicals. Apply a fresh layer of gel top coat at the halfway point of your vacation to refresh shine and seal any micro-chips that developed during activities.
Conclusion
These 25 stunning summer vacation nail ideas provide endless inspiration for travelers seeking beautiful and durable manicures. From tropical palms to ocean waves, each design captures the essence of summer while offering practical wear for active vacation schedules. The combination of proper gel application techniques, quality products, and consistent maintenance ensures your nails look flawless throughout your entire trip. Whether you prefer bold statement nails or minimalist elegance, vacation nail art enhances your travel experience and creates lasting visual memories. Visit Gel Nails by Lina for more seasonal nail design inspiration and expert tutorials that help you achieve salon-quality results at home before your next adventure.