I still remember the first time I picked up a crochet hook. I was maybe twelve, sitting cross-legged on my grandmother’s living room floor, absolutely convinced that if she could make a scarf appear out of thin air using nothing but string and a stick, I could too. Twenty minutes later, I had yarn tangled around three fingers, a hook I was gripping like a dagger, and a single, sad, lumpy chain that looked nothing like hers.

What nobody told me back then is the thing I wish someone had said on day one: crochet isn’t hard because the stitches are complicated. It’s hard because nobody teaches you how to actually hold the tools first.
Once you get the hold right the hook, the yarn, the tension everything else starts to click. This guide walks you through every method that works, why yarn keeps slipping off your hook in the first place, how to adapt your grip if you have arthritis or hand pain, and a few clever tricks for keeping your yarn under control while you work.
Table of Contents
Key Takeaways
- There are two main hook grips the pencil grip and the knife grip and neither is “correct.” The right one is whichever feels natural in your hand.
- Yarn slipping off the hook is almost always a tension problem, not a “you’re doing it wrong” problem.
- If you have arthritis or joint pain, ergonomic hooks and simple DIY grip modifications can make crocheting comfortable again you don’t have to give up the hobby.
- Consistent yarn tension is the real secret to even, professional-looking stitches, and it comes from your non-hook hand, not your hook hand.
- Crocheting has genuine mental and physical benefits, including possible links to reduced dementia risk, which is part of why so many people take it up later in life.
The Two Main Ways to Hold a Crochet Hook
Before we talk about yarn, let’s settle the hook question, because this is where most beginners freeze up trying to copy a video tutorial exactly.
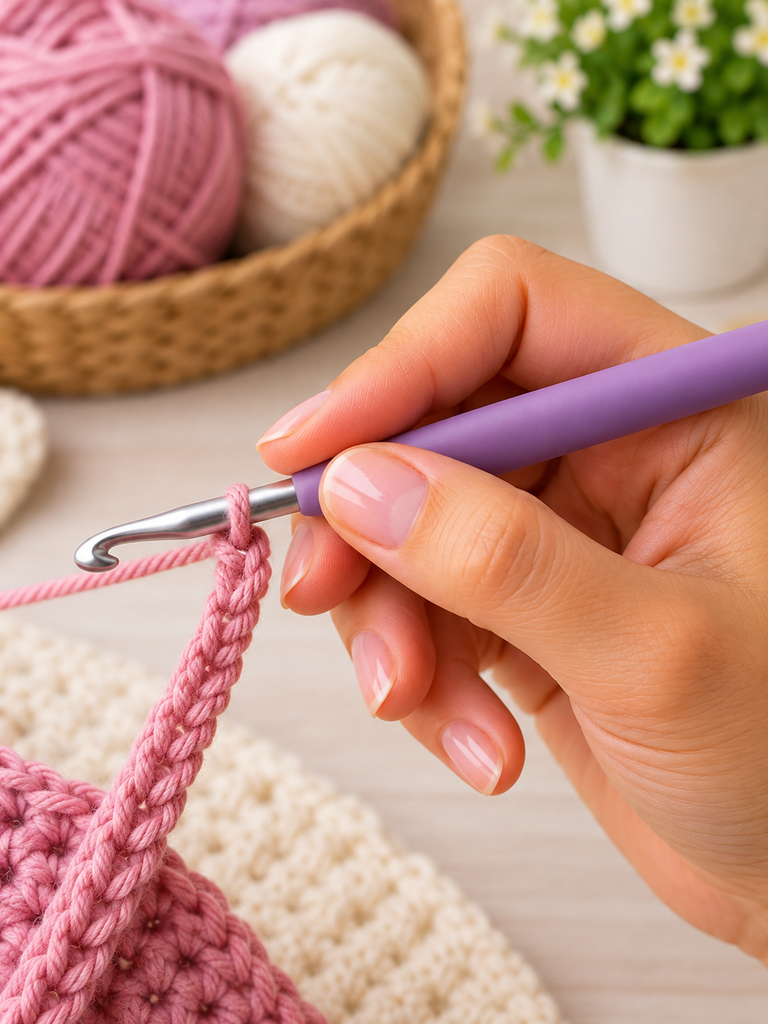
The Pencil Grip
Hold the hook the same way you’d hold a pencil between your thumb and index finger, resting along the side of your middle finger, with the hook pointing slightly downward. This grip tends to give you more precision and control, especially for detailed stitch work or amigurumi.
The Knife Grip
Here, you hold the hook the way you’d hold a butter knife your whole hand wrapped around the shaft, thumb on top or to the side, hook angled outward. This grip is popular for faster, looser work and can feel more natural if you’ve done a lot of sewing or knife work in the kitchen.

Here’s the honest truth: there is no “correct” grip. I’ve watched expert crocheters who’ve been at it for forty years use both, sometimes switching mid-project depending on the stitch. Try both for ten minutes each. Your hand will tell you which one it prefers. Don’t force yourself into a grip because it looks more “proper” in a tutorial comfort wins every time, because you’ll be holding this position for hours.
How to Hold the Yarn (The Part Everyone Skips)
This is genuinely the step most tutorials rush through, and it’s the one that determines whether your stitches look even and professional or loose and uneven.
Your non-dominant hand does two jobs at once: it feeds the yarn and it controls tension.


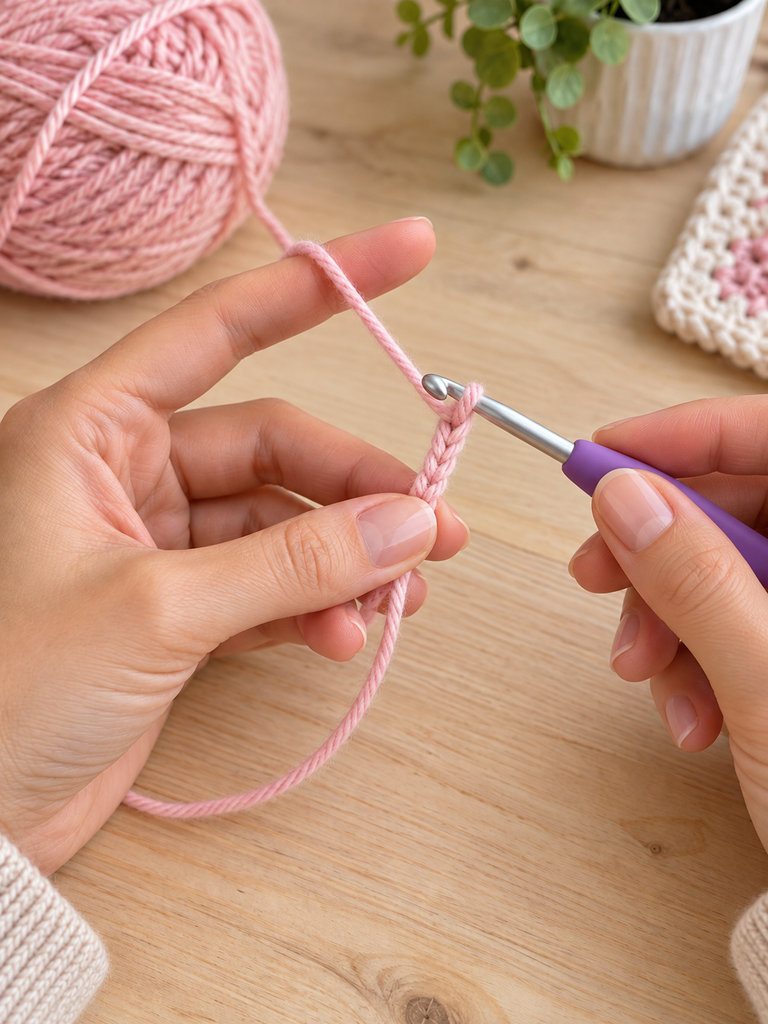
Your index finger becomes the “yarn feeder” it lifts and releases yarn with small movements as you wrap and pull through each stitch. This is the muscle memory that takes the longest to develop, so don’t get discouraged if your first few rows look inconsistent. Everyone’s did.
Why Does My Crochet Yarn Keep Slipping Off My Hook?
If you’ve been fighting with yarn sliding off the hook constantly, take a breath this is one of the most common frustrations in early crochet, and it’s almost never a sign you’re “bad” at it. It usually comes down to one of these:
Your tension is too loose. If the yarn isn’t held snugly enough by your non-dominant hand, there’s nothing keeping it seated on the hook as you work. Try weaving the yarn through one more finger than you currently are.
You’re using the wrong hook size for your yarn weight. A hook that’s too large for your yarn creates a loose loop that has nowhere to “grip.” Check the yarn label most brands recommend a hook size range right on the wrapper.
Your hook angle is wrong. If the hook is pointing too far downward or upward relative to your work, gravity does the rest and the loop just slides right off. Try keeping the hook roughly parallel to your work as you pull through.
The hook’s throat (the little groove that catches the yarn) might be too shallow or worn. Inline hooks (where the head is flush with the shaft) versus tapered hooks (with a more gradual funnel shape) grab yarn differently if you’re consistently struggling, it might be worth trying the other style.
How to Hold Crochet Yarn With Arthritis
This deserves its own real conversation, because a huge number of people either give up crochet or never start it at all because standard grip advice simply doesn’t work for hands dealing with arthritis, tendonitis, or joint pain and that’s a genuine loss, since crochet is one of the most soothing, meditative crafts there is.
Here’s the good news: you don’t need to force a standard grip. A few adjustments make a real difference.
Choose an Ergonomic Hook

Hooks with wide, cushioned, contoured handles (often made of soft rubber or built-up foam) reduce the pinching pressure required to hold them. Brands designed specifically for ergonomic comfort distribute grip pressure across your whole palm instead of concentrating it in your fingertips, which is usually where arthritis pain flares hardest.
Try the Palm Grip Modification
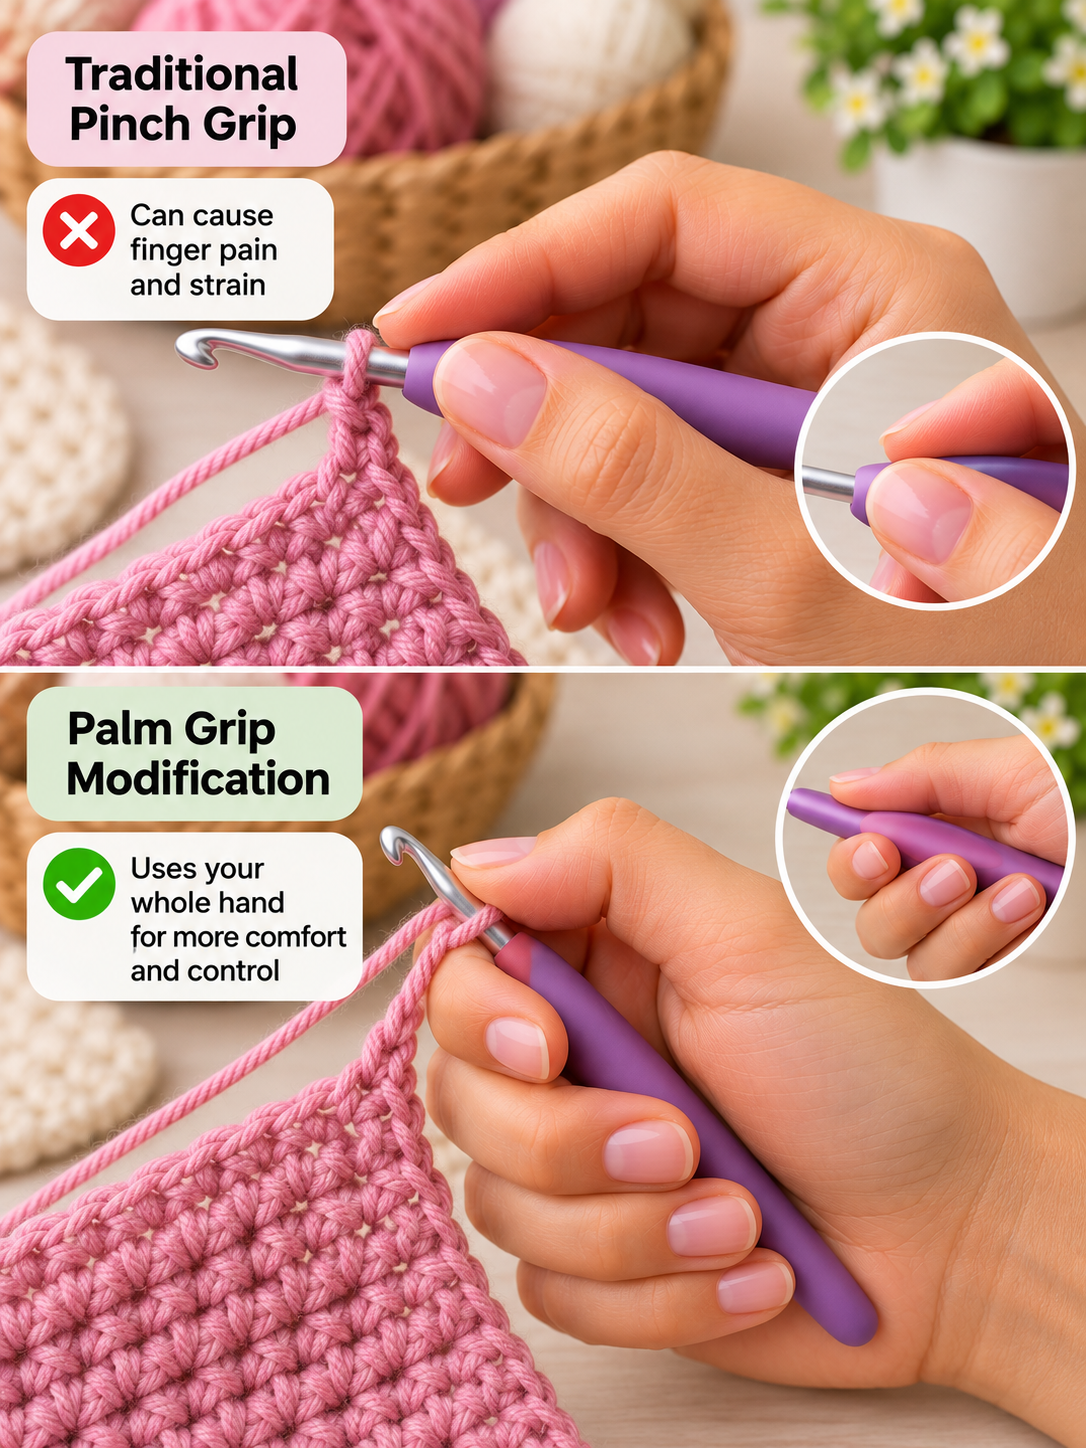
Instead of pinching the hook between thumb and forefinger, rest it more fully in your palm with your fingers gently curled around it, using your whole hand to guide movement rather than just your fingertips. It looks a little different, but plenty of long-time crocheters with arthritis swear by it.
Make Your Own Grip Cushion
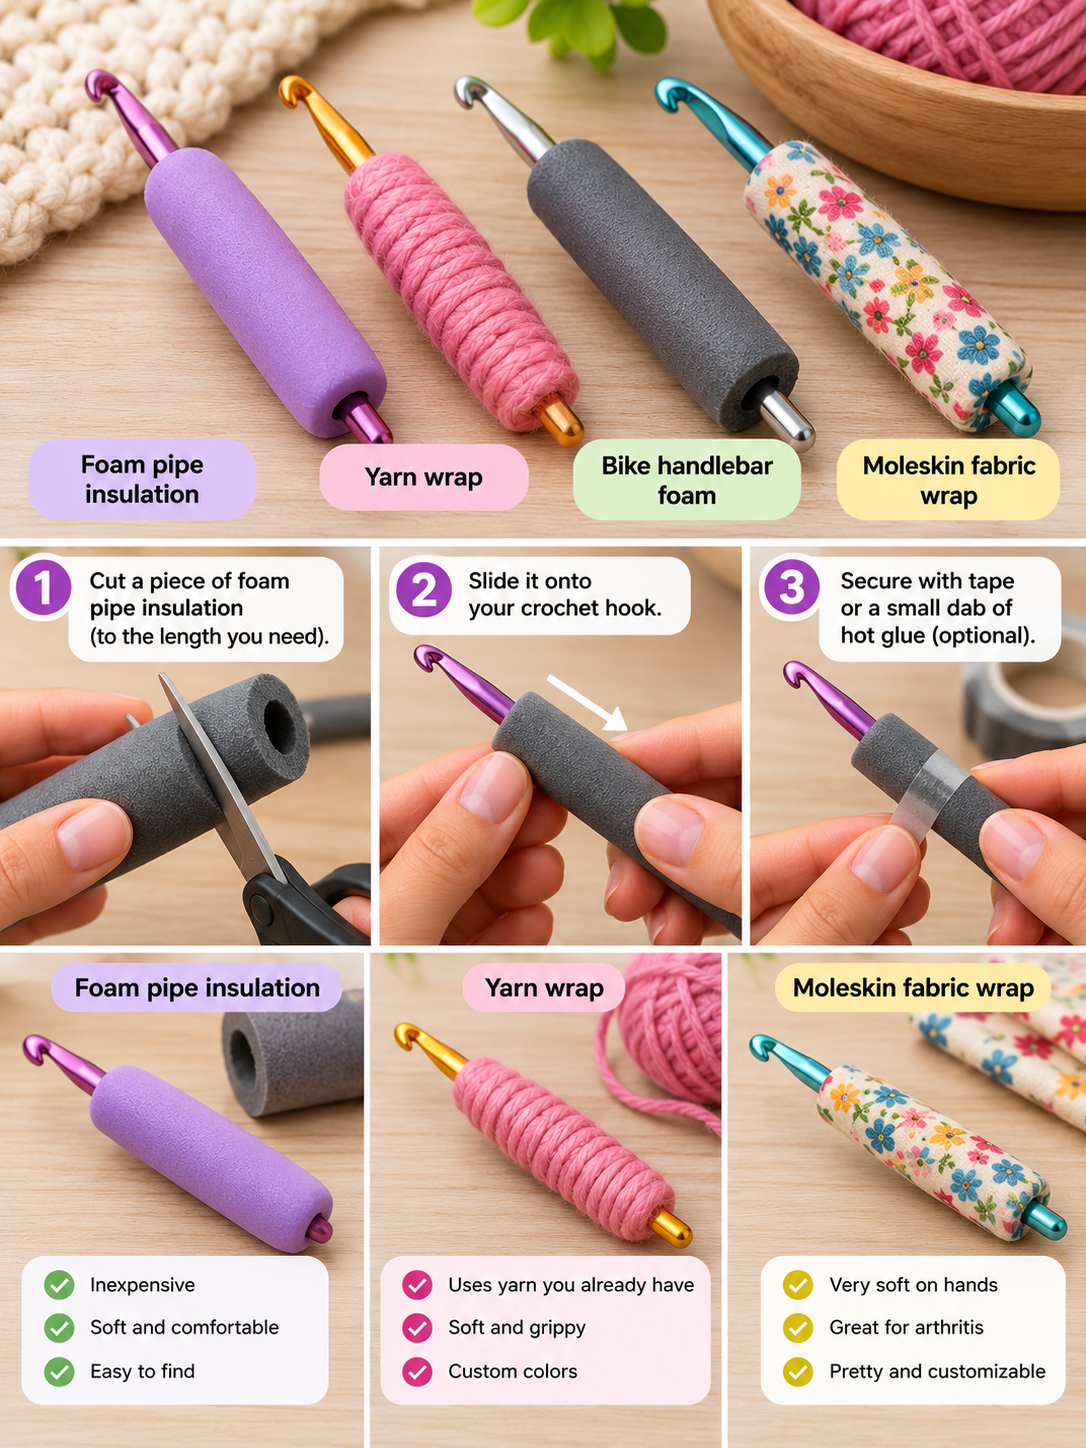
If you don’t want to buy a new hook, you can build a DIY grip in minutes:
1Wrap foam pipe insulation (from any hardware store) around the shaft of your existing hook and secure it with a bit of tape or a hot glue dab.
Alternatively, wrap the handle in soft yarn or moleskin fabric to add cushioning and thickness.
Bike handlebar grip foam, cut to size, works beautifully too and is easy to find online.
Take Breaks Before the Pain Starts
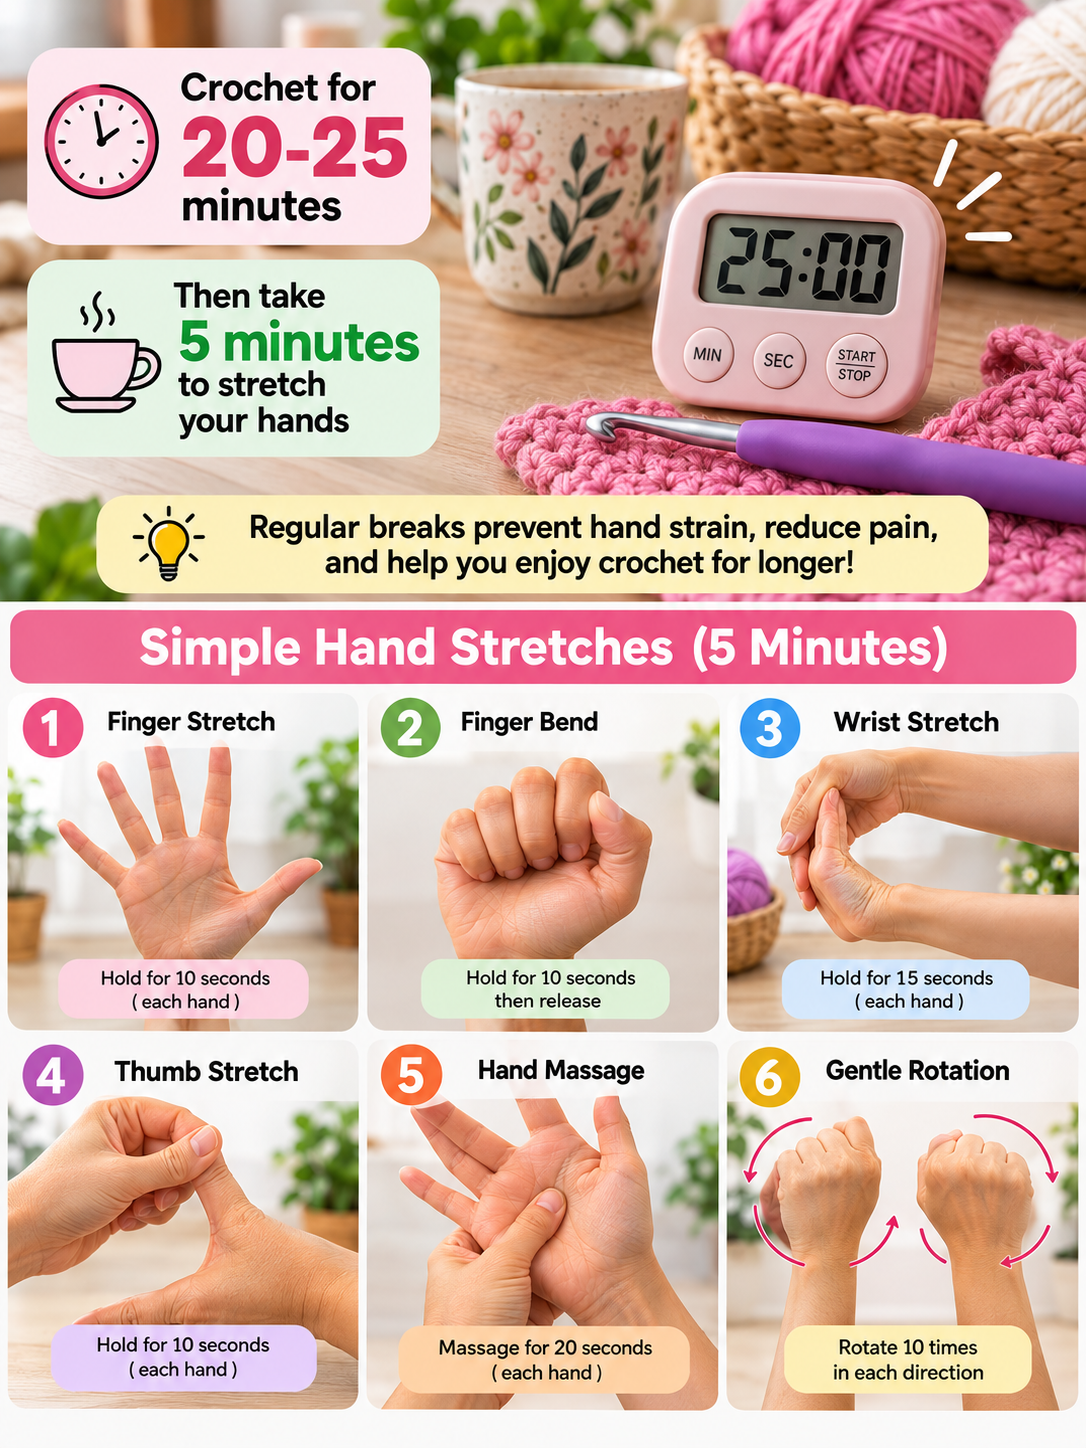
This sounds obvious, but it’s the piece of advice that actually helps most: set a timer for 20-25 minutes and stretch your hands, rather than waiting until they hurt to stop. Crochet-related hand strain builds gradually pacing yourself prevents it from becoming a barrier to enjoying the craft at all.
What to Use to Hold Yarn When Crocheting
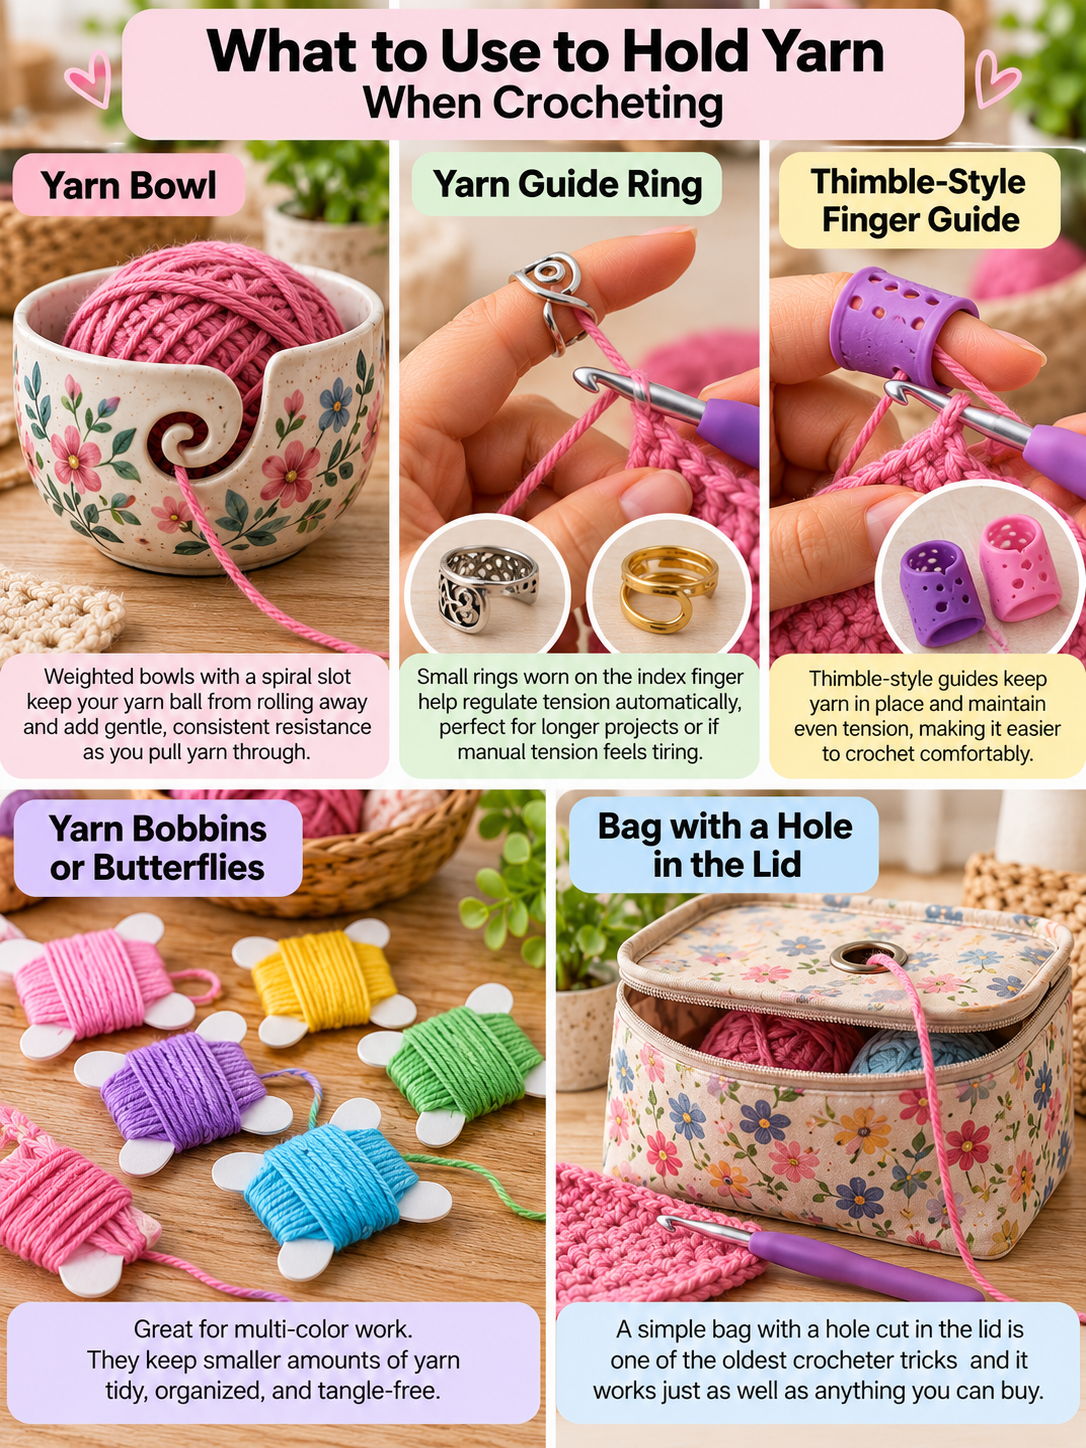
Beyond your fingers, a few tools can genuinely make tension control easier, especially for longer projects:
Yarn bowls weighted bowls with a spiral slot that keeps your yarn ball from rolling away and adds gentle, consistent resistance as you pull yarn through.
Yarn guides or thimble-style finger guides small rings worn on the index finger that help regulate tension automatically, popular for people who find manual finger-weaving tiring.
Yarn bobbins or butterflies for multi-color work, which keep smaller amounts of yarn tidy and tangle-free.
A simple bag with a hole cut in the lid genuinely one of the oldest crocheter tricks in the book, and it works just as well as anything you’d buy.
A Few Fun Facts Along the Way
While researching this topic, a few tangents kept coming up that are worth a mention, because they say something lovely about why this craft has stuck around for centuries.
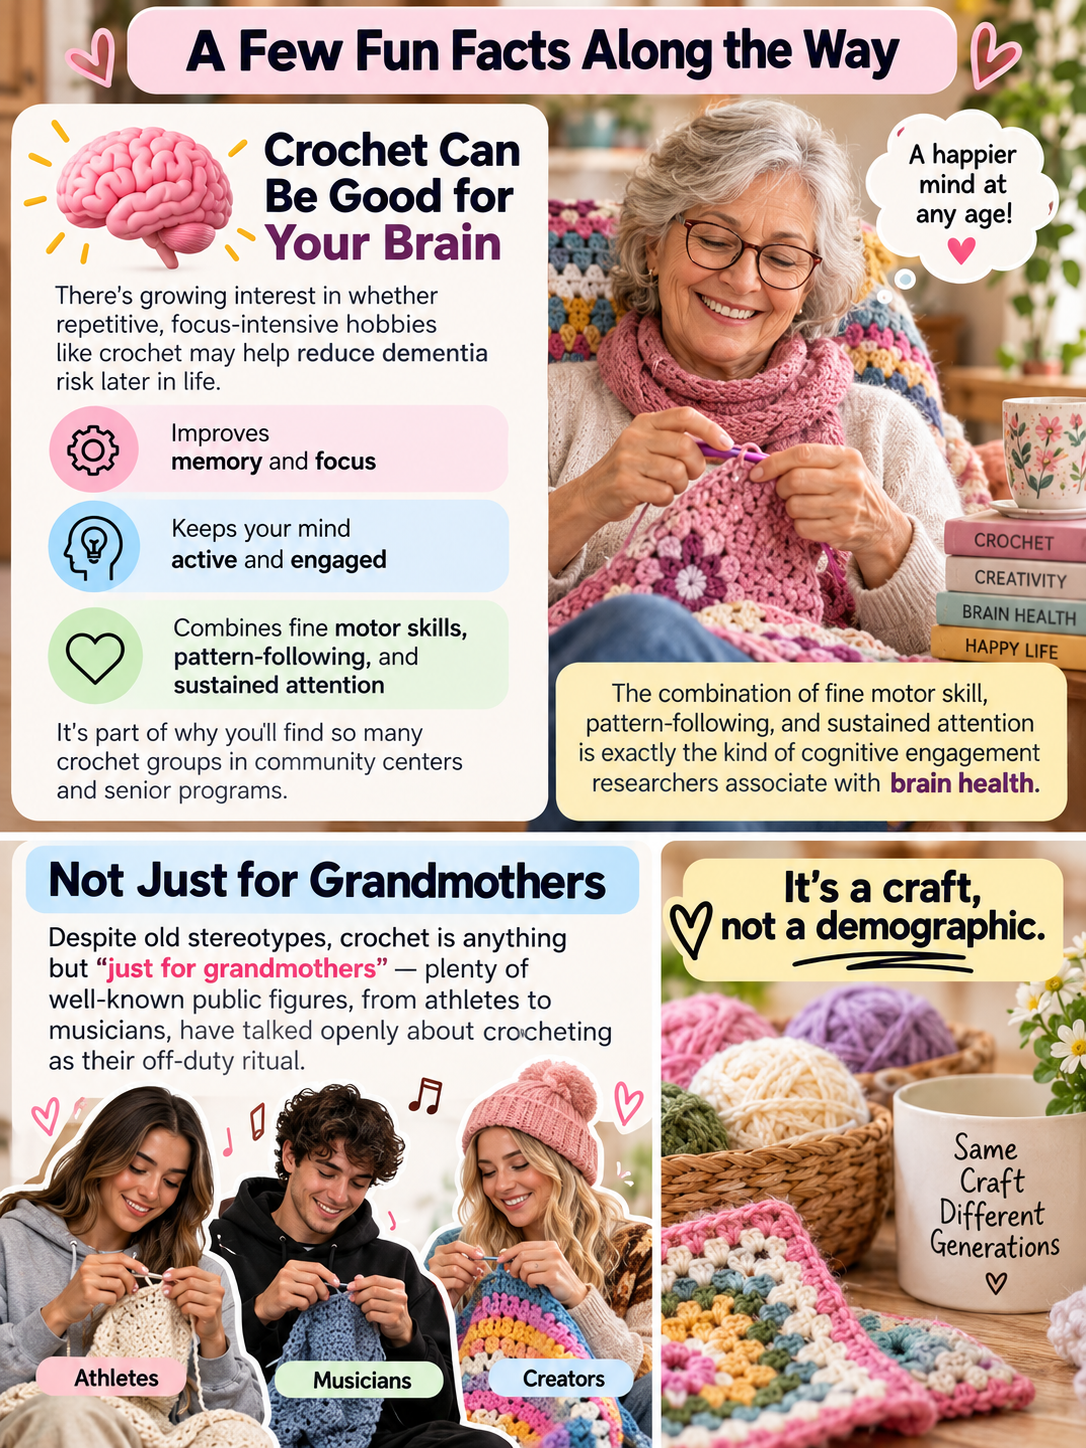
There’s growing interest in whether repetitive, focus-intensive hobbies like crochet may help reduce dementia risk later in life the combination of fine motor skill, pattern-following, and sustained attention is exactly the kind of cognitive engagement researchers associate with brain health. It’s part of why you’ll find so many crochet groups popping up in community centers and senior programs.
And despite old stereotypes, crochet is anything but “just for grandmothers” — plenty of well-known public figures, from athletes to musicians, have talked openly about crocheting as their off-duty ritual. It’s a craft, not a demographic.
Final Thoughts
Learning to hold a crochet hook and yarn properly isn’t about memorizing one “correct” technique it’s about experimenting until you find the combination that lets your hands relax into the rhythm of the stitches. Give yourself permission to look a little clumsy for your first few projects. Every single person who crochets beautifully now started exactly where you are, yarn tangled, hook gripped too tight, wondering why it isn’t working yet.
It will. Give it a week of short, regular practice sessions rather than one long frustrating attempt, and your hands will start finding the motion on their own.
Grab a hook, a small ball of scrap yarn, and try both grips for ten minutes each today. Then come back and tell me which one felt right — I’d genuinely love to know.