Blue and White French Nails: Complete Styling Guide

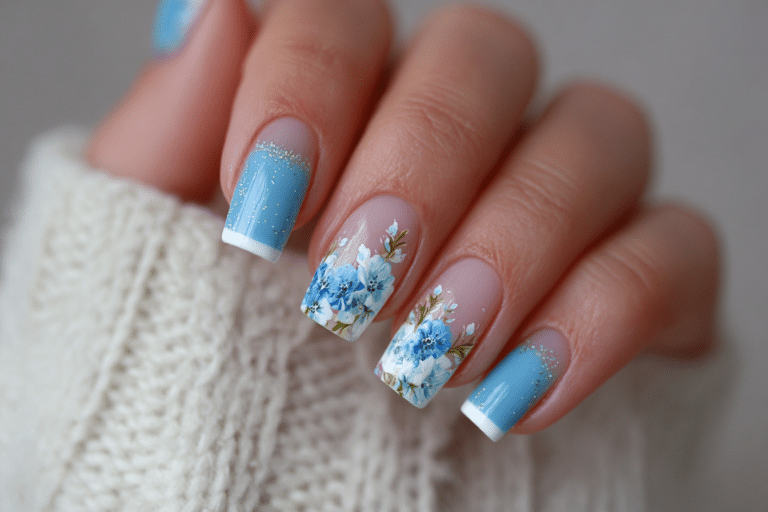
Blue and white French nails offer a modern twist on the classic French manicure by replacing traditional nude and white tones with refreshing blue hues.
This elegant nail design combines the timeless sophistication of French tips with vibrant color variations that suit any season or occasion. The versatile style works beautifully for both casual everyday wear and special events, making it a favorite among nail enthusiasts worldwide.
| Topic | Details |
|---|---|
| Category | Nail Art / Gel Nails |
| Skill Level | Beginner to Intermediate |
| Time Needed | 60 to 90 minutes |
| Tools Needed | UV/LED lamp, gel polish, nail file, brush, base coat, top coat |
| Best For | Anyone seeking a fresh, modern take on classic French manicure |
Table of Contents
Why This Nail Technique Works
The blue and white French nails technique works exceptionally well because it combines the elongating effect of traditional French tips with eye-catching color contrast. The white base creates a clean canvas that makes blue tips appear more vibrant and defined, while the color combination remains sophisticated rather than overwhelming. This design naturally draws the eye upward along the nail, creating the illusion of longer, more slender fingers regardless of your natural nail length.
The gel formula used for this style provides superior durability compared to regular nail polish, maintaining its glossy finish for up to three weeks without chipping. Gel polish adheres better to the nail plate and cures under UV or LED light, creating a hard protective layer that resists daily wear and tear. The chemical bond formed during curing makes blue and white French nails ideal for those with active lifestyles who need their manicure to withstand frequent hand washing, typing, and general daily activities.
Color psychology also plays a significant role in why this nail design remains popular. Blue evokes feelings of calm, confidence, and creativity, while white represents purity and freshness. Together, these colors create a balanced aesthetic that works across professional, casual, and formal settings. The versatility of blue shades from soft powder blue to bold navy allows for personalization while maintaining the classic French manicure structure that has proven timeless.
Tools and Products Needed
| Product | Purpose | Alternatives |
|---|---|---|
| UV/LED Lamp | Cures gel polish for long-lasting wear | Higher wattage lamps for faster curing |
| Gel Base Coat | Creates adhesion and protects natural nails | Peel-off base coat for easy removal |
| White Gel Polish | Main color for nail bed or tips | Off-white or cream shades |
| Blue Gel Polish | Creates French tips or base color | Any blue shade from pastel to navy |
| Gel Top Coat | Seals design and adds high shine | Matte top coat for different finish |
| Nail File (180 grit) | Shapes nails and smooths edges | Glass file for gentler filing |
| Nail Buffer | Smooths nail surface for better adhesion | Fine grit buffer block |
| Cuticle Pusher | Prepares cuticle area for clean application | Orange wood stick |
| Nail Dehydrator | Removes oils for better polish adhesion | Rubbing alcohol |
| Lint-Free Wipes | Removes tacky layer without leaving fibers | Cotton pads (less ideal) |
| Cuticle Oil | Nourishes cuticles after application | Vitamin E oil or jojoba oil |
| Thin Nail Brush | Creates precise French tip lines | Striping brush or detail brush |
For professional-quality results and additional nail art inspiration, visit Gel Nails by Lina for comprehensive tutorials and product recommendations.
Step-by-Step Application Guide for Blue and White French Nails
Nail Preparation
- Remove any existing nail polish using acetone-based remover and lint-free wipes to ensure a clean surface.
- Wash your hands thoroughly with soap and warm water to remove all traces of oils and debris.
- Push back cuticles gently using a cuticle pusher, moving in one direction to avoid damaging the delicate skin.
- File your nails to your desired shape using smooth, one-directional strokes rather than sawing back and forth.
- Buff the nail surface lightly with a fine-grit buffer to remove shine and create texture for better adhesion.
- Apply nail dehydrator or rubbing alcohol to each nail and allow to air dry completely before proceeding.
Base Coat Application
- Apply a thin layer of gel base coat to each nail, starting from the cuticle and sweeping toward the free edge.
- Cap the free edge by running the brush along the nail tip to seal and prevent chipping.
- Cure nails under UV lamp for 60 seconds or LED lamp for 30 seconds according to manufacturer instructions.
- Check that the base coat has cured completely with no tacky or soft spots before moving forward.
Gel Polish Layers
- Apply white gel polish to the entire nail or just the base, depending on your chosen design variation.
- Keep the first color coat thin and even, avoiding the cuticle area and side walls by leaving a small margin.
- Cure the first white layer for the recommended time based on your lamp specifications.
- Apply a second coat of white gel polish for full opacity and even color saturation across all nails.
- Cure the second white layer completely before adding any blue polish to prevent color bleeding.
- Create French tips using blue gel polish with a thin nail art brush or striping brush for precision.
- Start at one side of the nail and draw a curved line across to create the classic French smile line.
- Fill in the tip area with blue gel polish, maintaining even coverage without flooding the edges.
- Cure the blue layer according to the gel polish manufacturer’s recommended time for optimal hardness.
- Apply a second blue coat if needed for deeper color intensity and complete coverage.
Curing Process
- Ensure each layer receives adequate curing time by placing hands completely inside the lamp with nails facing upward.
- Avoid moving hands during the curing cycle to prevent smudging or creating uneven texture in the polish.
- Allow the lamp to complete its full cycle before removing your hand to ensure proper chemical bonding.
- Check for any soft spots or areas that need additional curing before proceeding to the top coat.
Finishing and Top Coat
- Apply a thin layer of gel top coat over the entire nail, covering both the white base and blue tips.
- Cap the free edge thoroughly with top coat to seal the design and maximize wear time.
- Cure the top coat for the full recommended time to achieve maximum hardness and shine.
- Remove the tacky inhibition layer using a lint-free wipe dampened with rubbing alcohol or gel cleanser.
- Apply cuticle oil around each nail and massage gently to rehydrate the skin and promote nail health.
For more detailed gel nail application techniques and troubleshooting advice, explore the resources available at Gel Nails by Lina.
Pro Nail Technician Tips
- Apply thin layers of gel polish rather than thick coats to prevent wrinkling, ensure proper curing, and avoid premature lifting at the edges.
- Clean the nail plate with a dehydrator or pH balancing solution before base coat application to remove natural oils that can cause gel polish to peel or chip early.
- Use a thin detail brush dipped in acetone to clean up any polish that touches the cuticle or side walls before curing each layer.
- Extend curing time by 10 to 15 seconds for darker blue shades since pigmented colors require more UV exposure to fully harden and set.
- Store gel polish bottles upside down for 24 hours before use to ensure pigments are evenly distributed throughout the formula.
- Apply cuticle oil daily after your manicure is complete to maintain flexibility around the nail and prevent the gel from cracking due to dryness.
Common Gel Nail Mistakes
| Mistake | Why it Happens | How to Fix |
|---|---|---|
| Thick Gel Layers | Attempting to achieve full opacity in one coat leads to thick application that cannot cure properly | Apply 2-3 thin coats instead, curing between each layer for proper hardening |
| Improper Curing | Using an underpowered lamp or not curing for sufficient time leaves gel soft and prone to denting | Invest in a quality 48-watt LED lamp and follow manufacturer cure times exactly |
| Skipping Nail Prep | Rushing through preparation leaves oils on the nail that prevent proper adhesion of gel polish | Always dehydrate nails and lightly buff the surface before applying base coat |
| Flooding the Cuticle | Applying polish too close to the cuticle causes lifting as the gel cannot adhere to skin | Leave a small margin around cuticles and clean up mistakes before curing |
| Not Capping the Free Edge | Forgetting to seal the nail tip allows water to penetrate and cause premature chipping | Run the brush along the free edge with each coat of base, color, and top coat |
Blue and White French Nail Design Variations
| Style | Description | Best Occasion |
|---|---|---|
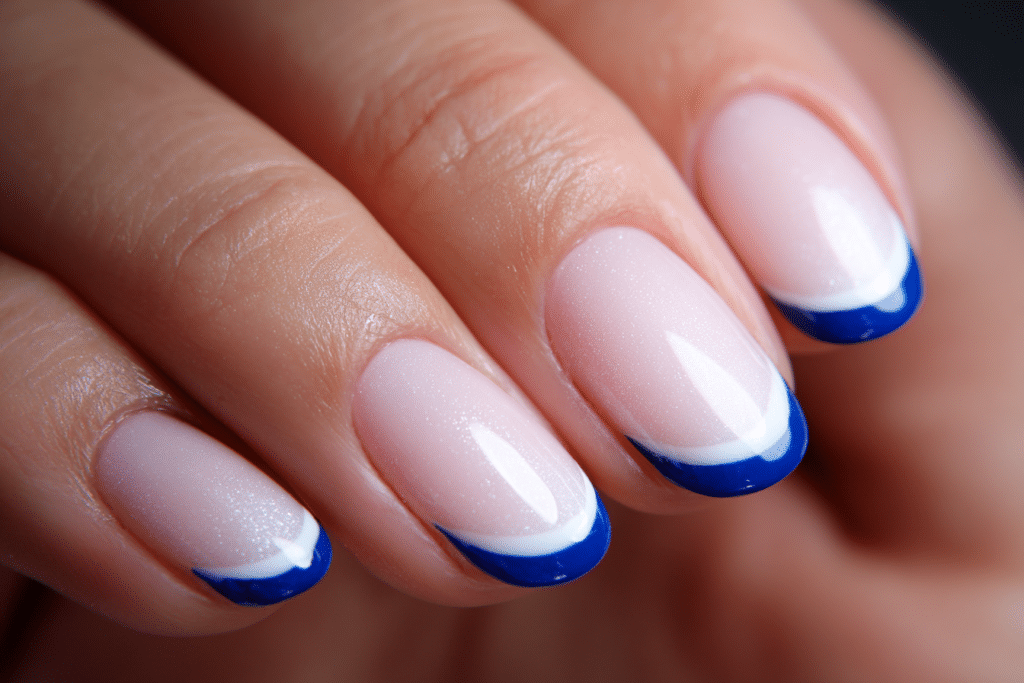
| Classic Blue Tips | White base with traditional curved blue French tips for a clean, elegant look | Professional settings, everyday wear, business meetings |
| Reverse French | Blue base color with white half-moon design at the cuticle area instead of tips | Creative environments, casual outings, artistic events |
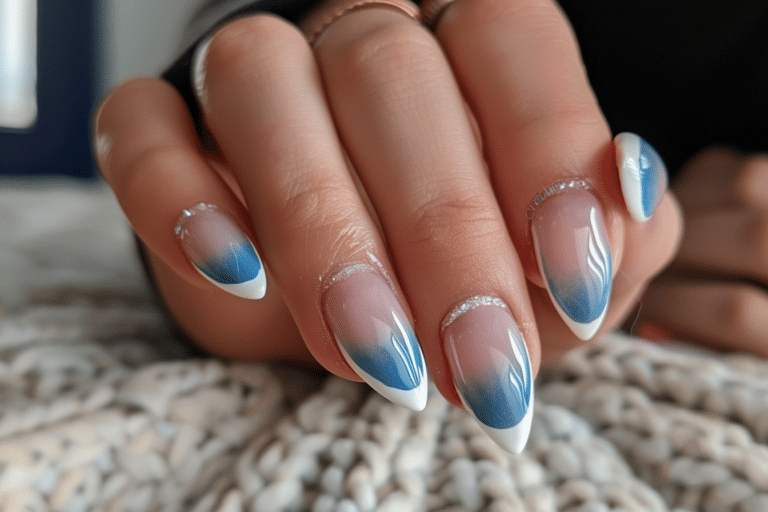
| Ombre French | Gradual fade from white at the base blending into blue at the tips for a soft transition | Weddings, formal events, romantic occasions |
| Geometric Blue Accent | White base with blue geometric patterns, stripes, or abstract shapes replacing traditional tips | Fashion events, parties, trendy social gatherings |
| Glitter Blue Tips | White base with sparkly blue glitter gel polish on tips for added dimension and shine | Holiday celebrations, evening events, festive occasions |
| Minimalist Line Design | White nails with a single thin blue line following the natural smile line for understated elegance | Minimalist aesthetics, modern workplaces, subtle style preferences |
| Marble Effect | Swirled combination of blue and white creating a marbled stone appearance across the entire nail | Luxury events, spa days, sophisticated gatherings |
Nail Care and Maintenance
Maintaining your blue and white French nails requires consistent daily care to preserve the design and protect your natural nails underneath. Apply cuticle oil at least once daily, preferably before bed, to keep the skin around your nails hydrated and prevent the gel from lifting due to dryness. Wear protective gloves when cleaning with harsh chemicals, washing dishes, or doing yard work to shield your manicure from damaging substances and excessive water exposure that can weaken the gel bond.
Avoid using your nails as tools to open cans, scratch off labels, or pry objects apart, as this creates stress on the free edge and can cause the gel to crack or the natural nail to break. Keep your hands moisturized with a quality hand cream several times daily, paying special attention to the area around your nails where dryness tends to appear first. If you notice any lifting at the edges, resist the temptation to peel or pick at the gel, as this removes layers of your natural nail and causes significant damage.
Schedule regular maintenance appointments every two to three weeks to assess nail growth and address any minor lifting before it becomes problematic. Consider taking breaks between gel applications every few months to allow your natural nails to breathe and recover from the filing and buffing process. During these breaks, apply strengthening treatments and keep nails short to prevent breakage while they rebuild their natural resilience and thickness.
Find expert nail care advice and maintenance tips at Gel Nails by Lina to keep your manicure looking fresh for weeks.
How to Remove Gel Nails Safely
Safe gel nail removal requires patience and the proper technique to avoid damaging your natural nails underneath the polish. Begin by filing off the shiny top coat layer with a coarse nail file, which allows the acetone to penetrate the gel more effectively and speeds up the removal process. Soak cotton balls or pads in pure acetone, then place one on each nail and wrap the fingertip securely with aluminum foil to hold the cotton in place and prevent evaporation.
Allow the acetone to work for 10 to 15 minutes, checking periodically to see if the gel has begun to dissolve and lift away from the nail plate. Gently scrape away the softened gel using an orange wood stick or cuticle pusher, applying minimal pressure to avoid scratching or thinning the natural nail. If the gel does not come off easily, rewrap the nail and soak for an additional five minutes rather than forcing removal, which can cause layers of the nail to peel away.
After all gel polish has been removed, wash your hands thoroughly with soap and warm water to eliminate acetone residue. Buff the nail surface very gently to smooth any remaining rough patches, then apply cuticle oil generously to all nails and the surrounding skin to restore moisture lost during the acetone soaking process. Follow up with a rich hand cream and consider applying a nail strengthening treatment to help your nails recover from the removal process.
Nail Health and Safety
Maintaining nail health while enjoying blue and white French nails requires understanding the potential risks and taking preventive measures. Excessive filing or buffing of the natural nail plate can thin the nail structure, making it weak, flexible, and prone to breakage or painful splitting. Always use a light touch when preparing nails for gel application, and never file aggressively into the nail bed or use coarse-grit files that remove too much material in a single pass.
Watch for signs of nail infection such as redness, swelling, tenderness around the cuticle area, or discoloration under the nail plate that appears green or yellow. These symptoms may indicate bacterial or fungal growth, which can develop when moisture becomes trapped between the gel polish and natural nail. If you notice any of these warning signs, remove the gel immediately and consult a dermatologist for proper treatment before applying any new polish.
Limit your exposure to UV lamps by applying broad-spectrum sunscreen to your hands 20 minutes before your manicure appointment, or wear fingerless UV-protective gloves during the curing process. While the UV exposure from nail lamps is relatively minimal, protecting your skin from cumulative damage remains important for long-term skin health. Take regular breaks from gel manicures every few months to allow your nails to recover and assess their condition without polish covering potential problems.
Frequently Asked Questions
How long do gel nails last?
Gel nails typically last between two to three weeks with proper application and care before showing signs of wear or outgrowth. The longevity depends on factors including your nail growth rate, daily activities, and how well you maintain the manicure with cuticle oil and protective measures. Some people experience longer wear time of up to four weeks, while those who work with their hands extensively may see chipping or lifting after 10 to 14 days.
How to remove gel nails safely at home?
Safe gel nail removal at home requires wrapping each nail in acetone-soaked cotton and aluminum foil for 10 to 15 minutes to dissolve the polish. Gently push off the softened gel with an orange wood stick without forcing or scraping aggressively, as this damages the natural nail underneath. Never peel or pick at gel polish, as this removes layers of your natural nail and can cause significant thinning, weakness, and long-term damage that takes months to repair.
Gel nails vs acrylic nails which is better?
Gel nails generally appear more natural, flexible, and glossy compared to acrylic nails, making them ideal for those seeking a lightweight enhancement. Acrylics provide greater strength and length for extremely weak or short nails but require more maintenance and involve stronger chemical odors during application. The choice depends on your personal needs, with gel nails better for a natural look and acrylics preferred for dramatic length or nail biting habits.
Why do gel nails peel or lift early?
Gel nails peel or lift prematurely when natural oils remain on the nail plate during application, preventing proper adhesion of the base coat. Other common causes include applying gel polish too close to the cuticle, failing to cap the free edge with each layer, or not curing the polish for sufficient time under the lamp. Proper nail preparation with dehydrator and thin, even polish application significantly reduces lifting and extends wear time to the full two to three weeks.
How to make gel nails last longer?
Making gel nails last longer requires daily application of cuticle oil, wearing gloves during cleaning or water exposure, and avoiding using nails as tools for prying or scratching. Proper application technique including thorough nail preparation, thin polish layers, adequate curing time, and capping the free edge with every coat creates a strong foundation for extended wear. Keeping hands moisturized and addressing any minor lifting immediately by visiting a nail technician prevents small problems from spreading and causing premature failure of the entire manicure.
Conclusion
Blue and white French nails provide a stunning contemporary update to the traditional French manicure that works beautifully for any occasion or personal style. By following proper application techniques, using quality gel products, and maintaining your manicure with daily cuticle oil and protective measures, you can enjoy this elegant nail design for weeks without chipping or lifting. Whether you choose classic blue tips, reverse French, or creative geometric variations, this versatile style offers endless possibilities for expressing your unique aesthetic while maintaining a polished, sophisticated appearance that transitions seamlessly from professional to casual settings.