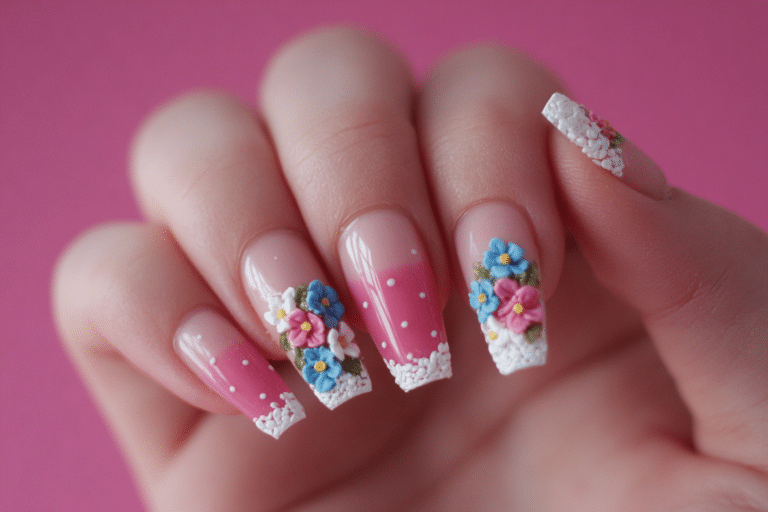
25 May French Tip Nail Ideas for a Fresh and Stylish Look

May French tip nail ideas combine the timeless elegance of classic French manicures with fresh, seasonal twists perfect for spring and early summer.
These versatile nail designs feature modern color palettes, creative tip variations, and floral accents that capture the vibrant energy of May. Whether you prefer subtle pastels or bold statement nails, French tip designs offer endless possibilities for expressing your personal style while maintaining a polished, sophisticated appearance.
| Topic | Details |
| Category | Nail Art / Gel Nails |
| Skill Level | Beginner to Intermediate |
| Time Needed | 45-90 minutes |
| Tools Needed | UV/LED lamp, gel polish, nail file, buffer, base coat, top coat |
| Best For | Anyone seeking elegant, seasonal nail designs for spring and summer events |
Table of Contents
Why This Nail Technique Works
French tip nail designs remain popular because they elongate the appearance of fingers while providing a clean, universally flattering aesthetic. The contrast between the nail bed and tip creates visual interest without overwhelming the overall look. This technique works particularly well in May because it allows for seasonal customization through color choices, floral additions, and creative tip shapes that reflect the blooming gardens and warmer weather.
The gel nail application method ensures these French tip designs last significantly longer than traditional polish, making them ideal for busy individuals who want beautiful nails throughout the month. Gel formulas provide superior shine, chip resistance, and durability that withstand daily activities. The curing process creates a hardened surface that protects natural nails while showcasing intricate designs with precision and clarity.
French tips specifically complement May occasions including Mother’s Day celebrations, graduation ceremonies, spring weddings, and outdoor gatherings. The versatility of this technique allows nail technicians to adapt the classic style to match any outfit, event, or personal preference while maintaining professional polish.
Tools and Products Needed
| Product | Purpose | Alternatives |
| UV/LED Lamp | Cures gel polish for long-lasting wear | Professional salon curing services |
| Gel Base Coat | Protects natural nail and ensures adhesion | Strengthening base coat formulas |
| Gel Color Polish | Provides color coverage for nail bed | Sheer pink, nude, or pastel shades |
| White Gel Polish | Creates classic French tip | Colored tips, chrome, or glitter alternatives |
| Gel Top Coat | Seals design and adds glossy finish | Matte or semi-gloss top coat options |
| Nail File (180 grit) | Shapes nail edges and free edge | Glass file or crystal file |
| Nail Buffer | Smooths nail surface for even application | Fine grit file or buffing block |
| Cuticle Pusher | Cleans cuticle area before application | Wooden orange stick |
| Cuticle Oil | Hydrates nails and surrounding skin | Vitamin E oil or jojoba oil |
| Nail Dehydrator | Removes moisture for better adhesion | Rubbing alcohol or nail prep solution |
| Lint-Free Wipes | Cleanses nails between steps | Cotton pads or paper towels |
Find high-quality gel nail products and professional tools at Gel Nails by Lina to achieve salon-quality results at home.
Step-by-Step Application Guide for May French Tip Nail Ideas
Nail Preparation
- Remove any existing nail polish using acetone-based remover and lint-free wipes.
- Wash hands thoroughly with soap and water to eliminate oils and debris.
- Push back cuticles gently using a cuticle pusher or wooden stick.
- File nails to your desired length and shape using smooth, one-direction strokes.
- Buff the nail surface lightly to remove shine and create texture for adhesion.
- Wipe each nail with nail dehydrator or rubbing alcohol to remove dust and oils.
Base Coat Application
- Apply a thin layer of gel base coat to each nail, avoiding the cuticle and sidewalls.
- Cap the free edge by running the brush along the nail tip.
- Cure nails under UV/LED lamp according to manufacturer instructions, typically 30-60 seconds.
- Check for any missed spots or uneven coverage before proceeding.
Gel Polish Layers
- Apply a thin layer of sheer pink, nude, or chosen base color to the entire nail.
- Cure the first color layer under the lamp for the recommended time.
- Apply a second thin coat of base color for opacity and even coverage.
- Cure the second layer completely before moving to French tip application.
- Use a thin striping brush or French tip guide to create the smile line.
- Apply white or colored gel polish to the tip area in thin, controlled strokes.
- Cure the tip layer under the lamp for full polymerization.
- Apply a second coat of tip color if needed for complete coverage.
- Cure the final tip layer thoroughly before adding any additional designs.
Curing Process
- Ensure each layer cures completely before applying the next coat.
- Keep fingers still inside the lamp to prevent smudging or shifting.
- Cure all five fingers of one hand together for consistent results.
- Check for any tacky residue or uncured areas after each curing cycle.
Finishing and Top Coat
- Apply a thin layer of gel top coat over the entire nail design.
- Cap the free edge thoroughly to seal and protect the French tip.
- Cure the top coat layer for the full recommended time.
- Wipe away any sticky residue with alcohol-soaked lint-free wipes if using a sticky top coat.
- Apply cuticle oil around the nail bed and massage into the skin.
- Allow nails to cool for a few minutes before exposing them to water or pressure.
For more detailed gel nail application techniques, visit our comprehensive nail care guides.
Pro Nail Technician Tips
- Apply gel polish in thin, even layers rather than thick coats to prevent wrinkling, peeling, or improper curing that leads to premature lifting.
- Avoid flooding the cuticle area by leaving a small gap between the polish and skin to prevent lifting at the base within days of application.
- Cure each layer for the full recommended time specific to your lamp wattage to ensure complete polymerization and maximum durability.
- Cap the free edge with every layer, including base coat, color, and top coat, to seal the tip and prevent chipping.
- Use a striping brush dipped in gel cleanser to clean up mistakes around the cuticle before curing for crisp, professional lines.
- Store gel polish bottles upside down for several hours before use to ensure pigments are evenly distributed for consistent color application.
Common Gel Nail Mistakes
| Mistake | Why It Happens | How to Fix |
| Thick gel layers | Applying too much product at once or not spreading evenly | Apply thin coats and build coverage gradually with multiple layers |
| Improper curing | Using incorrect lamp wattage or insufficient curing time | Follow gel brand instructions and ensure lamp bulbs are not expired |
| Skipping nail prep | Rushing the preparation steps or not removing oils properly | Always buff, cleanse, and dehydrate nails before base coat application |
| Flooding the cuticle | Applying polish too close to the cuticle area | Leave a small gap and clean edges with a brush before curing |
| Not capping the edge | Forgetting to seal the free edge with each layer | Run the brush along the tip edge with every coat applied |
May French Tip Nail Design Variations
| Style | Description | Best Occasion |
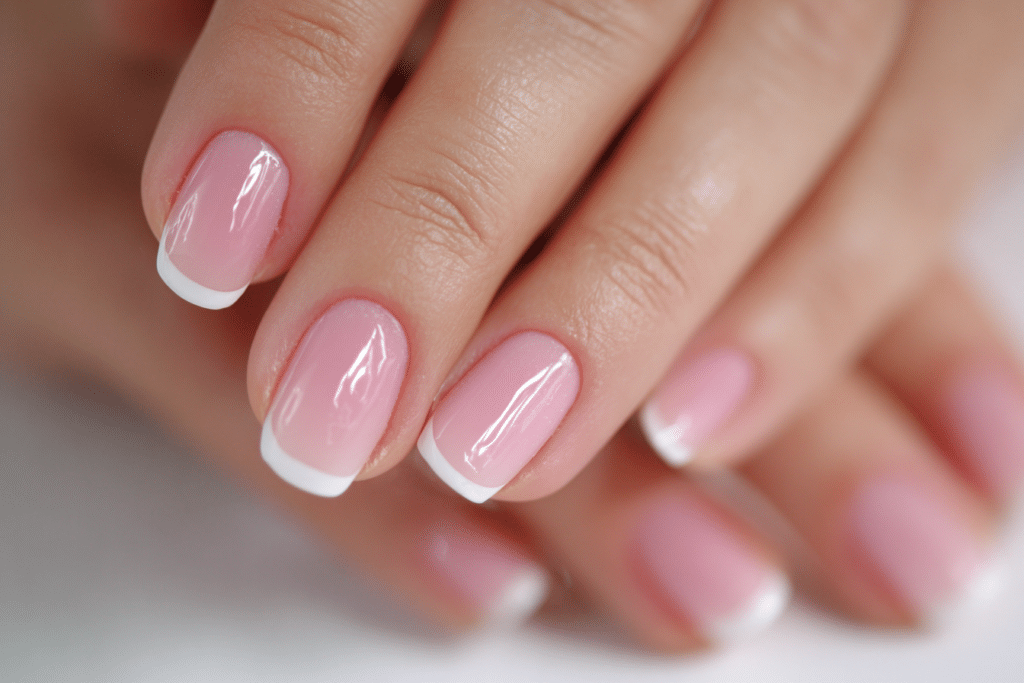
| Classic White French | Traditional white tips with nude or pink base for timeless elegance | Professional settings, weddings, everyday wear |
| Pastel Rainbow Tips | Each nail features a different pastel shade at the tip in soft spring colors | Casual outings, spring celebrations, graduation parties |
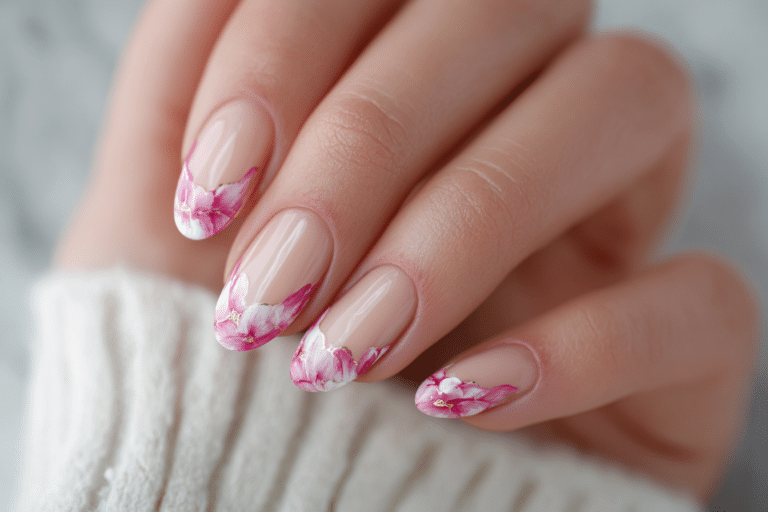
| Floral French Design | Delicate flower details painted on or near the French tip area | Mother’s Day, garden parties, bridal showers |
| Gold Foil Accent | Metallic gold foil pieces embedded in or along the French tip line | Evening events, formal occasions, special celebrations |
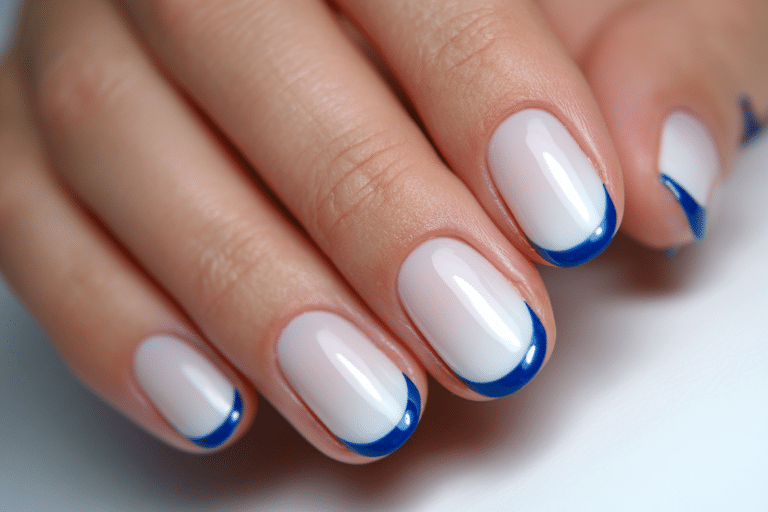
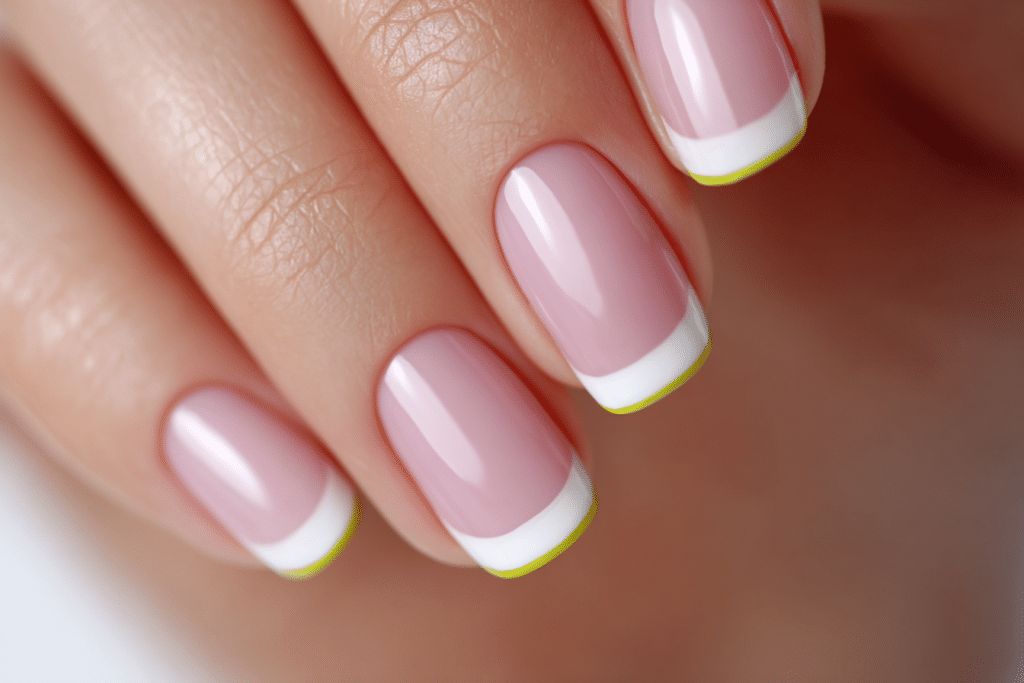
| Colored French Tips | Bright or vibrant colors replace traditional white for modern flair | Summer vacations, festivals, casual weekend activities |
| Reverse French Manicure | Color applied at the cuticle area instead of the tip | Fashion-forward events, creative settings, trendy gatherings |
| Glitter Gradient Tips | Fine glitter fades from dense at the tip to sparse toward the base | Prom, anniversaries, date nights, celebrations |
| Minimalist Line Tips | Thin colored lines define the French tip instead of solid coverage | Modern professional settings, minimalist style preferences |
| Butterfly Accent Nails | Butterfly decals or hand-painted butterflies on one or two accent nails | Spring weddings, outdoor events, nature-themed parties |
| Marble French Design | Marbled effect incorporated into the French tip area | Sophisticated events, art gallery openings, upscale dining |
Explore more seasonal nail art inspiration at Gel Nails by Lina for fresh design ideas throughout the year.
Nail Care and Maintenance
Maintaining healthy nails while wearing gel French tips requires consistent hydration and gentle care practices. Apply cuticle oil at least twice daily to keep the nail bed and surrounding skin moisturized, preventing dryness and hangnails. Massage the oil into the cuticle area and along the sidewalls to promote healthy nail growth and flexibility that resists cracking or breaking.
Wear protective gloves when cleaning, washing dishes, or using harsh chemicals to prevent premature lifting or dulling of the gel surface. Avoid using your nails as tools to open containers, scratch surfaces, or peel labels, as this creates stress points that lead to cracking. Keep nails at a manageable length that suits your lifestyle to reduce the risk of breakage or catching on clothing and objects.
Schedule regular maintenance appointments every two to three weeks to address regrowth and maintain the appearance of your French tip design. Professional fills or complete gel removal and reapplication prevent excessive lifting that can trap moisture and bacteria. Between salon visits, inspect nails daily for signs of lifting, chipping, or infection, addressing any issues promptly to maintain nail health.
How to Remove Gel Nails Safely
- File the shiny top coat layer gently to break the seal and allow acetone penetration.
- Soak cotton balls or pads in pure acetone until saturated but not dripping.
- Place the acetone-soaked cotton directly on each nail surface.
- Wrap each fingertip securely with aluminum foil to hold cotton in place and trap heat.
- Wait 10-15 minutes for the acetone to dissolve the gel polish layers.
- Remove the foil wrap from one finger and gently push softened gel with an orange stick.
- Avoid scraping or forcing gel off the nail plate to prevent damage.
- Rewrap and soak longer if gel has not softened sufficiently.
- Buff nails gently after removal to smooth any remaining residue.
- Wash hands thoroughly and apply cuticle oil generously to rehydrate nails.
- Wait at least a few days before applying new gel polish to allow nails to recover.
Nail Health and Safety
Protecting nail health during gel applications requires attention to proper technique and hygiene practices. Always ensure nail tools are properly sanitized before each use to prevent bacterial or fungal infections that thrive in moist environments. Avoid excessive filing or buffing that thins the nail plate, making nails weak, flexible, and prone to breakage or peeling in layers.
Watch for signs of allergic reactions to gel products, including redness, swelling, itching, or burning sensations around the nail area. If symptoms occur, remove the product immediately and consult a dermatologist for proper evaluation and treatment recommendations. Some individuals develop sensitivities to gel formulas over time, requiring alternative nail enhancement options or breaks between applications.
Frequently Asked Questions
How long do gel French tip nails last?
Gel French tip nails typically last two to three weeks with proper application and care. The longevity depends on factors including nail preparation quality, gel brand, daily activities, and natural nail growth rate. Proper curing, thin application layers, and avoiding excessive water exposure extend wear time significantly.
How do you remove gel French tip nails safely at home?
Remove gel French tips by filing the top coat, soaking nails in acetone-saturated cotton wrapped with foil for 10-15 minutes, then gently pushing softened gel off with an orange stick. Never peel or force gel polish off, as this damages the natural nail plate. Apply cuticle oil immediately after removal to restore moisture and prevent dryness.
What is the difference between gel nails and acrylic nails for French tips?
Gel nails cure under UV/LED light and offer a more natural, flexible finish with high shine, while acrylic nails harden through chemical reaction and provide stronger, thicker enhancements. Gel French tips appear more natural and require less filing, whereas acrylic French tips offer greater length extension and durability for those with weak natural nails. Gel removal uses acetone soaking, while acrylic requires more intensive filing and soaking processes.
Why do gel French tip nails peel or lift prematurely?
Gel French tip nails peel due to improper nail preparation, oil or moisture on the nail surface, thick application layers, insufficient curing time, or failure to cap the free edge. Other causes include exposure to excessive water, harsh chemicals, or physical trauma that breaks the seal between gel and natural nail. Thorough cleansing, dehydration, and proper technique prevent premature lifting and peeling.
How can I make my gel French tip nails last longer?
Make gel French tips last longer by applying thin, even layers, curing each coat thoroughly, capping the free edge with every layer, and avoiding excessive water exposure. Wear protective gloves during cleaning, apply cuticle oil daily to prevent dryness, and avoid using nails as tools. Proper nail preparation including buffing, dehydrating, and removing all oils ensures maximum adhesion and extended wear time.
Conclusion
May French tip nail ideas offer endless creative possibilities for achieving a fresh, stylish look perfect for spring and summer. These versatile designs combine classic elegance with seasonal flair through pastel colors, floral accents, and modern variations that suit any occasion or personal style. By following proper application techniques, using quality gel products, and maintaining consistent nail care, you can enjoy beautiful, long-lasting French tip manicures throughout the month. Experiment with different color combinations, tip shapes, and accent details to discover your perfect May French tip nail style that captures the vibrant energy of the season.