30 Beach Nail Designs to Match Every Summer Vibe

Beach nail designs capture the essence of coastal beauty through ocean-inspired colors, tropical patterns, and summery textures.
These creative manicures transform your nails into miniature works of art that reflect sandy shores, crystal waters, and sunset skies. Whether you prefer subtle seashell accents or bold wave patterns, the perfect beach-inspired design awaits to complement your summer adventures.
| Topic | Details |
| Category | Nail Art |
| Skill Level | Beginner to Advanced |
| Time Needed | 45-90 minutes |
| Tools Needed | Gel polish, UV lamp, nail art brushes, decorations |
| Best For | Summer vacations, beach trips, tropical occasions |
Table of Contents
Why Beach Nail Designs Work
Beach nail designs resonate deeply because they evoke positive memories and emotions associated with coastal experiences. The psychology of color plays a crucial role, with ocean blues promoting calmness, sandy neutrals providing warmth, and coral pinks creating energy. These designs work exceptionally well with gel polish because the formula maintains vibrant pigmentation and glossy finishes that mimic the natural shine of water and wet sand.
The versatility of beach-themed nail art allows for endless creativity while remaining universally flattering. Turquoise shades complement warm and cool skin tones alike, while metallic accents replicate the sparkle of sunlight on waves. Professional nail artists favor beach designs because they accommodate various skill levels and can be simplified or elaborated based on client preferences. The thematic consistency makes color coordination effortless, whether you choose monochromatic ocean hues or vibrant tropical palettes.
From a technical standpoint, beach nail designs benefit from gel polish durability and resistance to water exposure. Summer activities involving swimming, humidity, and sun exposure can damage traditional polish, but properly cured gel manicures withstand these conditions for two to three weeks. The dimensional nature of beach art, including textured sand effects and raised seashell embellishments, showcases gel’s structural capabilities and artistic potential.
Tools and Products Needed
| Product | Purpose | Alternatives |
| UV/LED Lamp | Cures gel polish layers | Professional salon curing |
| Base Coat | Protects natural nails | Strengthening base formula |
| Gel Polish Colors | Creates design foundation | Regular polish with quick dry |
| Nail Art Brushes | Detailed design work | Dotting tools, toothpicks |
| Top Coat | Seals and protects design | Matte or glossy finish options |
| Nail File | Shapes nail edges | Glass file, emery board |
| Nail Buffer | Smooths nail surface | Fine-grit buffer block |
| Cuticle Oil | Hydrates nail beds | Vitamin E oil, jojoba oil |
| Nail Decorations | Adds dimensional elements | Rhinestones, shells, glitter |
| Nail Prep Solution | Dehydrates nail plate | Rubbing alcohol |
For premium gel polish options and professional nail tools, visit Gel Nails By Lina for expert recommendations and quality products.
Step-by-Step Application Guide for Beach Nail Designs
Nail Preparation
- Remove any existing nail polish using acetone-soaked cotton pads and gentle pressure to avoid nail plate damage.
- Push back cuticles gently using a wooden or rubber cuticle pusher to create a clean canvas.
- File nails into your desired shape, whether almond, square, or round, maintaining consistent length across all fingers.
- Buff the nail surface lightly to remove shine and create texture for better gel adhesion.
- Cleanse nails thoroughly with nail prep solution or rubbing alcohol to remove oils and debris.
- Apply cuticle oil to surrounding skin, avoiding the nail plate to prevent lifting issues.
Base Coat Application
- Apply a thin layer of gel base coat starting from the cuticle area and pulling toward the free edge.
- Cap the free edge by running the brush along the nail tip to seal and prevent chipping.
- Cure under UV lamp for 30 seconds or LED lamp for 15 seconds according to manufacturer specifications.
- Check for any uncured spots or bubbles that may compromise the manicure longevity.
Gel Polish Layers and Beach Design Creation
- Apply your chosen base color in thin, even layers to prevent thick buildup and ensure proper curing.
- Cure the first color coat for the recommended time based on your lamp type and polish brand.
- Add a second coat for opacity and vibrant color payoff, maintaining thin application technique.
- Cure the second coat completely before beginning decorative elements to avoid smudging or mixing colors.
- Create ocean waves using a fine nail art brush with white and turquoise gel, blending where colors meet.
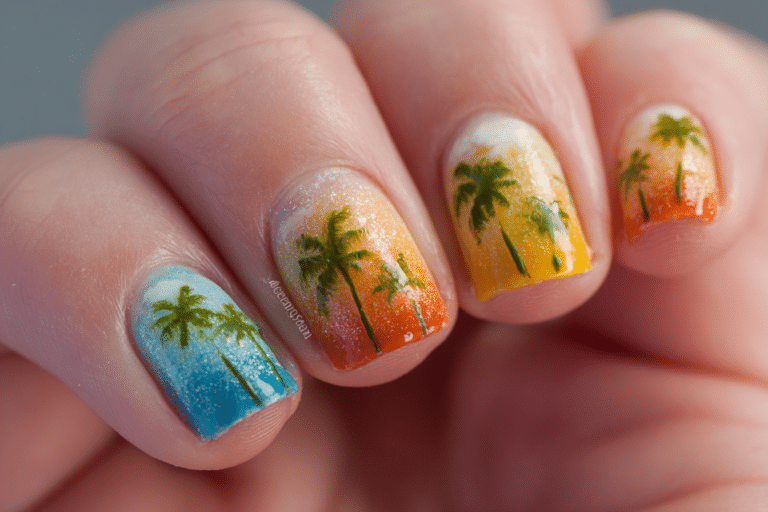
- Add beach elements like palm trees, starfish, or seashells using detail brushes and coordinating gel colors.
- Apply gradient effects by dabbing multiple shades with a makeup sponge for sunset or ombre looks.
- Cure each design layer individually to build dimension without compromising the previous artwork.
Curing Process
- Position your hand flat inside the UV or LED lamp ensuring all nails receive equal light exposure.
- Set the timer according to gel polish specifications, typically 30-60 seconds for LED or 2 minutes for UV.
- Avoid moving your hand during curing to prevent smudging or incomplete polymerization of gel layers.
- Check that decorative elements like glitter or rhinestones remain secure after curing before proceeding.
Finishing and Top Coat
- Apply gel top coat in a thin layer over the entire nail including design elements for protection.
- Cap the free edge again with top coat to seal the manicure and maximize wear time.
- Cure the top coat for the full recommended duration to achieve maximum hardness and shine.
- Wipe away the sticky inhibition layer using rubbing alcohol and a lint-free wipe if using a standard top coat.
- Apply cuticle oil around each nail to restore moisture and create a polished, professional finish.
- Massage oil into cuticles and sidewalls to promote nail health and prevent dryness from gel application.
Pro Nail Technician Tips for Beach Nail Designs
- Use thin gel polish layers to prevent premature lifting and ensure complete curing through all layers, especially with opaque summer colors.
- Prep the nail plate thoroughly by removing all oils and moisture to create maximum adhesion for long-lasting gel manicures.
- Invest in quality nail art brushes with fine tips for detailed beach elements like palm fronds, waves, and intricate patterns.
- Mix gel colors on a palette to create custom beach shades that perfectly match your vision for ocean depths or sand tones.
- Seal decorative elements like seashells or rhinestones with an extra layer of top coat to prevent them from catching on clothing.
- Allow proper curing time between layers, especially when building dimensional designs that require multiple color applications.
For more expert techniques and professional nail art tutorials, explore the comprehensive guides at Gel Nails By Lina for insider tips from experienced nail technicians.
Common Gel Nail Mistakes with Beach Designs
| Mistake | Why It Happens | How to Fix |
| Thick Gel Layers | Applying too much product at once to achieve color quickly | Use multiple thin coats instead, curing between each layer |
| Improper Curing | Insufficient lamp wattage or moving hand during curing process | Upgrade to professional lamp and keep hand still for full duration |
| Skipping Nail Prep | Rushing through preparation steps to save time | Always buff, cleanse, and dehydrate nails before base coat application |
| Flooding the Cuticle | Applying polish too close to cuticle area causing lifting | Leave small gap near cuticle and cap free edge properly |
| Overworking Designs | Continuously touching wet gel before curing causing smudges | Plan design ahead and cure immediately after completing each element |
Beach Nail Design Variations
| Style | Description | Best Occasion |
| Ocean Wave Nails | Blue gradient with white foam details mimicking crashing waves | Beach vacations, summer parties |
| Seashell Accent Nails | Nude base with hand-painted shells and pearl embellishments | Tropical weddings, resort getaways |
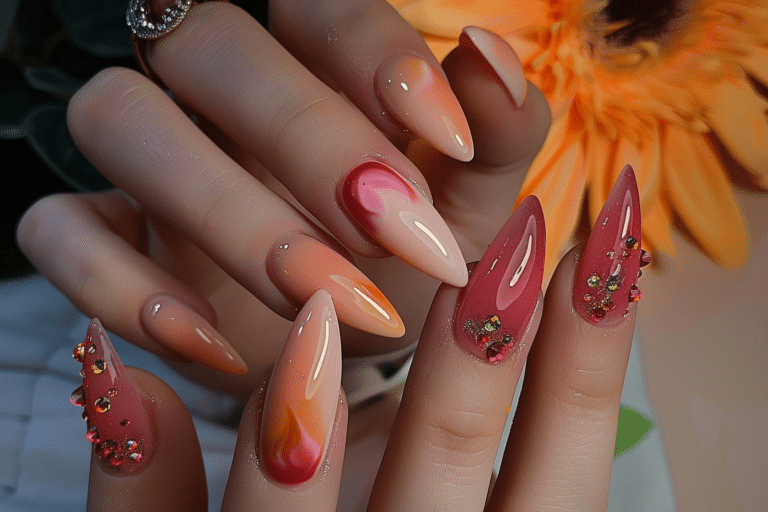
| Sunset Ombre | Pink, orange, and purple gradient reflecting evening beach skies | Summer evenings, romantic occasions |
| Tropical Palm Trees | Light blue background with silhouette palm trees and sunset | Vacation, casual summer outings |
| Starfish and Sand | Textured beige base with tiny starfish and gold glitter accents | Beach weddings, coastal events |
| Mermaid Chrome | Iridescent chrome powder creating scales effect on ocean colors | Pool parties, summer festivals |
| Anchor and Nautical | Navy and white stripes with anchor symbols and rope details | Sailing trips, maritime themes |
| Coral Reef Nails | Underwater scene with coral, fish, and bubbles on turquoise base | Diving trips, ocean conservation events |
| Beach Glass Effect | Translucent gel creating frosted sea glass appearance with shimmer | Minimalist summer looks, daily wear |
| Tropical Fruit Nails | Bright colors with pineapple, watermelon, or citrus slice designs | Summer BBQs, casual gatherings |
Nail Care and Maintenance for Beach Designs
Maintaining beach nail designs requires consistent hydration and protection from environmental stressors. Apply cuticle oil at least twice daily, especially after exposure to chlorine or salt water, which can dry the nail bed and surrounding skin. Quality cuticle oil penetrates the gel layers to nourish the natural nail underneath, preventing brittleness and breakage. Massage the oil into cuticles and sidewalls using circular motions to improve circulation and promote healthy nail growth throughout the summer season.
Protect your beach nail designs from excessive sun exposure by applying SPF to your hands regularly. UV rays can cause gel polish discoloration, particularly with lighter shades like whites and pastels commonly used in coastal designs. Wear gloves when cleaning with harsh chemicals or doing yard work to prevent premature chipping and dulling of the glossy finish. Avoid using your nails as tools to open cans or scrape surfaces, as this creates stress points that lead to cracks and lifting.
Schedule fills or touch-ups every two to three weeks to maintain the pristine appearance of your beach nail designs. As natural nails grow, the gap at the cuticle becomes visible and can harbor bacteria if not addressed promptly. Monitor your nails daily for signs of lifting, which appears as a white or cloudy area under the gel. Address lifting immediately by visiting a professional or carefully removing the affected nail to prevent moisture from getting trapped, which can lead to fungal infections.
Keep your hands moisturized with a quality hand cream containing ingredients like shea butter or glycerin. Well-hydrated skin around nails prevents hangnails and cracking that can catch on clothing and damage your manicure. Store your nail care products in a cool, dry place away from direct sunlight to maintain their effectiveness. Proper maintenance extends the life of your beach nail designs while keeping your natural nails healthy and strong underneath the gel layers.
How to Remove Beach Nail Designs Safely
Safe gel nail removal protects your natural nails from damage and prepares them for your next beach-inspired manicure. Begin by gently filing the shiny top coat layer using a coarse nail file to break the seal and allow acetone to penetrate. Avoid aggressive filing that reaches the natural nail, as this thins the nail plate and causes weakness. Focus only on removing the glossy surface layer of the gel polish.
Soak cotton balls in pure acetone and place one on each nail, ensuring complete coverage of the gel surface. Wrap each finger tightly with aluminum foil strips to hold the cotton in place and create heat that accelerates the breakdown process. Allow nails to soak for 10 to 15 minutes without peeking, as opening the foil releases heat and slows removal. The gel should appear lifted and softened when ready for removal.
Remove the foil wraps and gently push off the softened gel using a wooden cuticle pusher or orangewood stick. Work from the cuticle area toward the free edge using minimal pressure to avoid scraping the nail surface. If gel resists removal, rewrap and soak for an additional five minutes rather than forcing it off. Never peel or pick at gel polish, as this removes layers of the natural nail and causes significant damage.
Nail Health and Safety with Beach Designs
Maintaining nail health while enjoying decorative beach designs requires balancing aesthetic desires with proper nail care practices. The natural nail plate needs to breathe and regenerate between gel applications to prevent weakening and brittleness. Dermatologists recommend taking breaks of at least one week between gel manicures every two to three months, allowing nails to recover from the filing and chemical exposure. During these rest periods, focus on strengthening treatments containing biotin, keratin, or calcium to rebuild nail structure.
Monitor for signs of nail infections including redness, swelling, pain, or discoloration around the nail bed. Fungal infections can develop when moisture becomes trapped between the gel and natural nail, particularly after swimming in pools or oceans. If you notice green or yellow discoloration under the gel, remove it immediately and consult a dermatologist for appropriate treatment. Proper nail preparation and ensuring complete drying before gel application significantly reduces infection risk.
Avoid excessive filing or buffing of the natural nail surface, which thins the nail plate and makes it vulnerable to damage. Professional nail technicians should only lightly buff to create texture for adhesion, never filing deeply enough to cause heat or discomfort. Over-filed nails become flexible, painful, and prone to peeling in layers. If you experience sensitivity or pain during or after a manicure, the filing was too aggressive and you should allow several weeks for the nail to regenerate before applying gel again.
Frequently Asked Questions
How long do beach nail designs with gel polish last?
Beach nail designs created with gel polish typically last two to three weeks with proper application and care. The longevity depends on factors including nail preparation quality, gel polish brand, daily activities, and exposure to water. Chip-resistant gel formulas and proper curing extend wear time, while activities like frequent hand washing or swimming may slightly reduce durability. To maximize the lifespan of your beach designs, apply cuticle oil daily and wear gloves during household chores.
How do I remove gel beach nail designs safely at home?
Safe at-home gel removal requires soaking nails in pure acetone for 10 to 15 minutes after filing off the top coat. Wrap each nail with acetone-soaked cotton and aluminum foil to create heat that softens the gel for gentle removal. Never peel or forcefully scrape gel polish, as this removes layers of the natural nail and causes damage. After removal, moisturize thoroughly with cuticle oil and hand cream to restore hydration.
What is the difference between gel beach nails and acrylic nails?
Gel beach nails cure under UV or LED light and offer a natural, flexible finish that works well for detailed nail art. Acrylic nails use a liquid and powder system that air-dries to create a harder, more durable enhancement suitable for length extensions. Gel polish is generally easier to apply for beginners and removes more gently than acrylics. Beach designs work beautifully with both systems, though gel provides more color vibrancy and natural shine for ocean-inspired themes.
Why do my beach gel nails peel or lift prematurely?
Gel nails peel or lift due to inadequate nail preparation, oil contamination, thick polish layers, or insufficient curing time. Skipping the dehydration step leaves natural oils that prevent proper adhesion between the gel and nail plate. Applying gel too close to the cuticle or on wet nails also causes lifting within days. To prevent peeling, thoroughly prep nails, apply thin coats, cure completely, and avoid getting polish on skin or cuticles.
How can I make my beach nail designs last longer during summer?
Extend the wear of beach nail designs by applying cuticle oil twice daily, wearing gloves during cleaning, and avoiding excessive water exposure. Use a quality gel top coat that resists chipping and yellowing from sun exposure or chlorine. Cap the free edge with each gel layer to seal the nail tip where chipping commonly begins. Proper nail preparation and thin gel application create the foundation for long-lasting manicures that withstand summer activities and environmental stressors.
Conclusion
Beach nail designs offer endless creative possibilities for expressing your summer style through vibrant colors, ocean-inspired patterns, and tropical themes. These versatile manicures complement every coastal occasion from casual beach days to elegant seaside weddings. With proper application techniques, quality gel products, and consistent maintenance, your beach nail designs will remain flawless throughout the season. Embrace the artistic freedom of ocean-themed nail art and transform your nails into stunning accessories that capture the beauty of summer shores.