The first scrunchie I ever sewed looked like a deflated donut. Too little fabric, too much elastic, and a seam that pointed straight up like a little shark fin. I wore it anyway. Proudly. For about a day.
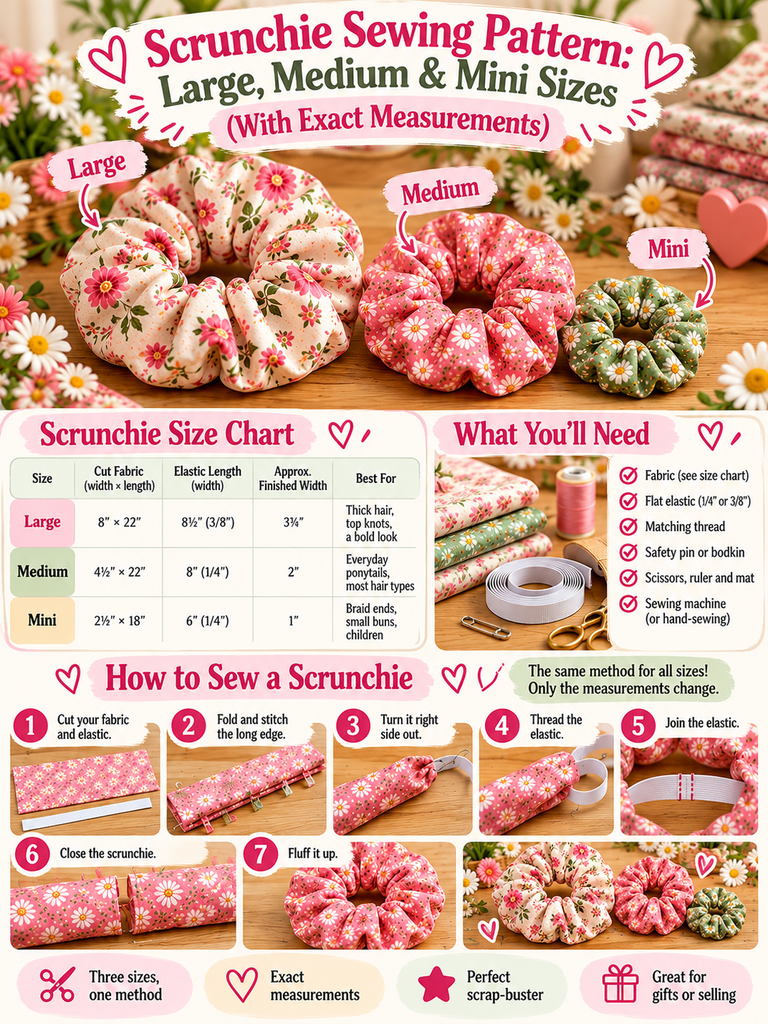
Here’s what I learned from that sad little donut: a great scrunchie isn’t about skill. It’s about ratios. Get the fabric width, fabric length and elastic length right, and the scrunchie practically makes itself. Get them wrong, and no amount of careful stitching will save it.
So that’s what this guide gives you. Three tested sizes (large, medium and mini), the exact numbers for each, and the method I now use every single time. If you can sew a straight line, you can make all three this afternoon.
Table of Contents
Key Takeaways
- Three sizes, one method: the steps are identical; only the cutting measurements change.
- Large: 8″ × 22″ fabric with 8½” of 3/8″ elastic for a full, statement-style scrunchie.
- Medium: 4½” × 22″ fabric with 8″ of 1/4″ elastic for the everyday classic.
- Mini: 2½” × 18″ fabric with 6″ of 1/4″ elastic for buns, braids and kids’ hair.
- One fat quarter is enough for several scrunchies, which makes this a perfect scrap-buster.
A Quick Bit of Scrunchie History (It’s Better Than You’d Think)
The scrunchie has an inventor. In 1987, nightclub singer Rommy Hunt Revson patented the design after getting fed up with metal hair ties snagging her hair. She named her brand “Scunci,” after her toy poodle.
Think about that for a second. The original selling point of the scrunchie wasn’t style. It was kindness to hair. That fabric cushion around the elastic spreads out the pressure, so you get less creasing and less snapping than with a bare elastic band.
That’s exactly why they came back. And honestly? They’re never leaving my sewing table again.
What You’ll Need
The supply list is short, which is part of the charm:
- Fabric (see the size chart below for amounts)
- Flat elastic, 1/4″ or 3/8″ wide
- Matching thread
- A safety pin or bodkin to thread the elastic
- Scissors or a rotary cutter, ruler and mat
- Pins or sewing clips
- A sewing machine (or a needle and some patience, since hand-sewing works fine)
Scrunchie Size Chart: Large, Medium & Mini
This is the heart of the pattern. All measurements include a 1/4″ seam allowance.
| Size | Cut Fabric | Elastic | Approx. Finished Width | Best For |
|---|---|---|---|---|
| Large | 8″ × 22″ | 8½” of 3/8″ elastic | 3¾” | Thick hair, top knots, a bold look |
| Medium | 4½” × 22″ | 8″ of 1/4″ elastic | 2″ | Everyday ponytails, most hair types |
| Mini | 2½” × 18″ | 6″ of 1/4″ elastic | 1″ | Braid ends, small buns, children |
Metric conversions: Large 20 × 56 cm with 22 cm elastic. Medium 11.5 × 56 cm with 20 cm elastic. Mini 6.5 × 46 cm with 15 cm elastic.
One thing worth saying out loud: these numbers are a starting point, not a law. If you like a looser hold, add half an inch of elastic. If you love that extra-ruffled look, add two inches to the fabric length. The method doesn’t change, so experiment freely.
How Many Scrunchies From One Fat Quarter?
A fat quarter measures roughly 18″ × 22″, so you cut your strips across the 18″ side and use the full 22″ length:
- Large: 2 scrunchies
- Medium: 4 scrunchies
- Mini: 7 scrunchies
Or mix and match. One large plus two mediums fits nicely, and a matching big-and-little set makes a lovely gift.
Choosing the Right Fabric
Picture this: you’ve made a gorgeous large scrunchie from stiff quilting cotton. It looks great on the table. Then you put it in your hair and it stands out like a lampshade.
Fabric weight matters more for scrunchies than people expect. Here’s my rough guide:
- Quilting cotton: easy to sew, holds its shape. Brilliant for medium and mini sizes.
- Satin and silk: slippery to sew, but smooth on hair and beautifully drapey. Ideal for large scrunchies and for sleeping in.
- Velvet: rich and plush. Use a slightly longer stitch and go slowly, because it creeps.
- Linen and rayon: soft, natural and lovely for a relaxed, oversized look.
As a general rule, the bigger the scrunchie, the softer and lighter your fabric should be. Stiff fabric plus lots of volume equals lampshade.
Step-by-Step: How to Sew a Scrunchie
These steps work for every size in the chart. Grab your fabric and let’s go.
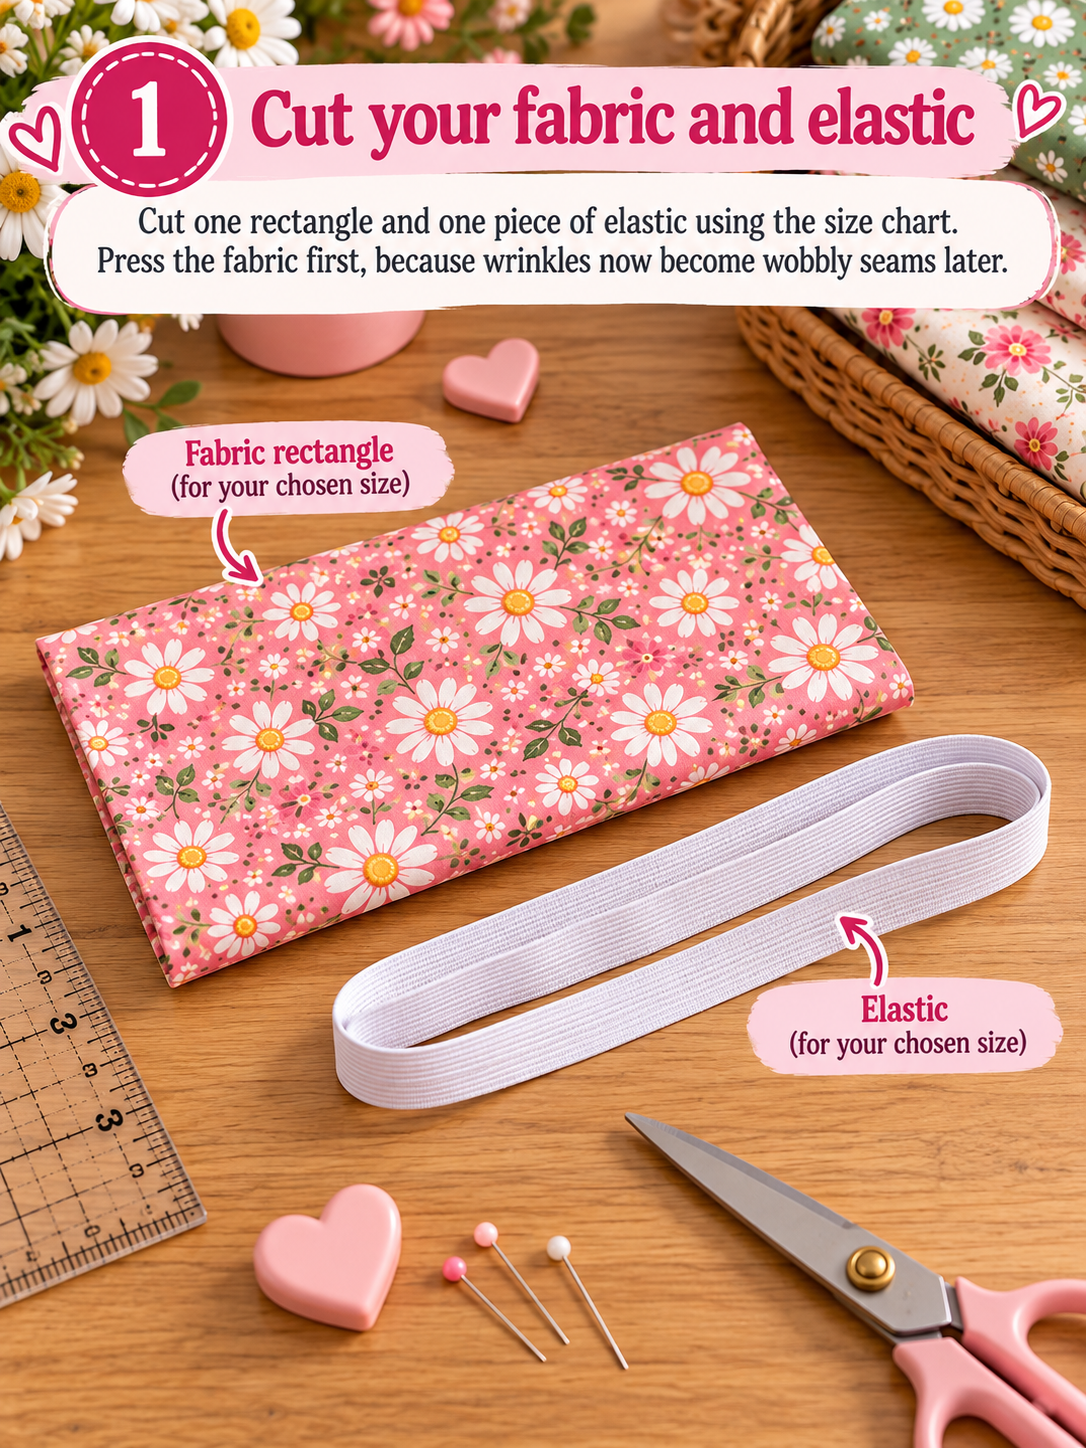
1. Cut your fabric and elastic
Cut one rectangle and one piece of elastic using the size chart. Press the fabric first, because wrinkles now become wobbly seams later.
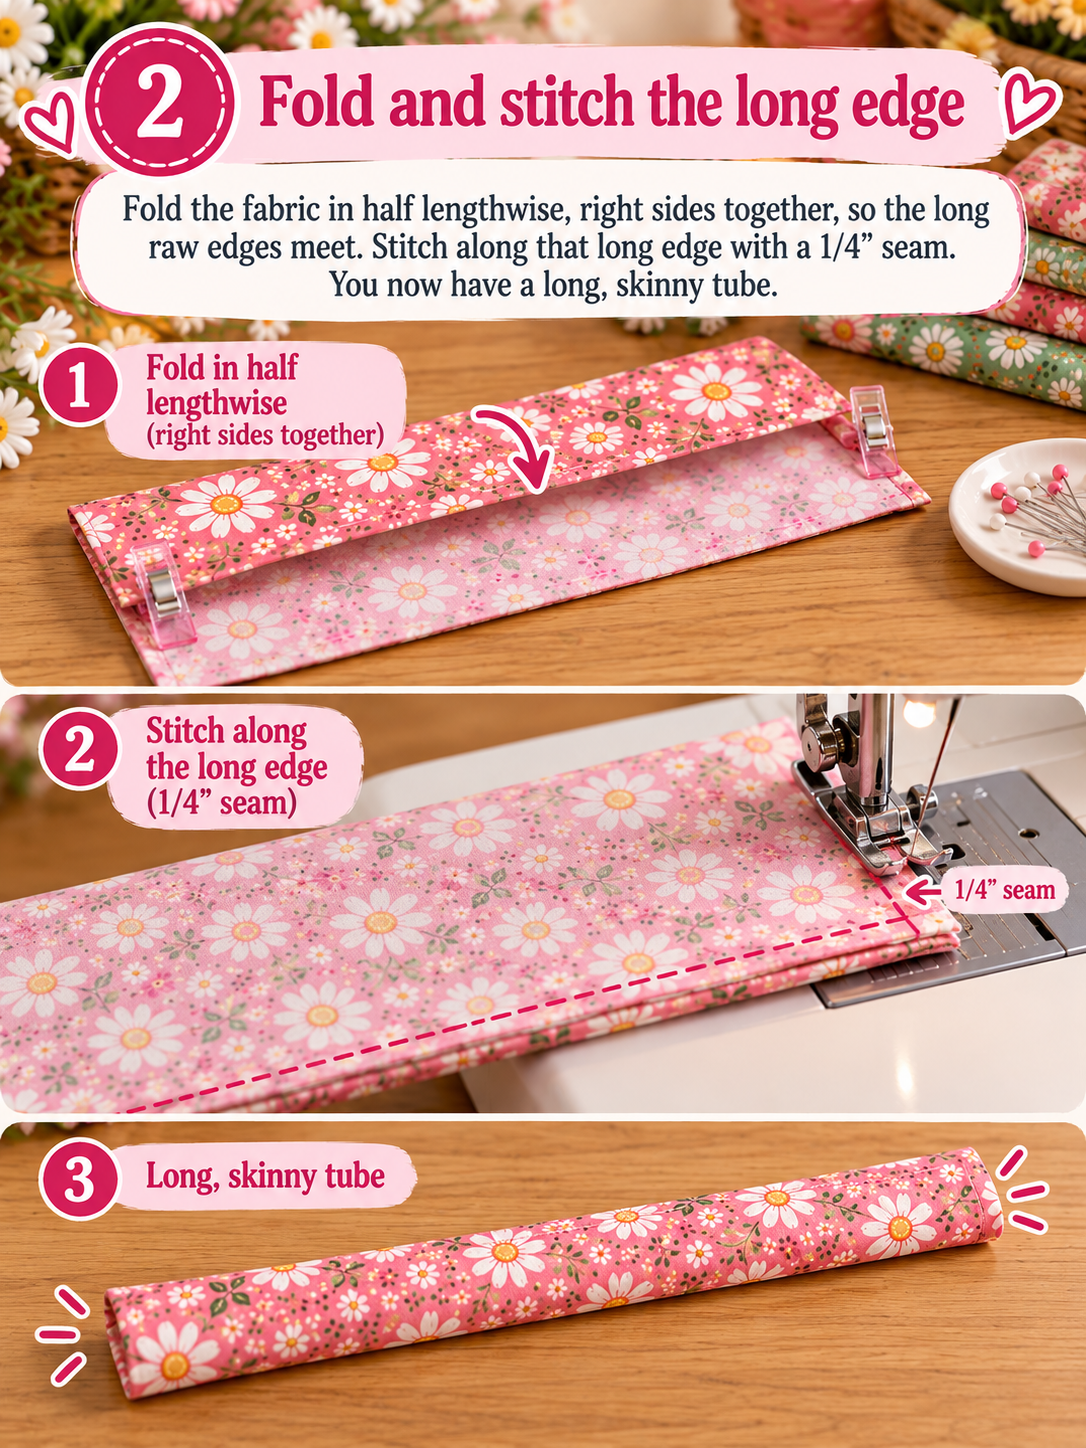
2. Fold and stitch the long edge
Fold the fabric in half lengthwise, right sides together, so the long raw edges meet. Stitch along that long edge with a 1/4″ seam. You now have a long, skinny tube.
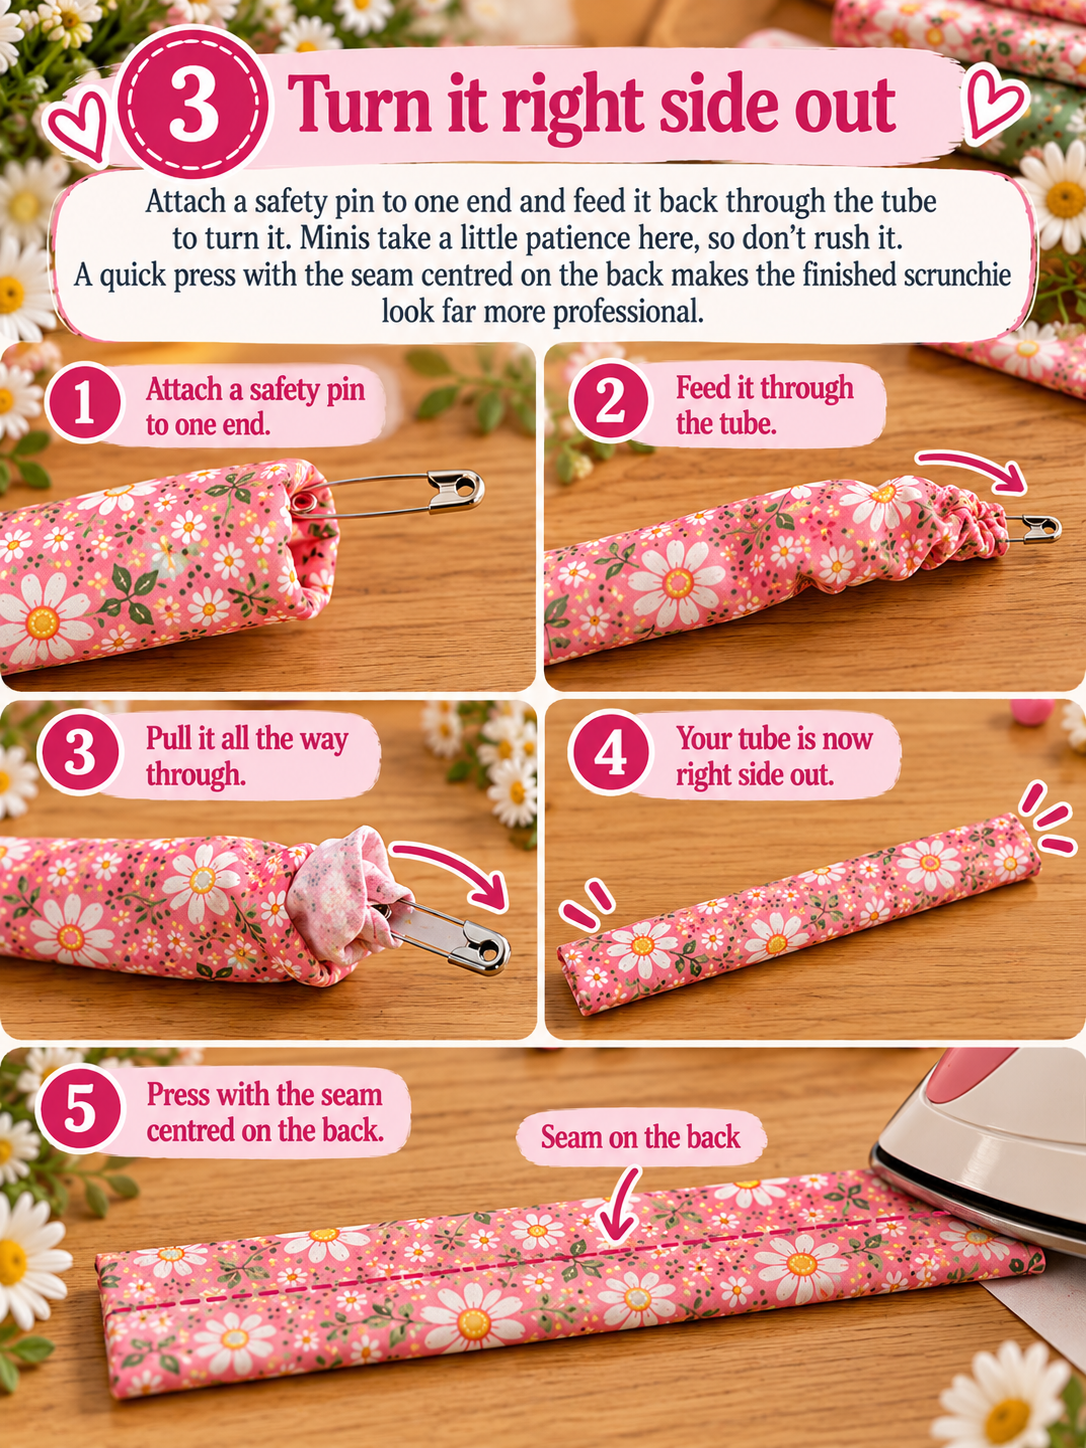
3. Turn it right side out
Attach a safety pin to one end and feed it back through the tube to turn it. Minis take a little patience here, so don’t rush it. A quick press with the seam centred on the back makes the finished scrunchie look far more professional.
4. Thread the elastic
Pin the safety pin to one end of the elastic and work it through the tube. Here’s the trick that saves a lot of frustration: pin the other end of the elastic to the fabric before you start, so it can’t disappear inside.

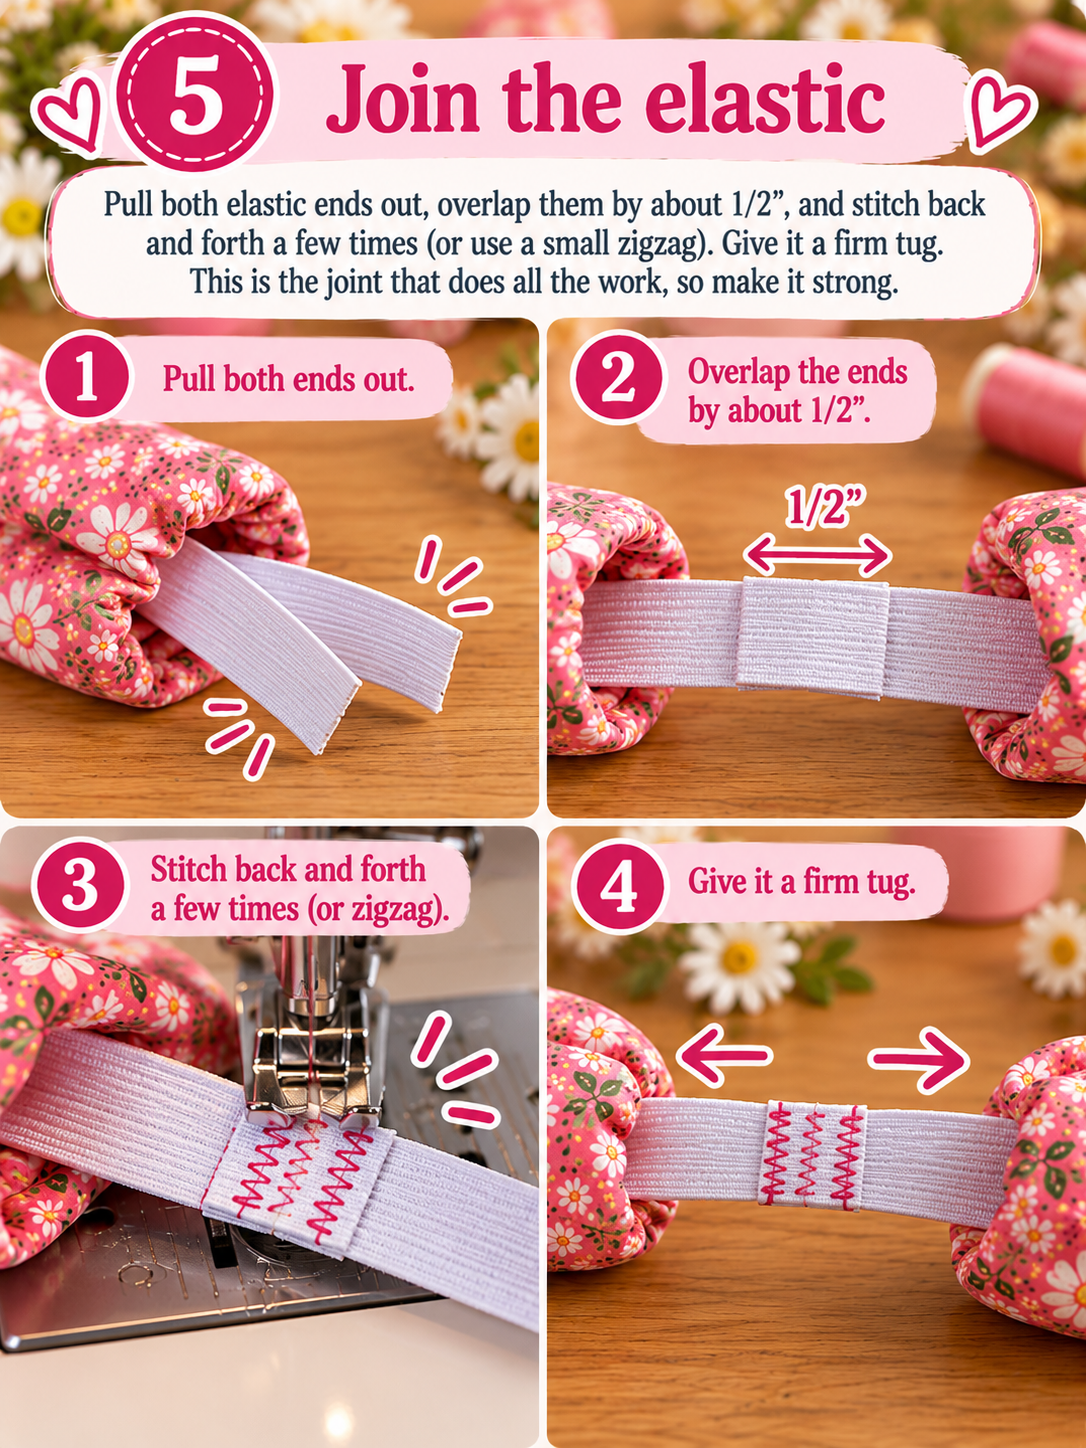
5. Join the elastic
Pull both elastic ends out, overlap them by about 1/2″, and stitch back and forth a few times (or use a small zigzag). Give it a firm tug. This is the joint that does all the work, so make it strong.
6. Close the scrunchie
Fold one raw end of the fabric tube in by about 1/4″. Tuck the other raw end inside it, overlapping by around 1/2″. Then topstitch across the join, or slip-stitch it by hand for an invisible finish.

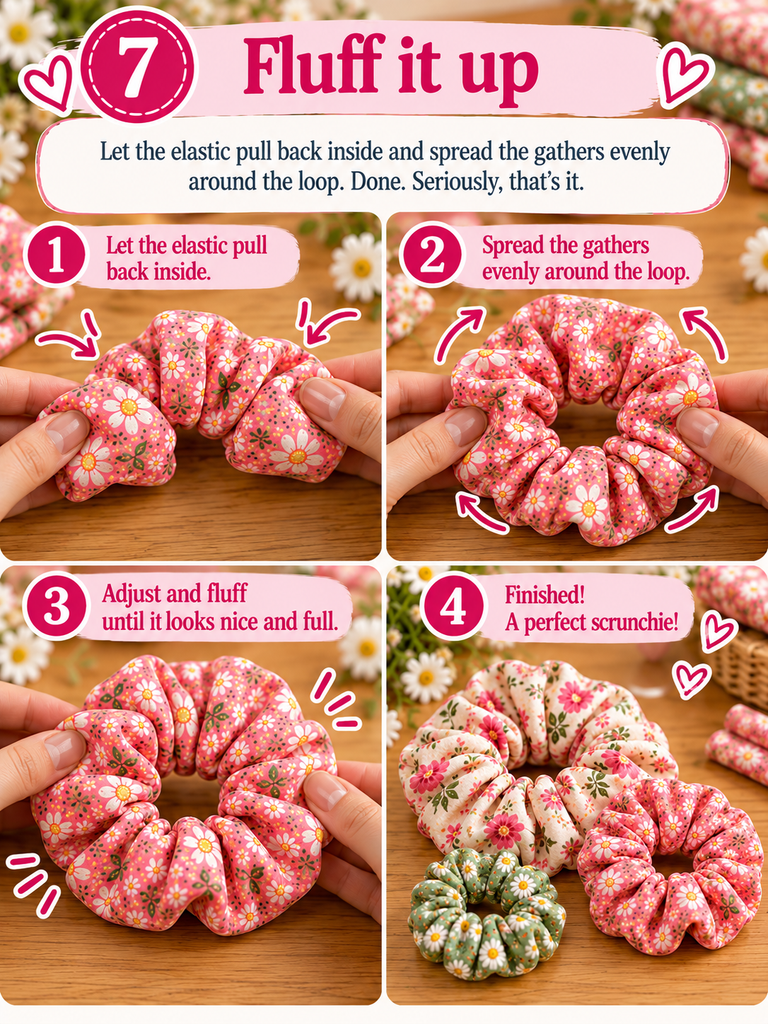
7. Fluff it up
Let the elastic pull back inside and spread the gathers evenly around the loop. Done. Seriously, that’s it.
Little Tips That Make a Big Difference
After more scrunchies than I’d care to count, these are the habits that actually changed my results:
- Use a slightly shorter stitch length (around 2.0–2.2 mm) on the long seam. Scrunchies get stretched constantly, and tighter stitches hold up better.
- Leave the elastic slightly long on your first try, then trim after testing it on your wrist and in your hair.
- Press the tube flat with the seam on one side. It hides the seam and gives cleaner gathers.
- Batch-sew. Cut ten at once, stitch all the tubes, turn them all, then thread them all. It’s far faster than finishing one at a time.
- Use up the scraps. Minis are the perfect home for those “too pretty to throw away” leftovers.
Common Scrunchie Mistakes (And How to Fix Them)
It looks flat and sad. You need more fabric length, not more elastic. Try adding 2″ to the length of your cut piece.
It slides out of my hair. The elastic is too long or too thin. Shorten it by half an inch, or step up from 1/4″ to 3/8″ elastic.
It gives me a headache. The opposite problem: the elastic’s too short. Add half an inch and test again.
The elastic snapped apart. The overlap wasn’t secure. Overlap a full 1/2″ and stitch it several times, or use a zigzag across the join.
Frequently Asked Questions
Can I sew a scrunchie without a sewing machine?
Yes. A simple backstitch along the long seam is strong enough for everyday wear. It takes longer, but it’s relaxing work to do in front of the TV.
Can I use a hair tie instead of elastic?
You can. Thread a ready-made hair tie through the tube instead of loose elastic, and you’ll skip the elastic-joining step entirely. It’s a popular shortcut for minis.
Are scrunchies good for selling at markets?
They’re one of the most popular handmade items out there. Materials cost very little, they’re quick to make, and buyers love picking matching sets. Offering all three sizes in the same fabric is an easy way to encourage bundle sales.
How do I wash a fabric scrunchie?
Cotton and linen scrunchies can go in a laundry bag on a gentle cycle. For silk, satin and velvet, hand-wash in cool water and let them air-dry.
Final Thoughts: Start Small, Then Go Big
Remember my deflated donut? The problem was never the sewing. It was the numbers. Now you have the numbers for all three sizes, and that means your very first scrunchie can look like your fiftieth.
If you’re brand new, I’d start with the medium. It’s forgiving, it suits almost everyone, and it’ll teach you the method. Once that clicks, make a mini for fun and a large in something silky just because you deserve it.
Fifteen minutes, a scrap of fabric and a bit of elastic. Hard to find a better return on your sewing time than that.
Your Turn
Which size are you making first, and what fabric are you using? Tell me in the comments. I’d genuinely love to see what you create, so if you share a photo on social media, tag it so I can find it. And if this pattern helped you, save it for later or pass it to a friend who’s been wanting an easy first sewing project.