
Easy Crochet Hat Size Chart: Get the Perfect Fit Every Time (Preemie to Adult)
I still remember the first hat I ever crocheted for my nephew. I spent two whole evenings on it: soft blue yarn, a cute little pom-pom, the works. I wrapped it up, handed it over with pride, and watched it slide right down over his eyes and rest on his nose.
He thought it was hilarious. I did not.
Here’s the thing nobody tells you when you’re starting out: the stitches are the easy part. Getting the size right is where most hats go wrong. And the fix is surprisingly simple. You need a good crochet hat size chart and about five minutes to understand how to use it.
That’s exactly what you’ll find below. A clean, easy-to-read chart for every age, plus the little tricks I wish someone had shared with me before that blue hat disaster.
Table of Contents
Key Takeaways
- Every hat comes down to three numbers: head circumference, hat height, and crown diameter.
- Make your hat 1 to 2 inches (2.5–5 cm) smaller than the head so it hugs instead of slipping. This is called negative ease.
- The crown diameter is roughly the head circumference divided by 3.14. That’s the whole secret behind the chart.
- Measure the actual head whenever you can. Charts are averages, and real heads aren’t.
- Check your crown before you start the body. It saves you from ripping out an entire hat later.
The Easy Crochet Hat Size Chart
Bookmark this one, print it, or screenshot it for your phone. I keep a copy taped inside my yarn cabinet, and I honestly look at it almost every time I start a hat.
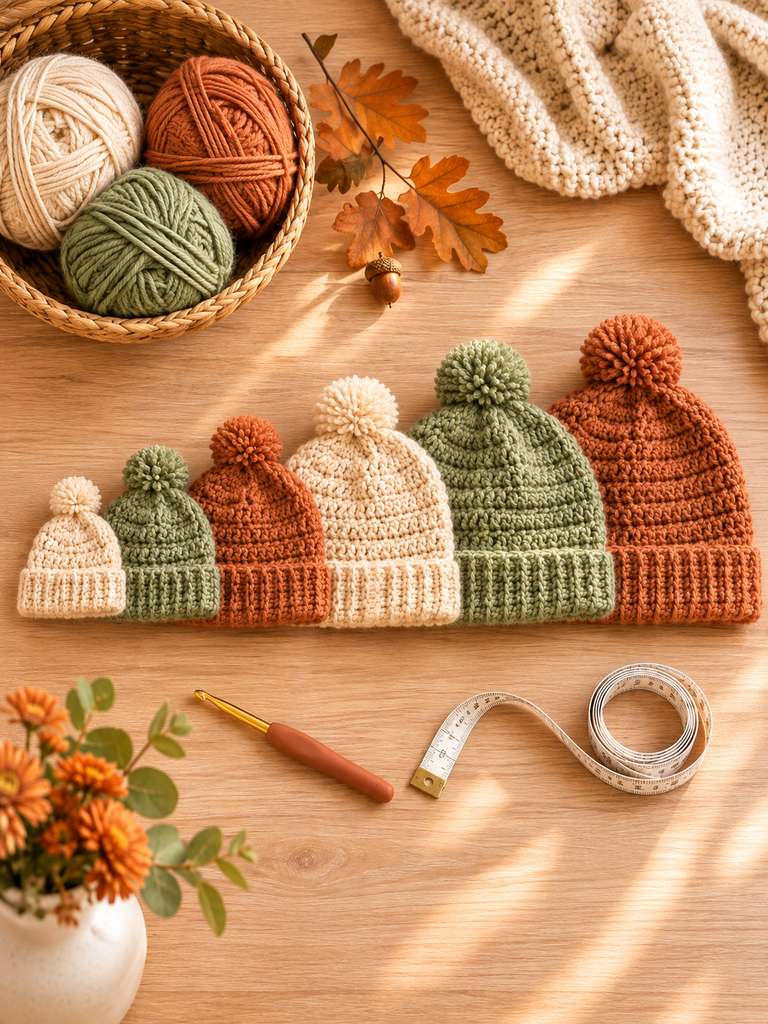
| Size | Head Circumference | Hat Height (brim to crown) | Crown Diameter |
|---|---|---|---|
| Preemie | 12–14 in (30.5–35.5 cm) | 4–5 in (10–13 cm) | 3.5–4 in (9–10 cm) |
| Newborn (0–3 months) | 14–15 in (35.5–38 cm) | 5–5.5 in (13–14 cm) | 4.25 in (11 cm) |
| Baby (3–6 months) | 15–17 in (38–43 cm) | 6 in (15 cm) | 5 in (12.5 cm) |
| Baby (6–12 months) | 17–18 in (43–46 cm) | 6.5 in (16.5 cm) | 5.5 in (14 cm) |
| Toddler (1–3 years) | 18–19 in (46–48 cm) | 7 in (18 cm) | 6 in (15 cm) |
| Child (3–10 years) | 19–20 in (48–51 cm) | 7.5 in (19 cm) | 6.25 in (16 cm) |
| Teen / Small Adult | 20–21 in (51–53 cm) | 8–8.5 in (20–21.5 cm) | 6.5 in (16.5 cm) |
| Adult Woman | 21.5–22.5 in (54.5–57 cm) | 8.5–9 in (21.5–23 cm) | 7 in (18 cm) |
| Adult Man | 22–23.5 in (56–60 cm) | 9–10 in (23–25.5 cm) | 7.25 in (18.5 cm) |
Quick note: these are average measurements. Different designers round things a little differently, so if your pattern’s numbers are off by a quarter inch, don’t panic. You’re in the right ballpark.
What Do These Three Measurements Actually Mean?
If you’ve ever looked at a chart like this and felt your eyes glaze over, you’re not alone. Let’s break it down in plain English.
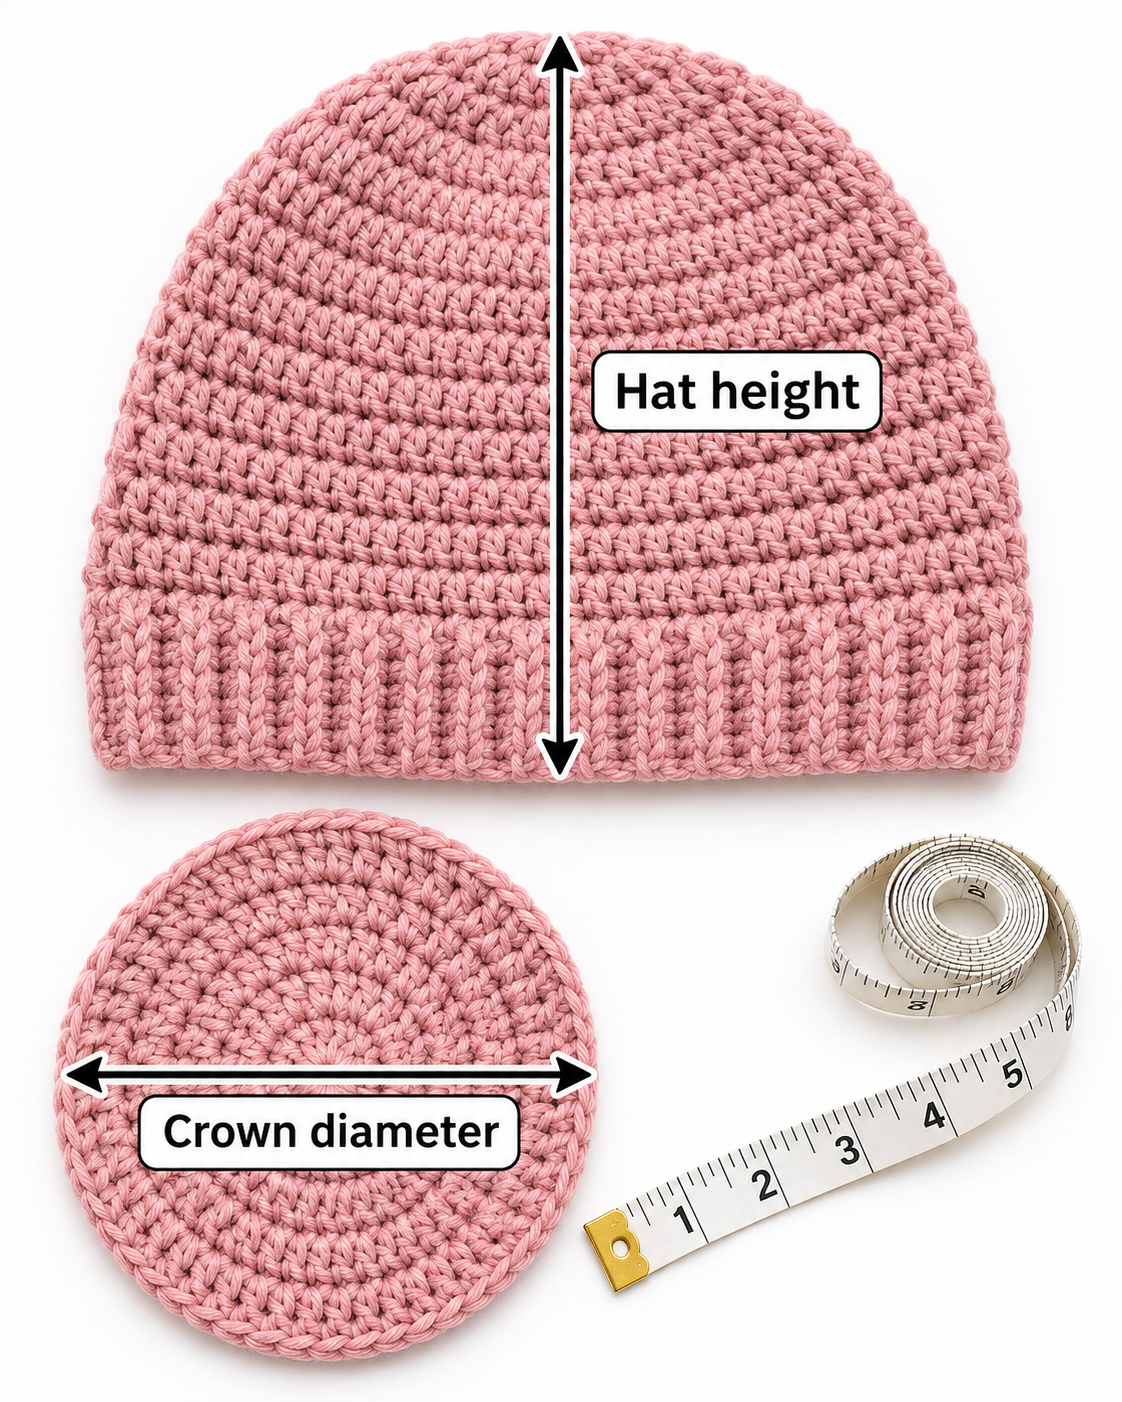
Head Circumference
This is the distance all the way around the head, measured just above the eyebrows and ears, across the widest part of the back of the head. It’s the number everything else is built on.
Hat Height
This is how tall the finished hat should be, from the bottom edge of the brim to the very top of the crown. Want a slouchy beanie? Add 1 to 3 inches. Want a snug hat with a folded brim? Add the depth of the fold so it doesn’t end up too short once you turn it up.
Crown Diameter
This one confuses people the most, so stay with me. When you crochet a top-down hat, you start with a flat circle. The crown diameter is how wide that flat circle should be, measured straight across, before you stop increasing and start working the sides.
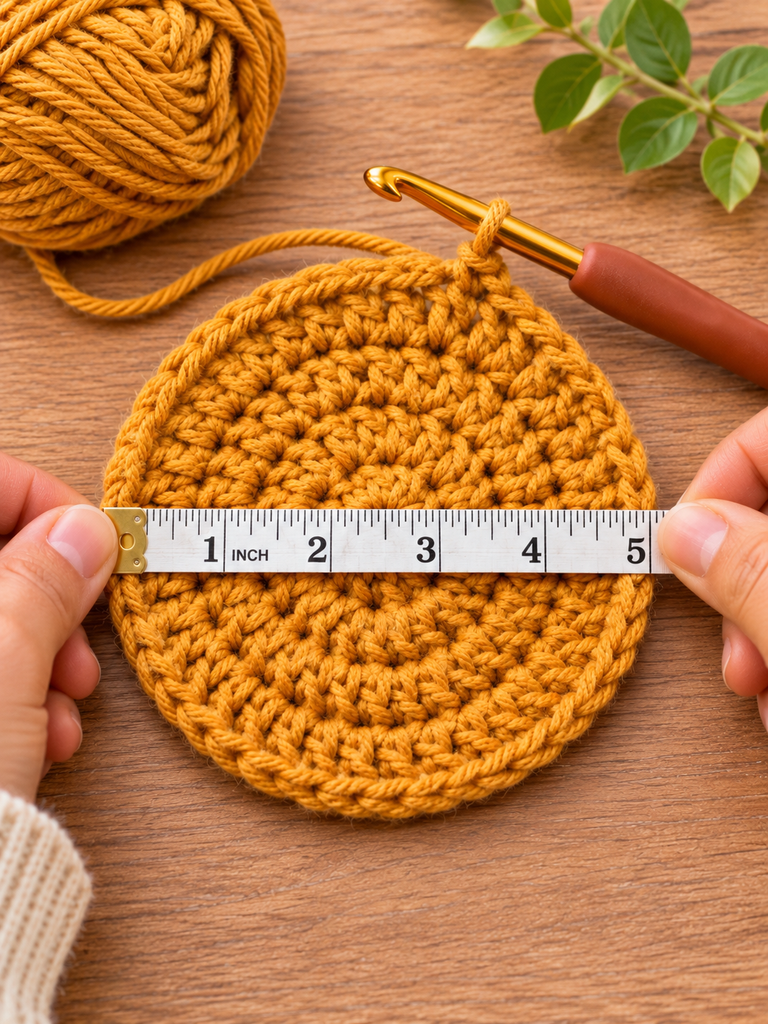
And here’s a little-known fact that changed how I crochet: you don’t actually need to memorize the crown column at all. Just divide the head circumference by 3.14 (pi, from school math). A 22-inch head divided by 3.14 gives you about 7 inches. Look at the chart above. Adult woman, 7 inches. That’s the whole trick.
Why Your Hat Should Be Smaller Than the Head
This sounds backwards, right? I thought so too.
But crochet fabric stretches. If you make a hat that’s exactly 22 inches around for a 22-inch head, it’ll feel fine for about ten minutes. Then the stitches relax, the hat loosens, and it starts creeping down toward the eyebrows. (Sound familiar? Hello, blue hat.)
The fix is something designers call negative ease. You simply make the hat 1 to 2 inches (2.5–5 cm) smaller than the head measurement. That small difference is what lets the hat hug the head gently and stay put.
My rule of thumb: For stretchy stitches like ribbing or half double crochet worked in the back loop, go closer to 2 inches of negative ease. For stiffer stitches, or chunky yarn with less give, 1 inch is usually plenty.
How to Measure a Head the Right Way
Whenever you can, measure the real person. Charts work beautifully for gifts and donations, but nothing beats the actual head in front of you.
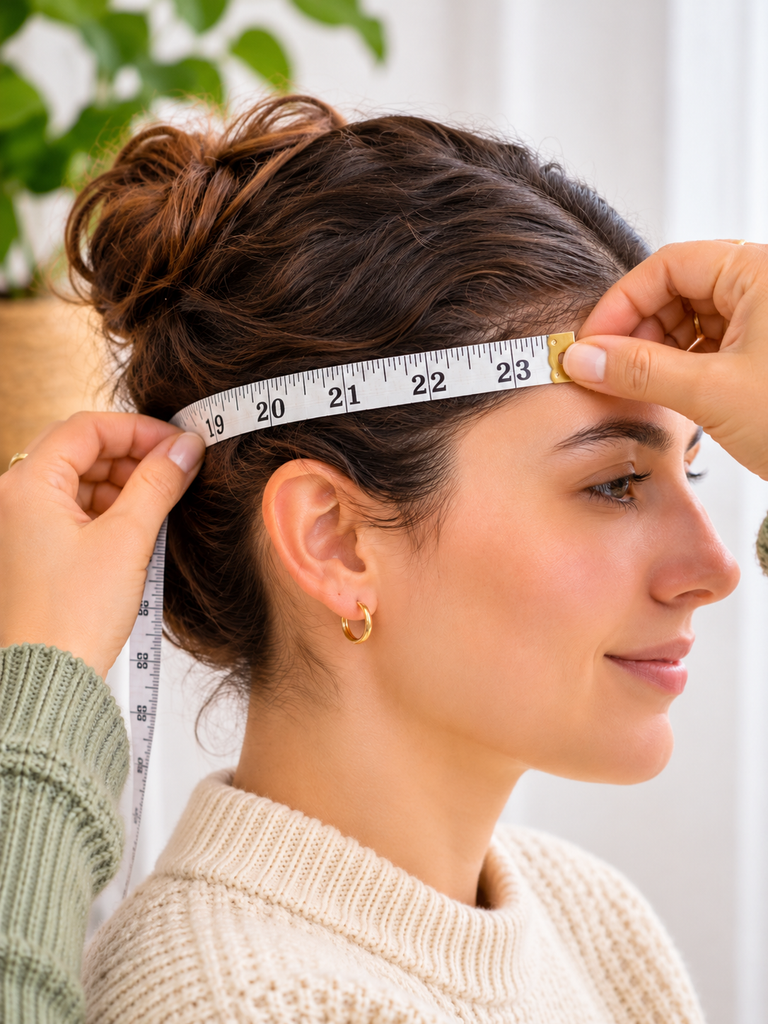
- Grab a soft, flexible measuring tape (the sewing kind, not the metal one from the toolbox).
- Wrap it around the head about a finger-width above the eyebrows, just over the tops of the ears.
- Keep it snug but not tight. You should be able to slide one finger under the tape.
- Write the number down right away. Trust me, you’ll forget it by the time you find your hook.
Measuring a wiggly toddler? Try doing it while they’re distracted by a snack or a cartoon. And if the hat is a surprise gift, a hat the person already owns and loves can work too. Lay it flat, measure across the bottom edge, and multiply by two.
How to Use the Chart While You Crochet
Knowing the numbers is one thing. Using them mid-project is where the magic happens. Here’s the simple process I follow for almost every top-down hat:
- Pick your size from the chart, or use your own head measurement.
- Work your increase rounds for the crown as your pattern says.
- Lay the circle flat and measure across it after each round once you get close. Stop increasing when you hit the crown diameter.
- Work even rounds (no more increases) until the hat reaches the right height.
- Try it on if you can, before adding the brim or finishing touches.
That third step is the one I want you to remember. Measuring the crown takes ten seconds. Skipping it can cost you an entire evening of frogging (that’s crochet slang for ripping out your work, because you “rip-it, rip-it”).
Common Sizing Mistakes (and How to Avoid Them)
We’ve all made at least one of these. Here’s how to dodge them next time.
Ignoring Your Gauge
Gauge is how many stitches and rows fit into a set measurement. If you crochet tighter or looser than the designer, your hat will come out smaller or bigger, even if you follow the pattern word for word. A quick gauge swatch, or just measuring your crown as you go, solves this.
Swapping Yarn Weights Without Adjusting
Switching from worsted weight to chunky yarn? Your stitches get bigger, and so does your hat. That’s fine. Just lean on the measurements in the chart instead of the round count in the pattern.
Measuring a Curled Crown
Crochet circles love to ruffle or cup. Gently flatten your crown on a table before measuring. If it’s wavy, you’ve added too many increases. If it’s cupping like a bowl, you need a few more.
Forgetting the Brim
A folded brim or a pom-pom can change the look of the height. Plan for it before you start, not after.
A Few Bonus Tips From My Hook to Yours
- Babies grow fast. Gifting a baby hat? Consider making it one size up so it fits for more than a few weeks.
- Making hats for charity? Many hospitals and shelters have their own size guidelines, especially for preemie hats. Always check them first.
- Keep a size notebook. Write down the hook, yarn, and round counts for every hat that fits perfectly. Future you will be very grateful.
- Between sizes? Go with the smaller one. A slightly snug hat stretches. A loose one just keeps slipping.
Your Turn: Make a Hat That Actually Fits
That blue hat I made for my nephew? I eventually remade it, this time with a tape measure, a little negative ease, and a crown measured round by round. It fit perfectly. He wore it all winter, and I’m pretty sure it’s still in his closet somewhere.
That’s really all it takes. Three numbers, one simple chart, and the habit of checking your work as you go. Once sizing clicks, hats stop being a gamble and become one of the most satisfying, quick projects you can make. They’re perfect for gifts, donations, or just treating yourself to something cozy.
So grab your hook, pick a size from the chart, and start that next hat with confidence.
Now I’d love to hear from you: who are you making your next hat for? And what’s the funniest sizing mistake you’ve ever made? Share it in the comments below. I promise it can’t be worse than a hat sitting on a baby’s nose. And if this chart helped, save it for later or pass it along to a crochet friend who could use it.