The first chain I ever crocheted was so tight I couldn’t get the hook back into it. I’d watched a two-minute video, felt very confident, and twenty minutes later I was holding something that looked less like a foundation row and more like a shoelace a toddler had been chewing on.
If that sounds familiar, good. You’re in exactly the right place.
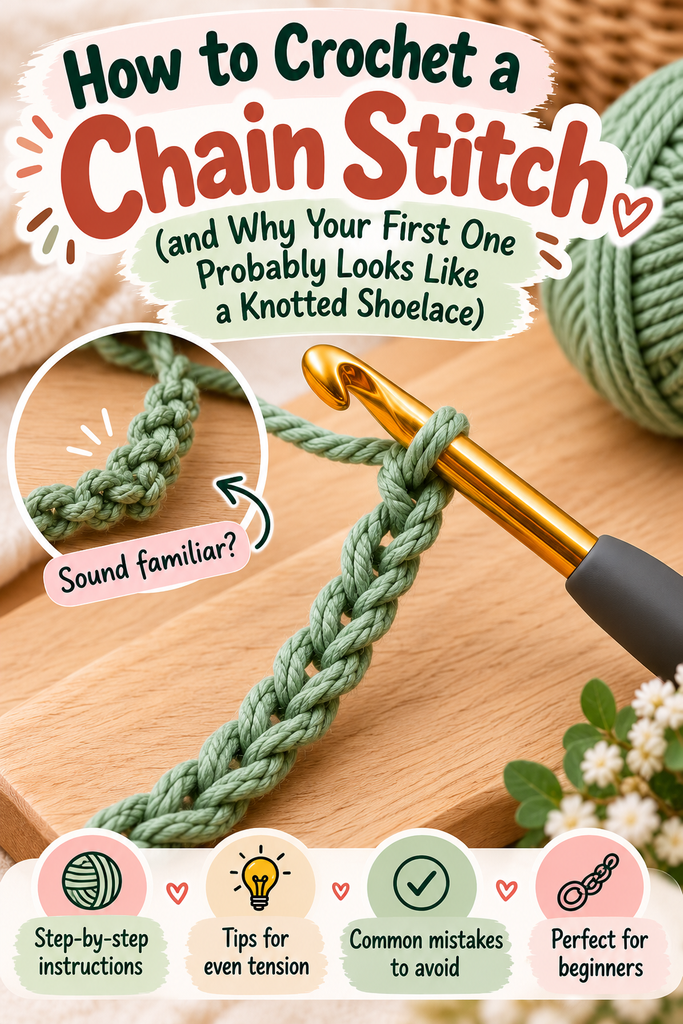
The chain stitch is the first stitch almost every crocheter learns, and it’s the one nearly every project starts with. Blankets, beanies, amigurumi, granny squares: they all begin with a little row of loops. Get comfortable with this one stitch and everything after it gets noticeably easier. Let’s walk through it together, slowly, the way I wish someone had shown me.
Table of Contents
Key Takeaways
- A chain stitch is simply pulling a loop of yarn through the loop already on your hook. That’s the whole stitch.
- Start with a slip knot, and don’t count it (or the loop on your hook) as a chain.
- Even tension matters far more than speed. Loose and consistent beats tight and fast every time.
- Use smooth, light-colored, medium-weight yarn while you learn so you can actually see your stitches.
- If your foundation chain keeps coming out too tight, try making it with a hook one size larger.
What Exactly Is a Chain Stitch?
Think of the chain stitch as the alphabet of crochet. On its own it doesn’t say much, but every word you’ll ever “write” in yarn is built on it.
In patterns, you’ll see it abbreviated as ch. “Ch 20” means make twenty chain stitches. In crochet charts, it’s usually drawn as a small oval. Happily, the name and abbreviation are the same in both US and UK terminology, which isn’t true for many other stitches (more on that confusion another day).
You’ll use chains in three main ways:
- The foundation chain – the starting row you build your first real stitches into.
- Turning chains – a few chains at the end of a row that lift you up to the height of the next one.
- Spaces and loops – the open, lacy gaps in things like shawls and mesh bags.
What You’ll Need Before You Start
Here’s a little secret most tutorials skip: half the struggle beginners have isn’t technique. It’s the yarn.
Fuzzy, dark, or super-thin yarn hides your stitches, so you can’t tell where to put your hook. For learning, I always recommend:
- Yarn: a smooth, worsted-weight (medium, category 4) yarn in a light color. Cream, pale yellow, or light blue are perfect.
- Hook: a 5 mm (US H-8) hook, or whatever size your yarn label recommends.
- Scissors: any pair will do.
That’s it. No fancy kit required. Some of the most beautiful work I’ve seen started with a cheap hook and a single ball of acrylic.
How to Hold Your Hook and Yarn
There are two common grips for the hook, and neither is “correct.”
The pencil grip is exactly what it sounds like: you hold the hook the way you’d hold a pen. The knife grip has your hand over the hook, the way you’d hold a knife to cut a steak. Try both for a minute and go with whichever feels less awkward. Honestly, they’ll both feel awkward at first. That’s normal.
Your other hand (usually the left, if you’re right-handed) holds the yarn. A common way is to drape the working yarn over your index finger and pinch the base of your work between your thumb and middle finger. Your index finger becomes a little tension controller, feeding yarn out smoothly as you go.
Step 1: Make a Slip Knot
Every chain begins with a slip knot. It’s the anchor that attaches your yarn to the hook.
- Leave a tail of about 6 inches (15 cm) and make a loop by crossing the yarn over itself.
- Reach through that loop and pull the working yarn (the side attached to the ball) through, forming a second loop.
- Slide that new loop onto your hook.
- Gently tug both ends to snug the knot around the hook. It should slide up and down the shaft easily, not grip it tightly.
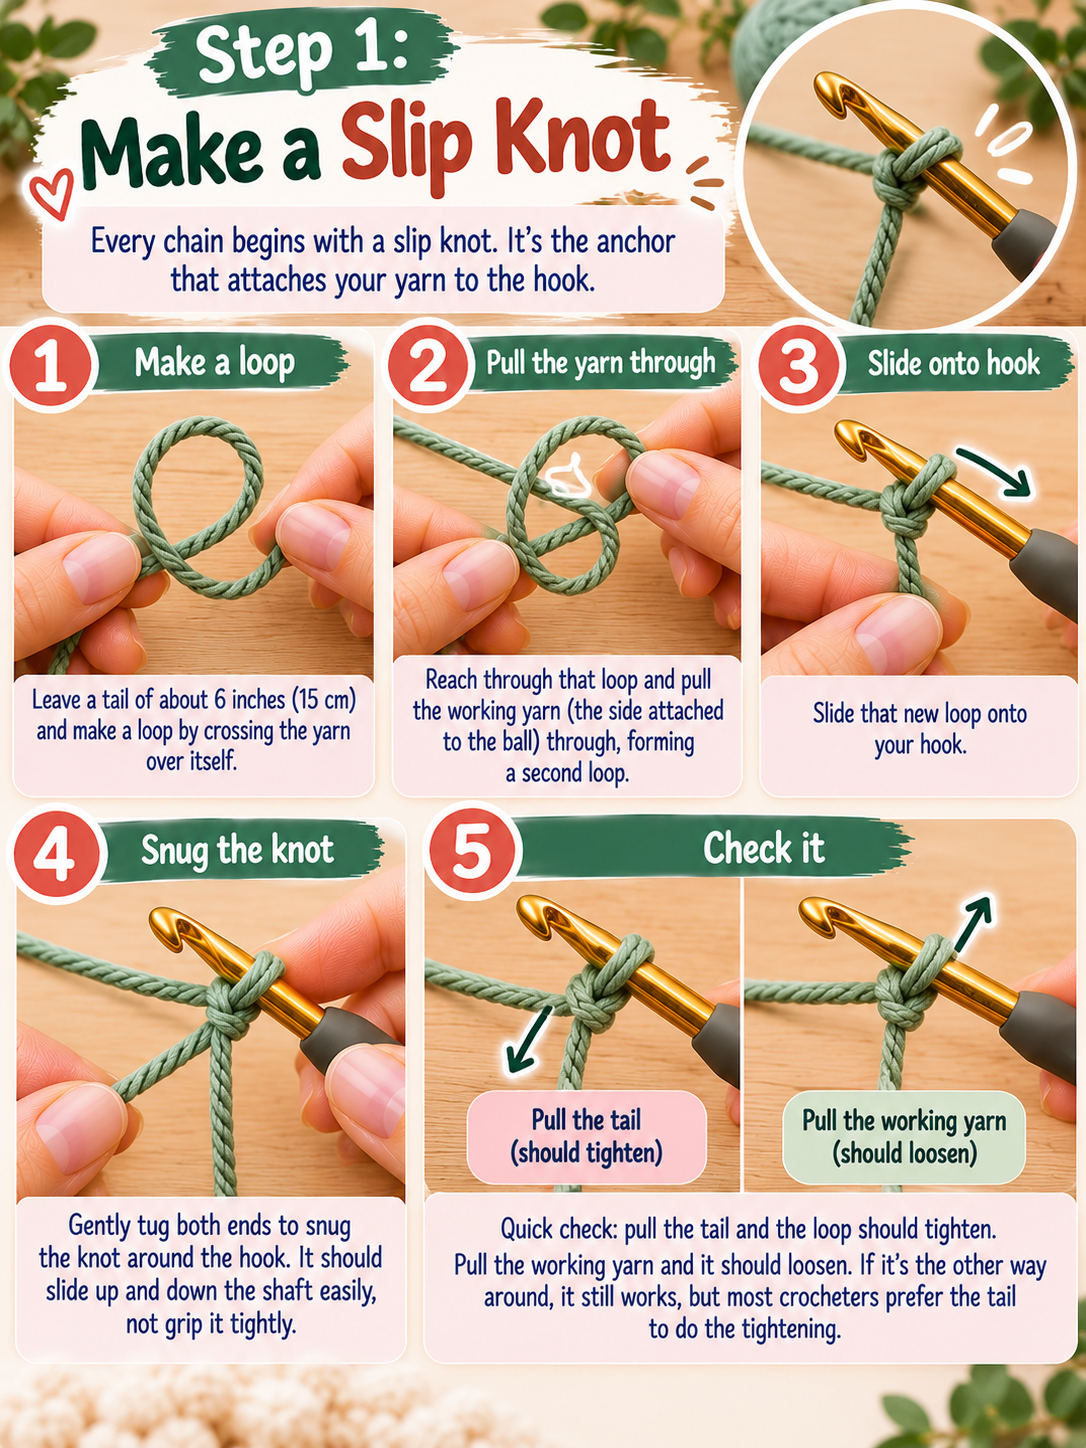
Quick check: pull the tail and the loop should tighten. Pull the working yarn and it should loosen. If it’s the other way around, it still works, but most crocheters prefer the tail to do the tightening.
Step 2: Yarn Over
“Yarn over” (abbreviated yo) is the most repeated move in all of crochet, so it’s worth getting the direction right from the start.

With the slip knot on your hook, bring the working yarn over the hook from back to front. Alternatively, you can move the hook under and around the yarn to catch it. Either way, the yarn should now sit across the hook, ready to be grabbed by the hook’s throat (that little notch at the tip).
Step 3: Pull Through the Loop
Now turn the hook slightly so the throat faces down toward the loop on your hook. Gently pull the yarn you just caught back through that loop.
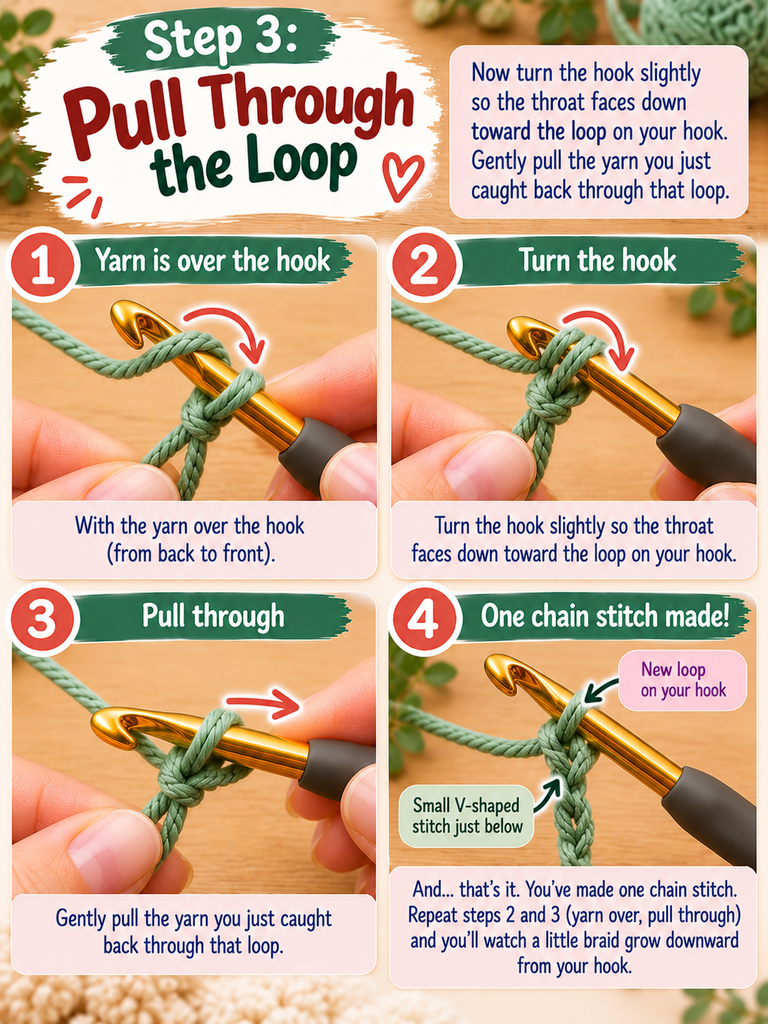
And… that’s it. You’ve made one chain stitch. Really.
You’ll have a new loop on your hook and a small V-shaped stitch just below it. Repeat steps 2 and 3 (yarn over, pull through) and you’ll watch a little braid grow downward from your hook.
The Secret Nobody Tells You: It’s All About Tension
Here’s the counterintuitive part. When beginners struggle with chains, their instinct is to hold on tighter. More control, right?
Wrong. Tighter almost always makes it worse.
Each chain should form around the thickest part of the hook shaft, not around the narrow tip. If you form your loops up near the tip, they’ll be too small, and later you’ll be trying to jam your hook into stitches that barely exist. That was my toddler-shoelace problem exactly.
A few things that helped me (and the many friends I’ve since taught):
- After each stitch, slide the new loop down onto the wider part of the hook.
- Move your pinching fingers up every few stitches so you’re always holding close to the hook.
- Relax your shoulders. Seriously. Tension in your body ends up in your yarn.
- Still too tight? Make your foundation chain with a hook one size larger, then switch back to your regular hook for the rest of the project. Plenty of experienced crocheters do this every single time.
How to Count Your Chains Correctly
Counting sounds trivial until you’re forty stitches in and the pattern isn’t working out. Two rules will save you a lot of frustration:
- Don’t count the loop on your hook. It’s the working loop, not a finished stitch.
- Don’t count the slip knot. It’s the anchor, not a chain.
Look at the front of your chain and you’ll see a neat row of little V shapes, each one sitting inside the one before it, like a line of tiny hearts. Each V is one chain. Count those, starting from the one just below your hook.
Flip the chain over and you’ll see a row of small bumps running down the back. Some patterns ask you to work into this “back bump,” which gives a cleaner bottom edge. Good to know for later.
For long chains, I clip a stitch marker (or a bobby pin, or a scrap of contrasting yarn) every 10 or 20 stitches. It feels a bit fussy, but recounting 120 tiny loops is far more fussy.
Common Beginner Mistakes (and How to Fix Them)
Chains are wildly uneven. Some big, some tiny. This is just practice, and it’s completely normal. Make a long chain with no project in mind, purely to find your rhythm. Pull it out and do it again. Nobody’s grading you.
The chain twists like a corkscrew. A long foundation chain naturally wants to twist. Before you work into it, lay it flat and make sure all the V’s face up. Working into a twisted chain is one of the most common reasons a first row looks “off.”
The hook keeps catching the wrong strand. Rotate the hook so the throat faces down as you pull through. If it’s facing up, it tends to snag the loop instead of sliding through it.
The edge pulls in and puckers. Classic sign of a tight foundation chain. Go back to that “one hook size up” tip.
Practice Ideas That Are Actually Fun
Making chain after chain can get dull. So why not make something useful while you practice?
- A bookmark or gift-wrap ribbon: one long chain with a tassel at the end.
- A friendship bracelet: braid three chains together in different colors.
- A simple garland: a long chain with small pom-poms or beads tied along it.
- A drawstring: perfect for threading through a knitted or crocheted bag later.
The first time you use something you made, even something as humble as a chain ribbon on a birthday gift, the hobby stops being “practice” and starts being yours.
Frequently Asked Questions
How many chains should I make for my project?
Your pattern will tell you. If you’re designing your own piece, make a small test swatch first, measure how many stitches fit in a given width, and then calculate from there.
Why is my foundation chain shorter than my finished rows?
Usually because the chain was worked tighter than the stitches above it. Use a larger hook for the chain, or consciously loosen up.
Do left-handed crocheters chain differently?
The motion is the same, just mirrored. Hold the hook in your left hand and the yarn in your right, and everything else follows.
How do I fasten off a chain?
Cut the yarn, leaving a short tail, then yarn over and pull the cut end all the way through the loop on your hook. Tug gently to secure it.
Your Chain Is the Start of Everything
Remember my chewed-shoelace first attempt? I still have it, tucked in the bottom of my yarn basket. It’s lumpy, tight, and honestly a little ugly. But every blanket and sweater I’ve made since then started with the same simple move: yarn over, pull through.
You don’t need to be perfect today. You just need to make one chain, then another, then another. Speed will come. Evenness will come. And one evening, you’ll look down and realize you made a row of neat little V’s without even thinking about it.
That’s the moment crochet clicks.
Now it’s your turn. Grab some yarn, make a chain of twenty, and take a look at it. Is it tight? Twisty? Surprisingly neat? Tell me in the comments how your first chain turned out, or share the one question that’s still tripping you up. I read every one, and your question might become the next tutorial.