


It’s 7 a.m., the house is quiet, and someone pulls a chair out from the kitchen table. Screeeech. Everyone is suddenly awake, and there’s a fresh pale scratch in the floor to prove it happened.
That sound is what sent me looking for a fix, and it led me to one of my favorite small projects: crochet chair socks. They’re small tubes that slip over the bottom of each chair leg. They stop the noise, protect the floor, and add a little color to a room. They’re also one of the best first projects you can choose if you’re learning to crochet.
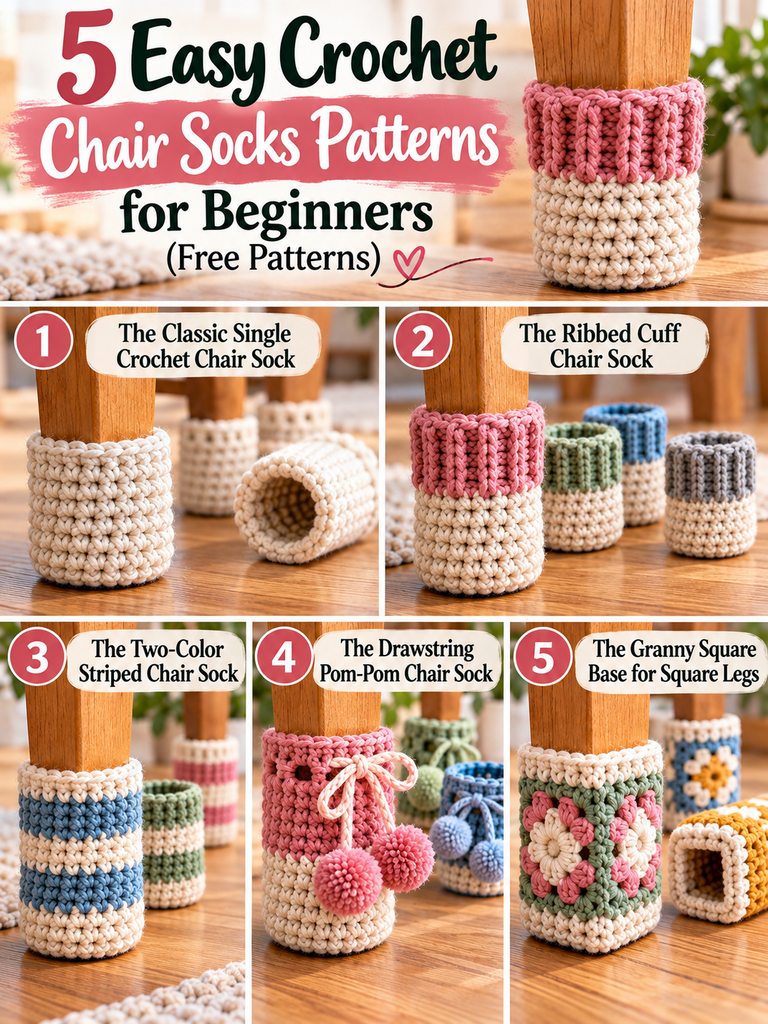
Here’s why. A chair sock covers nearly every skill a beginner needs: starting in the round, increasing, working even rounds, and finishing off. Each one takes about 20 to 30 minutes, so you can finish a whole set in a weekend and have something useful at the end.
Below are five free patterns, ordered from simplest to slightly more adventurous. Each one teaches you something new.
Table of Contents
Key Takeaways
- Chair socks are quick, cheap, and good practice for working in the round.
- All five patterns use worsted weight yarn, a 5 mm (H-8) hook, and basic stitches.
- Measure your chair legs before you start. Fit matters more than anything else.
- Cotton yarn holds up best under daily sliding; acrylic is softer and cheaper.
- Make all four bases first, then all four sides. It keeps your socks matching.
What You’ll Need Before You Start
You don’t need much, which is part of the appeal. For one set of four chair socks:
- Yarn: about 50–60 yards of worsted weight (#4) yarn. Cotton or a cotton blend is my first choice for durability.
- Hook: 5 mm (H-8). If your stitches look loose or holey, go down to 4.5 mm or 4 mm.
- Stitch marker: a safety pin or scrap of contrasting yarn works fine.
- Tapestry needle for weaving in ends.
- Scissors and a soft measuring tape.
Abbreviations (US terms)
- ch – chain
- sl st – slip stitch
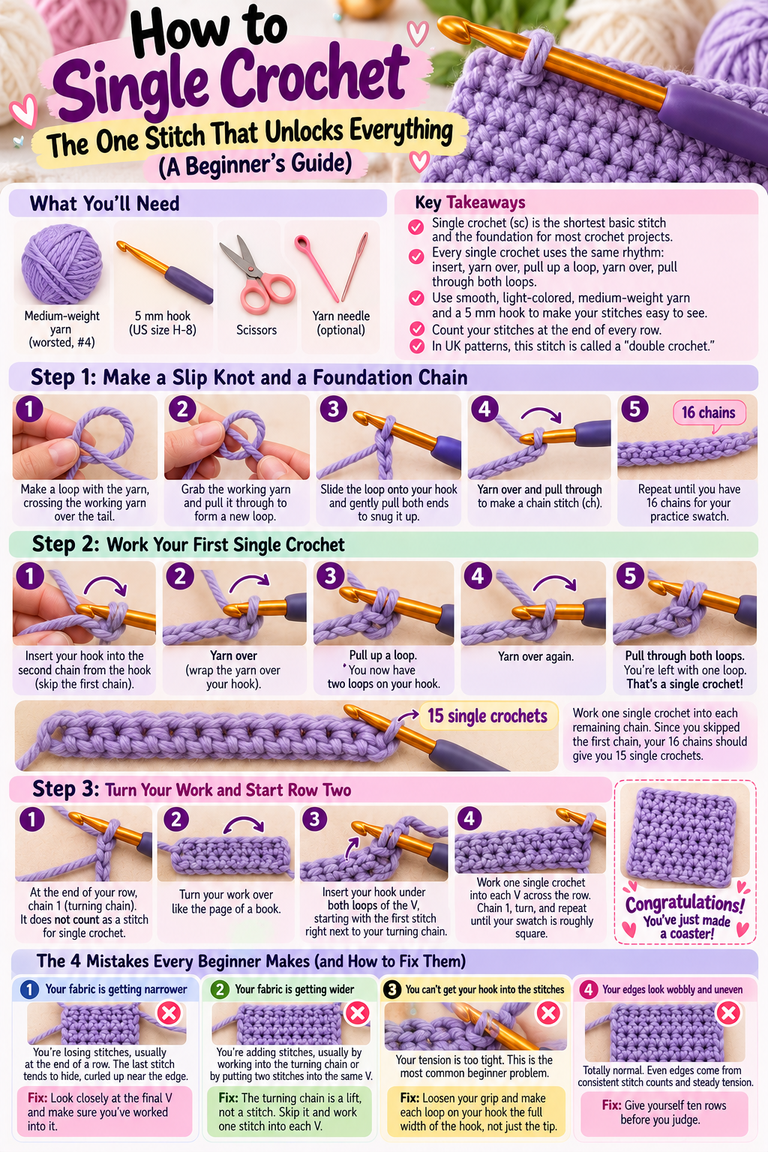
- sc – single crochet
- hdc – half double crochet
- dc – double crochet
- inc – increase (2 stitches in the same stitch)
- BLO – back loop only
- FPdc / BPdc – front post / back post double crochet
- MR – magic ring (also called magic circle)
How to Measure Your Chair Legs (Don’t Skip This)
Honestly, this is where most chair sock projects go wrong. A sock that’s too loose slides off every time the chair moves, and one that’s too tight won’t go on at all.
Wrap your measuring tape around the bottom of a chair leg and note the circumference. Then look at the foot of the leg itself. Is it round or square? Does it taper? Most dining chair legs are somewhere between 4 and 5 inches around at the bottom, and the patterns below are written for that range.
The simple rule for every pattern here: keep increasing until your flat circle is the same size as the bottom of the leg. Hold it against the leg as you go. That one habit fixes most sizing problems.
Pattern 1: The Classic Single Crochet Chair Sock
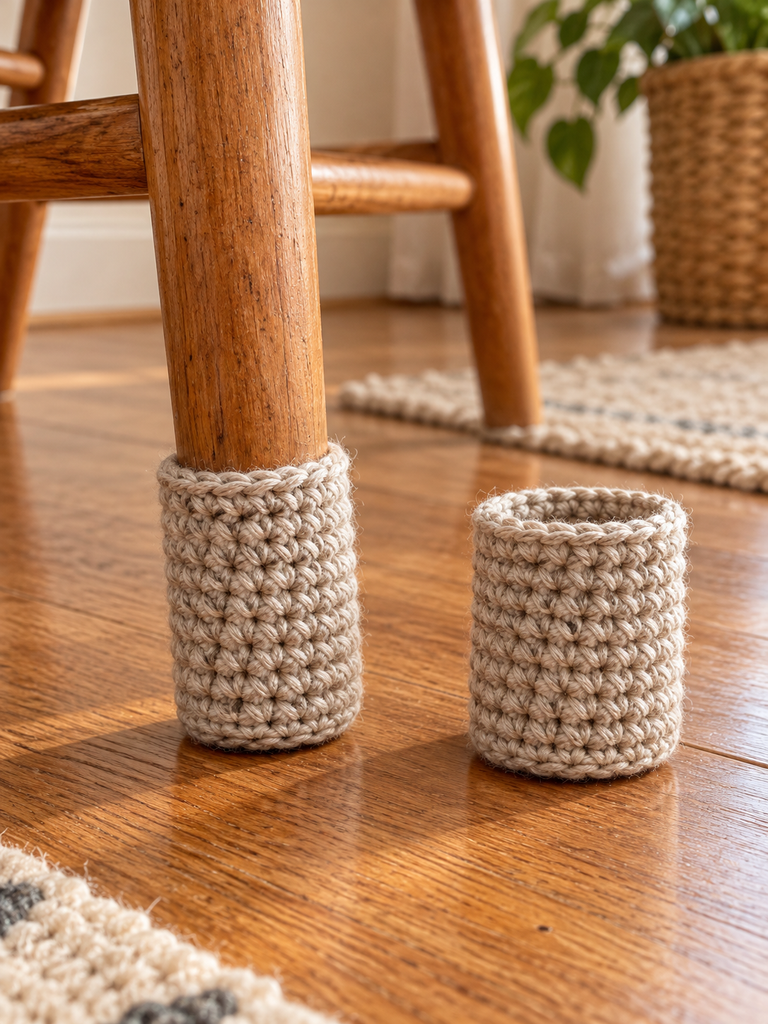
If you only make one pattern from this list, make this one. It’s dense, sturdy, and uses only single crochet. Work in continuous spiral rounds and move your stitch marker up at the start of each round.
- Rnd 1: MR, 6 sc into the ring. Pull the ring closed. (6)
- Rnd 2: inc in each st around. (12)
- Rnd 3: *sc 1, inc* repeat 6 times. (18)
- Rnd 4 (only if needed): *sc 2, inc* repeat 6 times. (24) Check the circle against the leg; skip this round if Rnd 3 already fits.
- Next Rnd: sc in BLO of each st around. This creates the crisp edge where the bottom turns into the sides.
- Following Rnds: sc in each st around until the sides measure about 2 inches (usually 7–8 rounds).
- Sl st into the next st, fasten off, and weave in your ends.
Why it works: single crochet makes the tightest fabric, so it grips the leg and stands up to dragging. It’s not flashy, but it’s the one I come back to most.
Pattern 2: The Ribbed Cuff Chair Sock
This one looks like a tiny sweater cuff, and the ribbing has a bit of stretch that helps it hug the leg. It introduces post stitches, which sound intimidating but are easier than they look: instead of going into the top of a stitch, you hook around its “post,” the vertical part.

- Work the base exactly as in Pattern 1, Rnds 1–3 (or Rnd 4 if needed), finishing with an even number of stitches.
- Next Rnd: sc in BLO of each st around.
- Next 2 Rnds: hdc in each st around. Join each round with a sl st to the first st, ch 2 (does not count as a st).
- Ribbing Rnds (3–4 rounds): *FPdc around the next st, BPdc around the next st* repeat around. Sl st to the first st, ch 2. Keep the front posts lined up over the front posts.
- Fasten off and weave in ends.
Tip: if post stitches feel awkward at first, make a little practice swatch before working them in the round. Ten minutes of practice saves a lot of frogging.
Pattern 3: The Two-Color Striped Chair Sock
Stripes are the easiest way to make chair socks look intentional, like you picked them to match the room. They’re also how you learn color changes, a skill you’ll use in nearly every project after this.

- With Color A, work the base and the BLO round from Pattern 1. Then join each round with a sl st and ch 1 from here on. Joined rounds keep the stripes neater than a spiral.
- Rnds 1–2 of the sides: sc around in Color A.
- Color change: on the last stitch of the round, work the sc until 2 loops remain on your hook, then pull Color B through to finish it.
- Next 2 Rnds: sc around in Color B.
- Keep alternating every 2 rounds until the sides are about 2 inches tall. Carry the unused color loosely up the inside instead of cutting it, so there are fewer ends to weave in.
- Fasten off and weave in ends.
The inside of the sock is hidden on the chair leg, which makes this a forgiving place to practice carrying yarn. Messy floats on the inside don’t show.
Pattern 4: The Drawstring Pom-Pom Chair Sock
This is my answer to the “it keeps falling off” problem. An eyelet round near the top holds a drawstring, so you can cinch each sock snugly around legs of slightly different sizes. The pom-poms on the ends are just for fun.

- Work the base and the BLO round from Pattern 1.
- Sides: hdc in each st around for 4 rounds. Join each round with a sl st, ch 2 (does not count as a st). Hdc is taller than sc, so this part goes quickly.
- Eyelet Rnd: ch 4 (counts as dc + ch 1), skip next st, *dc in next st, ch 1, skip next st* repeat around. Sl st to the 3rd ch of the starting ch 4.
- Top Rnd: ch 1, sc in each dc and each ch-1 space around. Sl st to join and fasten off.
- Drawstring: chain about 12 inches, fasten off, and weave it in and out through the eyelets.
- Make two small pom-poms (wrapping yarn around a fork about 40 times works well) and tie one to each end of the drawstring.
Slip the sock on, pull the drawstring snug, and tie a bow. Small, playful, and it really does stay put.
Pattern 5: The Granny Square Base for Square Legs
Round socks on square legs never sit quite right; the corners stretch and the sock creeps off. This pattern starts with one round of a classic granny square, so the base is square from the beginning.

- Rnd 1: MR, ch 3 (counts as dc), 2 dc into the ring, ch 2, *3 dc into the ring, ch 2* repeat 3 times. Sl st to the top of the starting ch 3. Pull the ring tight. You now have 4 groups of 3 dc separated by 4 corner spaces.
- Check the fit: hold the square against the leg. If it’s too small, work a standard second granny round (3 dc, ch 2, 3 dc in each corner; 3 dc in each side space) before moving on.
- Turning Rnd: ch 1, sc in BLO of each dc and work 2 sc into each ch-2 corner space. Sl st to join. (20 sts after a single granny round)
- Sides: ch 1, sc in each st around, joining each round with a sl st. Work until the sides are about 2 inches tall.
- Fasten off and weave in ends.
Bonus: you’ve now made your first granny square, the stitch behind a huge share of classic crochet blankets.
Tips That Make Chair Socks Last
Make them in batches. Crochet all four bases first, then all four sides. Your tension changes over a session, and working each stage together keeps the socks the same size.
Go tighter than you think. Chair socks get dragged across the floor dozens of times a day. Dense fabric lasts much longer than loose, airy stitches. If in doubt, drop a hook size.
Choose yarn for the job. Cotton is tough, slides smoothly on hardwood, and survives the washing machine. Acrylic is softer and comes in more colors but tends to pill with heavy use. For high-traffic chairs, I use cotton every time.
Plan for dust. Chair socks collect dust and pet hair. Make an extra set so you can swap them out on laundry day. Wash cold and lay flat to dry.
Add felt for extra protection. For delicate floors, cut a small circle of adhesive felt and stick it inside the base before slipping the sock on. You get the protection of felt pads with the look of handmade.
Frequently Asked Questions
How long does it take to crochet one chair sock?
Most beginners finish one in 20 to 30 minutes. Once you’ve made a few, you’ll be closer to 15. A full set of four makes a relaxed evening project.
Do crochet chair socks really protect hardwood floors?
Yes. They put a soft layer between the leg and the floor, which prevents scratches and cuts down on scraping noise. Keep them clean, though: grit trapped in the yarn can still scuff a finish.
What if my chair legs are angled or tapered?
Measure at the very bottom of the leg and make the base to match. Then add a round or two of increases partway up the sides if the leg widens. The drawstring style in Pattern 4 is especially forgiving here.
Can I use leftover yarn?
Absolutely. Each sock uses only 10–15 yards, so chair socks are a great way to use up scraps. Mismatched colors can look charming on purpose, especially with the striped pattern.
Are these patterns okay for someone who just learned to crochet?
Yes. If you can make a magic ring and single crochet, you can make Pattern 1 today. Work through the list in order and each pattern adds one new skill.
Your First Quiet Morning Starts Here
Remember that 7 a.m. screech? A few yards of yarn and an evening on the couch is all it takes to fix it. Along the way, you’ll learn to work in the round, change colors, use post stitches, and build a granny square. That’s a lot of skill packed into such a small project.
My suggestion: start with the classic single crochet sock tonight. Once you’ve slipped that first one onto a chair leg and pulled the chair out without a sound, you’ll want to make the rest.
Now I’d love to hear from you. Which pattern are you trying first? Share a photo of your finished chair socks or tell me about your chair-leg challenge in the comments. Odd shapes, wobbly fits, and color dilemmas are all welcome, and I’m happy to help you troubleshoot.

2 Comments