

It started with a half-eaten apple left on the kitchen counter.
My youngest picked it up, turned it around, and asked, “Why does the middle look like a little house?” Honestly, I didn’t have a great answer. So we grabbed a knife, cut a fresh apple in half, and spent the next ten minutes poking at seeds and talking about cores, stems, and skins.

Then I looked at the pile of empty toilet paper rolls I’d been saving “for a craft someday.” Someday had arrived.
This paper roll apple core craft is what came out of that afternoon. It’s cheap, it’s quick, and it looks surprisingly cute lined up on a windowsill. Best of all, it gives kids a hands-on way to remember what’s actually inside an apple.
Quick Takeaways Before You Start
- Time: About 15 minutes of hands-on work (plus paint drying time).
- Cost: Next to nothing. Most supplies are recyclables or things already in your craft drawer.
- Best for: Preschool through early elementary, roughly ages 3–8, with adult help on the gluing.
- Bonus: A natural, no-pressure way to teach the parts of an apple.
- Flexible: Easy swaps if you’re missing red liners, sticks, or paint.
Why This Little Apple Core Is Worth Your Time
Let’s be honest: not every craft on Pinterest survives contact with real kids. Some need twelve supplies and a steady adult hand at every step. This one doesn’t.
There are only five steps, and the most “advanced” skill involved is drawing a few black dots. That makes it a great pick for a classroom table, a rainy weekend, or one of those afternoons when everyone’s a bit restless and you need something to do right now.
It’s also a craft with a built-in conversation. While little hands are painting, you can talk about where apples come from, what the seeds are for, and why we don’t eat the core. (Kids love learning the “rules” of food.)
What You’ll Need
Before you start, gather everything on the table. Trust me, hunting for scissors while a preschooler holds a dripping paintbrush is not a fun experience.
- Paper rolls (toilet paper rolls work perfectly)
- Red cupcake liners (two per apple)
- White craft paint and a paintbrush
- Green construction paper
- Small sticks from the yard
- Glue (hot glue for adults, or strong craft glue for kids)
- A black marker
- Scissors
Here’s a tip I love: send the kids outside to find their own sticks before you start. A short “stick hunt” burns off a little energy and makes them feel like the apple stem is truly theirs.
How to Make a Paper Roll Apple Core, Step by Step
Step 1: Paint the paper roll white
Paint the outside of each paper roll white and let it dry completely. Then give it a second coat. One coat usually lets the brown cardboard peek through, so two coats give you that clean, “freshly bitten apple” look.
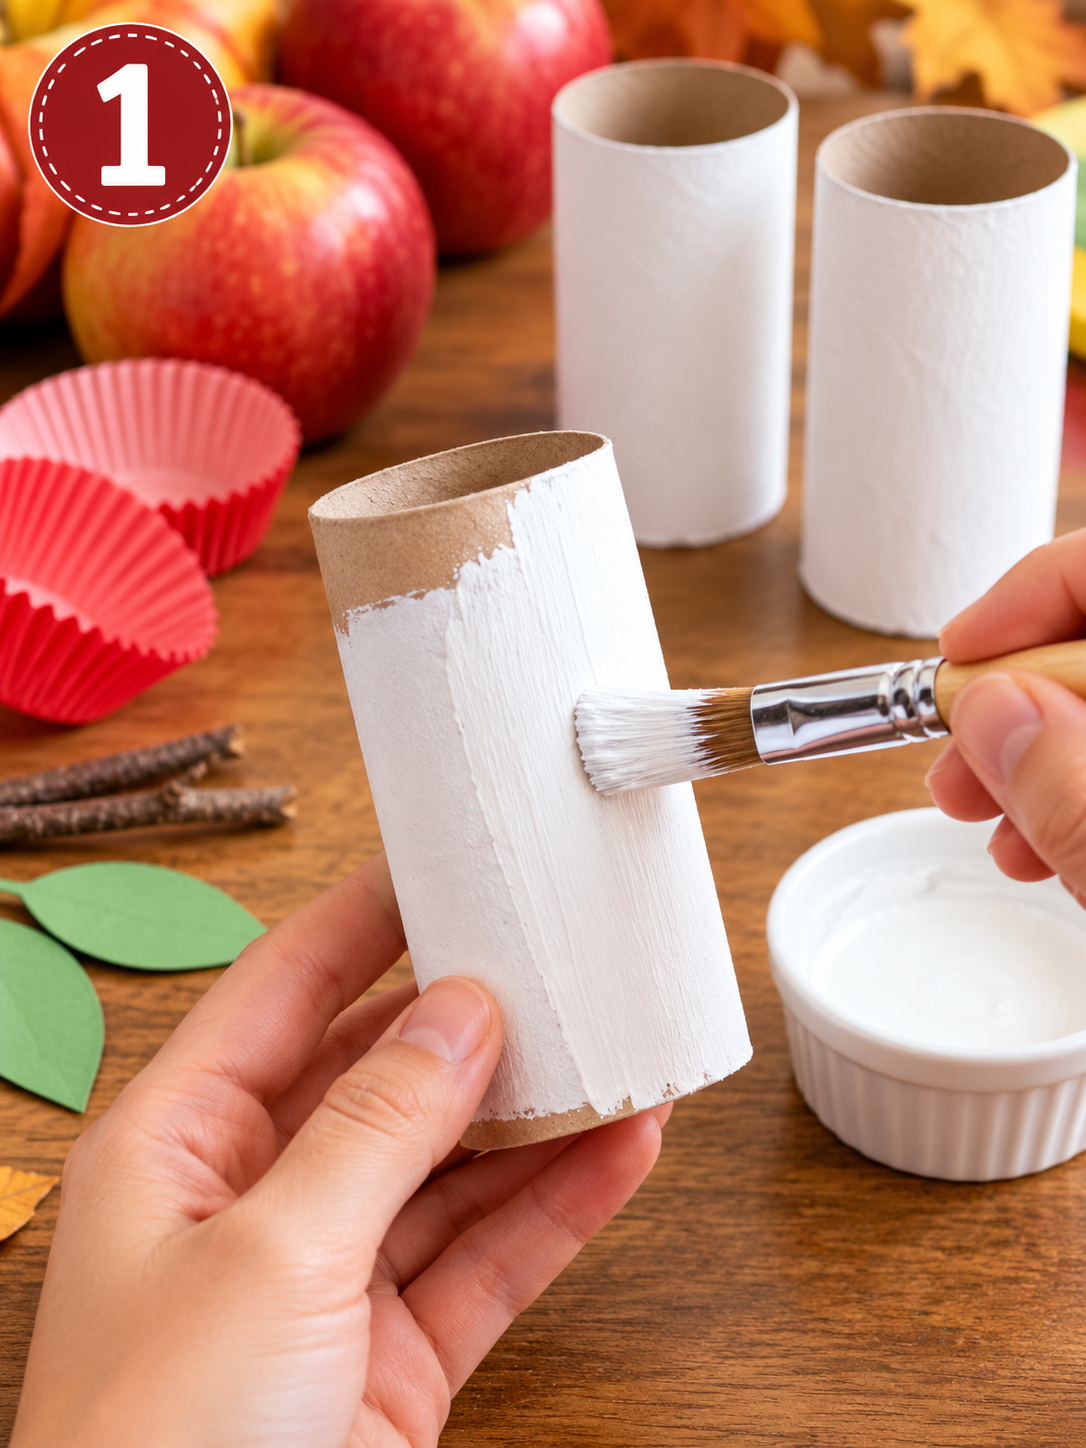
If you’re working with little ones, this is a good place to pause. Paint in the morning, finish the craft after lunch.
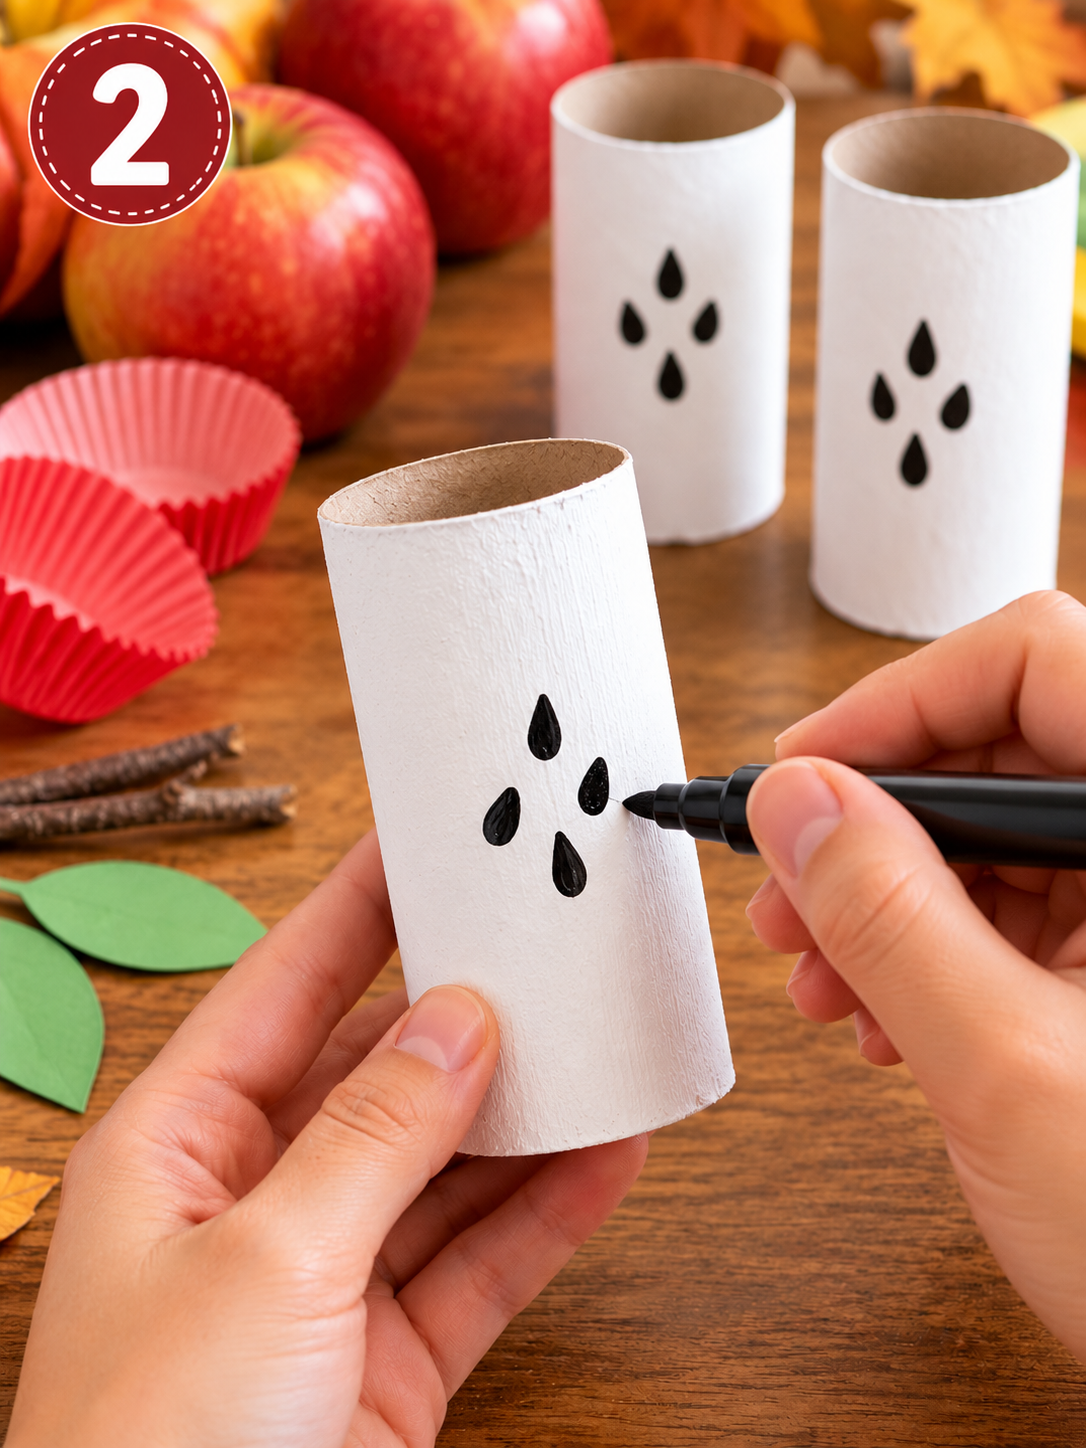
Step 2: Draw the seeds
Once the paint is dry, use a black marker to draw a few seeds in the middle of the roll. Teardrop shapes look the most realistic, but don’t correct anyone who draws circles. Every apple is different!
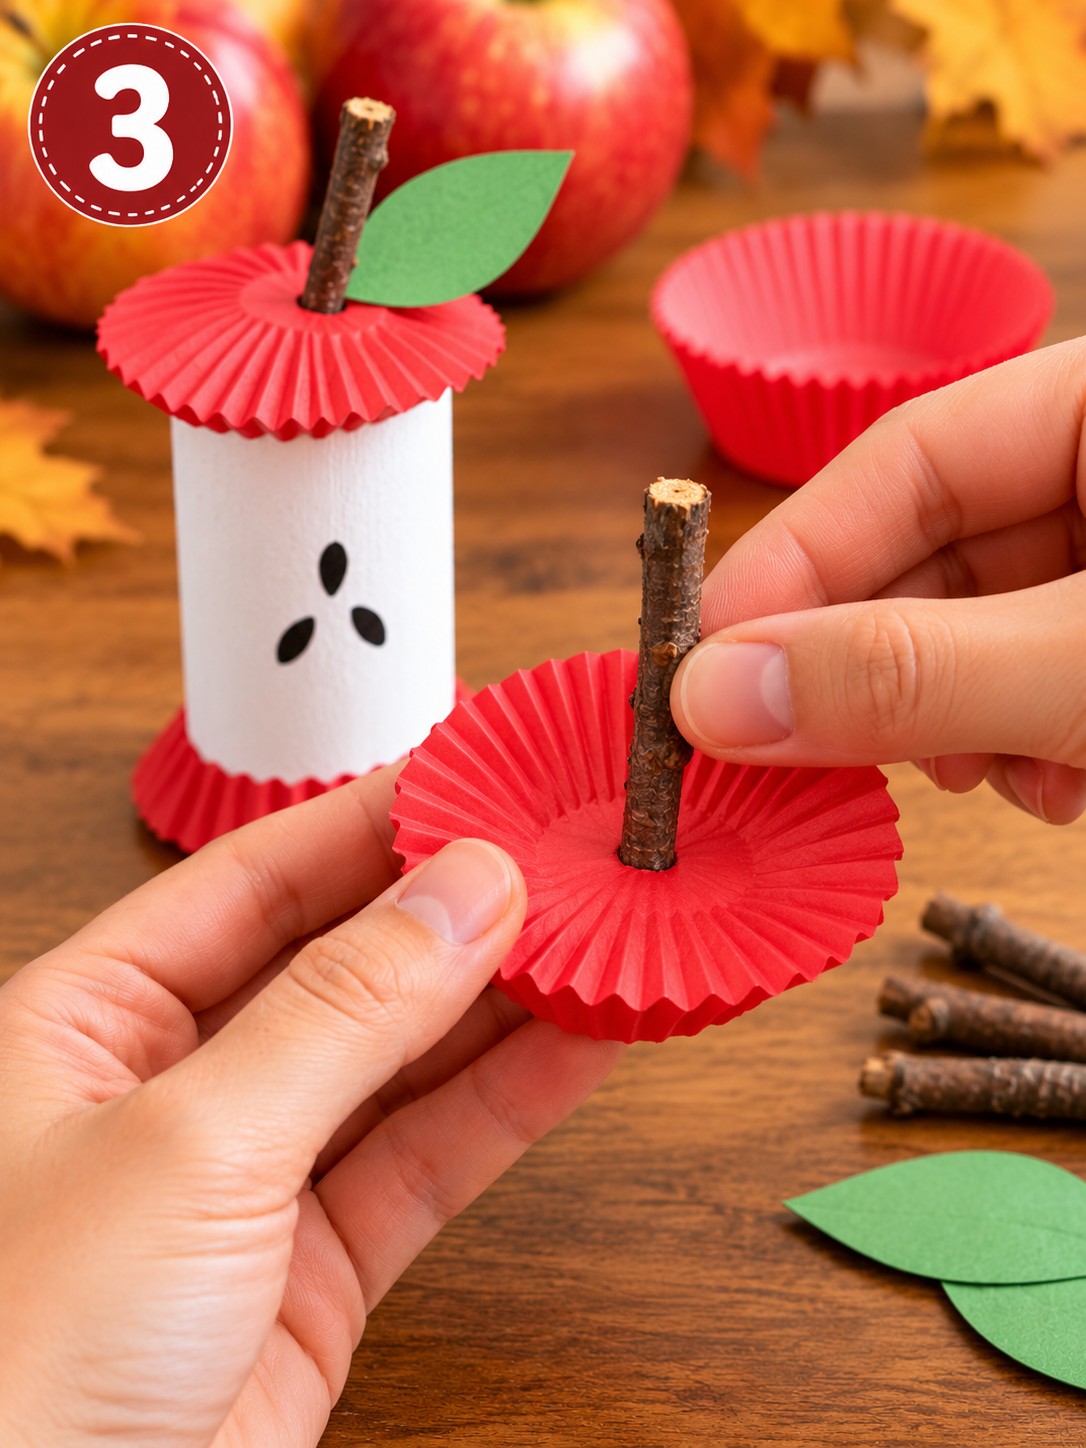
Step 3: Add the stick stem
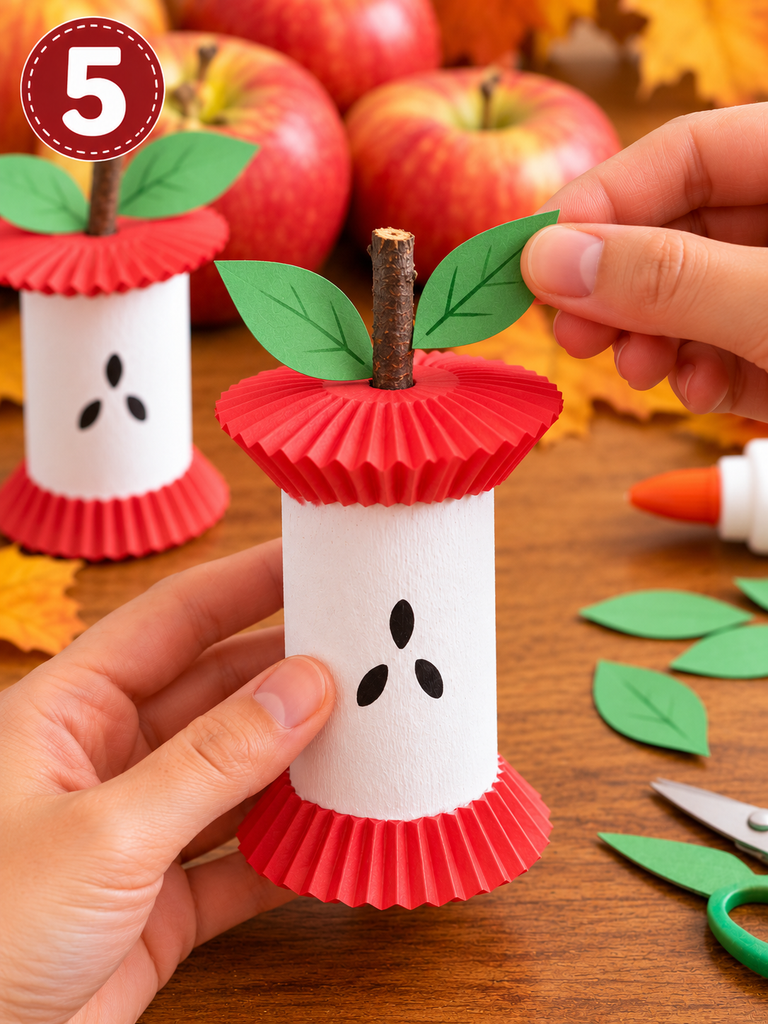
Poke a small stick through the center of one cupcake liner. A pencil tip can help start the hole if the liner is stubborn. This liner will become the top of your apple.
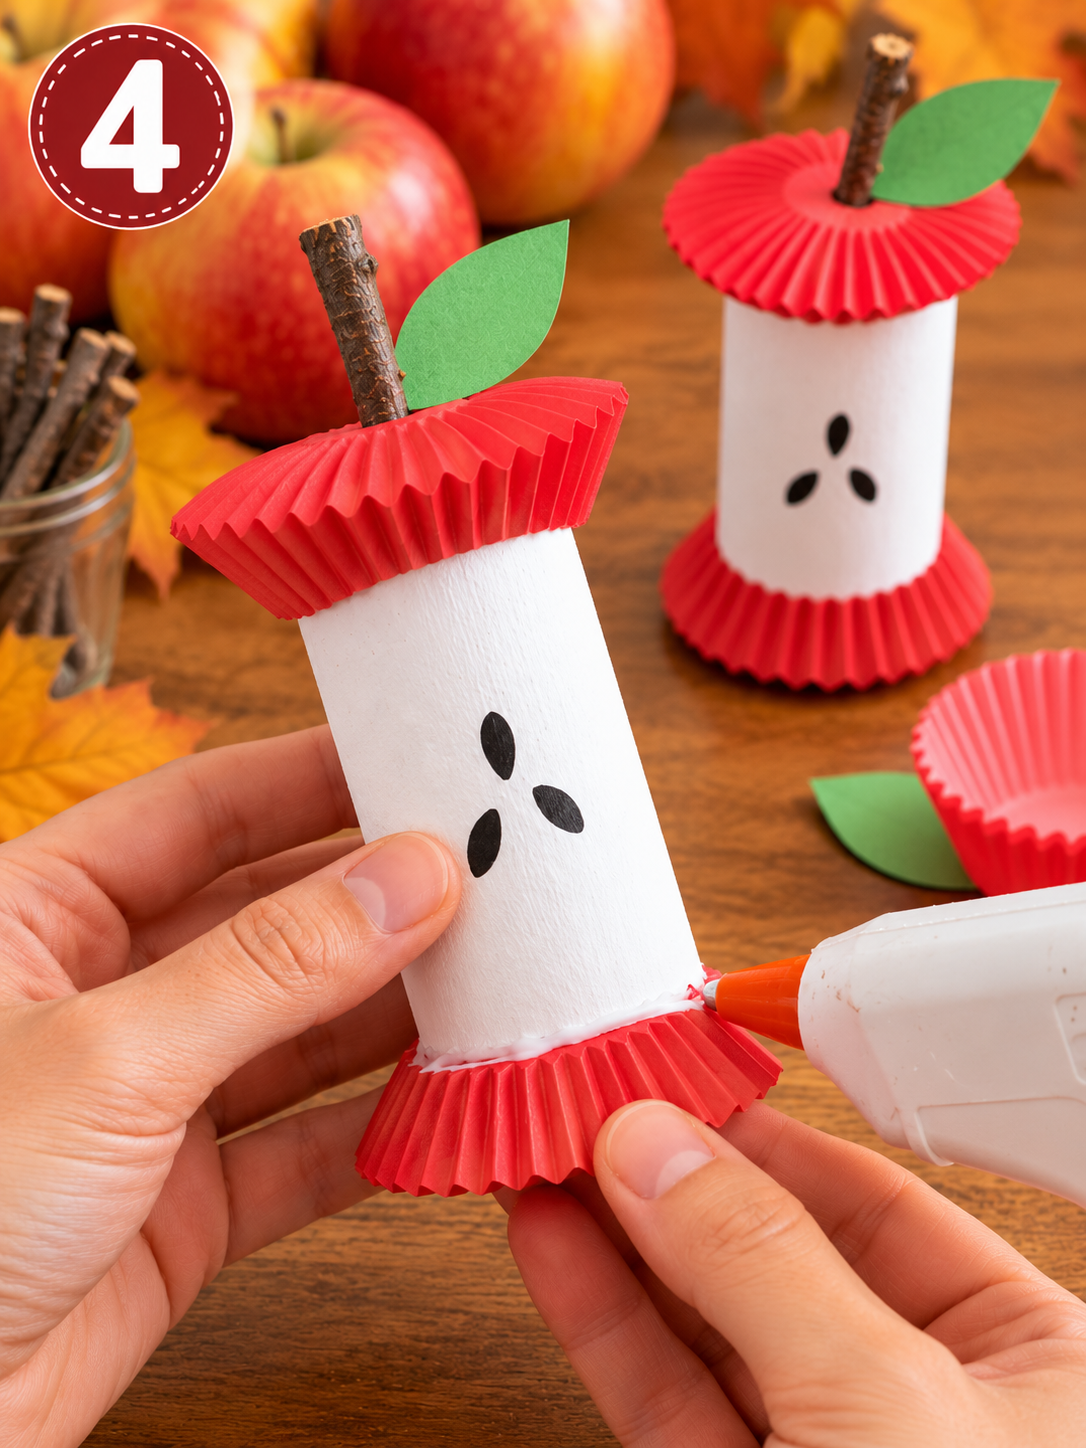
Step 4: Glue on the top and bottom
Glue a plain cupcake liner to the bottom end of the paper roll, and the liner with the stick to the top end. The red liners hug the roll just like the leftover skin on a real apple core.
Step 5: Cut and attach the leaves
Cut small leaf shapes from green construction paper and glue them onto the stick. One or two leaves look sweet; five leaves look like an apple that’s having a very good day. Both are correct.
And that’s it. Step back and admire your apple core.
A Quick Word About Glue and Safety
Hot glue holds the liners best and dries almost instantly, but it isn’t for small hands. If you use it, let kids handle the placement and keep the glue gun on the adult side of the table.
For a kid-only version, thick white craft glue or tacky glue works fine. You’ll just need to hold the liners in place for a minute or set the rolls upright while they dry. It takes a bit more patience, but kids get to do every step themselves, which they usually love.
Easy Variations (No Perfect Supplies Needed)
Missing something? Don’t let that stop you. Here are a few swaps that work just as well:
- Skip the painting: Use white paper rolls if you can find them, and jump straight to drawing the seeds.
- No sticks? Craft sticks (popsicle sticks) make a great stem. Snap or cut them shorter first.
- No red liners? Use white cupcake liners and let the kids paint them red. Bonus points for a mix of red, green, and yellow apples.
That last one is my favorite, actually. Talking about different apple varieties (and which ones taste the sweetest) turns the craft into a little taste test afterward.
Turn It Into a Mini Apple Science Lesson
This is where the craft goes from “cute” to “wait, my kid actually learned something.”
Before you start, cut a real apple in half. If you slice it sideways (across the middle instead of top to bottom), you’ll find the seeds arranged in a star shape. Kids are always amazed by this, and it’s a fun “secret” they’ll want to show everyone.
Then, while they work, point out each part:
- The stem (the stick) connected the apple to the tree.
- The leaves (green paper) helped the tree make food from sunlight.
- The skin (red liners) protects the fruit inside.
- The core (the paper roll) is the center that holds the seeds.
- The seeds (black dots) could grow into a brand-new apple tree.
A few questions to ask along the way: How many seeds did our real apple have? What do you think would happen if we planted one? Which part of the apple do we eat?
You don’t need to turn it into a quiz. Just let the conversation happen naturally.
What to Do With Your Finished Apple Cores
Please don’t let these end up in a drawer. A few ideas:
- Line them up on a windowsill or mantel as simple fall decor.
- Make a whole “orchard” for a classroom bulletin board or autumn display.
- Use them as props while reading an apple-themed picture book.
- Pair them with a real apple-picking trip so kids can compare the craft to the real thing.
Frequently Asked Questions
What age is this apple craft best for?
It works well for kids around 3 to 8. Preschoolers will need help with cutting and gluing, while older kids can usually do it all on their own.
How long does the paper roll apple core craft take?
The hands-on part takes about 15 minutes. The paint needs time to dry between coats, so plan for a short break or split it across two sessions.
Can I make this craft without paint?
Yes. Use white paper rolls, or wrap a regular roll in white paper and tape it down.
Is this a good classroom craft?
Definitely. It uses recyclables, costs very little, and works well for a fall or apple-themed unit. Ask families to send in empty paper rolls a week ahead.
Wrapping Up
That half-eaten apple on my counter turned into one of our favorite fall afternoons. A few cardboard rolls, some cupcake liners, a handful of sticks, and suddenly we had a little orchard on the windowsill and a kid who could explain exactly what a core is.
That’s the magic of simple crafts. They don’t need to be perfect or expensive. They just need to give kids something to make with their hands and something to wonder about while they do it.
Now it’s your turn. Save your next few paper rolls, grab an apple, and give this one a try. When you do, I’d love to hear how it went. Did your kids discover the hidden star? Did anyone make a purple apple? Share your photos or tell me in the comments. Those little moments are my favorite part.





One Comment