Blue Nail Designs: Stunning Ideas for Every Style

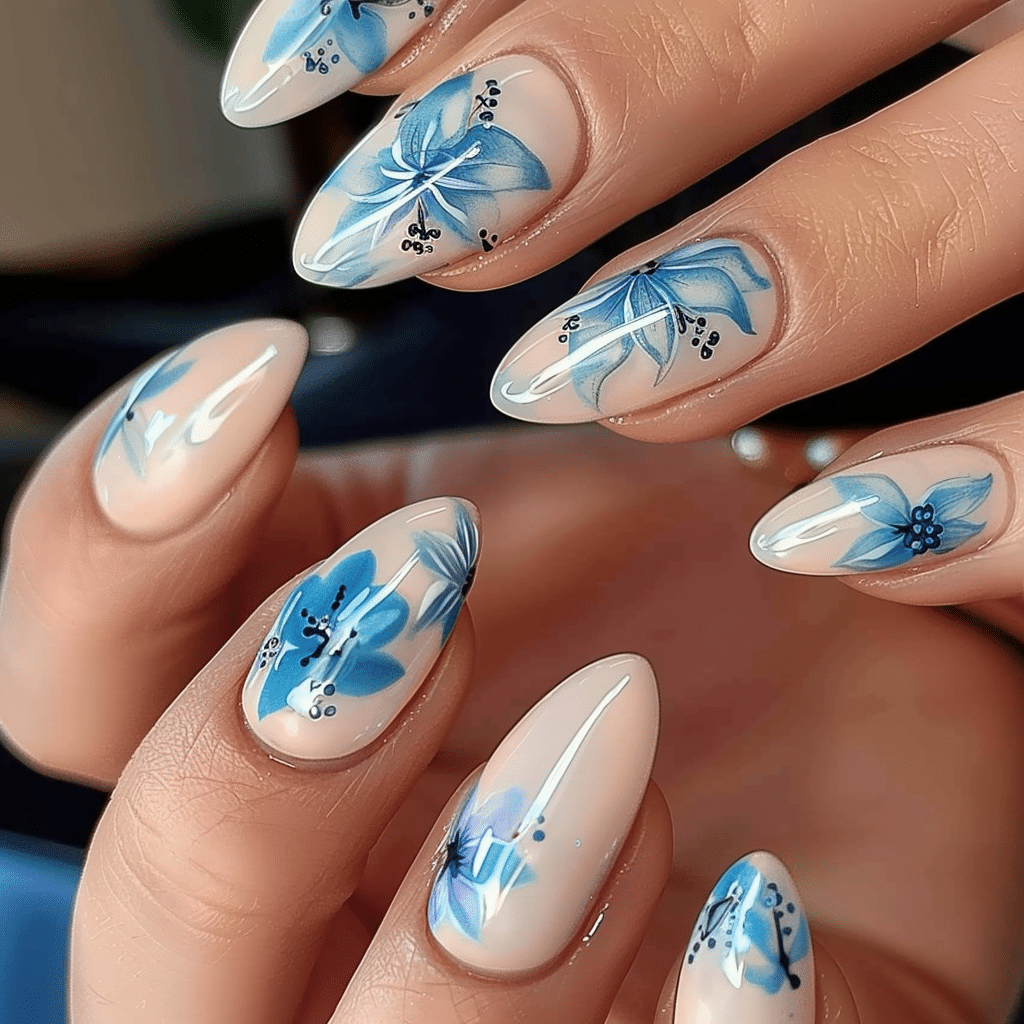
Blue nail designs represent one of the most versatile and universally flattering color choices in nail art.
From deep navy to vibrant turquoise, blue shades complement every skin tone and suit any occasion. Professional nail technicians consider blue an essential color in their palette because it offers limitless creative possibilities for both minimalist and elaborate designs.
| Topic | Details |
|---|---|
| Category | Nail Art / Gel Nails |
| Skill Level | Beginner to Advanced |
| Time Needed | 45-90 minutes |
| Tools Needed | UV/LED lamp, gel polish, nail file, base coat, top coat |
| Best For | Anyone seeking versatile, elegant nail designs |
Table of Contents
Why Blue Nail Designs Work
Blue nail designs work exceptionally well because the color spectrum provides options for every personality and preference. Cool blue tones create a calming visual effect that draws attention without overwhelming the eye. The pigments in quality blue gel polishes contain stable colorants that resist fading and maintain vibrancy throughout the wear period.
From a color theory perspective, blue complements warm and cool skin undertones equally well. Lighter blues like sky and powder blue enhance fair skin tones, while deep navy and cobalt shades create striking contrast on darker complexions. This universal appeal makes blue nail designs consistently popular across demographics. Professional nail artists appreciate blue’s compatibility with other colors, allowing endless combination possibilities for intricate nail art.
Tools and Products Needed for Blue Nail Designs
| Product | Purpose | Alternatives |
|---|---|---|
| UV/LED Lamp | Cures gel polish properly | Professional salon curing |
| Gel Base Coat | Protects natural nails and ensures adhesion | Ridge-filling base coat |
| Blue Gel Polish | Primary color application | Regular nail lacquer with quick-dry top coat |
| Gel Top Coat | Seals design and adds shine | No-wipe top coat |
| Nail File (180 grit) | Shapes nail edges | Glass nail file |
| Nail Buffer | Smooths nail surface | 240-grit buffer block |
| Cuticle Pusher | Prepares nail bed | Orange wood stick |
| Cuticle Oil | Maintains nail health | Vitamin E oil or jojoba oil |
| Nail Cleanser | Removes oils before application | Isopropyl alcohol 70% |
| Lint-Free Wipes | Cleans sticky layer | Cotton pads |
| Dotting Tools | Creates patterns and details | Bobby pins or toothpicks |
| Nail Art Brushes | Adds fine details | Thin liner brushes |
Quality tools make a significant difference in achieving professional blue nail designs at home. Investing in proper equipment ensures your manicure lasts longer and looks salon-quality. Find comprehensive guides on selecting the right tools at Gel Nails by Lina.
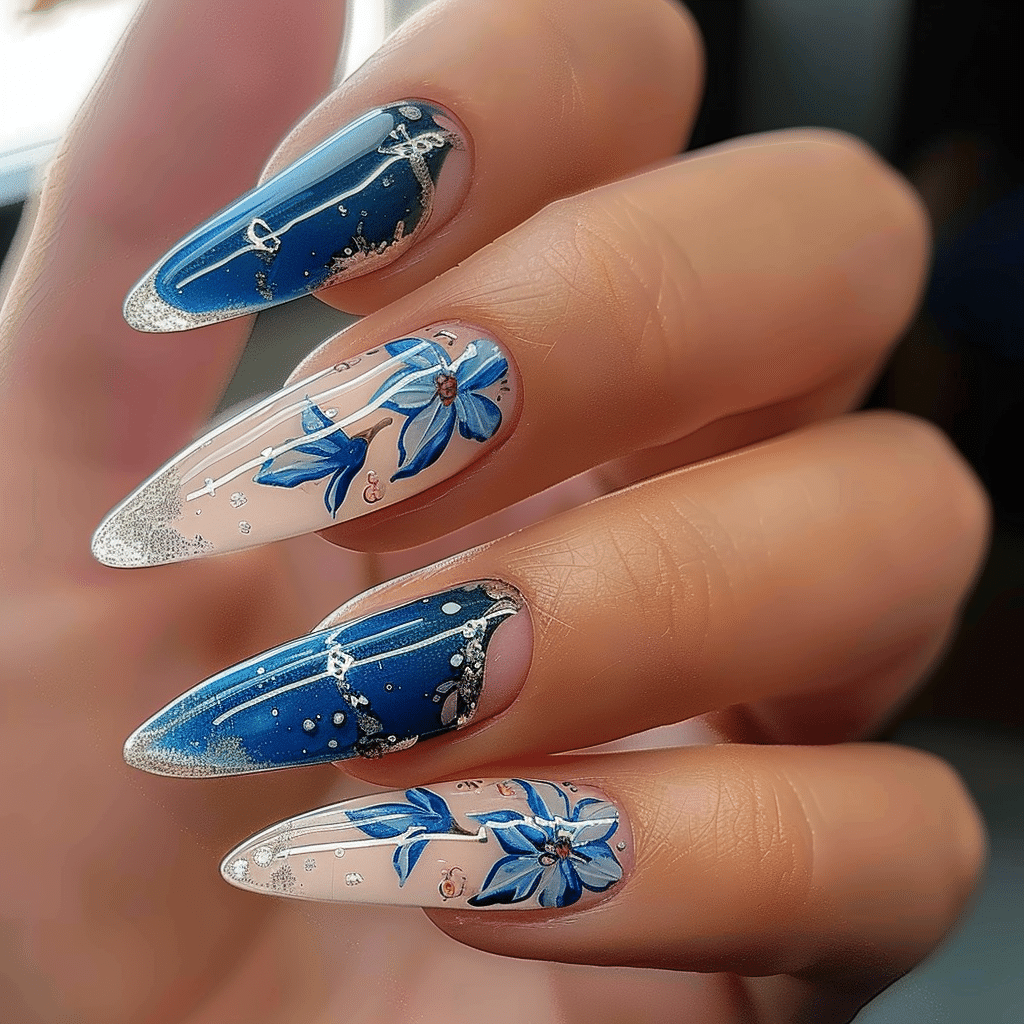
Step-by-Step Application Guide for Blue Nail Designs
Nail Preparation
- Remove any existing nail polish completely using acetone-based remover and lint-free wipes.
- Wash hands thoroughly with soap and warm water to eliminate all residue and oils.
- Push back cuticles gently using a cuticle pusher at a 45-degree angle.
- File nails to your desired shape using smooth, one-directional strokes from corner to center.
- Buff the nail surface lightly with a 240-grit buffer to remove shine and create adhesion.
- Clean nails with nail cleanser or isopropyl alcohol to remove all dust and oils.
- Allow nails to dry completely for at least two minutes before proceeding.
Base Coat Application
- Apply a thin layer of gel base coat starting from the cuticle area.
- Cap the free edge by running the brush along the nail tip.
- Ensure even coverage without flooding the cuticles or sidewalls.
- Cure under UV lamp for 60 seconds or LED lamp for 30 seconds.
- Check that the base coat has cured completely before proceeding to color.
Blue Gel Polish Layers
- Apply the first thin layer of blue gel polish in three strokes: center, left, right.
- Keep the polish application thin and even to prevent bubbling or wrinkling.
- Cap the free edge to seal the color and prevent chipping.
- Cure the first color layer for 60 seconds under UV or 30 seconds under LED.
- Apply a second thin coat of blue gel polish for full opacity and depth.
- Ensure complete coverage without touching cuticles or skin.
- Cure the second color layer using the same timing as the first coat.
- Add a third coat only if the color appears streaky or sheer.
Curing Process
- Position your hand flat inside the lamp with all nails exposed to light.
- Set the timer according to your lamp specifications and gel brand recommendations.
- Keep fingers still during the entire curing cycle to prevent smudging.
- Allow the lamp to complete its full cycle before removing your hand.
- Check each nail for proper curing by gently touching the surface.
Finishing and Top Coat
- Apply a thin layer of gel top coat over the entire nail surface.
- Cap the free edge thoroughly to seal all layers together.
- Cure the top coat for 60 seconds under UV or 30 seconds under LED.
- Remove the sticky inhibition layer with cleanser and a lint-free wipe if using a regular top coat.
- Apply cuticle oil around each nail and massage into the skin.
- Admire your professional blue nail designs and allow time for full hardening.
Pro Nail Technician Tips for Blue Nail Designs
- Choose darker blue shades for better opacity and fewer coats required for full coverage.
- Apply gel polish in thin layers rather than thick coats to prevent wrinkling and improper curing.
- Clean the brush on the bottle neck before each application to control polish amount.
- Avoid touching cuticles by leaving a tiny gap that naturally fills during curing and shrinkage.
- Mix different blue shades to create custom colors that perfectly match your style preferences.
- Cure each layer for the full recommended time to ensure maximum durability and prevent peeling.
- Store blue gel polishes away from direct sunlight to prevent color fading and pigment separation.
- Use a white or nude base color beneath sheer blue polishes for consistent opacity.
Common Gel Nail Mistakes with Blue Nail Designs
| Mistake | Why It Happens | How to Fix |
|---|---|---|
| Thick Gel Layers | Applying too much polish at once to save time | Remove and reapply thin coats, curing between each layer |
| Improper Curing | Insufficient lamp wattage or premature removal from lamp | Invest in quality lamp and follow exact curing times |
| Skipping Nail Prep | Rushing the preparation phase to start color quickly | Always buff, clean, and dehydrate nails before base coat |
| Flooding the Cuticle | Applying polish too close to cuticle area | Leave small gap and use cleanup brush with acetone |
| Not Capping Free Edge | Forgetting to seal the nail tip with each layer | Run brush along tip edge with every coat application |
Understanding these common mistakes helps you achieve flawless blue nail designs consistently. Professional nail technicians spend years perfecting their technique to avoid these pitfalls. Learning from typical errors saves time and prevents frustration during your manicure process.
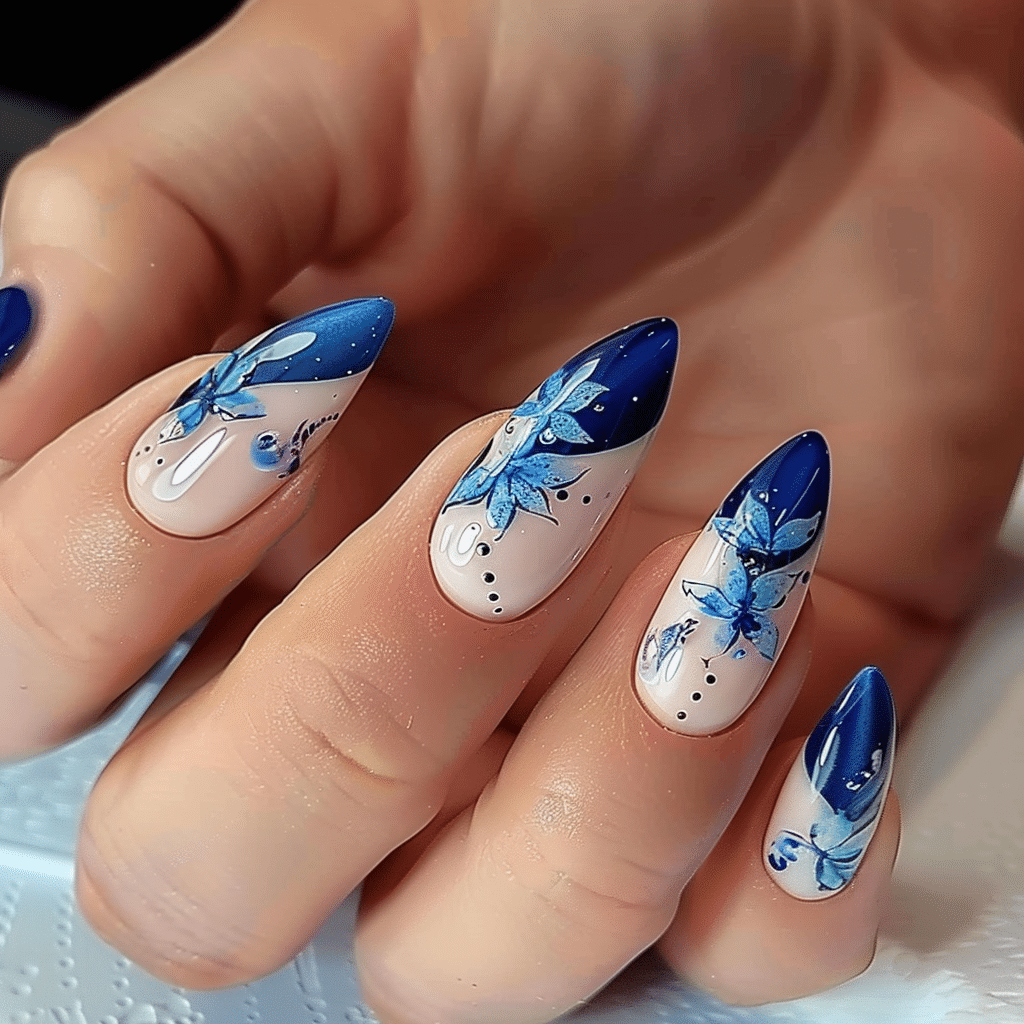
Blue Nail Design Variations
| Style | Description | Best Occasion |
|---|---|---|
| Classic Navy Blue | Solid deep blue polish for sophisticated look | Professional settings, business meetings |
| Sky Blue French Tips | Light blue tips on nude or clear base | Spring events, casual outings |
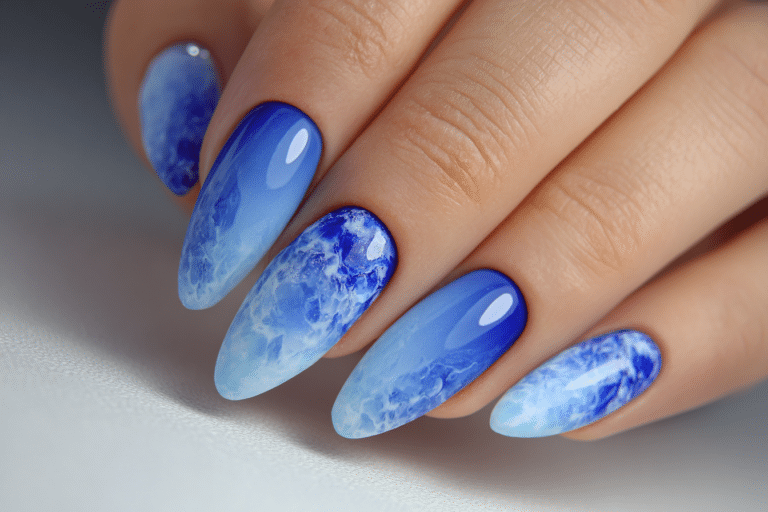
| Blue Ombre Nails | Gradient from light to dark blue shades | Beach vacations, summer parties |
| Cobalt Chrome Nails | Metallic blue with mirror finish effect | Evening events, formal occasions |
| Blue Marble Design | Swirled patterns mimicking natural stone | Fashion-forward daily wear |
| Turquoise Glitter Accent | Bright blue with sparkle on accent nails | Parties, celebrations, holidays |
| Navy and Gold | Dark blue base with gold foil details | Weddings, upscale events |
| Baby Blue Minimalist | Soft blue with simple line art | Everyday wear, office appropriate |
| Royal Blue Geometric | Bold blue with angular patterns | Fashion shows, creative events |
| Teal Watercolor | Blue-green blend with artistic effect | Art galleries, cultural events |
These blue nail design variations offer inspiration for every style preference and occasion. Experiment with different techniques to discover which designs best express your personality. Visit professional nail art galleries for additional creative ideas and seasonal trends.
Nail Care and Maintenance for Blue Nail Designs
Maintaining beautiful blue nail designs requires consistent care and proper maintenance habits. Apply cuticle oil twice daily to keep the nail bed hydrated and prevent lifting around the edges. Hydrated cuticles create a smooth, professional appearance and extend the life of your gel manicure.
Wear gloves when performing household chores or using cleaning chemicals to protect your blue nail designs from harsh substances. Chemicals can break down the gel polish structure and cause premature chipping or discoloration. Even gentle soaps can gradually weaken the bond between layers if your hands remain submerged in water frequently.
Avoid using your nails as tools to open cans, scrape surfaces, or peel labels. This behavior creates stress points that lead to cracks and breaks in both the gel polish and natural nail. Instead, use proper tools designed for these tasks to preserve your beautiful blue nail designs.
Schedule regular maintenance appointments every two to three weeks to address regrowth and refresh your manicure. Professional nail technicians can assess nail health and make adjustments before minor issues become major problems. Consistent maintenance prevents damage and keeps your nails looking freshly manicured.
How to Remove Blue Gel Nails Safely
- File the shiny top coat layer using a coarse nail file to break the seal.
- Soak cotton pads in pure acetone until thoroughly saturated but not dripping.
- Place acetone-soaked cotton on each nail and wrap with aluminum foil squares.
- Wait 10 to 15 minutes to allow acetone to dissolve the gel polish layers.
- Remove foil wraps and gently push softened gel off with an orange wood stick.
- Avoid scraping or forcing gel that has not fully dissolved to prevent nail damage.
- Re-wrap any nails where gel remains and soak for additional five minutes.
- Buff nails gently to remove any remaining residue after all gel is removed.
- Wash hands thoroughly with soap and warm water to remove acetone.
- Apply cuticle oil generously and massage into nails and surrounding skin.
- Allow nails to rest for at least 24 hours before applying new gel polish.
Nail Health and Safety for Blue Nail Designs
Maintaining nail health while enjoying blue nail designs requires awareness of proper safety practices. Never over-file the natural nail surface, as excessive buffing removes protective layers and weakens the nail structure. A light buffing to remove shine is sufficient for gel adhesion without compromising nail integrity.
Monitor your nails for signs of infection, including redness, swelling, pain, or unusual discharge around the nail bed. Gel polish can trap moisture and bacteria if applied over damaged skin or compromised nails. Address any concerning symptoms immediately by removing polish and consulting a healthcare provider.
Allow your nails to breathe between gel manicures by taking breaks every three to four months. During these rest periods, focus on strengthening treatments and intensive hydration to restore natural nail health. Dermatologists recommend these breaks to prevent long-term damage from continuous gel wear.
Choose reputable nail product brands that avoid harmful chemicals like formaldehyde, toluene, and dibutyl phthalate. Quality gel polishes formulated without toxic ingredients protect both your immediate health and long-term nail condition. Research brands before purchasing to ensure they meet safety standards.
Frequently Asked Questions About Blue Nail Designs
How long do blue gel nail designs last?
Blue gel nail designs typically last two to three weeks with proper application and care. Darker blue shades often show less tip wear than lighter colors, extending the professional appearance. Factors affecting longevity include your daily activities, nail growth rate, and how well you maintain the manicure. Following proper application techniques and avoiding harsh chemicals helps maximize wear time.
How do I remove blue gel nails safely at home?
Remove blue gel nails safely by soaking acetone-saturated cotton pads on each nail and wrapping with foil for 10 to 15 minutes. Gently push softened gel off with an orange wood stick, never forcing or peeling the polish. If gel remains, re-wrap and soak for additional time rather than scraping aggressively. Always finish with cuticle oil to restore moisture after acetone exposure.
What is the difference between blue gel nails and acrylic nails?
Blue gel nails cure under UV or LED light and offer a flexible, glossy finish, while acrylic nails air-dry and provide a harder, more durable surface. Gel polish is generally gentler on natural nails and easier to remove than acrylics. Acrylics work better for creating length and structure, whereas gels excel at natural nail overlays and artistic designs. Both options can achieve stunning blue nail designs depending on your preferences.
Why do my blue gel nails peel after a few days?
Blue gel nails peel prematurely due to inadequate nail preparation, moisture trapped under polish, or insufficient curing time. Skipping the buffing step prevents proper adhesion, while oil residue creates a barrier between gel and nail. Ensure you thoroughly clean, buff, and dehydrate nails before application, then cure each layer for the full recommended time. Flooding the cuticle area also causes lifting and peeling within days.
How can I make my blue gel nail designs last longer?
Make blue gel nail designs last longer by applying thin, even coats and capping the free edge with every layer. Maintain hydrated cuticles with daily oil application while avoiding submerging hands in water for extended periods. Wear gloves during cleaning and household tasks to protect nails from chemicals and physical stress. Proper preparation including buffing and cleansing creates the foundation for extended wear beyond three weeks.
Conclusion
Blue nail designs offer endless creative possibilities for expressing your personal style while maintaining a polished, professional appearance. From classic navy to vibrant turquoise, blue shades complement every skin tone and suit any occasion perfectly. By following proper application techniques, investing in quality products, and maintaining consistent nail care, you can achieve salon-quality blue nail designs at home. Remember that healthy nails provide the best canvas for beautiful designs, so prioritize nail health alongside aesthetics. Explore the versatility of blue and discover your signature style today.