30 Whale Shark Nail Designs That Are Totally Unique

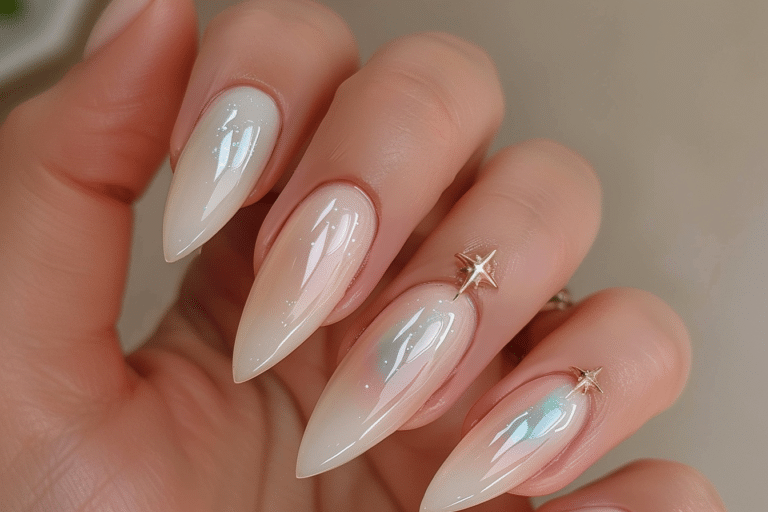
Whale shark nail designs combine the majesty of the ocean’s gentle giants with creative nail artistry for a truly unique manicure.
These spotted beauties translate perfectly onto nails through various techniques from hand-painted details to stamping and gradient effects. Marine life nail art continues to trend among beauty enthusiasts seeking designs that stand out from traditional florals and geometrics.
| Topic | Details |
|---|---|
| Category | Nail Art |
| Skill Level | Intermediate to Advanced |
| Time Needed | 60-90 minutes per manicure |
| Tools Needed | Gel polish, dotting tools, fine brushes, stamping plates |
| Best For | Ocean lovers, creative nail art enthusiasts, statement manicures |
Table of Contents
Why This Nail Technique Works
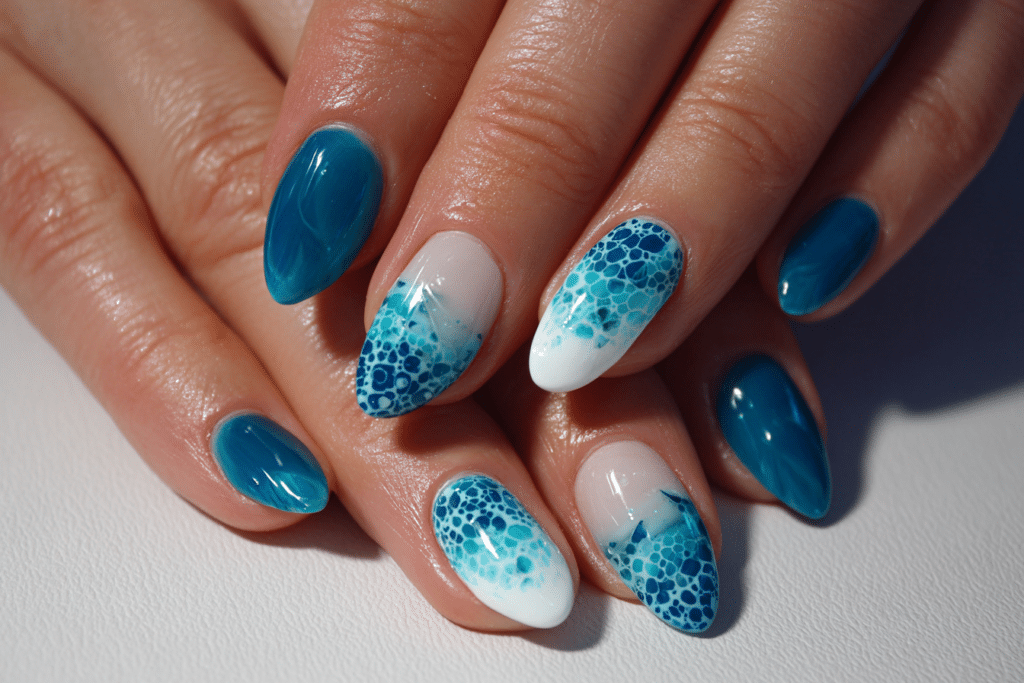
Whale shark nail designs work exceptionally well because their natural patterns translate beautifully to the nail canvas. The distinctive spotted pattern of whale sharks creates visual interest without overwhelming small nail surfaces. The contrast between dark blue or gray base colors and white or cream spots provides depth and dimension that catches light naturally.
These marine-inspired designs offer versatility that suits both subtle and bold preferences. You can create minimalist accent nails featuring simple whale shark silhouettes or elaborate full sets with intricate underwater scenes. The color palette naturally complements summer wardrobes while remaining sophisticated enough for year-round wear. Professional nail artists appreciate how whale shark patterns hide minor imperfections while creating a polished finished look.
The popularity of ocean conservation efforts has increased demand for marine life nail art among environmentally conscious clients. Whale sharks symbolize gentle strength and mystery, making them meaningful choices beyond pure aesthetics. This emotional connection encourages clients to maintain their manicures longer and share their nail art on social media platforms.
Tools and Products Needed
| Product | Purpose | Alternatives |
|---|---|---|
| UV/LED Lamp | Cures gel polish layers | 48W or higher LED lamp |
| Base Coat | Protects natural nails and ensures adhesion | Ridge-filling base coat |
| Navy/Gray Gel Polish | Creates whale shark body color | Dark blue, charcoal, or teal shades |
| White Gel Polish | Forms characteristic spots | Cream or off-white shades |
| Fine Detail Brush | Paints intricate details and outlines | Size 00 or 000 nail art brush |
| Dotting Tools | Creates uniform spots and patterns | Bobby pins or toothpicks |
| Nail Stamping Plates | Transfers ocean-themed designs | Water decals or stickers |
| Top Coat | Seals design and adds shine | Matte or glossy finish options |
| Cuticle Oil | Maintains nail health and flexibility | Jojoba or vitamin E oil |
| Nail File 180 Grit | Shapes and smooths nail edges | Glass or crystal file |
| Nail Buffer | Creates smooth surface for polish application | 4-way buffer block |
For premium gel polish options and professional nail art tools, visit Gel Nails by Lina for curated product recommendations.
Step-by-Step Application Guide
Nail Preparation
- Remove any existing polish using acetone-soaked cotton pads and gentle pressure.
- Push back cuticles gently using a wooden or rubber cuticle pusher to create clean nail beds.
- File nails into your desired shape using smooth strokes in one direction.
- Buff the nail surface lightly to remove shine and create better adhesion.
- Cleanse nails thoroughly with alcohol wipes or nail cleanser to remove oils and debris.
- Apply dehydrator or primer if working with naturally oily nail beds.
Base Coat Application
- Apply a thin layer of base coat starting from the cuticle area and sweeping toward the free edge.
- Cap the free edge by running the brush along the nail tip.
- Cure under UV/LED lamp according to manufacturer specifications, typically 30-60 seconds.
- Check for complete coverage without any bare spots or streaking.
Gel Polish Layers
- Apply the first coat of navy or gray gel polish in thin, even layers.
- Cure for 30-60 seconds depending on your lamp wattage and polish formula.
- Apply a second coat for full opacity and rich color saturation.
- Cure again following the same timing guidelines.
- Use a lint-free wipe with cleanser to remove the tacky layer if creating detailed art.
Whale Shark Pattern Creation
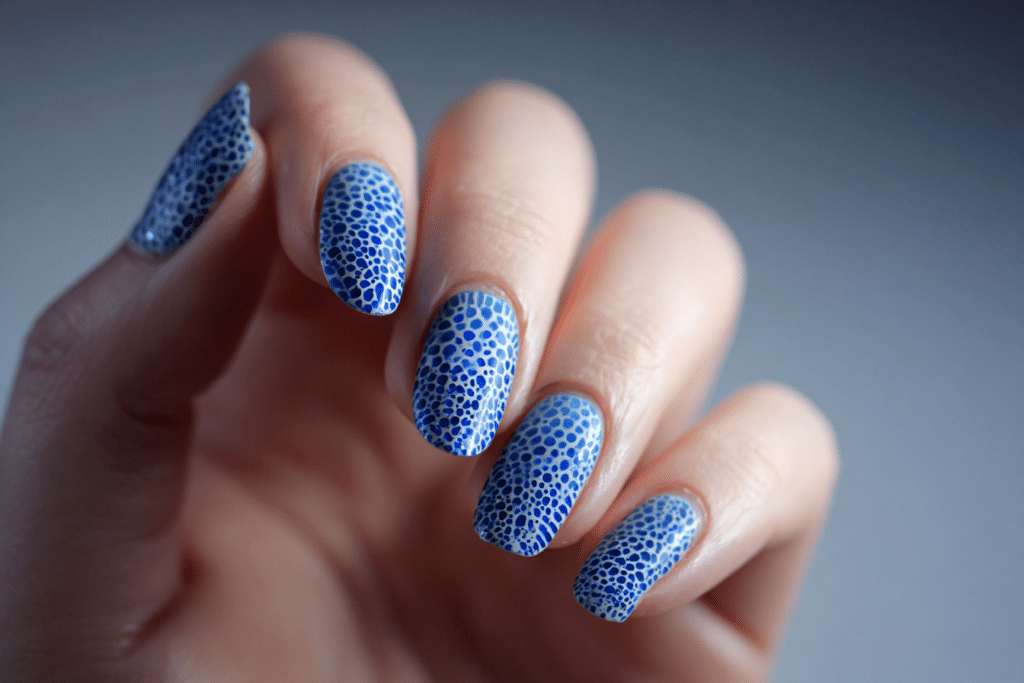
- Load your dotting tool with white gel polish and create random spots across the nail surface.
- Vary dot sizes by using different sized tools or applying different pressure levels.
- Use a fine detail brush to add small connecting lines between some spots for authentic texture.
- Cure the spotted layer for 60 seconds to set the design.
- Add lighter cream dots on top of some white spots for dimensional effect.
- Paint a simple whale shark silhouette on accent nails using dark blue polish and fine brush.
- Cure all decorative elements thoroughly before proceeding to sealing.
Finishing and Top Coat
- Apply a generous layer of high-quality gel top coat over the entire design.
- Cap the free edge carefully to prevent chipping and peeling.
- Cure for the full recommended time, typically 60-120 seconds for complete hardening.
- Wipe away the tacky residue with alcohol or gel cleanser on a lint-free pad.
- Apply cuticle oil around the nail perimeter and massage gently into skin.
- Inspect each nail for any imperfections or areas needing touch-ups.
Pro Nail Technician Tips
- Create spot patterns before curing to adjust placement and achieve natural randomness without permanent mistakes.
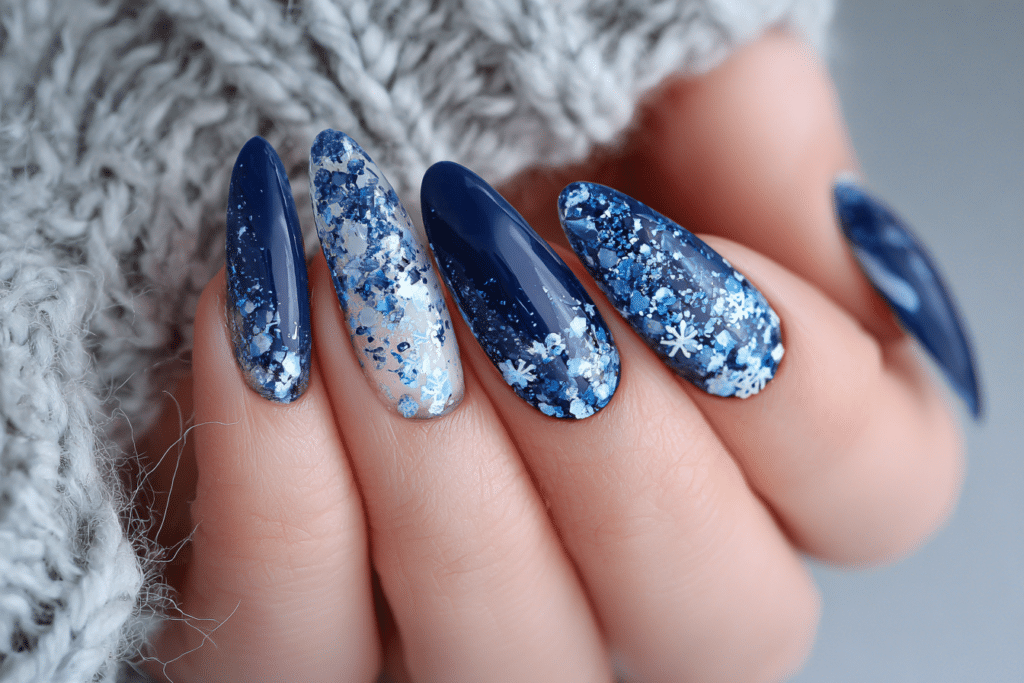
- Layer different shades of blue and gray before adding spots to create depth that mimics actual whale shark coloring.
- Use a matte top coat on some nails and glossy on others for textural contrast in your whale shark nail designs.
- Prepare multiple dotting tools in various sizes before starting to maintain workflow efficiency during application.
- Reference actual whale shark photographs while working to capture authentic spot distribution and sizing patterns.
- Apply thinner polish layers rather than thick coats to prevent wrinkling, lifting, and incomplete curing issues.
- Allow each layer to cure completely before adding details to prevent color bleeding and smudging.
- Store specialty brushes in protective cases between uses to maintain fine tips essential for detailed work.
Find more expert techniques and professional nail art guidance at Gel Nails by Lina for elevated manicure results.
Common Gel Nail Mistakes
| Mistake | Why It Happens | How to Fix |
|---|---|---|
| Spots bleeding together | Applying wet polish on uncured base or using too much product | Cure base color completely and use minimal polish on dotting tools |
| Uneven spot distribution | Rushing application without planning pattern layout | Mark light guidelines before applying spots or reference placement photos |
| Dull or cloudy finish | Insufficient curing time or touching nails before complete hardening | Increase cure time by 30 seconds and avoid contact until fully set |
| Design chipping quickly | Skipping edge capping or applying polish too thick | Always cap free edges and apply multiple thin coats instead of thick layers |
| Difficulty creating fine details | Using polish that is too thick or brushes that are too large | Thin gel polish with clear gel or invest in size 00 detail brushes |
| Color lifting at cuticles | Inadequate nail preparation or polish touching skin | Clean nail beds thoroughly and leave small gap between polish and cuticle area |
Nail Design Variations
| Style | Description | Best Occasion |
|---|---|---|
| Full Whale Shark Pattern | Complete spotted design covering all nails with varying spot sizes | Beach vacations, summer events, aquarium visits |
| Accent Nail Silhouette | Nude base with single accent nail featuring whale shark swimming across | Professional settings, everyday wear, subtle statement |
| Underwater Scene | Gradient blue background with whale shark and ocean elements | Special occasions, photo shoots, marine fundraisers |
| Minimalist Line Art | Simple black outline of whale shark on light neutral background | Modern aesthetics, minimalist fashion, artistic events |
| Glitter Ocean Gradient | Blue to white ombre with whale shark spots and shimmer particles | Evening events, parties, festival season |
| 3D Textured Design | Raised dots and sculpted elements creating dimensional whale shark effect | Nail competitions, editorial work, luxury clients |
| Abstract Interpretation | Artistic representation using whale shark colors and patterns loosely | Creative professionals, art gallery events, personal expression |
Nail Care and Maintenance
Maintaining whale shark nail designs requires consistent care to preserve both the artistic details and nail health underneath. Apply cuticle oil twice daily, focusing on the nail perimeter where lifting commonly begins. Quality cuticle oil penetrates the gel layers slightly, maintaining flexibility that prevents cracking. Avoid exposing your manicure to harsh chemicals by wearing gloves during cleaning tasks or dish washing.
Keep nails properly hydrated by drinking adequate water and using hand cream specifically formulated for gel manicures. The intricate details in whale shark nail designs show wear more noticeably than solid colors, making maintenance crucial. Inspect your manicure daily for any lifting or chipping, addressing small issues immediately before they expand. Avoid using your nails as tools for opening cans or scratching surfaces, which compromises the gel seal.
Schedule fills or complete manicure refreshes every 2-3 weeks depending on your natural nail growth rate. The detailed artwork in whale shark nail designs often looks best when fresh, so consider slightly shorter maintenance intervals compared to simple manicures. Protect your investment by applying a thin layer of top coat at home every 5-7 days to refresh shine and add protective barrier. Store your hands away from direct sunlight when possible, as prolonged UV exposure can cause color fading in detailed designs.
How to Remove Gel Nails Safely
- File the shiny top coat layer gently using a coarse nail file to break the seal.
- Soak cotton pads in pure acetone until completely saturated with product.
- Place acetone-soaked pads directly onto each nail surface covering the entire design.
- Wrap each fingertip with small pieces of aluminum foil to secure pads and prevent evaporation.
- Wait 10-15 minutes allowing the acetone to break down the gel polish layers.
- Remove foil wraps and gently push softened gel off using a wooden cuticle pusher.
- Avoid forcing or scraping gel if resistance occurs; re-wrap and soak for additional time.
- Buff away any remaining residue using a fine-grit buffer with light pressure.
- Wash hands thoroughly with soap and water to remove acetone traces.
- Apply nourishing cuticle oil and rich hand cream to rehydrate nails and surrounding skin.
Nail Health and Safety
Protecting natural nail health while enjoying elaborate whale shark nail designs requires balanced approaches to application and maintenance. Over-filing the nail plate during preparation removes protective layers that prevent moisture loss and bacterial entry. Dermatologists recommend filing only until the shine disappears, avoiding aggressive buffing that thins nails excessively. Allow natural nails to breathe between gel applications by taking short breaks every few months.
Watch for signs of nail damage including yellowing, brittleness, white spots, or separation from the nail bed. These symptoms indicate the need for immediate removal and recovery time. Fungal infections can develop under lifted gel polish, so address any gaps between product and nail immediately. Maintain proper salon hygiene by ensuring technicians sterilize tools between clients or bring your personal implements.
Explore more nail health resources and professional product recommendations at Gel Nails by Lina for maintaining healthy, beautiful nails.
Frequently Asked Questions
How long do gel nails last with detailed designs?
Gel nails with whale shark designs typically last 2-3 weeks with proper application and care. The longevity depends on your natural nail growth rate, daily activities, and maintenance routine. Detailed artwork may show wear slightly sooner than solid colors, especially if exposed to harsh conditions. Applying cuticle oil daily and wearing gloves during housework extends the life of intricate designs significantly.
How do I remove gel nails safely at home?
Remove gel nails safely by soaking them in pure acetone for 10-15 minutes using the foil wrap method. File the top coat first to break the seal, then wrap acetone-soaked cotton pads onto each nail with aluminum foil. Gently push softened gel off with a wooden tool, never forcing or peeling. Follow removal with deep moisturizing treatments to restore hydration to nails and cuticles.
What is the difference between gel nails and acrylic nails for detailed art?
Gel nails offer a smoother, glossier surface ideal for detailed painting while acrylic nails provide a stronger base for 3D embellishments. Gel polish self-levels better, creating even canvases for intricate whale shark patterns without texture interference. Acrylic requires more skill to achieve smooth surfaces but offers superior strength for longer nail extensions. Most nail artists prefer gel for detailed hand-painted designs due to easier correction capabilities.
Why do my gel nails peel after a few days?
Gel nails peel prematurely due to improper nail preparation, oil contamination, or insufficient curing time. Failing to push back cuticles allows gel to adhere to skin rather than nail, causing immediate lifting. Natural nail oils prevent proper bonding if not removed with dehydrator or cleanser before application. Using a quality base coat and capping free edges prevents most peeling issues when combined with thorough preparation.
How can I make my gel nails last longer?
Make gel nails last longer by maintaining proper hydration, avoiding harsh chemicals, and addressing small issues immediately. Apply cuticle oil twice daily to maintain flexibility and prevent cracking at stress points. Wear gloves during cleaning or gardening to protect the gel seal from damage. Avoid extremely hot water which softens gel temporarily, making it more vulnerable to impacts and pressure.
Conclusion
Whale shark nail designs offer creative nail art enthusiasts a unique way to express their love for marine life through stunning manicures. These spotted patterns combine artistic challenge with wearable beauty, suitable for both subtle accent nails and elaborate full sets. With proper techniques, quality products, and consistent maintenance, your whale shark nail designs will capture ocean magic on your fingertips. Start experimenting with these techniques today and discover how marine-inspired nail art elevates your personal style while celebrating the ocean’s gentle giants.