19+ Polka Dot Nail Ideas That Are Too Cute to Ignore

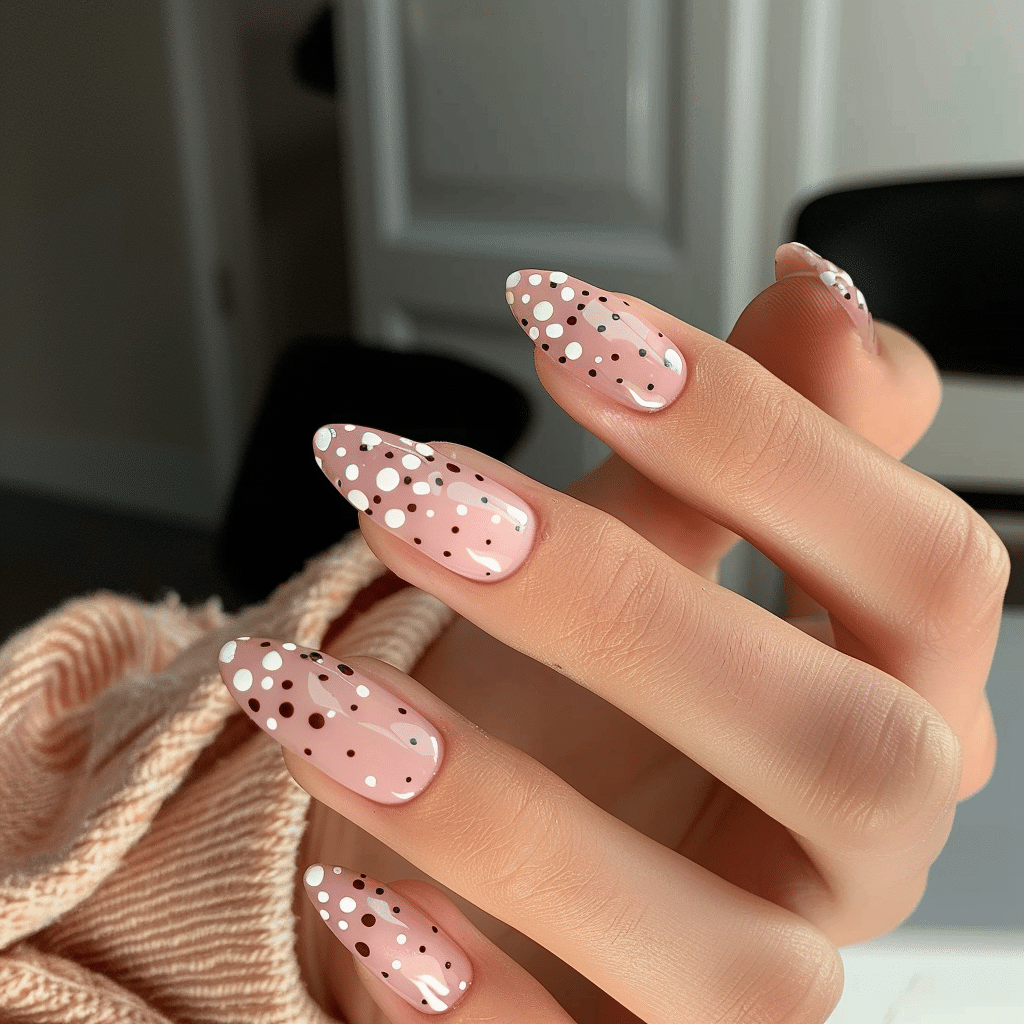
Polka dot nail ideas combine timeless charm with playful elegance, making them one of the most versatile nail art styles.
These delightful patterns work for every occasion from casual outings to formal events, offering endless creative possibilities. Whether you prefer classic black and white dots or vibrant rainbow combinations, polka dot designs remain a favorite among nail enthusiasts worldwide.
| Topic | Details |
|---|---|
| Category | Nail Art |
| Skill Level | Beginner to Intermediate |
| Time Needed | 45-60 minutes |
| Tools Needed | Dotting tool, gel polish, UV/LED lamp, base coat, top coat |
| Best For | Anyone wanting playful, versatile nail designs |
Table of Contents
Why Polka Dot Nail Designs Work
Polka dot nail designs succeed because they balance simplicity with visual impact through strategic placement and color combinations. The repetitive circular pattern creates rhythm and movement across the nails, drawing attention without overwhelming the overall aesthetic. This classic motif adapts seamlessly to different color palettes, nail lengths, and personal styles, making it universally flattering.
The psychology behind polka dots reveals why they remain perpetually popular in fashion and beauty. Circular shapes convey friendliness and approachability while maintaining sophistication when executed properly. These patterns work particularly well with gel polish because the medium allows precise dot placement and maintains crisp edges throughout wear.
Professional nail artists appreciate polka dots for their flexibility in design complexity. Beginners can create charming looks with uniform dots while advanced technicians incorporate gradient dots, negative space, or mixed sizing. This versatility ensures polka dot nail ideas remain relevant across skill levels and trending styles.
Tools and Products Needed
| Product | Purpose | Alternatives |
|---|---|---|
| UV/LED Lamp | Cures gel polish layers | LED-only lamp for faster curing |
| Base Coat | Protects natural nails and ensures adhesion | Peel-off base for easy removal |
| Gel Polish Colors | Creates background and dot colors | Regular polish for non-gel designs |
| Dotting Tool Set | Creates perfect circles in various sizes | Bobby pins, toothpicks, or pencil erasers |
| No-Wipe Top Coat | Seals design and adds shine | Regular gel top coat with cleanser |
| Nail File | Shapes nails to desired length | Glass file for gentler filing |
| Nail Buffer | Smooths nail surface for better adhesion | Fine-grit file |
| Cuticle Oil | Hydrates cuticles and surrounding skin | Vitamin E or jojoba oil |
| Nail Cleanser | Removes oils and debris before application | Isopropyl alcohol 70% |
For professional quality polka dot designs, invest in quality tools from trusted suppliers. Visit Gel Nails by Lina for expert recommendations on gel polish systems and nail art accessories that deliver consistent results.
Step-by-Step Polka Dot Application Guide
Nail Preparation
- Remove any existing polish completely using acetone or gel polish remover to ensure a clean canvas.
- Shape your nails using a quality nail file, moving in one direction to prevent splitting and damage.
- Push back cuticles gently with a cuticle pusher after soaking fingers in warm water for three minutes.
- Buff the nail surface lightly using a nail buffer to create texture for better gel adhesion.
- Cleanse nails thoroughly with nail cleanser or alcohol to remove oils, dust, and moisture from the surface.
- Apply dehydrator or nail primer if working with oily nail beds that tend to lift easily.
Base Coat Application
- Apply a thin layer of gel base coat, avoiding contact with cuticles and skin around the nail.
- Cap the free edge by running the brush along the nail tip to prevent chipping.
- Cure under UV lamp for 60 seconds or LED lamp for 30 seconds according to manufacturer guidelines.
- Check that the base coat is completely dry and tacky to the touch before proceeding.
Gel Polish Base Color Layers
- Select your background color and apply the first thin coat from cuticle to tip using smooth strokes.
- Maintain thin layers to prevent bubbling, wrinkling, or incomplete curing during the lamp process.
- Cure the first color coat for the recommended time based on your specific gel brand.
- Apply a second thin coat of base color for opacity and depth, ensuring even coverage.
- Cure the second coat completely before adding polka dot details to prevent smudging.
Creating Perfect Polka Dots
- Dip your dotting tool into gel polish, wiping excess on a paper towel for controlled application.
- Press the dotting tool perpendicular to the nail surface, creating uniform pressure for consistent size.
- Create your desired pattern whether random placement, straight lines, or graduated sizing across the nail.
- Work on one or two nails at a time to maintain control over wet polish.
- Cure each completed nail or hand before continuing to prevent accidental smudging during the process.
- Layer additional dot colors if creating multicolored designs, curing between each color application.
Finishing and Top Coat
- Allow dots to cure completely before applying top coat to avoid dragging or blending colors.
- Apply a thin layer of gel top coat over the entire nail, sealing all design elements.
- Cap the free edge again with top coat for maximum chip resistance and longevity.
- Cure the top coat for the full recommended time to ensure a hard, glossy finish.
- Wipe away the tacky residue using cleanser and a lint-free wipe if using regular gel top coat.
- Apply cuticle oil around the nail edges to hydrate and nourish the surrounding skin.
Pro Nail Technician Tips for Polka Dot Designs
- Use a dotting tool size chart to plan your design before starting, ensuring consistent sizing across all nails for a professional finish.
- Clean your dotting tool between each dot application to maintain crisp edges and prevent color contamination throughout your design.
- Practice dot placement on paper or a practice wheel before working on actual nails to develop muscle memory and placement confidence.
- Avoid overloading the dotting tool with polish as excess product creates irregular shapes and longer curing times that compromise results.
- Cure polka dots thoroughly before top coat application to prevent flattening or spreading that diminishes the dimensional quality of your design.
- Create visual interest by varying dot sizes within the same design, using larger dots as focal points and smaller ones as accents.
Professional nail artists recommend investing in quality dotting tools with comfortable grips for precision work. Learn more advanced techniques and design inspiration at Gel Nails by Lina where expert tutorials cover complex nail art methods.
Common Polka Dot Nail Mistakes
| Mistake | Why it Happens | How to Fix |
|---|---|---|
| Irregular Dot Sizes | Inconsistent pressure or polish amount on tool | Practice uniform pressure and reload tool with same amount each time |
| Dots Bleeding Together | Placing dots too close or using overly thin polish | Space dots appropriately and use properly pigmented gel polish |
| Flattened Dots After Top Coat | Insufficient curing time before sealing | Cure dots fully and apply top coat in thin layer without pressure |
| Smudged Polka Dots | Touching nails before curing or rushing the process | Cure immediately after creating dots and avoid contact until hardened |
| Uneven Pattern Distribution | Lack of planning before dot placement | Map out design mentally or with markers before applying polish |
19+ Polka Dot Nail Design Variations
| Style | Description | Best Occasion |
|---|---|---|
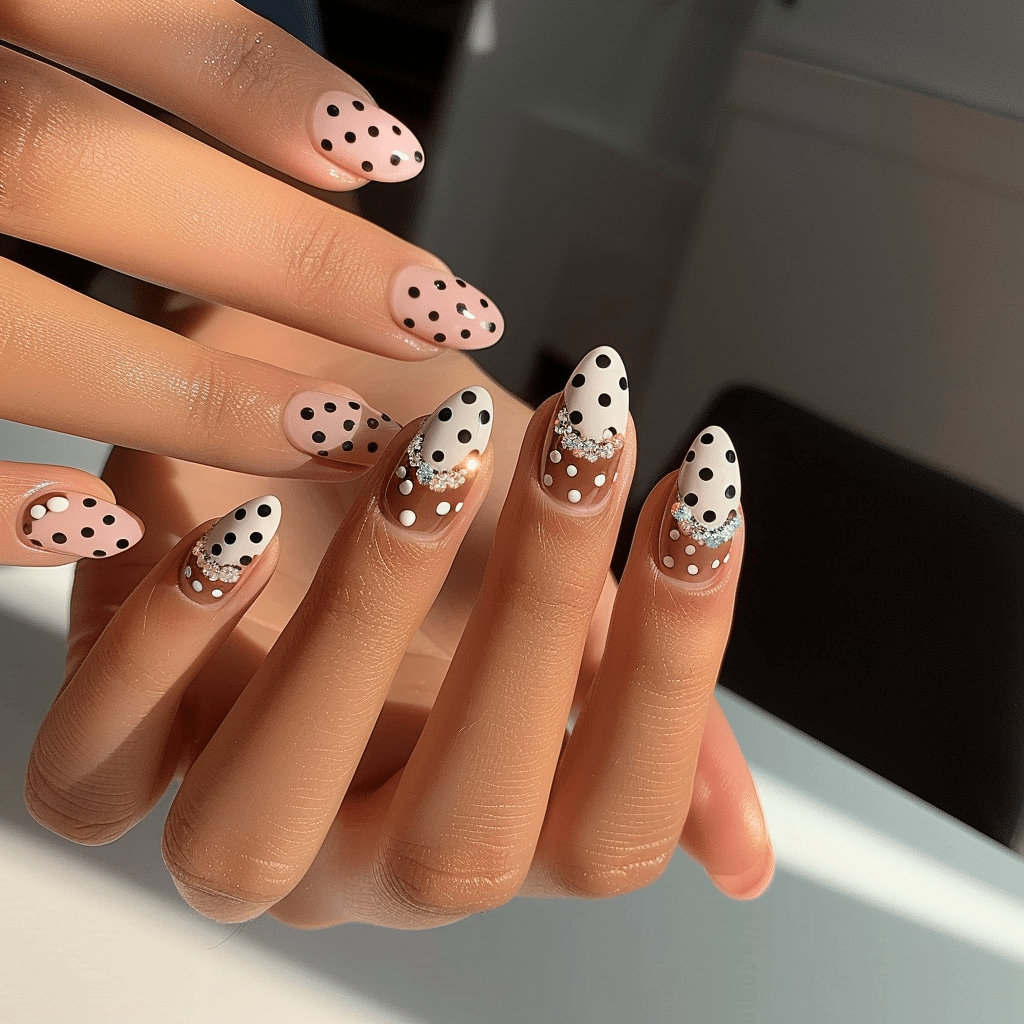
| Classic Black and White | Timeless combination with white base and black dots or vice versa | Professional settings, formal events, everyday wear |
| Rainbow Polka Dots | Multicolored dots on neutral base creating playful, vibrant look | Summer outings, festivals, casual parties |
| Pastel Polka Perfection | Soft colored dots on white or nude background for subtle elegance | Spring weddings, bridal showers, Easter celebrations |
| Metallic Dot Glamour | Gold, silver, or rose gold dots adding luxury to any base color | Holiday parties, New Year celebrations, anniversaries |
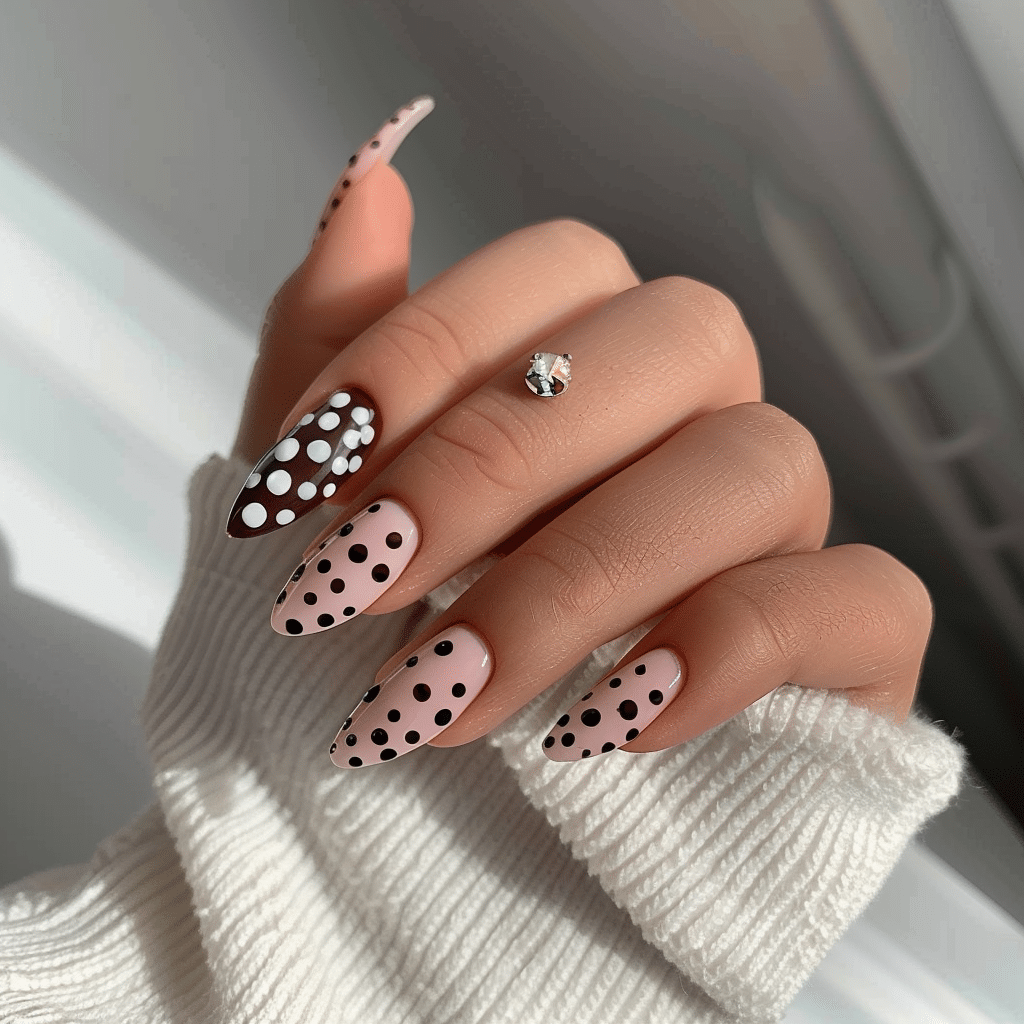
| Reverse Polka Dots | Dark base with bright or white dots creating dramatic contrast | Evening events, nightclub outings, bold fashion statements |
| Gradient Polka Dots | Dots transitioning in size or color across the nail creating ombre effect | Creative photoshoots, artistic events, fashion-forward occasions |
| French Tip Polka Dots | Traditional French manicure with dots along the smile line or tip area | Weddings, business meetings, sophisticated gatherings |
| Negative Space Dots | Dots surrounding bare nail areas for modern minimalist aesthetic | Contemporary art events, modern fashion shows, trendy venues |
| Glitter Polka Explosion | Glitter gel dots on solid base creating sparkly dimensional effect | Birthday parties, celebrations, festive holidays |
| Monochromatic Polka Dots | Various shades of same color family in dot pattern | Professional environments, elegant dinners, sophisticated events |
| Neon Polka Party | Bright fluorescent dots on black or white base for high visibility | Music festivals, beach parties, summer nights out |
| Tiny Dot Confetti | Multiple small dots scattered randomly like confetti | Birthday celebrations, New Year parties, fun gatherings |
| Half Moon Polka Dots | Dots combined with half moon design at cuticle area | Vintage themed events, retro parties, creative occasions |
| Polka Dot French Ombre | Dots fading from dense to sparse creating gradient illusion | Weddings, romantic dinners, photo sessions |
| Diagonal Polka Lines | Dots arranged in diagonal lines across the nail | Modern events, geometric fashion themes, contemporary settings |
| Seasonal Polka Designs | Holiday colors and patterns like red-green for Christmas, orange-black for Halloween | Holiday celebrations, seasonal parties, themed events |
| Accent Nail Polka Dots | Polka dots on one or two accent nails with solid complementary color on others | Everyday wear, office appropriate style, subtle statements |
| Vintage Pin-Up Polka Dots | Classic red base with white dots or vice versa in retro styling | Vintage car shows, retro events, rockabilly gatherings |
| Matte Polka Combination | Glossy dots on matte base or matte dots on glossy base for texture contrast | Fashion events, artistic gatherings, modern celebrations |
| Animal Print Polka Fusion | Combining animal prints with polka dots for eclectic bold look | Fashion-forward events, creative parties, statement occasions |
Explore endless variations of these polka dot nail ideas by experimenting with different color combinations and placement patterns. The beauty of this design lies in its adaptability to personal style preferences and seasonal trends.
Nail Care and Maintenance for Polka Dot Designs
Maintaining polka dot gel nails requires consistent care to preserve the design integrity and nail health throughout wear. Apply cuticle oil daily around the nail edges to prevent dryness and maintain flexibility in the gel polish layers. This practice reduces lifting and keeps the surrounding skin hydrated, extending the life of your manicure significantly.
Wear protective gloves when performing household tasks involving water, chemicals, or harsh detergents that compromise gel polish integrity. Excessive water exposure causes gel layers to separate from the natural nail, leading to premature lifting and chipping. Protect your investment by taking simple precautions during daily activities.
Avoid using your nails as tools for opening packages, scratching surfaces, or prying objects that create stress on the polish. These actions cause micro-fractures in gel layers that lead to cracks and peeling. When proper care is taken, polka dot gel nails maintain their vibrant appearance for two to three weeks.
Schedule regular maintenance appointments every two to three weeks to address regrowth and maintain nail health. Professional nail technicians can assess the condition of your natural nails and recommend treatments if needed. Visit Gel Nails by Lina for guidance on maintaining beautiful gel manicures between salon visits.
How to Remove Polka Dot Gel Nails Safely
Safe gel nail removal protects your natural nails from damage and maintains nail bed health for future manicures. Begin by filing away the shiny top coat layer with a coarse nail file, breaking the seal to allow acetone penetration. This step significantly reduces soaking time and prevents excessive exposure to harsh chemicals.
Soak cotton pads in pure acetone and place them directly on each nail, ensuring complete coverage of the gel surface. Wrap each finger tightly with aluminum foil to trap heat and accelerate the breakdown process. Allow nails to soak for 10 to 15 minutes before checking if gel has softened sufficiently.
Gently push softened gel away from the nail using a wooden cuticle stick or metal pusher, applying minimal pressure to avoid nail bed damage. Never force or scrape gel that has not fully dissolved as this removes layers of natural nail. If gel remains stubborn, rewrap and soak for an additional five minutes.
Nail Health and Safety Considerations
Maintaining natural nail health while enjoying polka dot gel designs requires understanding proper application and removal techniques. Over-filing the nail surface removes protective layers that guard against infections and brittleness. Always file gently and minimally, creating just enough texture for gel adhesion without compromising nail integrity.
Allow natural nails to breathe between gel applications by taking breaks every two to three months. This recovery period lets nails regain moisture and strength lost during repeated gel application cycles. During breaks, apply strengthening treatments and maintain regular cuticle oil application for optimal nail health.
Watch for signs of nail damage including discoloration, brittleness, persistent lifting, or pain around the nail bed. These symptoms may indicate fungal infections, allergic reactions, or over-processing that requires professional medical attention. Consult a dermatologist if you experience persistent nail problems beyond normal wear patterns.
Frequently Asked Questions About Polka Dot Gel Nails
How long do polka dot gel nails last?
Polka dot gel nails typically last two to three weeks with proper application and maintenance care. The longevity depends on factors including nail preparation quality, gel polish brand, curing time, and daily wear activities. Applying cuticle oil daily and avoiding harsh chemicals extends the lifespan of your polka dot manicure significantly.
How do I remove polka dot gel nails safely at home?
Remove polka dot gel nails by filing the top coat, soaking nails in acetone-soaked cotton pads wrapped with foil for 10 to 15 minutes. Gently push softened gel away with a wooden stick without forcing or scraping the natural nail surface. Always moisturize thoroughly after removal and avoid peeling or picking at gel polish to prevent damage.
What is the difference between gel nails and acrylic nails for polka dot designs?
Gel nails cure under UV or LED light and offer a more natural flexible finish ideal for detailed polka dot designs with crisp edges. Acrylic nails air dry and create a harder more durable surface but can appear thicker and less natural. Gel polish allows easier color blending and smoother application for intricate nail art like polka dots.
Why do my polka dot gel nails peel or lift after a few days?
Gel nails peel due to inadequate nail preparation, oil residue on the nail surface, thick polish layers, or insufficient curing time. Proper dehydration before application, thin even coats, complete curing, and avoiding cuticle contact prevent premature lifting. Using quality base coat and avoiding water exposure in the first 24 hours also improves adhesion significantly.
How can I make my polka dot gel nails last longer?
Make polka dot gel nails last longer by applying thin polish layers, curing properly between coats, using quality products, and capping the free edge. Daily cuticle oil application, wearing gloves during household tasks, and avoiding nail-biting or picking extends manicure life. Proper removal without peeling also maintains natural nail health for better future adhesion.
Conclusion
Polka dot nail ideas offer timeless versatility that adapts to any style preference, skill level, or occasion with endless creative possibilities. From classic black and white combinations to vibrant rainbow patterns, these charming designs remain perpetually fashionable and accessible. Master the techniques outlined in this guide to create professional quality polka dot manicures that showcase your personal style. Experiment with the 19 plus design variations presented here to discover your favorite polka dot nail looks that are truly too cute to ignore.