Every October, the same thing happens in our house. The leaves start turning, someone spots a scarecrow on a neighbor’s porch, and suddenly I hear it: “Can we make one?”
A real, life-size scarecrow with old jeans and a bale of straw? Not on a Tuesday afternoon, thank you. But a mini one made from an empty paper roll? That I can do. And honestly, the kids love the little version just as much, maybe more, because they get to make the whole thing themselves.
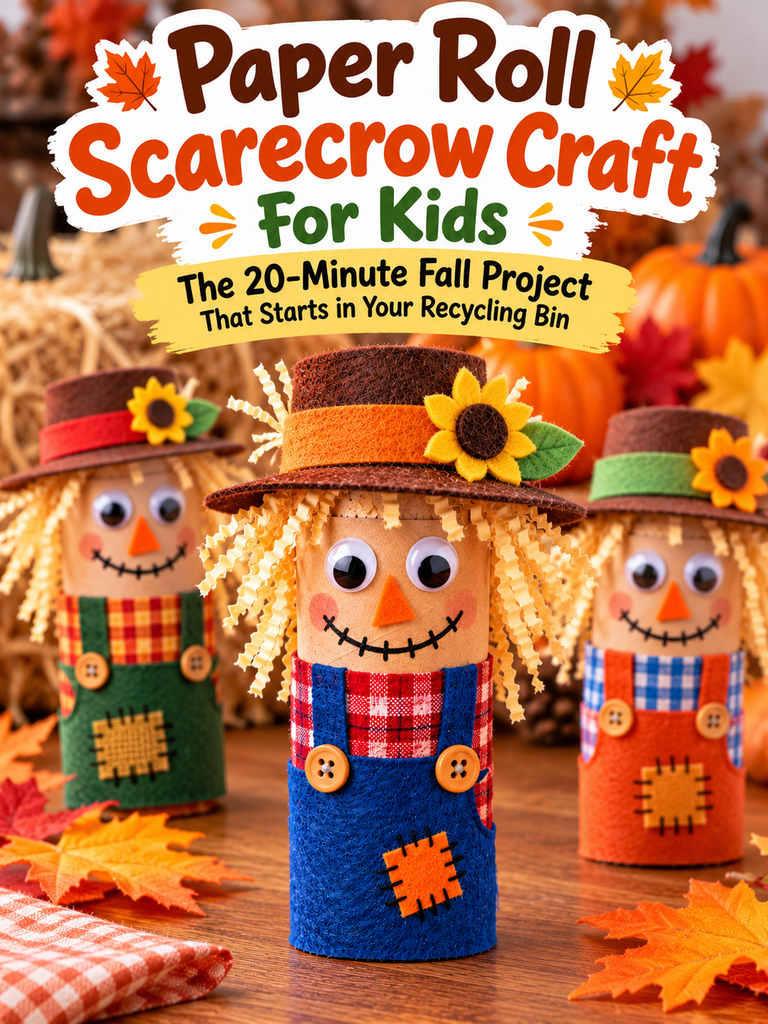
This paper roll scarecrow takes about 20 minutes, uses stuff you probably already have, and ends up looking adorable on a windowsill or a classroom shelf. Let me walk you through it.
Table of Contents
Quick Takeaways (If You’re Short on Time)
- What you need: a paper roll, felt or construction paper, googly eyes, crinkle-cut shred paper, a black marker, and glue.
- Time: about 20 minutes, plus a little drying time.
- Best for: preschoolers, kindergartners, and older kids, at home or in the classroom.
- No felt? No problem. Construction paper works just as well, and a marker can stand in for googly eyes.
- Bonus: it’s a recycling craft, so you’re quietly teaching kids that “trash” can become something new.
Wait, Why Do Scarecrows Even Exist?
Here’s a fun conversation starter before you start cutting. Scarecrows weren’t originally decorations at all. Farmers put them up in their fields to frighten crows and other birds away from the crops they’d worked so hard to grow.
These days, they’ve switched jobs. Most scarecrows you’ll see are there to look cheerful in gardens and on front porches. There are even scarecrow festivals in towns all over the world, where people line the streets with the funniest, most creative ones they can build.
I like sharing this with kids before we craft, because it turns a “glue this here” activity into a little story. Ask them: Would your scarecrow actually scare a bird? Or would it make friends with one? You’ll get some great answers.
Why Paper Roll Crafts Are a Parent’s (and Teacher’s) Best Friend
I’ll be honest: I have a box under my craft table that is nothing but empty toilet paper and paper towel rolls. My family teases me about it. But that box has saved more rainy afternoons than I can count.
Paper rolls are free, sturdy enough for little hands, and they already have a shape that looks like a body. Add paint or colored paper and they become practically anything: animals, trees, mushrooms, and yes, scarecrows.
There’s a quieter lesson in there too. When kids see a roll go from the recycling bin to a smiling scarecrow, they start to understand that we don’t have to throw everything away. That’s a habit worth building early.
What You’ll Need
- 1 paper roll (toilet paper size is perfect)
- Felt in two or three colors (or construction paper)
- Googly eyes
- Crinkle-cut shred paper, the kind used to fill gift baskets
- A black marker
- Glue
- Scissors (and a stapler, optional)
A small tip from experience: a glue stick is fine for paper, but felt holds much better with tacky craft glue or a low-temp glue gun (grown-ups only for the glue gun, of course).
How to Make a Paper Roll Scarecrow, Step by Step
Step 1: Give him some clothes
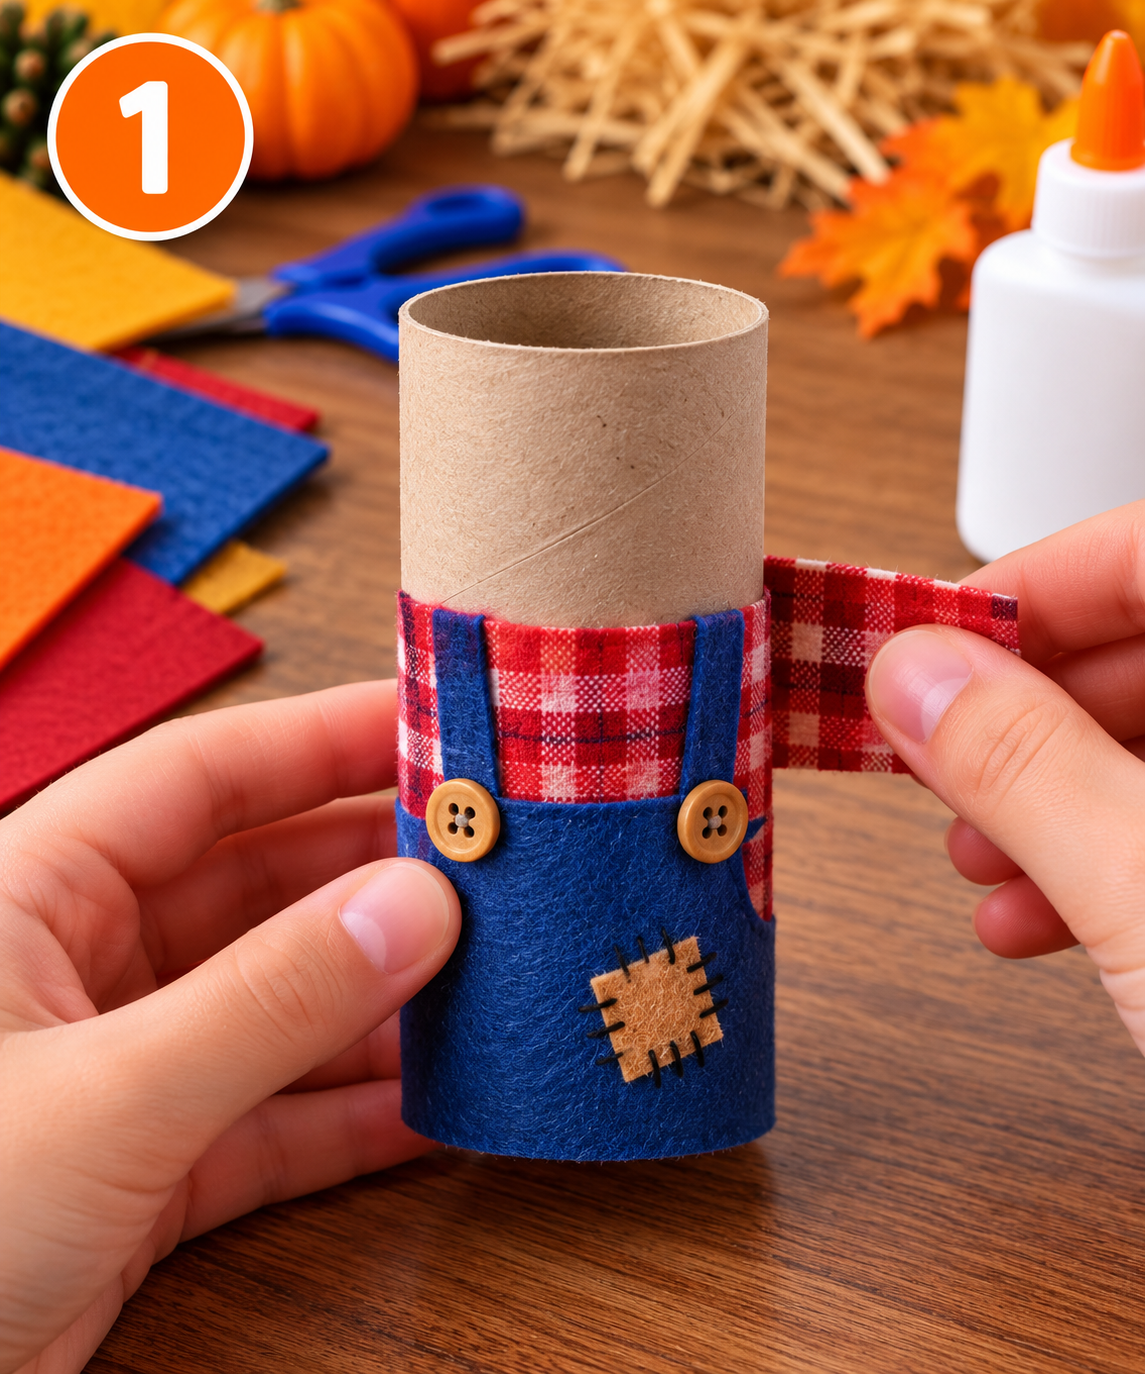
Cut a strip of felt or construction paper and glue it around the bottom part of the paper roll. This becomes your scarecrow’s shirt or overalls. Plaid-looking colors like red, blue, or mustard yellow give it that classic farm look.
Step 2: Add the straw hair
Glue a small bundle of crinkle-cut shred paper to the top of the roll so it sticks out like straw. If the glue isn’t holding, just staple it in place. Nobody will notice once the hat goes on, I promise.

Step 3: Make the hat brim
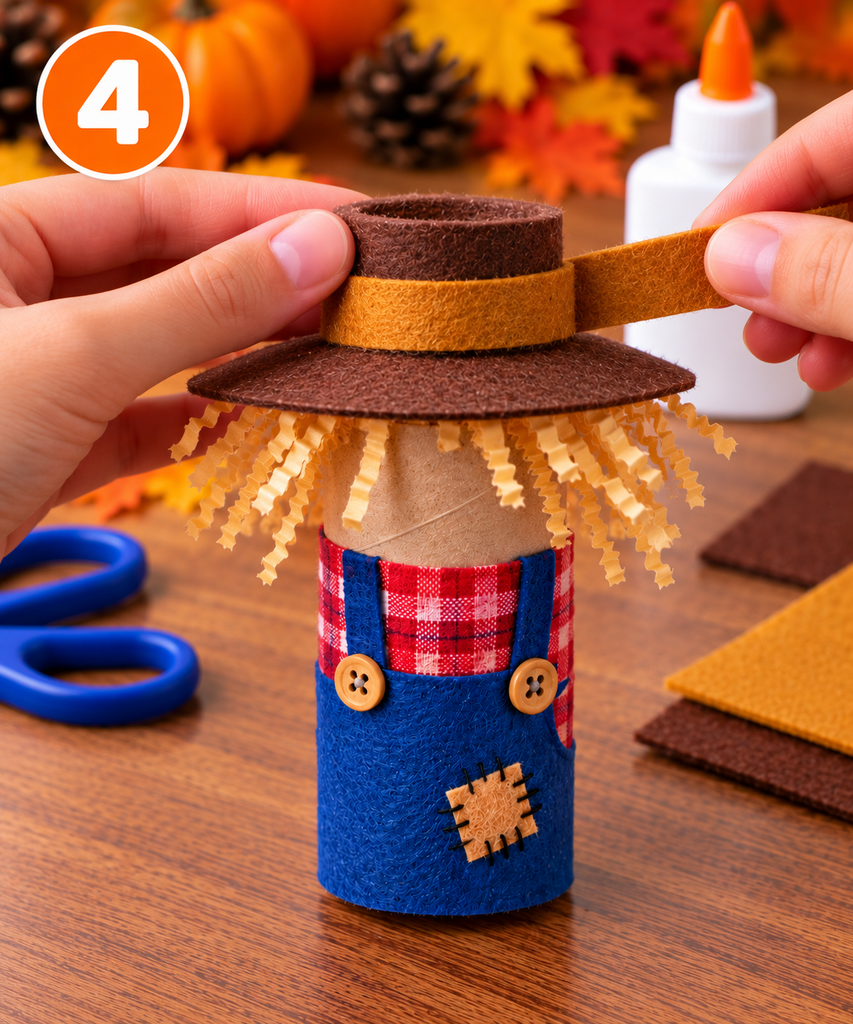
Cut a ring out of felt, construction paper, or craft foam. It should be just wide enough to slide over the top of the roll. Push it down gently until it sits over the hair like a hat brim.

Step 4: Finish the hat
Cut a strip of matching felt and glue it around the top of the roll, just above the brim. Now your scarecrow has a proper hat.
Step 5: Bring him to life
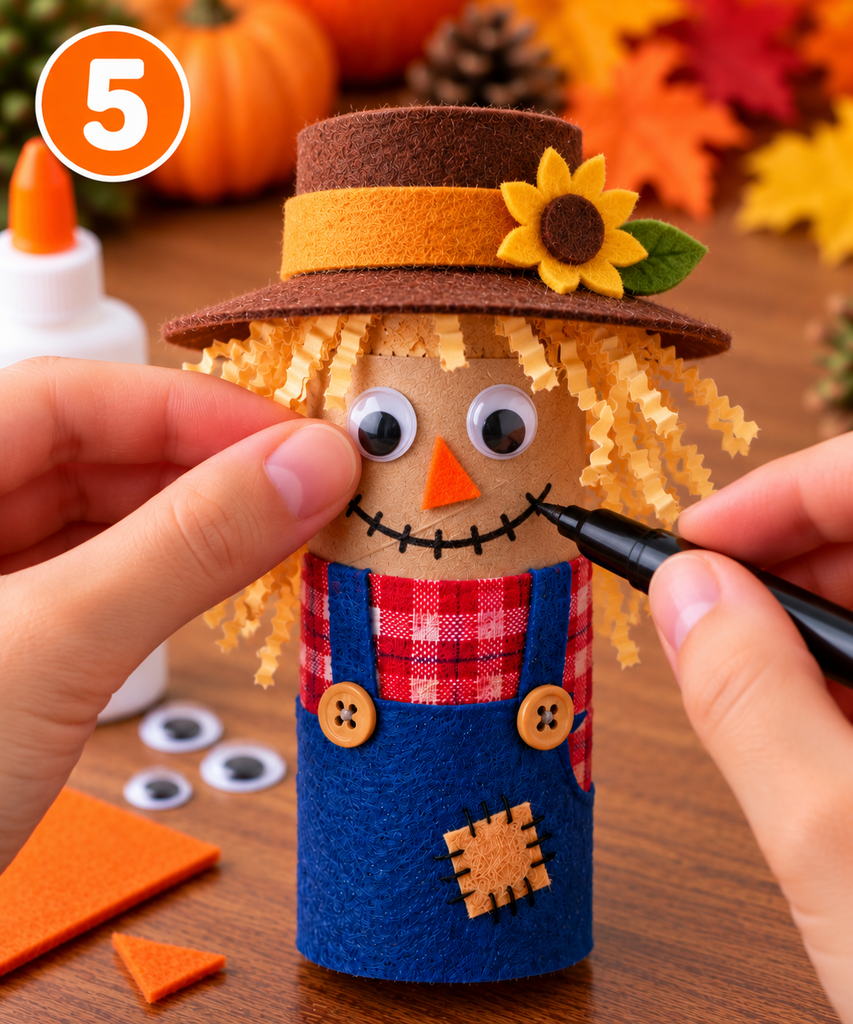
Stick on the googly eyes, glue on a little nose cut from felt (orange triangle = instant carrot nose), and draw a mouth with the black marker. Stitched-looking smiles are my favorite. Just draw a curved line with tiny dashes across it.
And that’s it. Set him somewhere to dry, and try not to smile every time you walk past.
Easy Swaps and Variations
Don’t let a missing supply stop you. Here are the substitutions that work:
- No felt? Use construction paper for the clothes and hat.
- No googly eyes? Draw the eyes with a black marker.
- No shred paper? Yarn, real straw, or thin strips of yellow and orange paper make great hair.
- No foam for the brim? Felt or a thicker piece of cardstock holds its shape well.
Want to take it further? Try painting the roll first instead of wrapping it, add a tiny felt patch to the clothes, or glue a small paper crow on his shoulder. Kids who finish early love a “decorate it however you want” challenge.
Adapting It for Different Ages
Toddlers and young preschoolers: Pre-cut every piece ahead of time. Let them do the gluing and sticking. That’s the fun part anyway. Keep a close eye on googly eyes, since small pieces are a choking hazard for little ones; drawn eyes are the safer pick here.
Preschool and kindergarten: Let them cut the straight strips themselves with kid-safe scissors. Cutting the hat ring is trickier, so a grown-up might need to help with that one.
Older kids: Hand them the materials and step back. You’ll be surprised how much personality they give their scarecrows: freckles, bow ties, eyebrows, even little names.
Making It Work in the Classroom
If you’re a teacher, this craft is a great fit for a fall unit. A few things that make it smoother with a group:
- Prep “kits” in zip bags the night before: one roll, pre-cut strips, a ring, and a pinch of shred paper.
- Pair it with a scarecrow picture book or a short chat about farms and harvest time.
- Line the finished scarecrows up on a windowsill as a “scarecrow festival.” The kids will walk past it with pride all week.
It also sneaks in real skills: cutting and gluing build fine motor control, and choosing colors and faces gives kids a chance to make creative decisions on their own.
Common Questions
How long does this craft take?
Around 15 to 20 minutes of crafting for most kids, plus drying time if you used liquid glue.
Can I use a paper towel roll instead?
Yes. Just cut it in half, or keep it long for a tall, skinny scarecrow. Both look great.
What age is this craft best for?
It works from preschool up. Younger kids will need pieces pre-cut, and older kids can do it start to finish on their own.
How can I make it sturdier for display?
Glue a cardboard circle to the bottom of the roll so it stands without tipping, and use craft glue instead of a glue stick for the felt.
Before You Go
Remember that “Can we make one?” moment I started with? This little scarecrow is my favorite answer to it. It’s quick, it’s cheap, it uses something we’d otherwise toss, and every single one comes out with its own personality. No two scarecrows ever look the same, and honestly, that’s the best part.
So grab a paper roll from the recycling bin, pull out the felt scraps, and give it a go this week. Your kids get a cute fall decoration, and you get 20 peaceful minutes. Everyone wins.
Now I’d love to hear from you: what did your kids name their scarecrow? Share a photo or tell me in the comments. And if you’re hunting for more ideas this season, take a look at our other fall and paper roll crafts. There’s plenty more where this came from.