Easy Beach Nails Designs

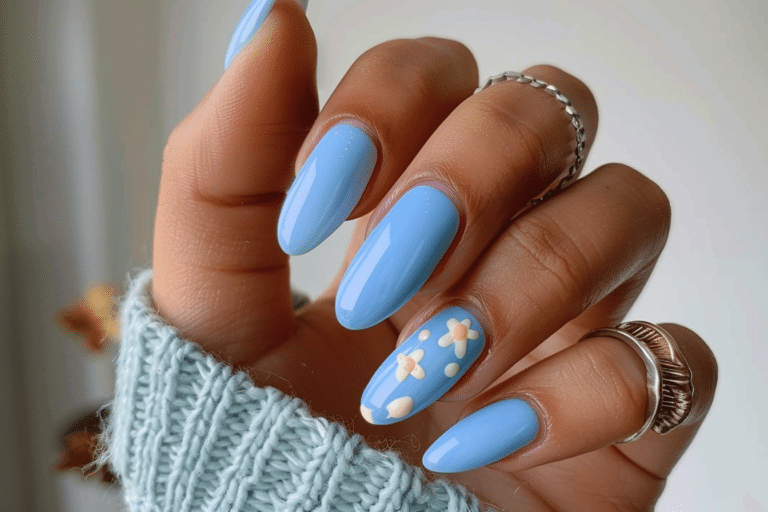
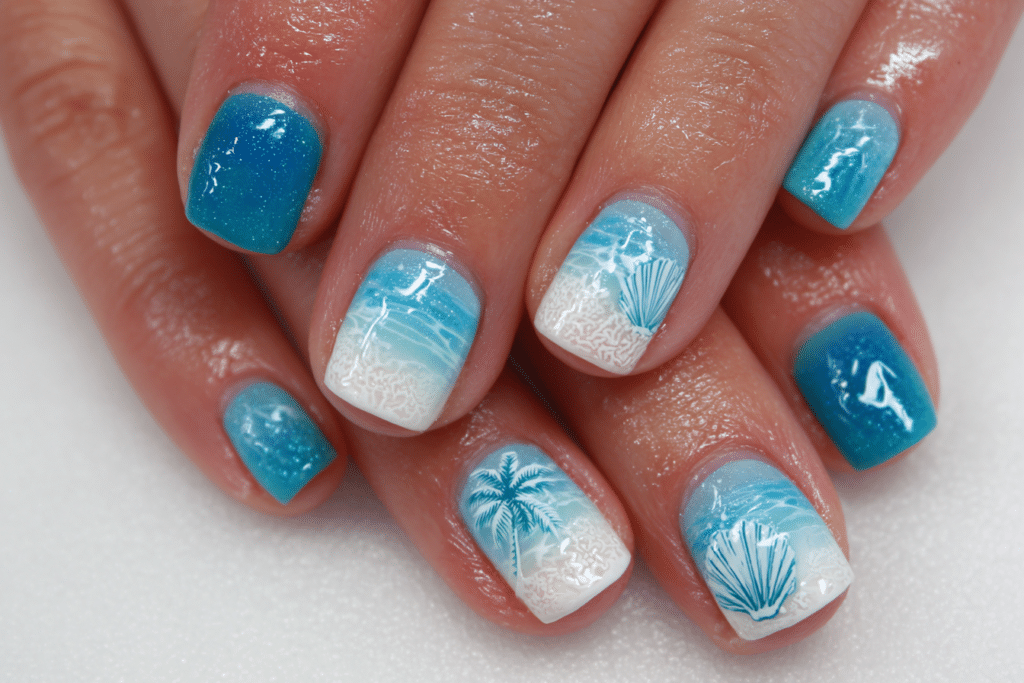
Easy beach nails designs capture the essence of summer with ocean-inspired colors, tropical patterns, and coastal themes that transport you to sandy shores.
These fun and vibrant nail art styles incorporate seashells, waves, palm trees, and sunset gradients to create the perfect vacation-ready manicure. Beach-themed gel nails are ideal for summer getaways, pool parties, or simply bringing seaside vibes to your everyday look.
| Topic | Details |
| Category | Nail Art / Gel Nails |
| Skill Level | Beginner to Intermediate |
| Time Needed | 45-90 minutes |
| Tools Needed | UV/LED lamp, gel polish, nail art brushes, dotting tools |
| Best For | Summer vacations, beach lovers, tropical themed events |
Table of Contents
Why Beach Nail Designs Work
Beach nail designs work exceptionally well because they allow for creative expression while maintaining versatility in color combinations and complexity levels. The ocean and coastal themes provide endless inspiration, from simple blue ombre gradients mimicking water to intricate seashell details and palm tree silhouettes. These designs tap into universal feelings of relaxation, vacation, and warm weather that resonate with clients seeking seasonal nail art.
The color palettes used in beach nails naturally complement most skin tones, featuring turquoise, coral, sandy beige, and sunset oranges that reflect natural coastal environments. Gel polish formulas work particularly well for beach designs because they maintain their vibrant colors and glossy finish despite exposure to water, sun, and sand. The durability of gel manicures makes them perfect for vacation wear when you want your nails to look flawless throughout your trip.
Beach-inspired nail art also offers flexibility in design complexity, allowing beginners to create simple wave patterns or color blocks while more advanced nail artists can incorporate detailed seascapes and three-dimensional elements. This adaptability makes beach nails accessible to everyone, regardless of skill level, while still delivering stunning visual impact.
Tools and Products Needed
| Product | Purpose | Alternatives |
| UV/LED Lamp | Cures gel polish layers | Higher wattage lamps for faster curing |
| Base Coat | Protects natural nails and ensures adhesion | Strengthening base coat for weak nails |
| Gel Polish Colors | Blue, turquoise, coral, white, beige, yellow shades | Regular polish for non-gel option |
| Top Coat | Seals design and adds shine | Matte top coat for textured finish |
| Nail File | Shapes nails and prepares surface | Glass file for gentler filing |
| Nail Buffer | Smooths nail surface | Fine grit buffer block |
| Cuticle Oil | Hydrates cuticles and nails | Vitamin E oil or jojoba oil |
| Nail Art Brushes | Creates detailed designs like waves and palm trees | Toothpick for simple dots |
| Dotting Tools | Makes perfect circles and dots | Bobby pin as substitute |
| Nail Cleanser | Removes tacky layer and cleanses surface | Isopropyl alcohol 70% or higher |
For professional quality results and a wide selection of gel polish colors perfect for beach designs, visit Gel Nails by Lina for expert recommendations and tutorials.
Step-by-Step Application Guide for Easy Beach Nails Designs
Nail Preparation
- Wash your hands thoroughly with soap and dry them completely to remove any oils or residue.
- Push back cuticles gently using a cuticle pusher or orangewood stick to create a clean nail bed.
- File your nails into your desired shape, whether square, round, almond, or coffin style.
- Buff the nail surface lightly to remove shine and create texture for better gel adhesion.
- Wipe nails with nail cleanser or alcohol to remove all dust and oils from the nail plate.
Base Coat Application
- Apply a thin layer of gel base coat to each nail, avoiding the cuticle area and skin.
- Cap the free edge by running the brush along the tip to prevent chipping.
- Cure nails under the UV/LED lamp according to manufacturer instructions, typically 30-60 seconds.
- Check that the base coat has cured completely and feels dry to the touch.
Gel Polish Layers
- Apply your chosen beach-inspired base color, such as sky blue, sandy beige, or coral pink.
- Use thin, even coats to prevent bubbling and ensure proper curing throughout the layer.
- Cure the first color layer under the lamp for the recommended time based on your gel brand.
- Apply a second coat of the base color for full opacity and vibrant color payoff.
- Cure the second layer completely before proceeding to nail art details.
Creating Beach Designs
- Choose your beach design elements, such as waves, palm trees, seashells, or sunset gradients.
- Use a thin nail art brush dipped in white gel polish to create wave designs or foam details.
- Create palm tree silhouettes using brown gel for trunks and green for fronds on accent nails.
- Add small dots in white or gold to represent sand, starfish, or shells using a dotting tool.
- Cure each design layer to prevent smudging before adding additional details or colors.
- Build up designs gradually with multiple thin layers rather than one thick application.
Finishing and Top Coat
- Apply a generous layer of gel top coat over the entire nail, including all design elements.
- Cap the free edge again to seal the tips and extend the longevity of your manicure.
- Cure the top coat for the full recommended time to ensure a hard, glossy finish.
- Wipe away the tacky residue layer using nail cleanser on a lint-free pad.
- Apply cuticle oil around each nail and massage it into the skin for hydration and shine.
Pro Nail Technician Tips
- Layer lighter colors over darker bases to create realistic water depth effects that mimic actual ocean gradients and make your beach designs more dimensional.
- Use a sponge technique with multiple blue shades to create ombre waves that blend seamlessly from turquoise to deep navy blue.
- Cure each design element separately when creating complex beach scenes to prevent colors from bleeding into each other and maintain clean lines.
- Keep polish application thin on detailed designs to avoid prolonged curing times that can lead to heat spikes and discomfort under the lamp.
- Seal hand-painted details with a layer of clear gel before applying top coat to prevent smudging and preserve intricate artwork.
- Store tropical colored gel polishes away from direct sunlight to prevent fading and maintain the vibrant hues essential for beach nail designs.
For more professional techniques and design inspiration, explore the tutorials available at Gel Nails by Lina where expert nail artists share their coastal nail art secrets.
Common Gel Nail Mistakes
| Mistake | Why It Happens | How to Fix |
| Thick gel layers causing wrinkling | Applying too much product at once prevents proper curing | Use thin coats and cure between each layer |
| Design bleeding or smudging | Not curing between colors or using wet brushes | Cure each color and clean brushes with cleanser |
| Gel polish flooding cuticles | Applying polish too close to skin or using too much product | Leave small gap at cuticle and use minimal pressure |
| Dull or tacky finish | Insufficient curing time or expired top coat | Cure full time and replace old products |
| Lifting at free edge | Skipping edge capping or improper nail preparation | Always cap edges and dehydrate nails properly |
Beach Nail Design Variations
| Style | Description | Best Occasion |
| Ocean Waves | Blue gradient with white foam details and wave patterns | Beach vacations, cruise trips |
| Tropical Sunset | Orange, pink, and purple ombre with palm tree silhouettes | Summer parties, resort wear |
| Seashell Accents | Nude base with hand-painted or 3D shell embellishments | Beach weddings, elegant events |
| Starfish and Sand | Sandy beige with starfish designs and gold shimmer | Casual summer outings |
| Nautical Stripes | Navy and white stripes with anchor or rope details | Boat trips, coastal events |
| Mermaid Scales | Iridescent scales using stencils in ocean colors | Pool parties, fun summer looks |
| Coral Reef | Bright corals and turquoise with tropical fish accents | Vacation nails, beach destinations |
Nail Care and Maintenance
Maintaining your beach nail designs requires consistent care to preserve both the artistic elements and the health of your natural nails. Apply cuticle oil daily, particularly after exposure to chlorine or salt water, as these environments can dry out the skin around your nails and cause gel polish to lift prematurely. Wear protective gloves when cleaning or doing dishes to prevent harsh chemicals from weakening the gel bond.
Avoid using your nails as tools to open cans or scratch surfaces, as this creates stress points that lead to cracking and chipping. The intricate details in beach nail designs can be delicate, so treat your manicure gently during the first 24 hours after application. Keep your hands moisturized with hand cream throughout the day, focusing on the cuticle area to maintain flexibility and prevent dryness.
Schedule gel manicure touch-ups every two to three weeks to maintain the fresh appearance of your beach designs. If you notice any lifting at the edges, avoid peeling or picking at the gel, as this damages the natural nail plate. Instead, file down any lifted areas gently and apply a thin layer of top coat to seal the edge until you can properly maintain or remove the gel polish.
How to Remove Gel Nails Safely
Safe gel nail removal preserves the health and strength of your natural nails while completely eliminating all gel polish layers. Begin by gently filing the shiny top coat layer with a coarse nail file to break the seal and allow acetone to penetrate the gel layers more effectively. Soak cotton balls or pads in pure acetone and place them directly on each nail, ensuring full coverage of the gel polish.
Wrap each fingertip securely with aluminum foil to hold the acetone-soaked cotton in place and prevent evaporation. Allow nails to soak for 10 to 15 minutes, checking periodically to see if the gel has softened and begun to lift from the nail plate. Once the gel appears dissolved and loose, use an orangewood stick to gently push off the softened gel, working from the cuticle toward the free edge.
Never force or scrape gel polish off your nails, as this removes layers of the natural nail and causes weakness and peeling. If gel remains after the initial soak, rewrap nails with fresh acetone-soaked cotton for an additional five minutes. After complete removal, wash hands thoroughly, buff nails gently to smooth any rough patches, and apply cuticle oil generously to replenish moisture lost during the acetone soak.
Nail Health and Safety
Maintaining nail health while enjoying beach nail designs requires attention to proper application techniques and giving your nails adequate recovery time. Over-filing the natural nail plate to achieve better gel adhesion actually weakens nails and makes them more susceptible to breakage and infection. Professional nail technicians recommend only light buffing to remove shine, preserving the integrity of the nail structure.
Watch for signs of nail damage such as excessive thinning, white spots, or separation of the nail from the nail bed, which indicate the need for a break from gel manicures. Exposure to UV lamps during curing carries minimal risk when used properly, but applying broad-spectrum sunscreen to hands 20 minutes before your manicure provides additional protection. Ensure all nail tools are properly sanitized between uses to prevent bacterial or fungal infections that thrive in warm, moist environments.
Frequently Asked Questions
How long do gel nails last?
Gel nails typically last two to three weeks with proper application and care before requiring maintenance or removal. The longevity depends on factors such as nail growth rate, daily activities, and how well you maintain the manicure. Beach nail designs may require touch-ups slightly sooner if exposed frequently to water and sun. Applying cuticle oil daily and avoiding harsh chemicals extends the life of your gel manicure significantly.
How to remove gel nails safely at home?
Safe at-home gel nail removal requires soaking nails in pure acetone for 10 to 15 minutes after filing off the shiny top coat layer. Wrap each nail in acetone-soaked cotton secured with aluminum foil to maximize penetration and effectiveness. Gently push off softened gel with an orangewood stick, never forcing or peeling it off, as this damages the natural nail plate. Always follow removal with cuticle oil application to restore moisture and nail health.
What is the difference between gel nails and acrylic nails?
Gel nails use a polish formula cured under UV or LED light, creating a flexible, glossy finish that looks more natural. Acrylic nails involve a liquid and powder mixture that hardens through air exposure, resulting in a harder, more durable enhancement. Gel nails generally cause less damage to natural nails and have no strong odor during application. Beach nail designs work beautifully with both methods, though gel polish offers more vibrant color options for tropical themes.
Why do my gel nails peel or lift?
Gel nails peel or lift primarily due to inadequate nail preparation, oil or moisture on the nail plate, or skipping the base coat. Failing to push back cuticles properly allows gel to adhere to skin rather than nail, causing premature lifting. Thick gel layers that do not cure completely also contribute to peeling, as does exposure to excessive water within 24 hours of application. Proper nail dehydration and thin, well-cured layers prevent most lifting issues.
How can I make my gel nails last longer?
Making gel nails last longer starts with thorough nail preparation including proper cleansing, buffing, and cuticle care before application. Apply thin layers of gel polish and cure each layer for the full recommended time to ensure complete hardening. Protect your manicure by wearing gloves during cleaning tasks and applying cuticle oil daily to maintain flexibility and prevent cracking. Avoid prolonged water exposure in the first 24 hours and always cap the free edge with base coat, color, and top coat for maximum durability.
Conclusion
Easy beach nails designs bring the beauty of coastal landscapes to your fingertips with creative patterns, vibrant colors, and endless customization options. Whether you prefer simple wave gradients or intricate tropical scenes, these designs offer something for every skill level and personal style. With proper application techniques, quality gel products from resources like Gel Nails by Lina, and consistent maintenance, your beach-inspired manicure will stay stunning throughout your summer adventures. Embrace the seaside spirit and create your own perfect vacation nails today.