Top 10 Easy 2-Ingredient Nail Soaks for Stronger, Healthier Nails

Top 10 easy 2-ingredient nail soaks offer a simple yet powerful way to achieve stronger, healthier nails using natural ingredients you likely already have at home.
These effective treatments combine basic kitchen staples to deliver professional-quality nail care without expensive salon visits. Each soak targets specific nail concerns from brittleness to discoloration while promoting overall nail health and growth.
| Topic | Details |
|---|---|
| Category | Nail Care |
| Skill Level | Beginner |
| Time Needed | 10-15 minutes per soak |
| Tools Needed | Small bowl, warm water, measuring spoons |
| Best For | Anyone seeking stronger, healthier nails naturally |
Table of Contents
Why This Nail Technique Works
Natural 2-ingredient nail soaks work by delivering concentrated nutrients and beneficial compounds directly to the nail bed and surrounding skin. The simplicity of these treatments ensures that active ingredients remain potent without unnecessary additives that might cause irritation or diminish effectiveness. When nails are submerged in these solutions, they absorb moisture and minerals that strengthen the keratin structure from within.
The combination of just two carefully selected ingredients creates synergistic effects that often surpass single-ingredient treatments. Warm water acts as a delivery system that opens nail pores and softens cuticles, allowing the second ingredient to penetrate deeply. Regular use of these soaks can transform weak, brittle nails into resilient, flexible ones that resist breaking and peeling.
Professional nail technicians recognize that nail health starts from the foundation, not just surface treatments. These simple soaks address underlying issues like dehydration, mineral deficiencies, and environmental damage that compromise nail integrity. The accessibility and affordability of 2-ingredient nail soaks make consistent nail care achievable for everyone, leading to sustained improvements over time.
Tools and Products Needed
| Product | Purpose | Alternatives |
|---|---|---|
| Small Glass Bowl | Holds soak solution for nail submersion | Ceramic bowl, shallow dish |
| Warm Water | Base liquid for all nail soaks | Distilled water, filtered water |
| Measuring Spoons | Ensures accurate ingredient ratios | Kitchen spoons, eyeball measurements |
| Soft Towel | Dries nails after soaking | Paper towels, microfiber cloth |
| Cuticle Oil | Seals in moisture after treatment | Coconut oil, jojoba oil |
| Nail File | Shapes nails post-treatment | Emery board, glass nail file |
| Base Coat | Protects nails before polish application | Ridge filler, strengthening base |
For complete nail care routines and professional gel nail application tips, visit Gel Nails by Lina for expert guidance and product recommendations.
The Top 10 Easy 2-Ingredient Nail Soaks
1. Olive Oil and Lemon Juice Soak
This classic combination strengthens nails while naturally brightening discoloration caused by dark nail polish or environmental stains. Mix two tablespoons of extra virgin olive oil with one tablespoon of fresh lemon juice in a small bowl. Soak nails for ten minutes, then massage the remaining oil into cuticles. The vitamin E in olive oil nourishes while citric acid gently exfoliates and brightens nail plates.
2. Apple Cider Vinegar and Honey Soak
Apple cider vinegar balances nail pH and fights fungal issues while raw honey provides antibacterial protection and intense hydration. Combine equal parts apple cider vinegar and honey in warm water until honey dissolves completely. Soak nails for fifteen minutes twice weekly. This powerful duo strengthens weak nails and prevents infections that compromise nail health.
3. Sea Salt and Olive Oil Treatment
Sea salt contains essential minerals like magnesium and calcium that fortify nail structure while olive oil delivers deep conditioning. Dissolve two tablespoons of fine sea salt in one cup of warm water, then add one tablespoon of olive oil. Soak nails for twelve minutes, allowing the minerals to penetrate. This treatment works exceptionally well for nails damaged by frequent gel polish or acrylic applications.
4. Green Tea and Lemon Soak
Antioxidant-rich green tea combined with vitamin C-packed lemon juice creates a rejuvenating treatment that promotes nail growth and strength. Brew strong green tea, let it cool slightly, then add freshly squeezed lemon juice from half a lemon. Soak nails for ten minutes. The polyphenols in green tea protect against free radical damage while lemon brightens and strengthens.
5. Coconut Oil and Tea Tree Oil Bath
This antifungal powerhouse combines coconut oil’s moisturizing properties with tea tree oil’s natural antimicrobial benefits. Warm two tablespoons of coconut oil until liquid, then add five drops of tea tree essential oil. Massage into nails and cuticles, allowing the mixture to absorb for fifteen minutes. This soak prevents nail infections and conditions extremely dry, brittle nails.
6. Milk and Honey Hydration Soak
Lactic acid in milk gently exfoliates while proteins strengthen nail keratin, and honey locks in moisture for lasting softness. Mix equal parts warm milk and honey in a bowl until well combined. Soak nails for ten minutes, then rinse with lukewarm water. This gentle treatment suits sensitive nail beds and provides noticeable softening after just one application.
7. Baking Soda and Lemon Whitening Soak
Baking soda’s mild abrasive action combined with lemon’s bleaching properties effectively removes stubborn stains without harsh chemicals. Mix one tablespoon of baking soda with juice from half a lemon to form a paste. Apply to nails, let sit for five minutes, then soak in warm water for another five minutes. This treatment restores natural nail brightness and smooths surface irregularities.
8. Argan Oil and Vitamin E Treatment
This luxurious combination delivers intensive nourishment for severely damaged or peeling nails that need serious rehabilitation. Pierce two vitamin E capsules and mix the oil with one tablespoon of argan oil. Massage into nails and cuticles nightly before bed. The high fatty acid content repairs damage while antioxidants protect against future breakage.
9. Orange Juice and Olive Oil Soak
Fresh orange juice provides vitamin C and folic acid that stimulate nail growth while olive oil prevents dryness and cracking. Combine equal parts fresh orange juice and olive oil in a bowl. Soak nails for fifteen minutes three times weekly. This refreshing treatment works particularly well for nails that grow slowly or remain stubbornly short.
10. Chamomile Tea and Almond Oil Calming Soak
Chamomile soothes inflamed cuticles and nail beds while almond oil delivers vitamin E and magnesium for strength. Brew strong chamomile tea, let it cool to comfortable temperature, then add one tablespoon of sweet almond oil. Soak nails for twelve minutes. This gentle treatment benefits those with sensitive skin or nails prone to lifting and inflammation.
Step-by-Step Application Guide for Nail Soaks
Nail Preparation
- Remove all existing nail polish using acetone-free remover to prevent additional drying before your treatment session.
- Wash hands thoroughly with gentle soap to remove oils, dirt, and product residue that might block ingredient absorption.
- Trim nails to your desired length using clean nail clippers, cutting straight across to prevent ingrown edges.
- File nail edges gently with a fine-grit nail file, moving in one direction to smooth rough spots without creating micro-tears.
- Push back cuticles gently using a wooden cuticle stick after softening them under warm water for thirty seconds.
Soak Solution Preparation
- Select your preferred 2-ingredient nail soak combination based on your specific nail concerns and available ingredients.
- Measure ingredients accurately using measuring spoons to maintain proper ratios for maximum effectiveness.
- Mix ingredients in a clean glass or ceramic bowl until thoroughly combined and evenly distributed.
- Test water temperature to ensure it feels comfortably warm but not hot enough to cause discomfort or burning.
- Pour the mixture into a bowl large enough to submerge all fingertips comfortably without overflowing.
Soaking Process
- Submerge all ten fingertips into the prepared solution, ensuring nails are completely covered by the liquid.
- Set a timer for the recommended duration, typically between ten and fifteen minutes depending on the specific soak.
- Relax during the soaking period, keeping hands still to allow maximum absorption of beneficial ingredients.
- Gently massage nails and cuticles occasionally during soaking to stimulate blood circulation and enhance penetration.
- Remove hands from the soak when the timer sounds, allowing excess liquid to drip back into the bowl.
Post-Soak Care
- Pat nails and hands dry gently with a soft, clean towel without rubbing harshly or disturbing softened cuticles.
- Apply cuticle oil or a rich hand cream immediately to seal in moisture and extend treatment benefits.
- Massage the moisturizer into nails, cuticles, and hands using circular motions to boost circulation and absorption.
- Allow nails to remain polish-free for at least two hours after soaking to maximize ingredient penetration.
- Avoid washing hands or exposing nails to water for thirty minutes post-treatment to prevent washing away beneficial residues.
Ongoing Maintenance Schedule
- Repeat your chosen nail soak two to three times weekly for the first month to establish strong foundational nail health.
- Reduce frequency to once weekly for maintenance after you notice significant improvements in nail strength and appearance.
- Rotate between different soak recipes monthly to provide varied nutrients and prevent ingredient tolerance buildup.
- Track your nail progress by taking photos weekly to document visible improvements in length, strength, and appearance.
- Adjust your soak selection based on seasonal changes, choosing more moisturizing formulas during winter months.
Pro Nail Technician Tips
- Always use fresh ingredients for nail soaks rather than pre-mixed solutions that may have lost potency over time. Fresh lemon juice contains more active vitamin C than bottled versions, and freshly extracted oils provide superior nutrient content.
- Perform nail soaks in the evening before bed to allow maximum absorption time without immediate hand washing or exposure to harsh chemicals. This timing lets ingredients work overnight when nail regeneration naturally occurs.
- Warm your soak ingredients slightly before mixing, as heat opens nail pores and enhances ingredient penetration without requiring extended soaking times. Never use hot water that could damage delicate nail beds or cause discomfort.
- Combine nail soaks with professional gel manicures from Gel Nails by Lina for comprehensive nail care that addresses both health and aesthetics simultaneously.
- Keep a nail care journal documenting which soaks you use and observed results to identify the most effective treatments for your specific nail type and concerns.
- Invest in a UV/LED lamp for gel polish application after your nail soak treatments to protect strengthened nails with long-lasting, chip-resistant color that maintains your hard-earned nail health improvements.
Common Nail Soak Mistakes
| Mistake | Why It Happens | How to Fix |
|---|---|---|
| Soaking Too Long | Belief that longer soak times produce better results | Limit soaks to 15 minutes maximum to prevent over-softening and nail damage |
| Using Water That Is Too Hot | Attempting to open pores more effectively with heat | Use comfortably warm water that feels pleasant, not scalding or uncomfortable |
| Inconsistent Treatment Schedule | Forgetting treatments or applying them irregularly | Set phone reminders and designate specific days for nail soak sessions |
| Skipping Moisturizer After Soaking | Assuming the soak provides enough hydration alone | Always apply cuticle oil or hand cream immediately after patting nails dry |
| Using Poor Quality Ingredients | Choosing cheap oils or artificial lemon juice for convenience | Invest in cold-pressed oils and fresh produce for maximum nutrient content |
Nail Design Variations to Complement Healthy Nails
| Style | Description | Best Occasion |
|---|---|---|
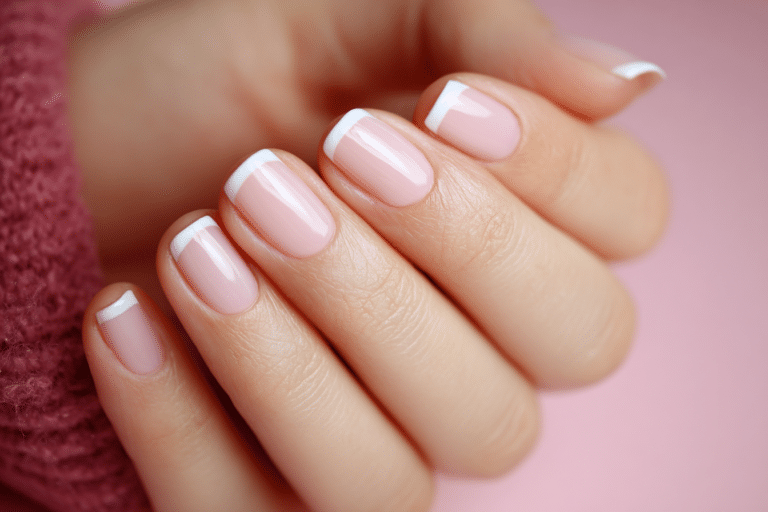
| French Gel Nails | Classic white tips with natural pink base showcasing healthy nail beds | Professional settings, weddings, everyday elegance |
| Chrome Nails | Mirror-finish metallic powder over gel base for modern shine | Evening events, parties, fashion-forward occasions |
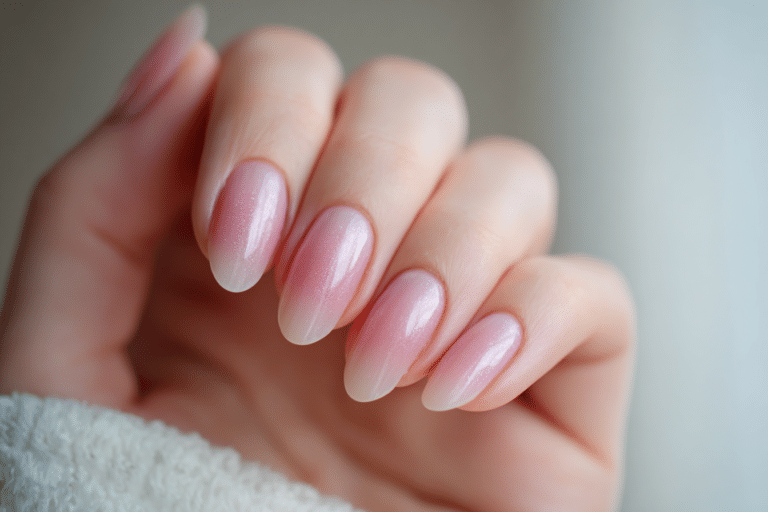
| Ombre Nails | Gradient color transition from cuticle to tip in complementary shades | Seasonal celebrations, creative expression, trendy looks |
| Minimalist Nail Art | Simple lines, dots, or negative space designs emphasizing nail health | Daily wear, professional environments, understated style |
| Seasonal Designs | Holiday-themed colors and patterns celebrating current season | Festive gatherings, themed parties, seasonal changes |
Once your nails achieve optimal health through regular 2-ingredient nail soaks, explore beautiful gel nail designs at Gel Nails by Lina to showcase your strong, healthy nails with stunning color and art.
Nail Care and Maintenance Between Soaks
Maintaining nail health between soak treatments requires daily attention to hydration and protection from environmental stressors. Apply cuticle oil at least twice daily, focusing on the nail bed area where new growth emerges. This consistent moisture application prevents the drying effects of hand washing, sanitizers, and exposure to cleaning products that strip natural oils from nails.
Wear protective gloves during household chores involving water or chemicals to shield nails from harsh substances that weaken keratin bonds. Even brief exposure to bleach, strong detergents, or prolonged water immersion can undo weeks of careful nail strengthening efforts. Choose cotton-lined rubber gloves that allow skin to breathe while providing effective protection.
Maintain a balanced diet rich in biotin, protein, and omega-3 fatty acids to support nail growth from within. Supplements can help if dietary intake falls short, but whole food sources like eggs, nuts, fish, and leafy greens provide synergistic nutrients that work together more effectively than isolated vitamins.
How to Remove Gel Nails Safely After Strengthening Treatments
Proper gel nail removal preserves the strength and health you have built through regular nail soaking treatments. Never peel or pick at gel polish, as this strips away layers of natural nail along with the product. Instead, file the shiny top coat layer thoroughly to break the seal and allow acetone to penetrate effectively.
Soak cotton balls in pure acetone, then place one on each nail and wrap with aluminum foil to hold in place. Leave wrapped for twelve to fifteen minutes, checking periodically to see if gel has softened enough to slide off gently. Use a wooden cuticle stick to nudge loosened gel, never forcing or scraping aggressively.
Immediately after gel removal, perform one of your favorite 2-ingredient nail soaks to replenish moisture lost during the acetone exposure process. Follow with a thick application of cuticle oil and hand cream to restore hydration. Wait at least two days before applying new gel polish, giving nails time to recover and rehydrate fully.
Buff nails gently after removal to smooth any remaining residue, but avoid aggressive filing that thins the nail plate. Your strengthened nails should withstand proper removal without damage, especially when you allow adequate recovery time between gel applications.
Nail Health and Safety Considerations
Understanding the difference between cosmetic nail concerns and medical conditions ensures you seek appropriate treatment when necessary. While 2-ingredient nail soaks address many common issues like dryness and brittleness, certain symptoms require dermatological evaluation. Persistent discoloration, unusual thickness, separation from the nail bed, or painful swelling around nails may indicate fungal infections or systemic health problems.
Practice proper hygiene by sanitizing nail tools between uses and never sharing implements with others to prevent bacterial or fungal transmission. Clean glass nail files and metal tools with rubbing alcohol, and replace disposable files regularly. Store nail care products in a cool, dry location away from moisture that encourages microbial growth.
Test new ingredients on a small area before full application if you have sensitive skin or known allergies. Essential oils and citrus juices can cause reactions in some individuals, so patch testing prevents widespread irritation. Discontinue any treatment that causes redness, itching, or burning sensations immediately and rinse thoroughly with cool water.
Frequently Asked Questions
How long do results from nail soaks last?
Results from regular 2-ingredient nail soaks become noticeable after two to three weeks of consistent twice-weekly applications. Initial improvements include increased moisture and flexibility, while significant strength gains appear after four to six weeks. Maintenance requires ongoing weekly treatments, as discontinuing soaks causes nails to gradually return to their previous condition over several weeks. The cumulative benefits build over time, with maximum nail health achieved after three months of dedicated treatment.
Can I use nail soaks if I have gel polish applied?
You can use oil-based nail soaks even with gel polish applied, as the oils condition cuticles without affecting cured gel. Water-based soaks should be avoided with gel nails because prolonged moisture exposure can cause lifting at the edges. Focus oil treatments on the cuticle area and nail base where new growth emerges. Perform comprehensive soaking treatments between gel manicures to maximize nail bed absorption and strengthening benefits without compromising your polish longevity.
Why do my nails still break despite regular soaking?
Persistent nail breakage despite regular soaking often indicates inadequate protein intake, vitamin deficiencies, or excessive exposure to water and chemicals. Evaluate your diet to ensure sufficient biotin, iron, and protein consumption that supports keratin production. Wear protective gloves during cleaning tasks and limit water exposure to prevent over-softening that leads to breakage. Some individuals require longer treatment periods or professional strengthening treatments from nail technicians to address severe damage. Consider medical evaluation if breakage continues after three months of proper care.
How do 2-ingredient soaks compare to commercial nail strengtheners?
Natural 2-ingredient nail soaks provide gentle, gradual strengthening without harsh chemicals found in many commercial products. Commercial strengtheners often contain formaldehyde or toluene that can cause brittleness with long-term use. DIY soaks work more slowly but deliver sustainable results through nourishment rather than surface hardening. Combining both approaches offers comprehensive care, using natural soaks for foundation health and commercial products for temporary reinforcement before special events.
What should I do if I have an allergic reaction to a nail soak ingredient?
Discontinue the nail soak immediately if you experience itching, redness, swelling, or burning sensations during or after treatment. Rinse hands thoroughly with cool water and mild soap to remove all traces of the ingredient. Apply a gentle, fragrance-free moisturizer to soothe irritation and take an antihistamine if significant itching occurs. Contact a dermatologist if symptoms persist beyond twenty-four hours or worsen despite rinsing. Test alternative ingredients individually to identify the specific allergen before trying new soak combinations in the future.
Conclusion
Top 10 easy 2-ingredient nail soaks provide accessible, effective solutions for achieving stronger, healthier nails without expensive treatments or complicated procedures. These simple combinations harness the natural power of common household ingredients to address specific nail concerns while promoting overall nail health. Consistent application of these soaks, combined with proper daily maintenance and protective practices, transforms weak, brittle nails into resilient, beautiful ones. Start your nail strengthening journey today with these proven recipes and experience the confidence that comes with naturally healthy nails.